
DIY Mesh Pumpkins (A 5-Minute DIY!)
These DIY mesh pumpkins can be made in minutes for only a few dollars! Along with the DIY copper mesh pumpkins, they’re easy fall decor, and they look great!
If I had a dollar for every time I thought my wife was nuts, I’d be retired on my very own private island nestled somewhere deep in the South Pacific.
I’d be cracking coconuts instead of crafting.
Beating bongos instead of blogging.
And most certainly dozing and dillydallying instead of DIYing.
But no one is giving me those dollars, so here I sit, writing to you about my bonkers babes.
The problem is, every time I think she’s checked into the Meshuga Motel for good, I come to realize that perhaps she isn’t loonier than a Canadian dollar. I come to realize that maybe she’s a super-genius disguised as a nattering nutter!

Case in point:
The other day she asked me to take her to the grocery store so she could buy some shower poufs.
“My babes!” She said, “I want to buy some orange shower thingies for a fall project I have in mind.”
“Mmmm-kay.” I said, “But I doubt they sell orange ones at the grocery store. I don’t think I’ve ever seen them, come to think of it.”
What the hell did I know? I’ve never shopped for a shower pouf in my life, and if I have my way, I never will!
“You never know, my babes. Let’s have a look, shall we?” She said.
“Mmmm-kay.” I said. “So what’s it for again?”
We walked into the store, and my eyes went to the meat section.
*Sigh* Next time, my delicious friends.
We turned away from the delicious meat and headed to the preening hens aisle health and beauty aisle.
“You’re going to make pumpkins from them!” She said, as a smile leapt into her lips.
And there it was. The perfect moment for me to be collecting a dollar so I could fund my private island retirement.
But, as usual, no one was paying.
So I nodded my head and pretended like she wasn’t battier than a Biloxi belltower.
It shouldn’t surprise you to learn that she was right about the damn orange poufs.
There they were, a whole huge bin of poufs in every color under the sun.
She pulled out all of the orange ones and proceeded to spend the next 10 minutes inspecting each pouf for color, shape and quality.
“My babes, they’re shower poufs, not diamonds!” I said.
Yeesh, that woman is a discerning shopper!
Around closing time, she had chosen the very finest orange poufs in town, and a couple of black ones and a gray one, to boot.

Then, just when I thought it was safe to head to the checkout aisle before the lights went dark and the cleaning crews moved in, my babes dragged me to the cleaning aisle.
She grabbed few packs of copper mesh pot scrubbers.
“You’re also going to make pumpkins from these!” She said.
“Of course I am.” I said.
(I waited for my dollar)
But my babes was radiating enthusiasm. She loves this stuff!
We headed home, and she showed me her vision.
And as almost always happens, the kook standing before me became a genius.

DIY Mesh Pumpkins
- Shower poufs – we used orange, gray and black, but you can use any color you like. You can find them on Amazon, in the Dollar Store or in almost any grocery store.
- Copper mesh scrubbers – Dollar Tree carries them.
- Dollar Store Fall greenery pick
- Cinnamon sticks
- Craft wire
- Thin wire – we got ours at Dollar Store.
- Pencil
- Scissors
- Wire cutter
- Glue gun
- Gold or black glue sticks – this is optional.
Folks, these DIY mesh pumpkins are so easy to make! Take it from me! If old sausage fingers here can do it, anyone can do it!
Watch the video below, but if that’s not your thing, don’t worry! I’ll still walk you through each and every step.
Let’s go!
DIY Mesh Pumpkins Video Tutorial
DIY Mesh Pumpkins Words ‘n’ Pictures Tutorial
First, cut off the tags.

But don’t cut off the ribbon hanger loop!

Measure out about a foot-long length of craft wire. I just eyeballed it. This sure as hell isn’t rocket science or precision German engineering!

Cut the wire.
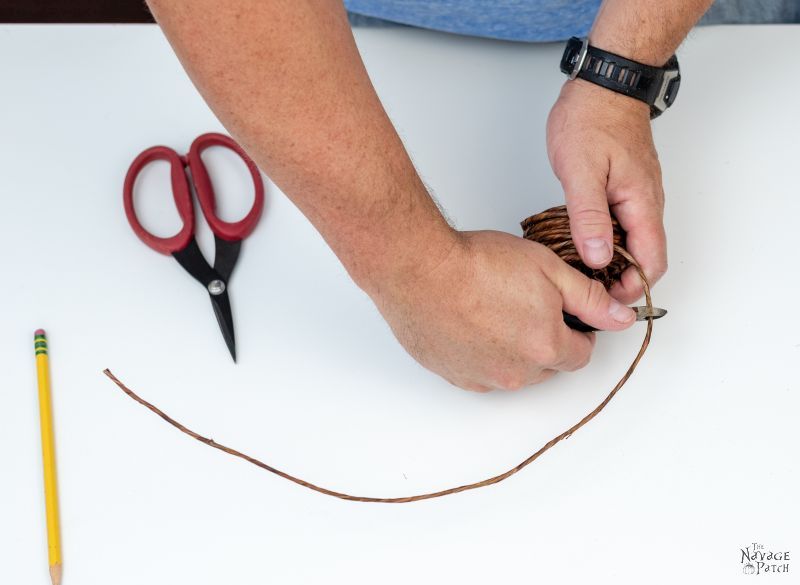
Wrap the craft wire around your pencil.
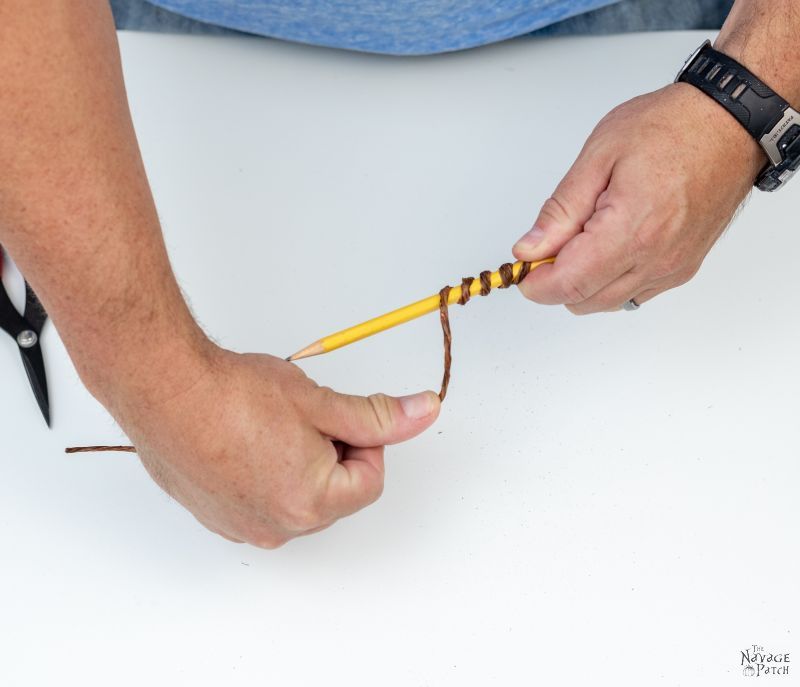
Then slide the coil off of the pencil.

Unroll a couple of coils in the middle.
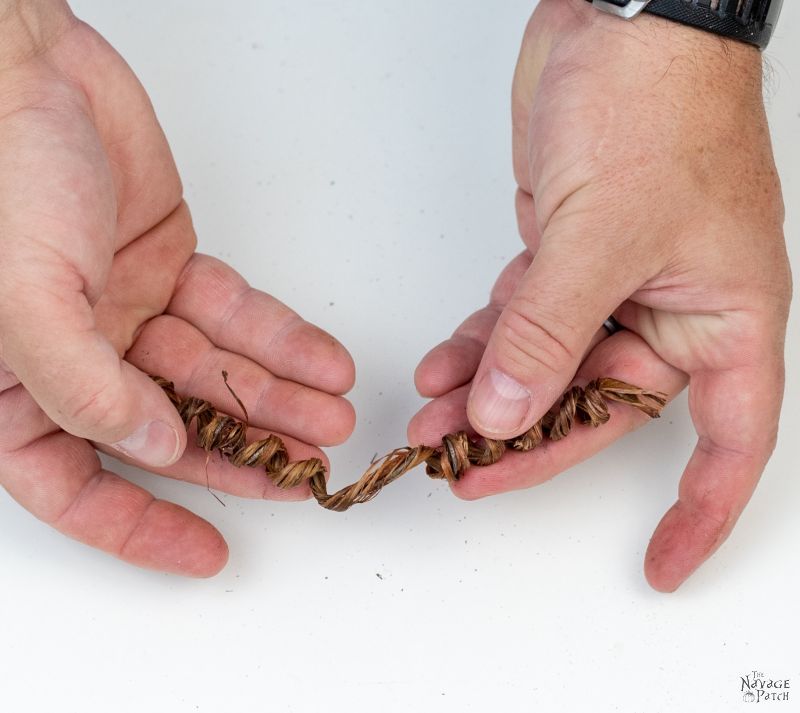
Then wrap the middle around your cinnamon stick.

Twist the craft wire over itself to lock it in place.

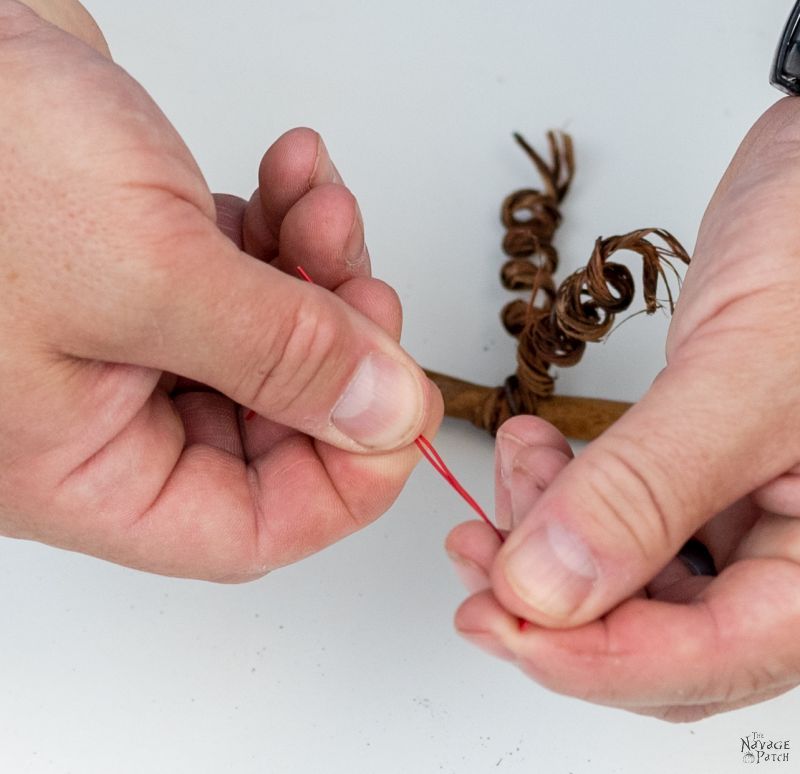
Cut a piece of wire a little longer than twice the length of your cinnamon stick.

Fold the wire in half.
Put the wire through the pouf’s ribbon loop.
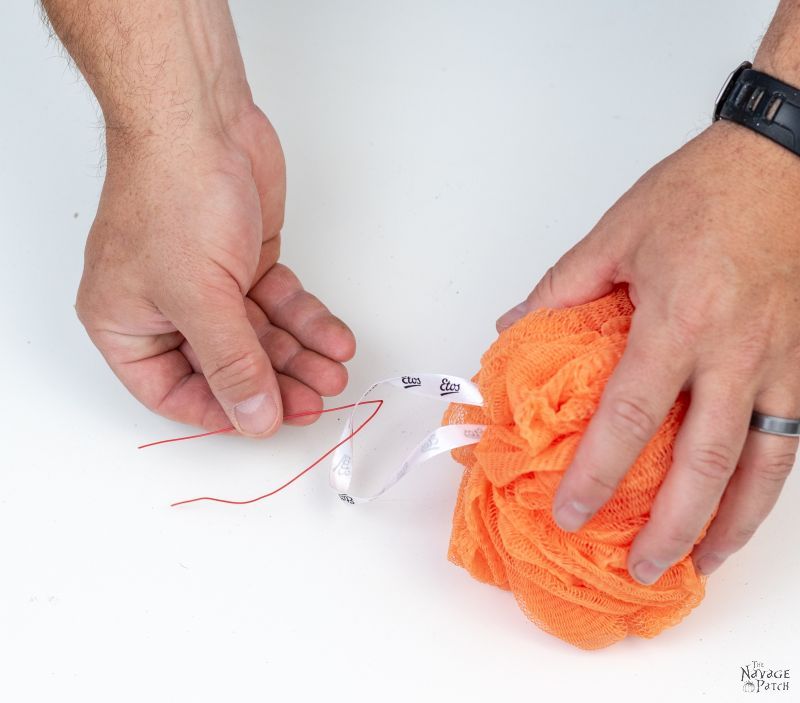
Twist the two wire ends together.

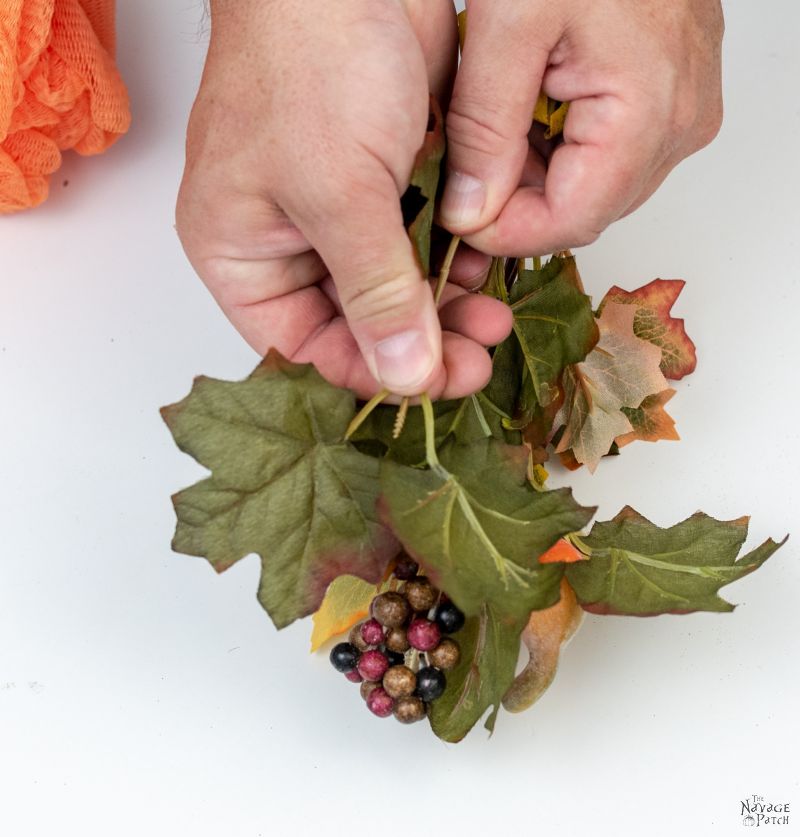
Find a pair of leaves you like from your Dollar Store pick.

Push the leaves off the stem.
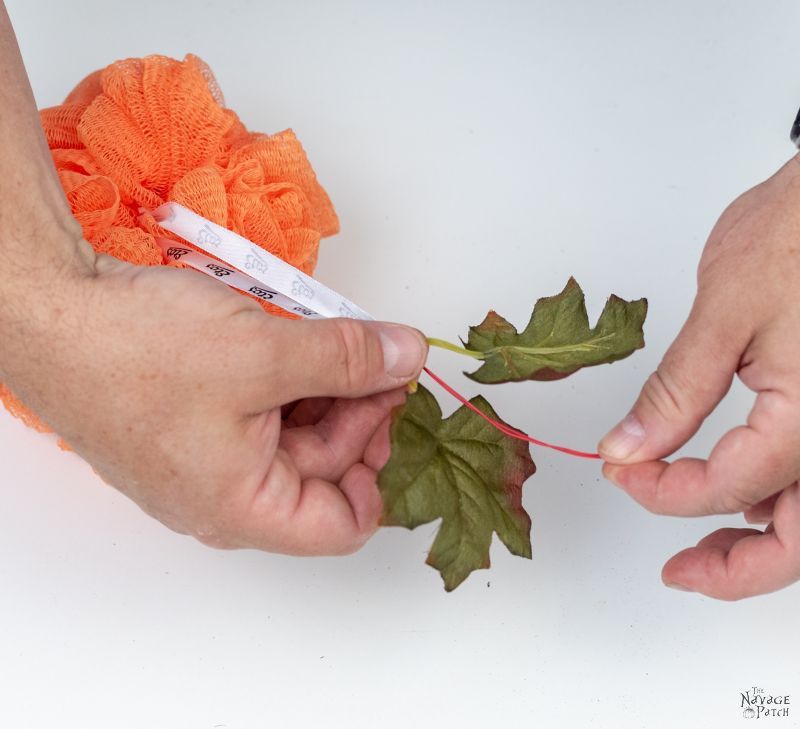
Thread the wire “needle” through the hole where the two leaves meet.

Thread the pouf loop through the leaves.
Pouf Loops. That could be a breakfast cereal, don’t you think?
I think they’d be a huge hit with art critics and hipsters.
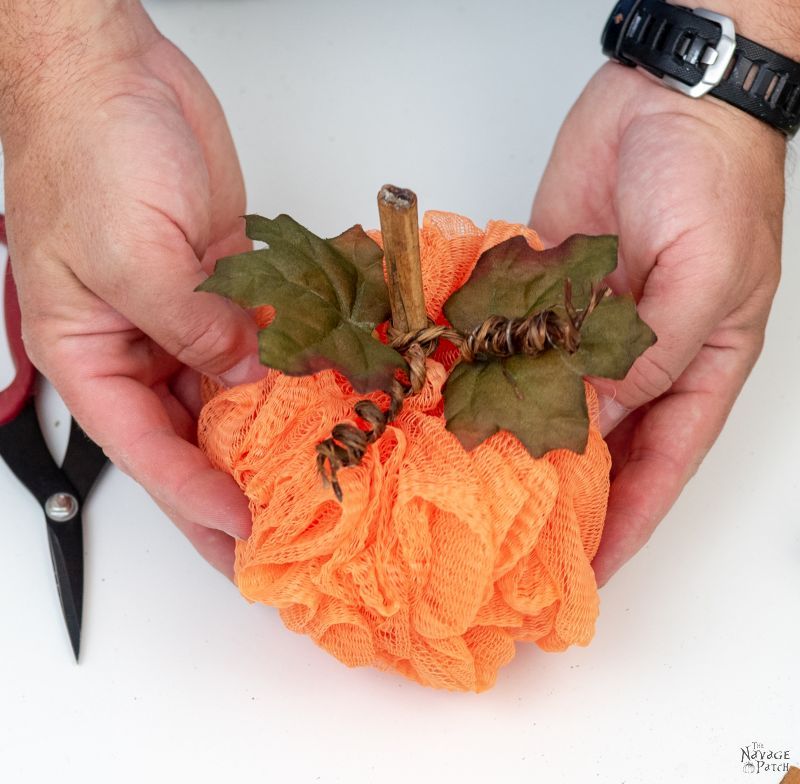
Anyway, press the leaves down against the shower pouf.

Thread the wire needle through your cinnamon stick.


Push the stem down into the pouf.

While pressing down on the pouf, add a dab of hot glue into the cinnamon stick. This will lock the pouf ribbon loop in place.
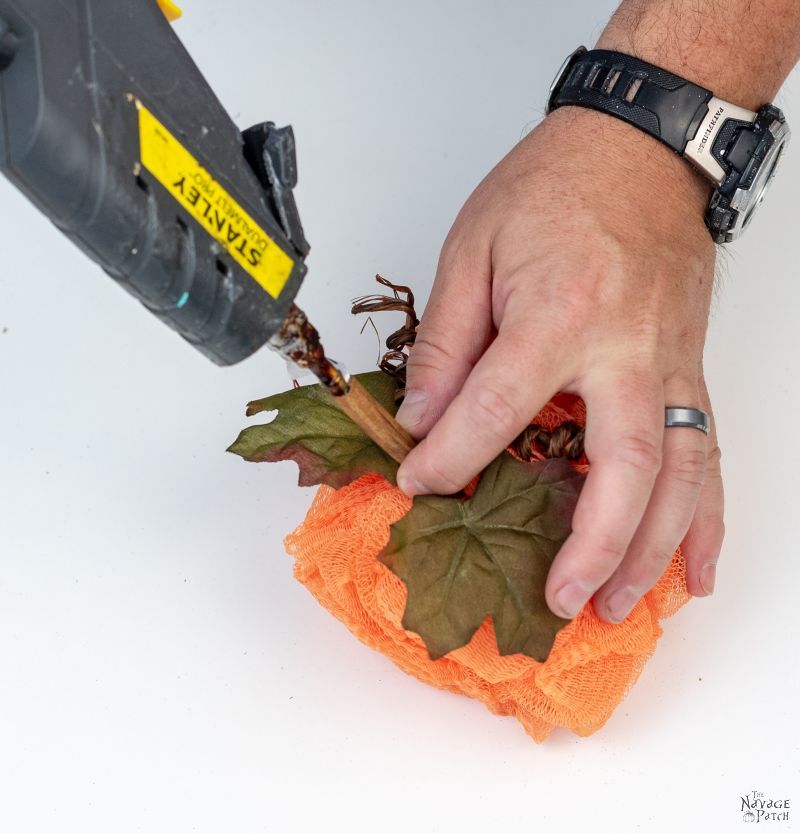
When the glue cools, trim off the pouf loop and wire so that it’s flush with the top of the stem. Black or gold glue looks best, and it hides the pouf loop that is still inside the cinnamon stick.

I used clear glue on this one, so the pouf loop is still visible. For all our other ones, I used black and gold.

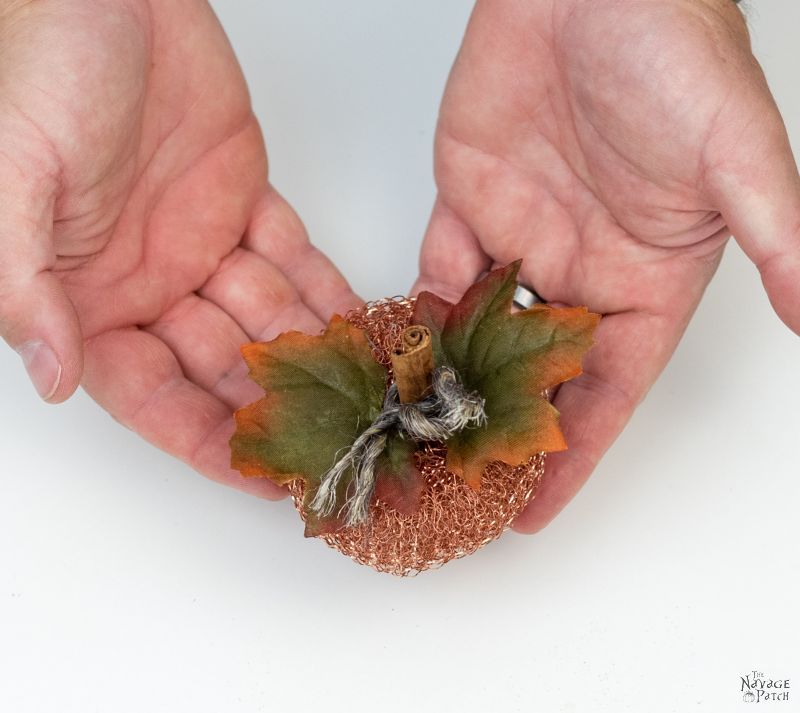
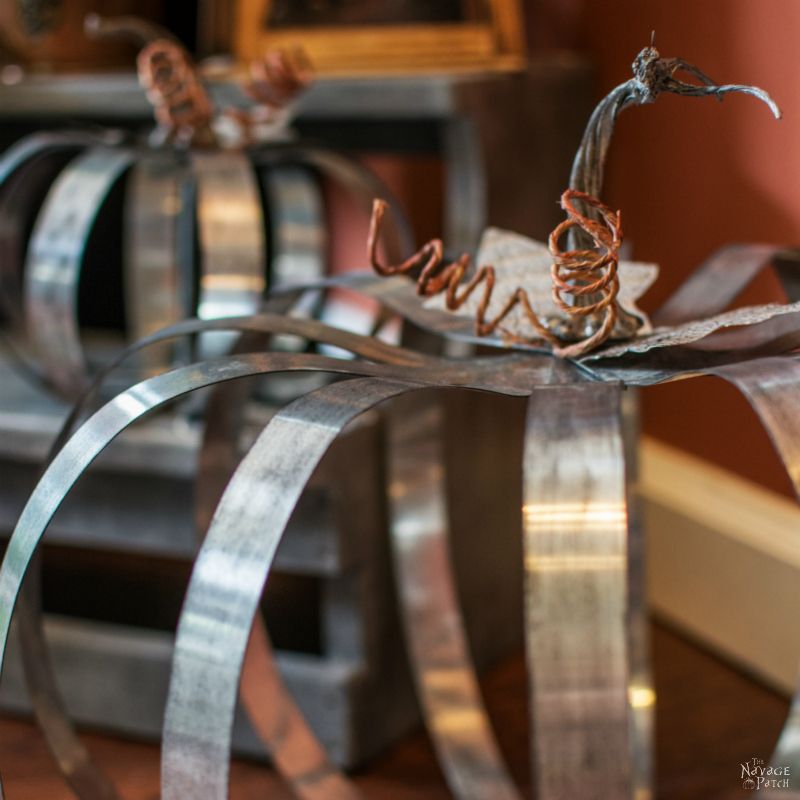
DIY Copper Mesh Pumpkins
If you thought the shower pouf mesh pumpkins were easy (you did, right??), then you’ll be able to make these DIY copper mesh pumpkins in your sleep!
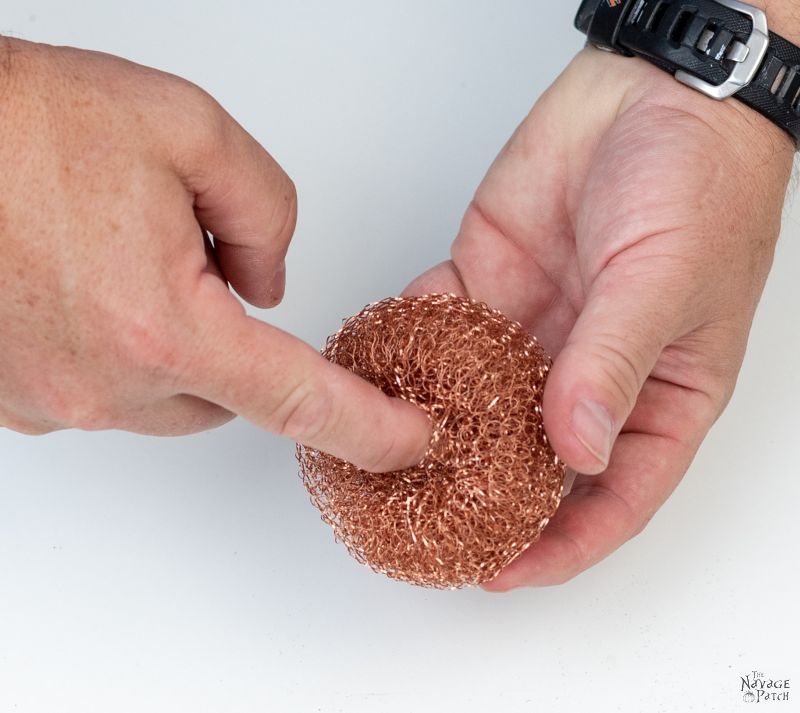
Grab a copper mesh scrubber. (You’re practically done. Go get yourself a glass of wine – you deserve it!)

Stick your finger in the middle and jiggle it around a little. You want to open up a little hole. (Did you get that glass of wine? How does it taste?)
Grab another leaf pair from your pick and jam it in the hole in your copper mesh.
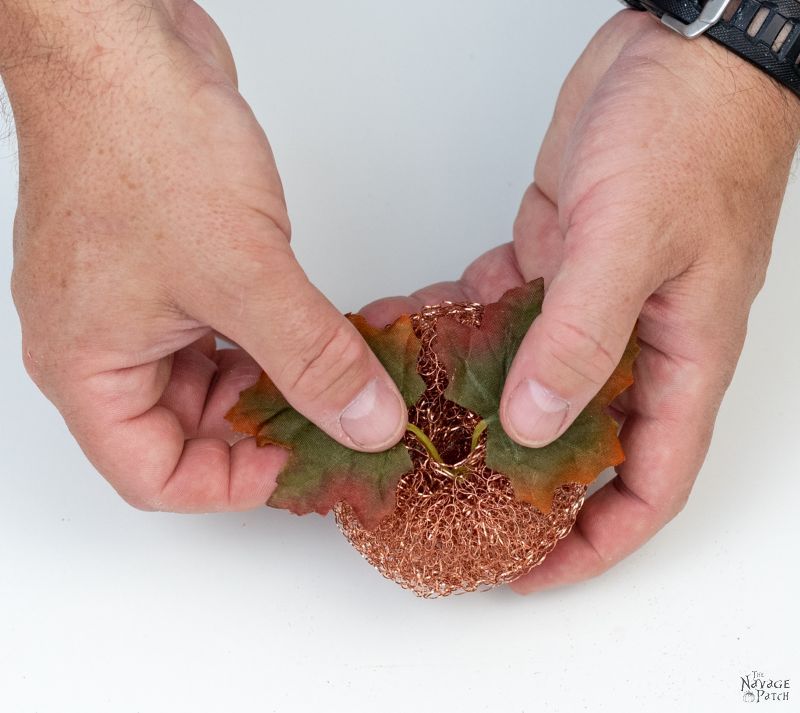
Have another sip of wine to celebrate how far you’ve made it – not only in this project, but in life, madam! Cheers to you!
Make another cinnamon stem as detailed above. For these copper mesh pumpkins, I used a grayish/greenish craft wire, as it contrasted better with the copper.
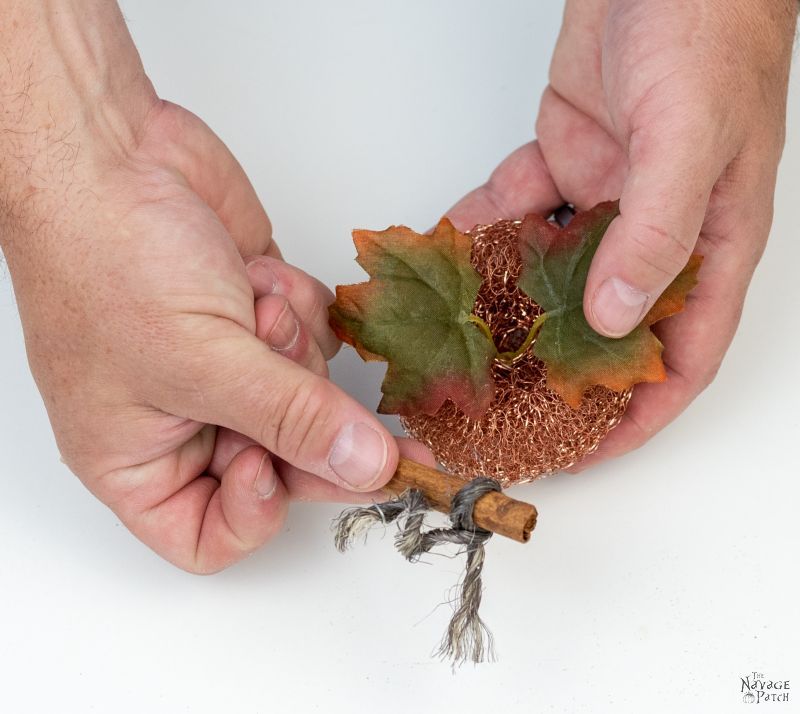
Stick that sucker in there and take a swig from you wine, because you just finished!

Ta-Da!
Now go pour another glass of wine for yourself and tell your husband to hop to it and make some more copper mesh and shower pouf pumpkins for you!

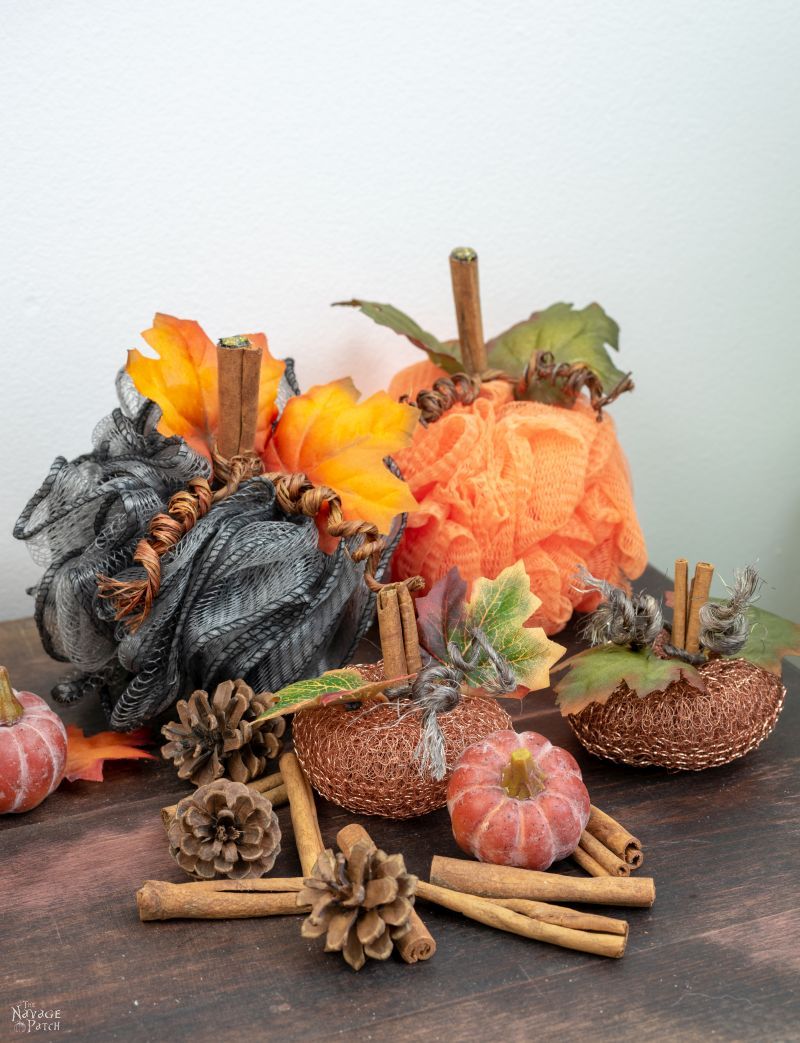
*******
And here they are altogether!


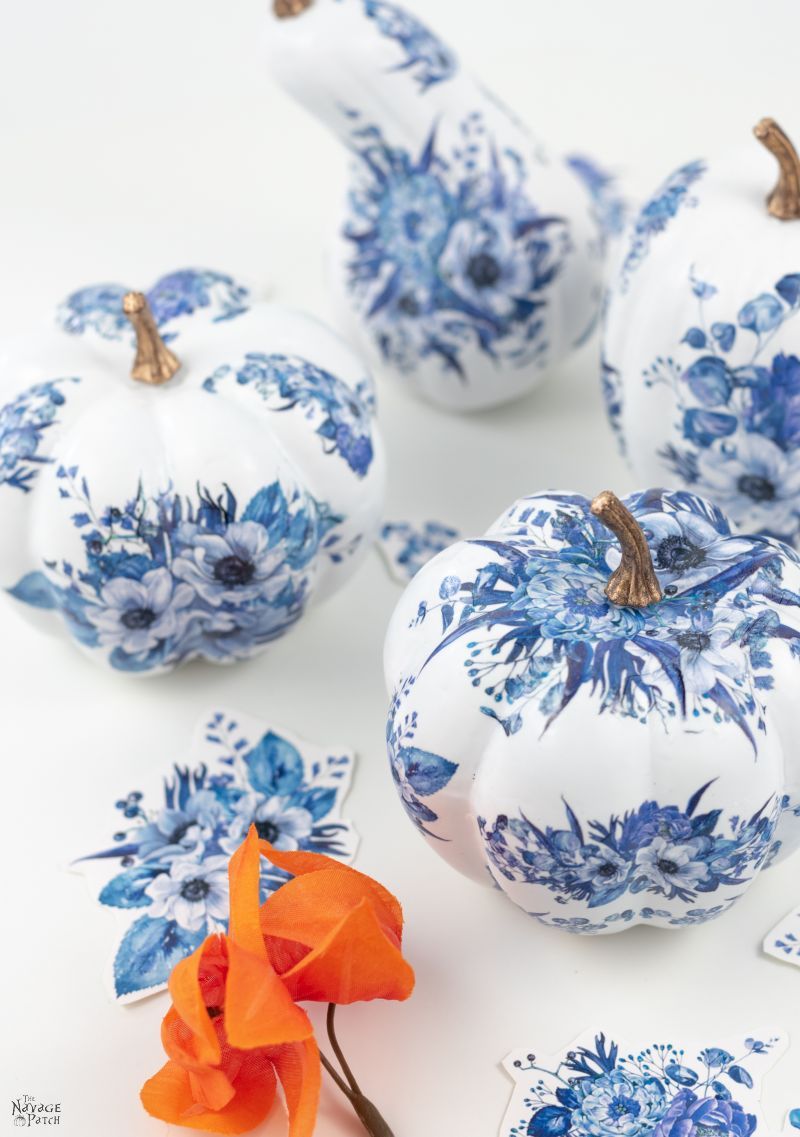
Here are some more easy pumpkin ideas for you.
DIY Dollar Store Blue and White Porcelain Pumpkins
Pottery Barn Inspired Metal Pumpkins
We love it when you share our posts on Facebook and Pinterest!


YEA!!!! Halloween craft ideas coming out so we have time to make them! Will there be new prints for 2019 to put on plates? My daughters loved theirs last year 🙂
Yes Wendy! We’ll have tons of prints that you can put on candles, plates, walls, pillows and even on pumpkins! You guys are gonna be spoiled rotten this year! 🙂
Very clever! What a good hubs you are for making her visions reality 🙂
She’s not the only bat s$%* crazy lady…there are plenty of us! I saw the most luxurious, soft, pumpkin orange yarn…my mom asked if I was going to knit a pumpkin…um, nope, who has time for that? I squished the ball of yarn into a pumpkin shape, used the end of it to make the ribs of the pumpkin and shoved last year’s pumpkin stem into it and just like that, it was done! (Yes, I save last year’s pumpkin stems, all dried out and ready to craft with this year!) Have fun with your fall crafting!
That sounds like a brilliant project, Angie! Even easier than ours, lol!
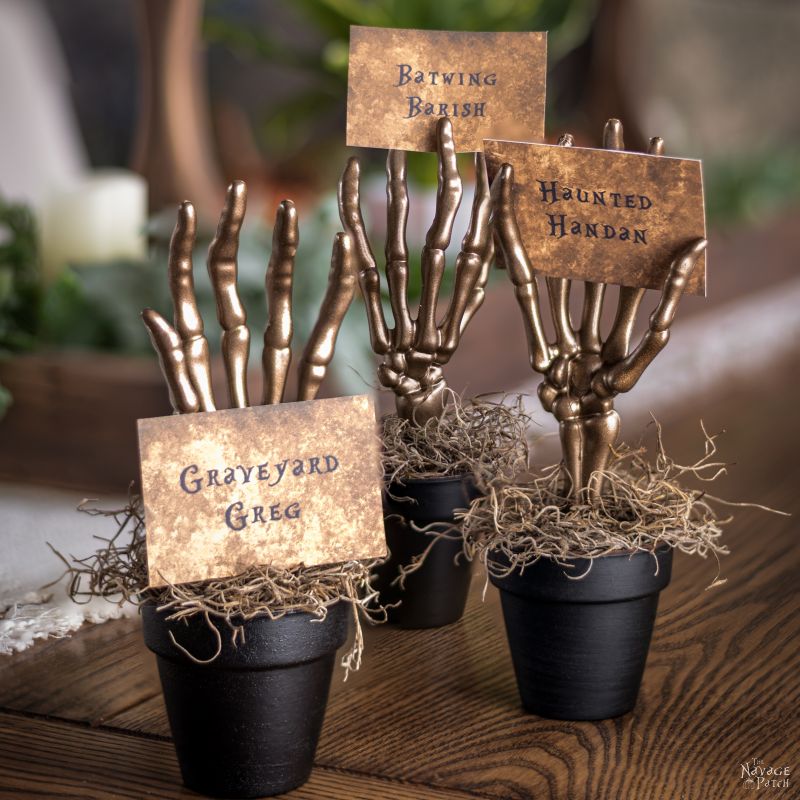
You’re gettin’ good at this stuff, Greg! Love the pouf pumpkins – have never thought of using them. I’ve made the copper mesh pumpkins before – like to use them for place markers for my table settings in the fall. I like the clever way you’ve brought the pouf loop through the cinnamon stick for the stem. Very clever!
Thank you, Barbara! I had a good teacher! 😉
I have followed your blog for the last 18 months or so and absolutely love the projects I’ve seen. The two of you make magic happen out of pretty much nothing. I love the fact that you include your son in some of the projects and as always, truly enjoy the fun banter. This pouf pumpkin diy is absolutely genius! I’m headed to the dollar store now! Thank you!
Thank you so much, Rena! We love what we do! 🙂
I resemble that remark about the Loonie 🙂 Great project!
LOL!
And 1-2-3, pouf, they’re done! Make my wine a Malbec.
Chilean or Argentinian? 🙂
Argentinian
Sweeeeet.
Loved your pumpkins. Last year I haunted GW for orange, etc. $1 clothes and made a bunch of pumpkins with Buffalo snow bought off season(cheaper than pillow stuffing ). Loved the cream cable sweater sleeves for Baby Boos. I started cutting up the Victoria Secret’s purple satin PJ pants BEFORE I read the label. Oh, well, they were too small for me anyway! I will need to add a few of yours for the colors and texture! You can NEVER have too many pumpkins! No wine for me when I’m crafting; I’m too dangerous with a glue gun to start with; just ask my burn blisters! Great project!
Thanks, Kathy! Handan would agree about the pumpkins, lol! 🙂
Hi! Another super tutorial/project! I love the ones I can actually do, but I still love the builds too! Very concise instructions, sir! As usual, a great job and great post. BTW, I nominated you for the awards this year.
Thank you so much, Linda! 🙂
Another awesome post! I don’t know how your wonderful wife keeps coming up with such great ideas!
Thank you, Susan! Neither do I, but I’m glad she does! 🙂
Thank u so much for the pumpkin ideas, I made two out of the copper mesh and love them..
Awesome! They’re so easy!
Fabulous! I love quick and easy projects! Will definitely need to make some of these for our office!
Dollar store here I come! Oh, the black glue? Was that the liquid (as shown in the supplies?) I don’t think I’ve seen black glue sticks. Though I DO have some sparkly ones!
Thank you, Jana! Glue sticks come in all shapes, sizes and colors! We found that black or sparkly gold look best with this project, but really it’s up to you!
OMG! How cute, how simple. Love it! I know what I will be doing this weekend. Love your website by the way.
Thank you so much, Kathy! Have fun with them! 🙂
I like the added touch of using the cinnamon sticks. I’m sure that smells so good. Too bad its still in the 90s here, I am so ready for fall!
So are we, Jen! 🙂
Love them! I did notice the little one lurking furtively in the background of the coffee can post, chose to ignore it because i didn’t want my brain going into Halloween mode too soon. Oh dear now i’ll be seeing pumpkins everywhere!Have some mini ones growing on my allotment.
LOL, you can’t avoid Halloween if you’re coming to The Navage Patch! You it’s our time to shine, lol! 🙂
This is a wonderfull idea !!!
I am french and I follow your posts for halloween (but not only)
Very nice ideas, easy to do and cheap !
Difficult sometime, as no one dollar store in my country !!! 🙁
Thank you, Sandrine! Even though you don’t have a dollar store in France, you should be able to find all the materials for this project! 🙂