Silverware Box Update
If you follow us on our Facebook page, you probably know Greg’s Wednesday posts: “Did you know?” Every Wednesday, he picks a subject and posts an interesting fact about it on our Facebook page. They are pretty entertaining I have to say, and since we don’t post on Facebook every day, it is a great way to keep in touch with our readers.
Last week after publishing his latest “Did you know?” he attempted to tidy the overflow of my knick-knacks in our basement while I was at work. This coincided with me e-mailing him the listing of the weekend tag sales that I wanted to go to. Reading my e-mail and seeing no point in tidying anything, he sent me this response:
“Did you know? If you picked one thing each day from our basement for your projects, in 2 years you’d still have another year’s worth of projects.”
Hahaha… I love him so much, because at any given time, he can make me burst into laughter!
As he had a point, I decided to lessen my hoard and picked this silverware box from our basement as my next project.
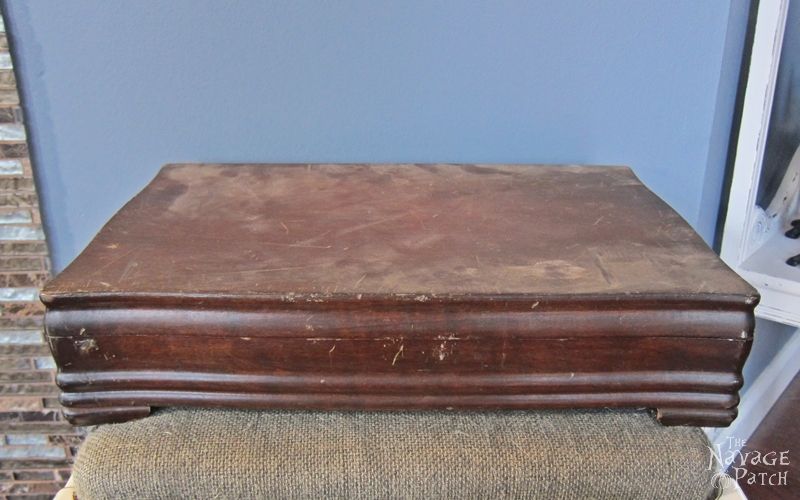
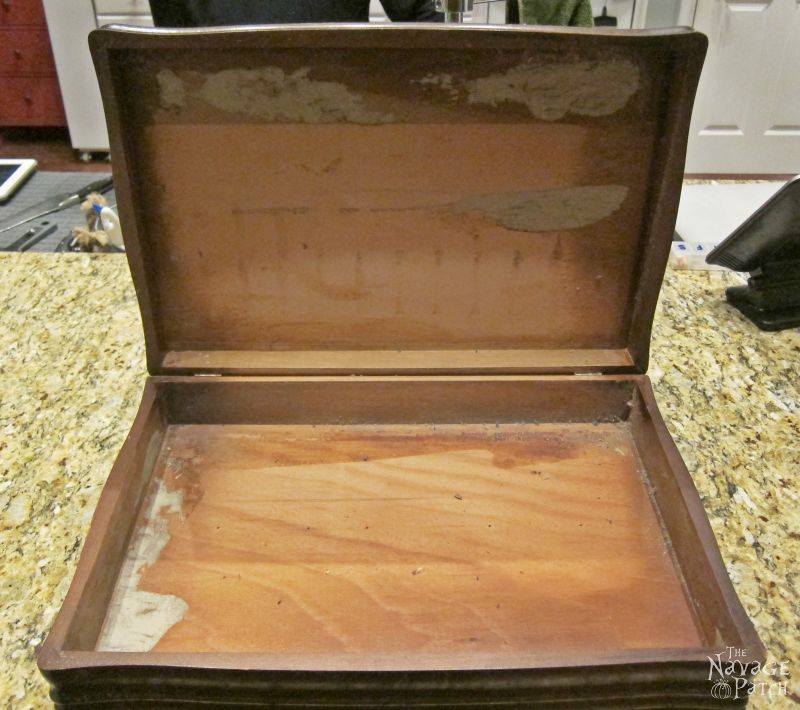
I bought it 2 years ago at a tag sale for a couple of dollars. It had some scratches here and there, and the lining was peeling off.
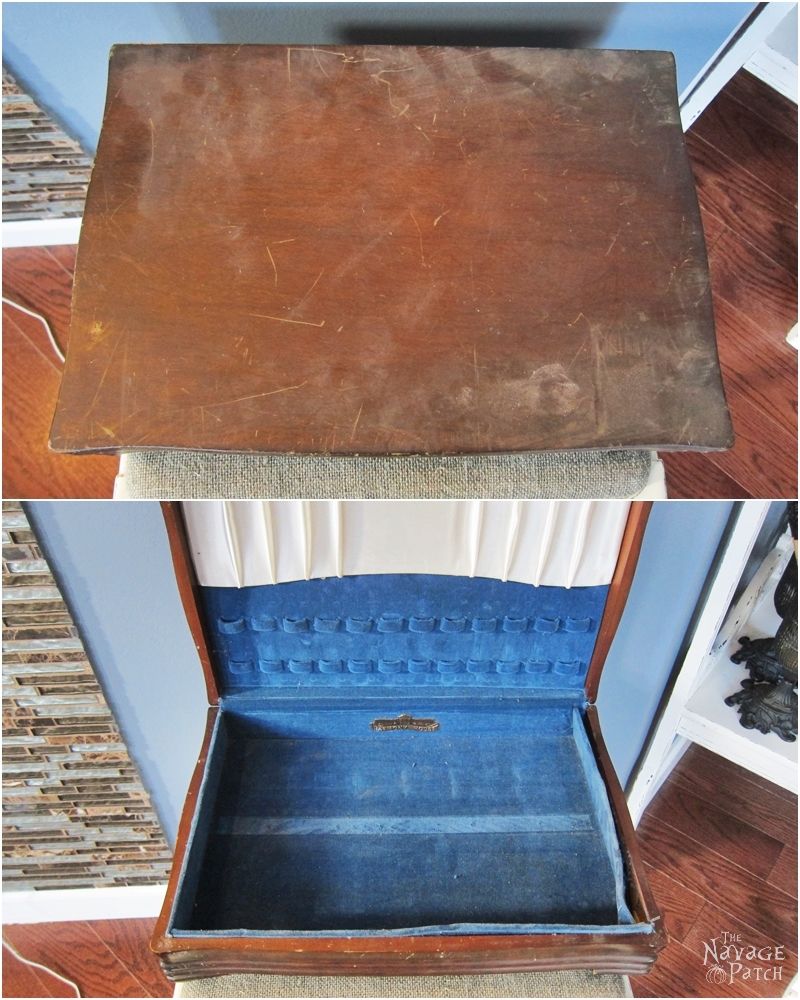
The plan was to turn it into a simple box that I can use as a storage for mail or other knick-knacks, so first I took off the lining.
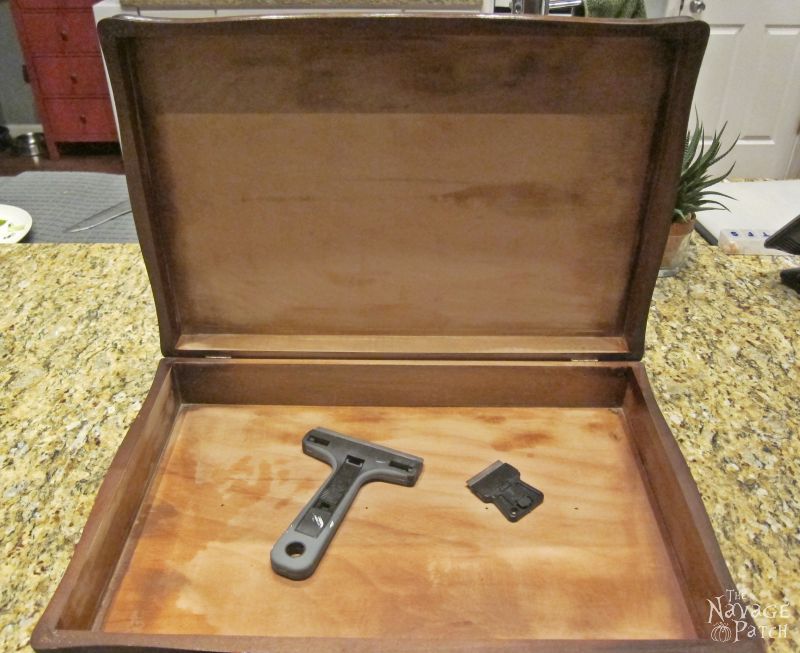
This was the most tedious part of this project since the lining was holding strong at certain places, so I enlisted the help of my paint scraper and little razor. Once the liner was entirely off, I sanded inside with my sander to flatten the raised areas caused by old glue. Then I cleaned the box to ready it for paint.
I usually use my Black & Decker hand held vacuum cleaner to clean inside the boxes or drawers, then I wipe with a damp cheesecloth. This eases my job with getting rid of the dust in the corners, besides it takes me no time to be finished with pre-paint cleaning.
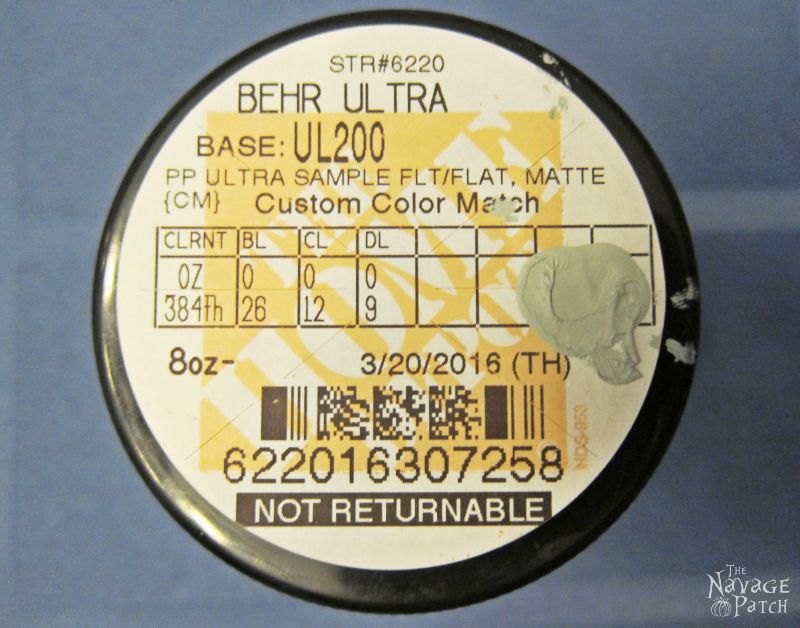
Now it was ready for painting. I decided to go with a color different than white this time, so I mixed up some blues I had on hand and some white, and came up with my own color: I named it “Aegean Sea.” As I couldn’t remember the proportions to make this color once again, I got it color matched at Home Depot and below is the picture of that color code if you would like to use it.
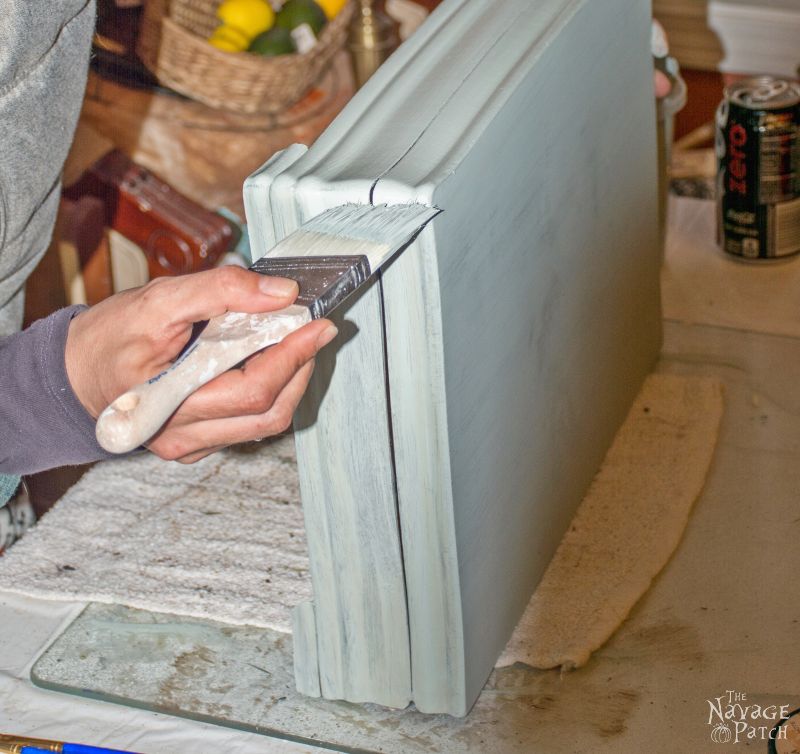
I prepared my homemade chalk paint in Aegean Sea color and started painting. I gave 2 coats of paint to the box, in and out, giving enough time for the paint to dry between the coats.
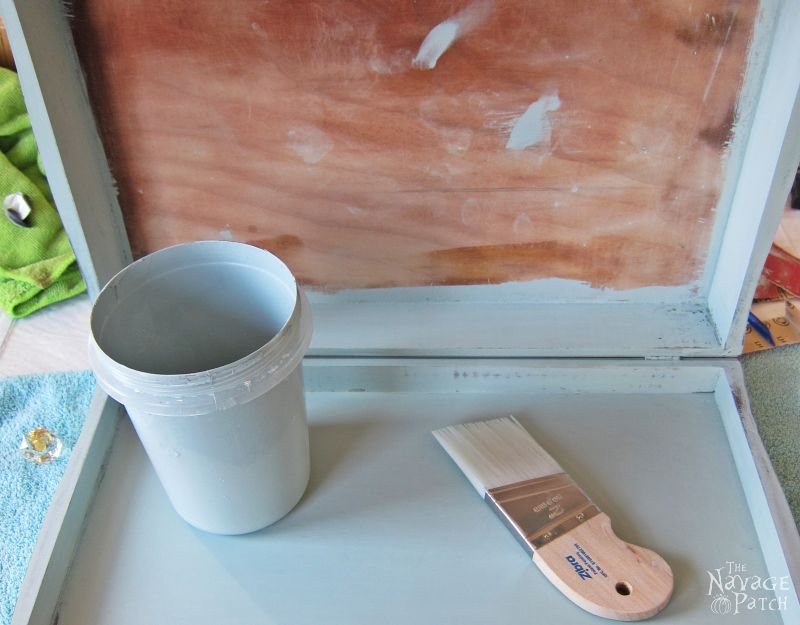
With furniture projects, I prefer using a paint sprayer, but with small projects like this, I prefer brush painting as it is faster. Nowadays I use Zibra paint brushes every time I brush paint, because I like the way they fit my hand and also they tend to leave the least amount of brush marks compared to other good brands I used till now.
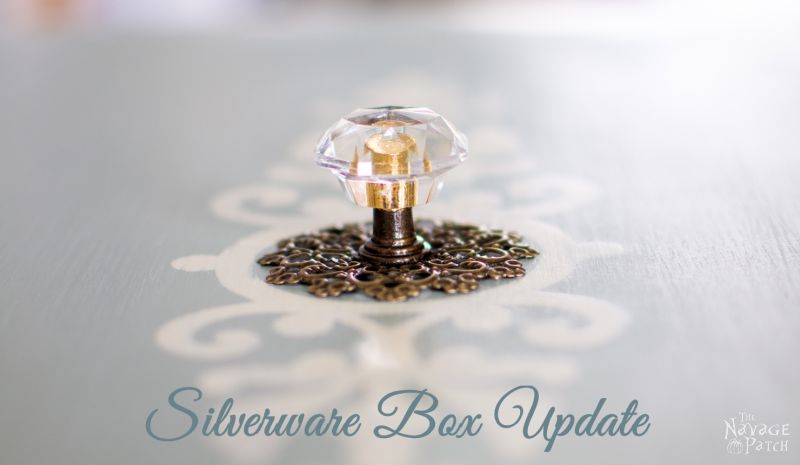
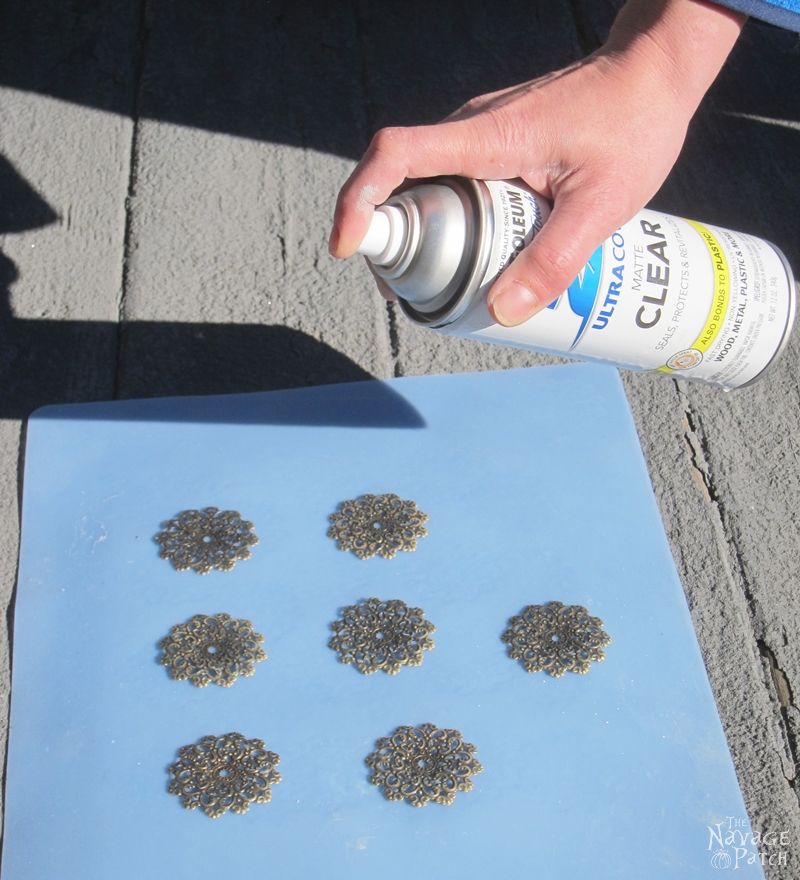
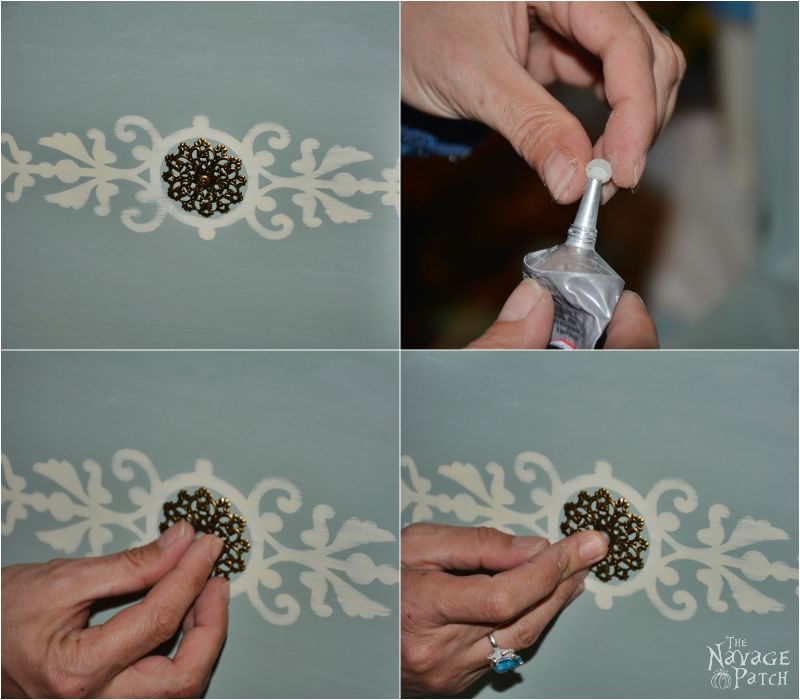
After painting the box, to give its plain looks a little excitement, I decided to stencil it and put a knob on the top. The small glass knob I found in my stash was the perfect size for the job, but it didn’t have a base, so I decided to use circular metal filigree/embellishment as the base. I bought these filigrees from Amazon some time ago to use on several projects. They come in a pack of 30, so it is a good deal for the price. I picked a bunch and sprayed them with clear protective coat.
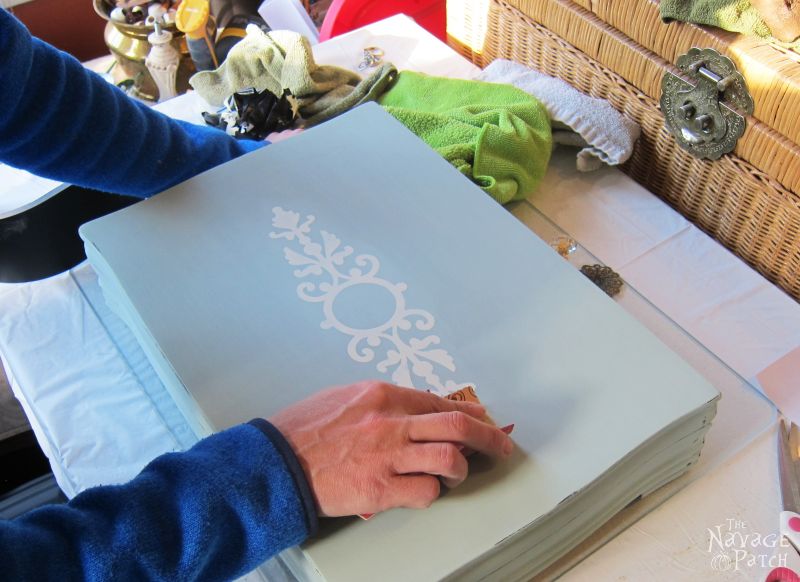
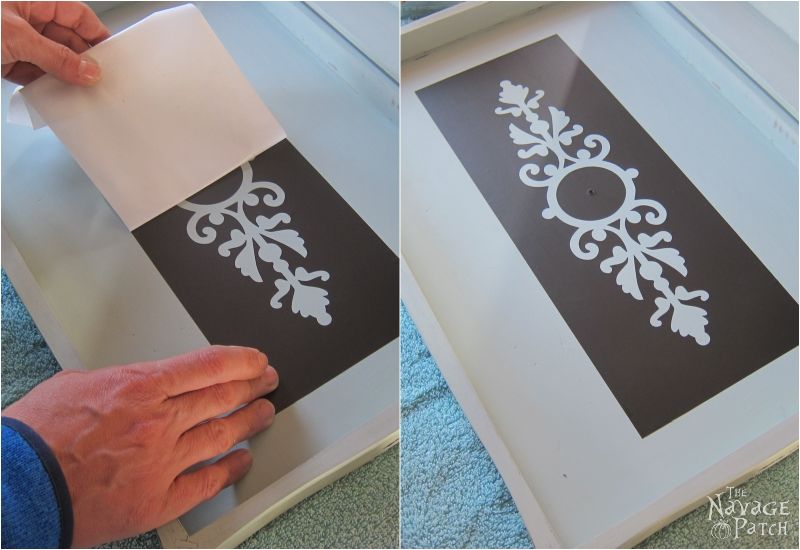
While waiting for the clear coat to dry, I worked on the stencil. It is a nice pattern, but I had to tweak it a little to have a circle right in the middle. Once the stencil design was to my liking, using my Cricut, I cut the stencil on re-positionable adhesive backed vinyl. I placed the stencil on top of the box with the help of transfer tape and stenciled the pattern with my homemade chalk paint in a custom color match to Old White color.

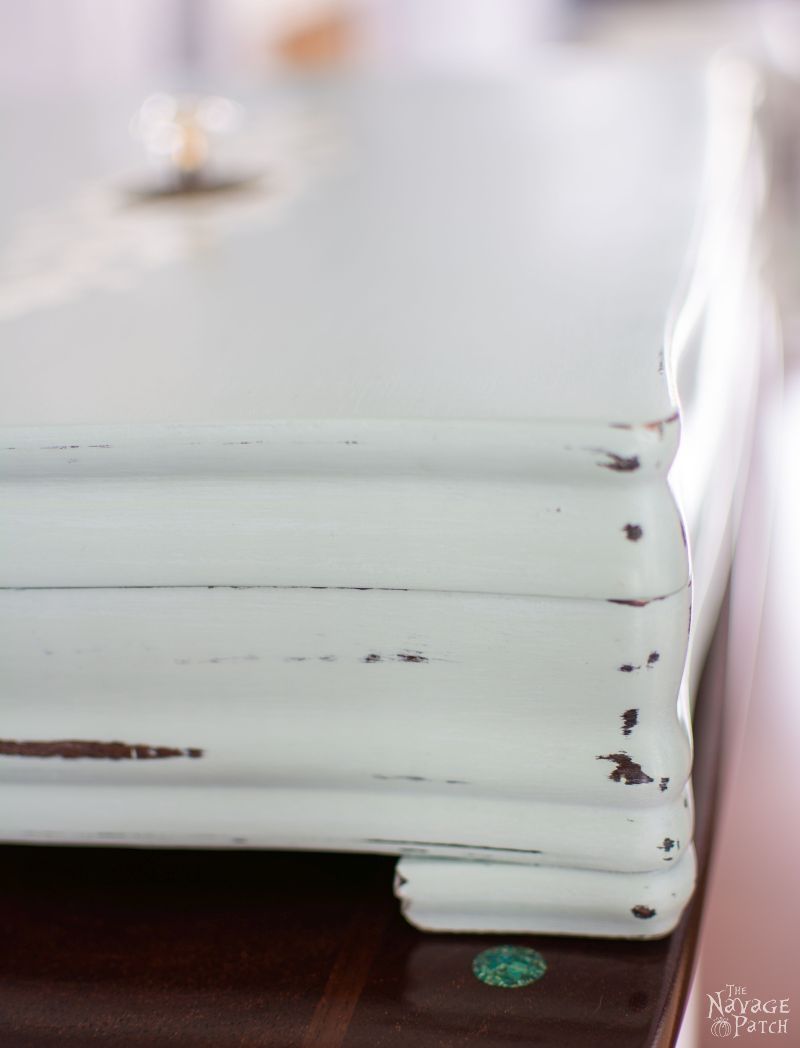
I waited for the stencil to dry, then I started lightly distressing the box (including the stenciled area) with 220 sandpaper. Then I smoothed all the surfaces with 320 sandpaper, and the box was ready to be waxed.
This is where I again changed my plan and decided to do the same stencil also inside the box. It is because of the knob’s screw… I just didn’t want an ugly screw showing inside the box, so I placed the same pattern right in the same spot but this time inside box.

After stenciling, I again slightly distressed the stencil, then I waxed the entire box (apart from the area where I was planning to line with fabric) with Annie Sloan’s clear wax.
Once waxing and buffing were finished, it was time to put on the knob, so I placed a metal filigree on both sides then the knob’s screw to the inner side of the box, then the knob to the outer side of the box. To hide the screw even better I glued a tiny half pearl to the back of the screw.

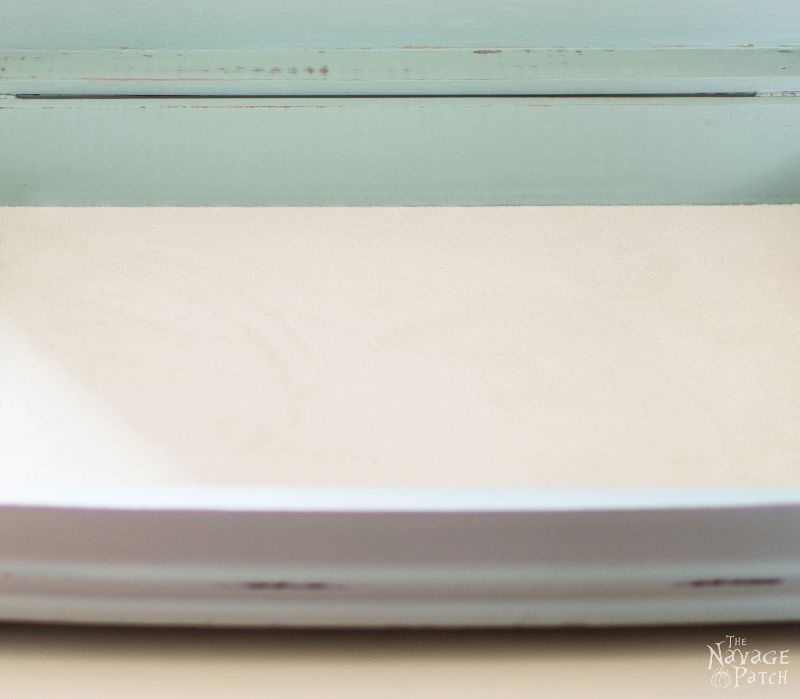
As the final finish, using Mod Podge I lined the inside of the box with a light color velvety fabric I had on hand.
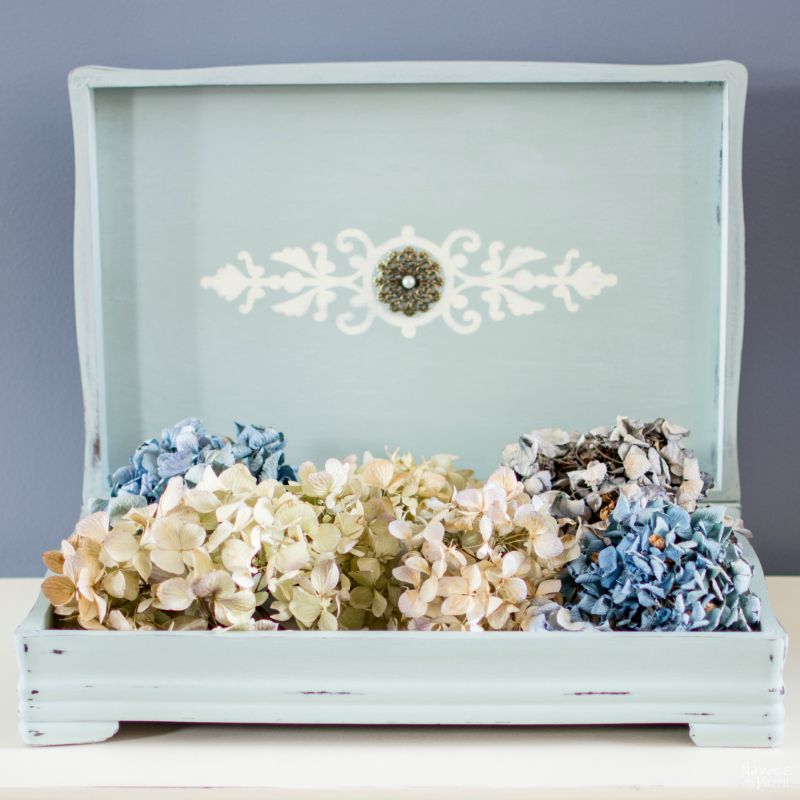
Here is my updated box.
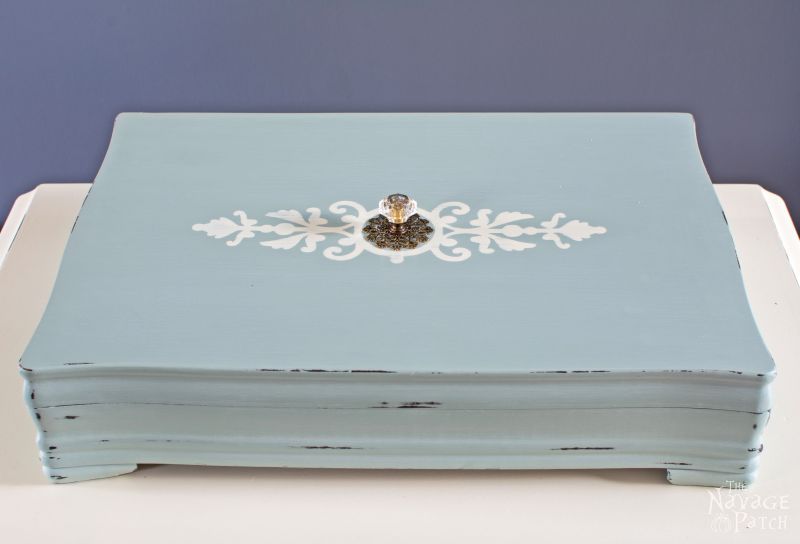
Seeing how lovely it turned out, I am so glad I kept changing my plan throughout the way.
I love how these filigrees brought a touch of elegance to an otherwise a plain box.
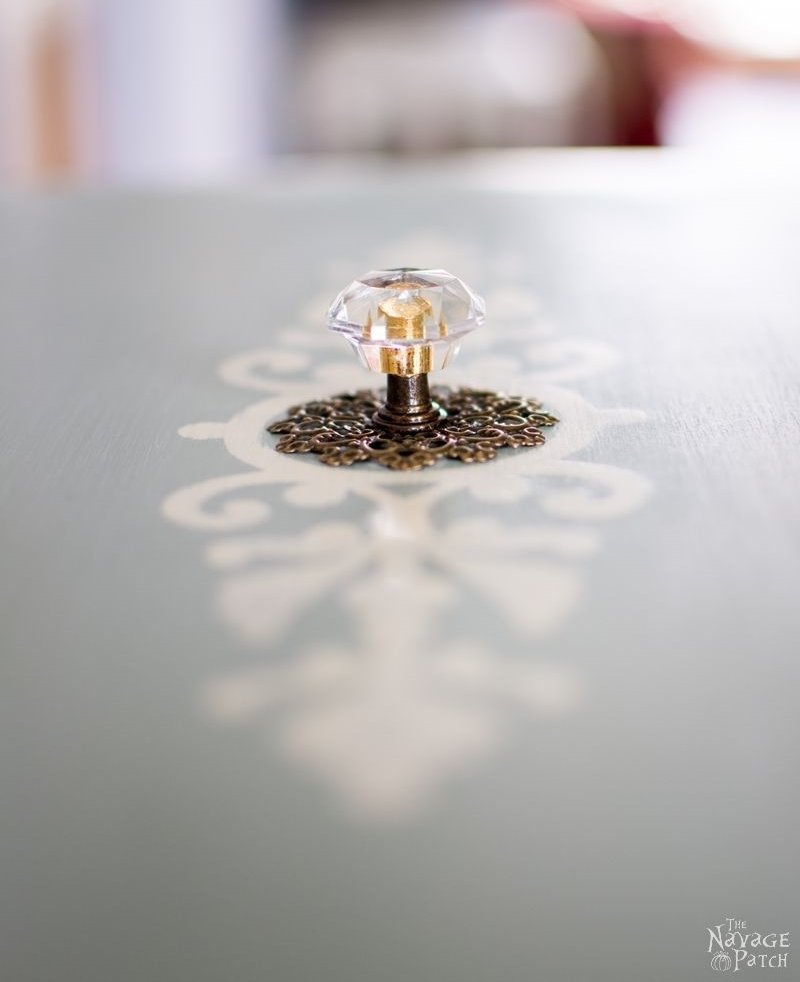
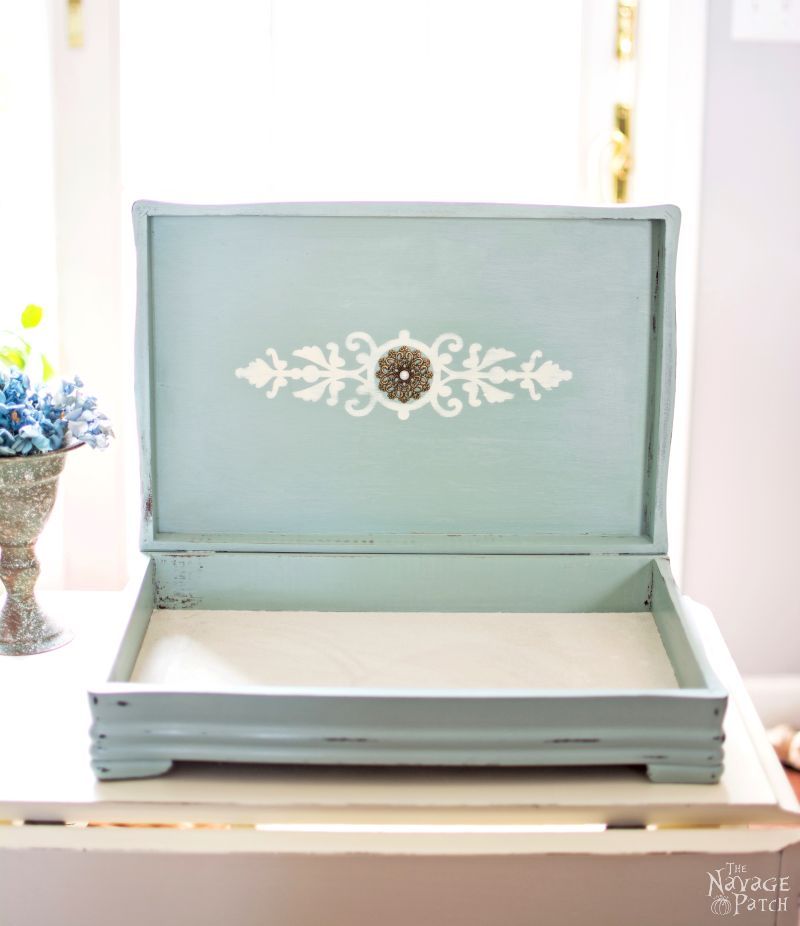
As usual, some close-up pictures…


I am still not sure how I will be using this box, but with the soft lining, I know it can make a great home for jewelry.

If you are you wondering what I did with the rest of the filigrees, click here to see where I used them.
Handan, xo


Aegean Sea what a beautiful name for a beautiful color, love the box transformation and love it with the hydrangeas, that put a big smile on my face, glad greg left your “stash” alone ha ha xx
Thank you so much, Chris! Hydrangeas were Greg’s idea. Who would have thought that he would pick up some interest in styling?
Beautiful!
Thank you so much! 🙂
Thank you so much for sharing this project. I have two old silverware boxes from my parents & knew something could be done with them without having any idea on what that might be. Well now I know & looking forward to the transformation. Thank you also for your chalk paint recipe. I’ve tried it with plaster of Paris, and though it was okay, I wasn’t completely sold.
Thank you so much for your kind words, Linda! I am sure you will love the homemade chalk paint with calcium carbonate and talc. Just make sure you mix it really well, preferably with a mixer. Also little hint on the storage: I keep my left over paint in a mason jar. Once I close the top properly it stays fresh (it doesn’t get thicker nor does it dry out) for at least 4-5 months. Before using again all I do is shake it properly or give it good mix again in case the calcium carbonate and talc settled during storage.
Hi Handan¡¡ , I did’nt know about your blog¡¡, This box is sooo nice , delicate and feminin…i love it ¡¡
Thank you so much, Victoria! Seeing your gorgeous projects on the Decorating Enthusiasts Forum I really trust your eye and taste in decor, and it makes me so happy that you liked it 🙂
I really like how this turned out! I have an empty box too in my stash. The hardest part is deciding what to paint it! Thanks for the idea!
Thank you so much, Pamela! =)
I love all the little touches you made to your box. The color is just perfect will have to try doing some painted furniture projects thanks for sharing visitng from homemade and handcrafted have a great day
Thank you so much, Lorraine! =)
Your pretty silverware box caught my eye at the Craft Frenzy Party. LOVE everything about this – the color, the stencil and adding the pretty backplate and glass knob. Pinning to share.
Thanks so much, Marie! xx
Wow, what a transformation and how lovely did this turn out! I’m loving the colour you chose and the little details are just perfect! I’d love to go to your basement as well! Thank you for sharing at Sweet Inspiration #2! Have a lovely weekend!
Thank you so much, Katrin! Oh yes, our basement can provide years and years of projects for a team of DIYers. I would take a picture and put it on the blog, but I am afraid people would think I am a hoarder lol. Thanks once again for your lovely comment and visiting us!!
You too have a great weekend =)
What a fun project! Love how it turned out! Have a great weekend 🙂
Thank you so much, Brenda! You too have a great weekend! 🙂
Wow that turned out beautiful! Thanks for sharing your method to upcycle and beautify the world and for linking up with Funtastic Friday!
Thank you so much, Sherri! =)
Great job! I actually have a box that is almost identical, and really needs refurbishing, only it is holding my grandmother’s set of silver plate silverware from the 1930’s or so, so it will stay as is for the time being! Thanks for sharing on craft schooling Sunday!
Thank you so much Sara! I am so glad you liked it!! =)
You did it again, love everything about the box! The color is so pretty, now I try to write down the colors I use for the mix to remember how to make them again. The know and the stencil are great additions too.
Thanks for sharing at Two Uses Tuesday and Sweet Inspiration, Handan!!
Thank you so much for your kind words, Pili! Your comment made my day =)
Love the color you chose. I am not much of a DIY’er nor am I crafty but I enjoy seeing what others do. Great job.
Thank you so much for your lovely comment! =)
Beautiful makeover project for your silverware box! I love all the details and your colors. I hope you’ll stop by and share at the Merry Monday party this week. Stopping by from Snickerdoodle.
Thank you so much, Shirley! I will definitely do. I already added your party to my favorites list!! =)
Looks great and elegant. Thank you for sharing with us at #HomeMattersParty. We would love to have you again next week.
Thank you so much, Sahana! and thank you for visiting!! I am planning on becoming a regular at your party 😉
What a gorgeous makeover! I love the color you created. It’s so bright and fresh now. The knob is the perfect finishing touch. Pinned and Tweeted. Thanks for sharing at Snickerdoodle Sunday.
Thank you for your sweet comment and visiting us, Beverly! Thanks for hosting such a great party!!
I love what you did with this! It came out so pretty. Thank you for linking up with us at the Family Joy link party!
Thanks so much, Samantha =)
Wow, this is so very pretty! I love the color and it would match any shabby chic décor! So beautiful! Thanks for sharing at our DIY Crush Craft Party! Hope to see you again this Thursday at 7pm EST.! We pin every post!
Thank you so much for visiting us, Denise! I am planning to become a regular at your wonderful party 🙂
What a cool and unique update! Pinned! Thanks for sharing at Merry Monday, hope to see you again next week!
Thank you so much, Chelc! =)
What a beautiful transformation–love it! Blessings, Cecilia
Thanks so much, Cecilia! =)
Oh my this turned out so pretty – the style is just up my alley. 🙂 Thank you for linking up at Friday Finds! Pinning and featuring 🙂
Wow, thank you so much, Aki!! 🙂
I absolutely love this makeover Handan. It’s so pretty! I’m featuring this at Vintage Charm today, and pinning too. Thanks so much for sharing it with us.
Oh how wonderful! Thank you so very much, Tuula!! 🙂
Love the details! I’ve pinned it. We’re prepping an upcoming estate sale and I just priced an almost identical box. It’s gonna hurt to see someone else buy it. LOL But there will always be another at a sale I get to shop at — if I don’t have one in my stash already…….. Hmmmmm….. Gotta go look.
Thank you so much, Wanda! I am so glad you liked it 🙂
Gorgeous upcycle!! I love silverware boxes and everything about them. I hate that they are not used as often anymore, but this is a great way to show them love again. The paint color you chose is beautiful too. Super creative. Thanks for sharing at Funtastic Friday. Pinning!
Thanks so much, Mistie! 🙂
I love this project! I made over a silverware box over the winter and I’m on the hunt for another for a different idea. I love the paint color that you used and also your stencil. I’m featuring you tomorrow night for “Best of the Weekend.”
Wow, what a great news! Thank you so much, Paula! 🙂 I’ll be there at your party tomorrow…to check out others’ posts and of course to link up more 😉
Looks like a different box! Thanks for sharing at the DIY party on Pleasures of the NW
Thank you so much, Helen! 🙂
This is so cute. I have one I am going to have to work on. Great idea.
Debi
Thank you so much, Debi!
Beautiful project! Love the color you chose and the design is awesome. Who knew a box could be so elegant. Hubby’s choice of hydrangeas is lovely. Thank you for sharing your creativity at DI&DI.
Thank you so much, Linda! After we started blogging Greg made huge progress in styling. Well…at least for a man…LOL
What a great project! It turned out looking fabulous 🙂
Oooh, this looks so lovely! The color is delicious!…Christine
I love your silverware box! So beautiful! Thank you for sharing at Ravenwould.
Thank you for your lovely comment, Kileen!
It’s beautiful Handan! Love that color and the distressing. I see these at Goodwill sometimes but always pass them up. This would be perfect for my hubby to put the stuff he seems to collect in. Lol