DIY Lighted Witch Hat (Grandin Road Inspired)
This DIY Lighted Witch Hat is our inexpensive take on Grandin Road’s pricey Grapevine Witch Hat with Lights, and we kinda like ours better!
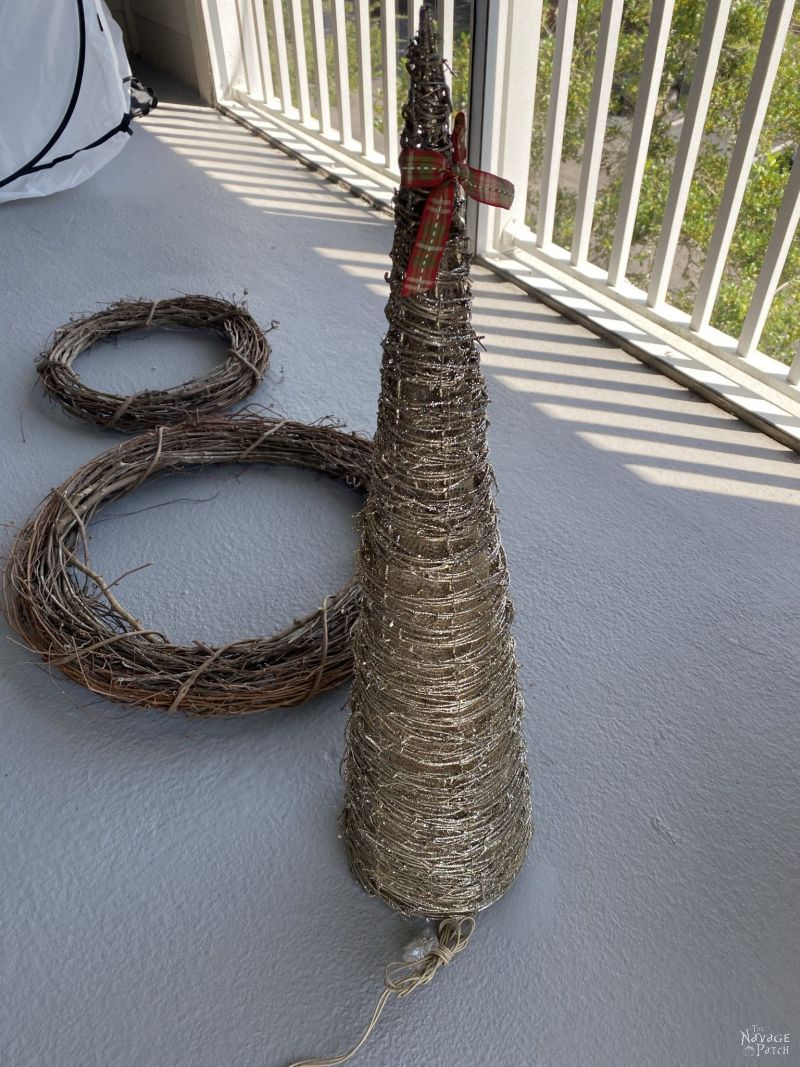
Years ago in a cold-and-dark-wintered land called Connecticut, my babes bought a trio of lighted grapevine cone trees from BJs Wholesale Club. For the next several holiday seasons, those glittering cone trees adorned various nooks and corners around The Navage Patch v1.0, indoors and out. At $50 for the trio, it was a bargain, and we got good use out of them, but after a time (and especially after displaying them indoors), they just became a glittery nuisance.
If there is one inviolable rule in the craftiverse, it is that glitter can, will, and must shed from wherever it is applied. There is no glue in the known universe that can hold it, no adhesive strong enough to contain the infinite power of a single speck of glitter. And when freed upon the world – whether onto a wood or carpeted floor or onto a hand or in the hair – there exists no vacuum powerful enough to inhale it nor any soap or surfactant powerful enough to draw it from the body.
So it was no surprise, really, when our glitter-encrusted triumvirate began divesting themselves of their tiny golden sparkles. By Winter Solstice, the glitter had spread throughout the house.
We endured the sparkling onslaught for the first few years, taking it all in stride. It was the Christmas season after all, and we were supposed to be brimming with good cheer and kind thoughts and goodwill towards all men, women and children.

But that glitter…
It just wouldn’t go away…
Good cheer turned to grumbling as we wrestled mightily with something so small, it didn’t have a measurable mass.
Finally, in our last winter in Connecticut, my babes had had enough and sentenced the offending cone trees to life in contractor bags until such time as she could think of some way to upcycle them.
And thus began their journey.
From Connecticut, they made their way south to Georgia where they continued to serve out their plastic-bound sentence.
And just recently, one of the three made its way from Georgia to Florida.
If there is one thing that amazes me about Handan (in fact there are many), it is her determination to pack and move…well, junk, not to put too fine a point on it, from city to city and state to state just because she knows she’ll eventually find a use for it!
Were it up to me, those three cones would be moldering in a Connecticut landfill right now. But it wasn’t up to me, and now we’ve got another cool upcycled project for you!
As happens at least once a year, my babes got her inspiration for this particular project from the Grandin Road Halloween Haven catalog. Sometime in July or early August, the first of many Halloween Haven catalogs appears in our mailbox, and Handan devours it from cover to cover. When she saw their Lighted Grapevine Witch Hat, she tore out the page and stuck it to the fridge with a yellow magnet advertising the many wonders of Abu Dhabi.

When the next Halloween Haven arrived, it had a different image of the same product. She tore that one and and hung it next to the previous one.
Long before we packed up Baris and shipped him off to Virginia Tech, my babes was showing me the plan out on our deck. I did a lot of head-nodding and general understanding. Cone trees and grapevine wreaths (of which we have many squirreled away from previous years) seemed to be the gist of it.
And I was gonna do it. I was gonna start.
But you know how it goes, madam! There was this thing and that thing oh and that other thing over there that demanded my full attention, and I just truly didn’t have a moment to spare for the glitter-infested cones!
Truth, madam, when we discovered we were moving, I breathed an inward sigh of relief.
Surely that meant that this sparkly boondoggle was DOA, and I wouldn’t have to worry about transporting all that glitter across state lines!
Indeed not. One of the cones and several grapevine wreath forms were (and I’m not making this up) among the very first items loaded into the U-Haul.
Hey, when my babes puts her mind to a project, nothing so inconsequential as an interstate move is going to sway her off course!

DIY Lighted Witch Hat SUPPLIES LIST
Affiliate links are provided below. Full disclosure here.
- Lighted cone tree or grapevine cone tree
- Grapevine wreaths – we used a 12 inch and an 18 inch
- Flat black spray paint (we used Krylon for this project)
- Zip ties (we got them at Dollar Tree)
- Black and orange Halloween scarf (we got ours at Dollar Tree)
More Easy DIY Halloween Decor Ideas
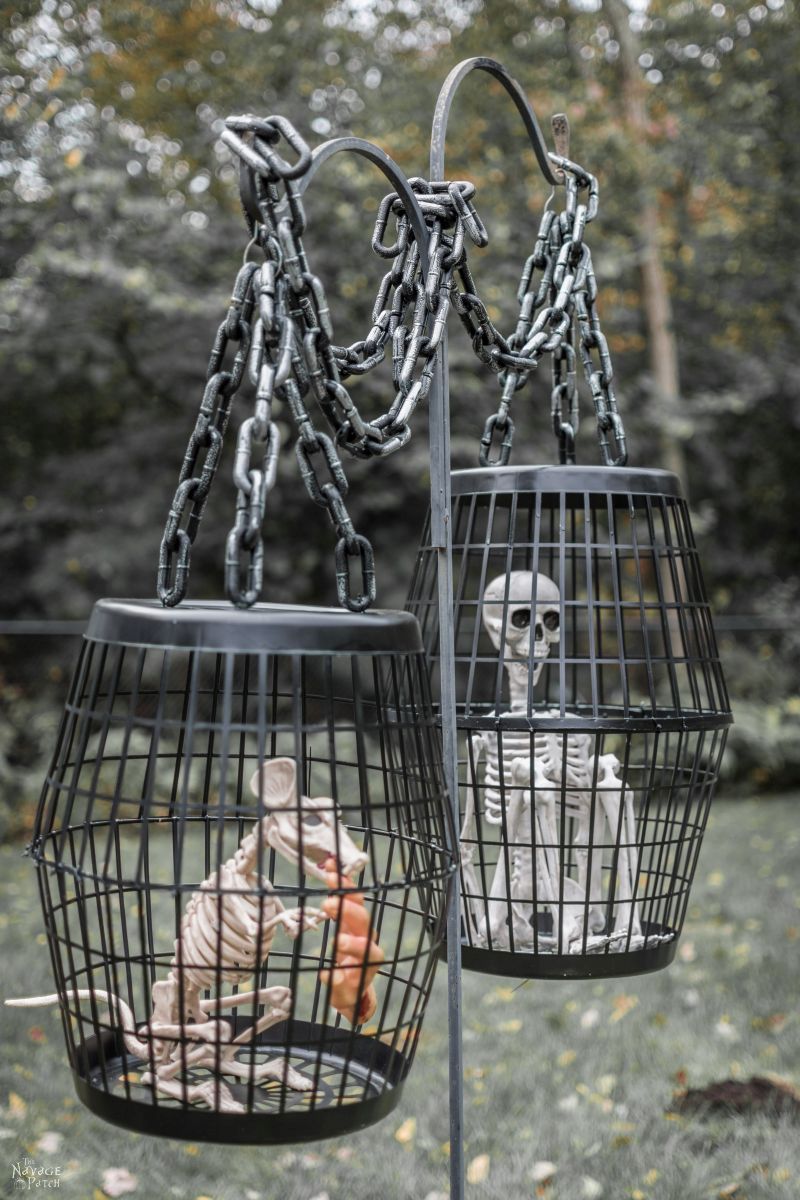

- Hanging Cage Halloween Prop
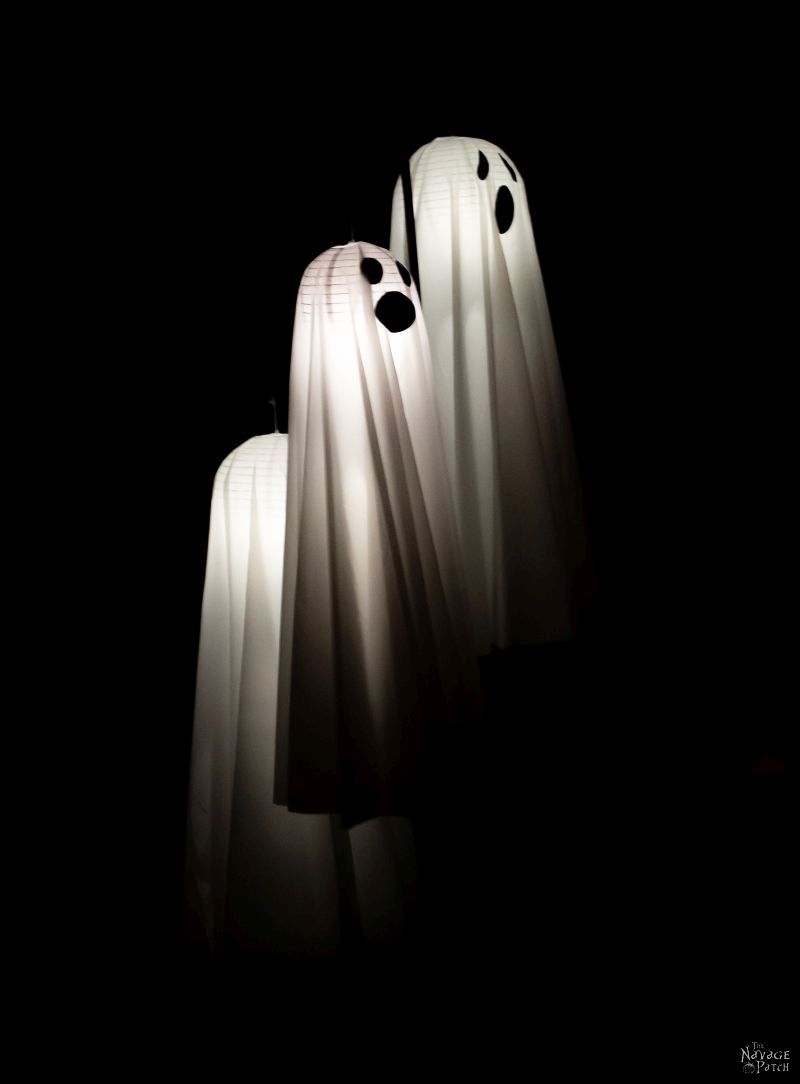
- Easy Lighted Hanging Ghosts (A Dollar Store DIY)
- Free Vintage Movie Monster Printables
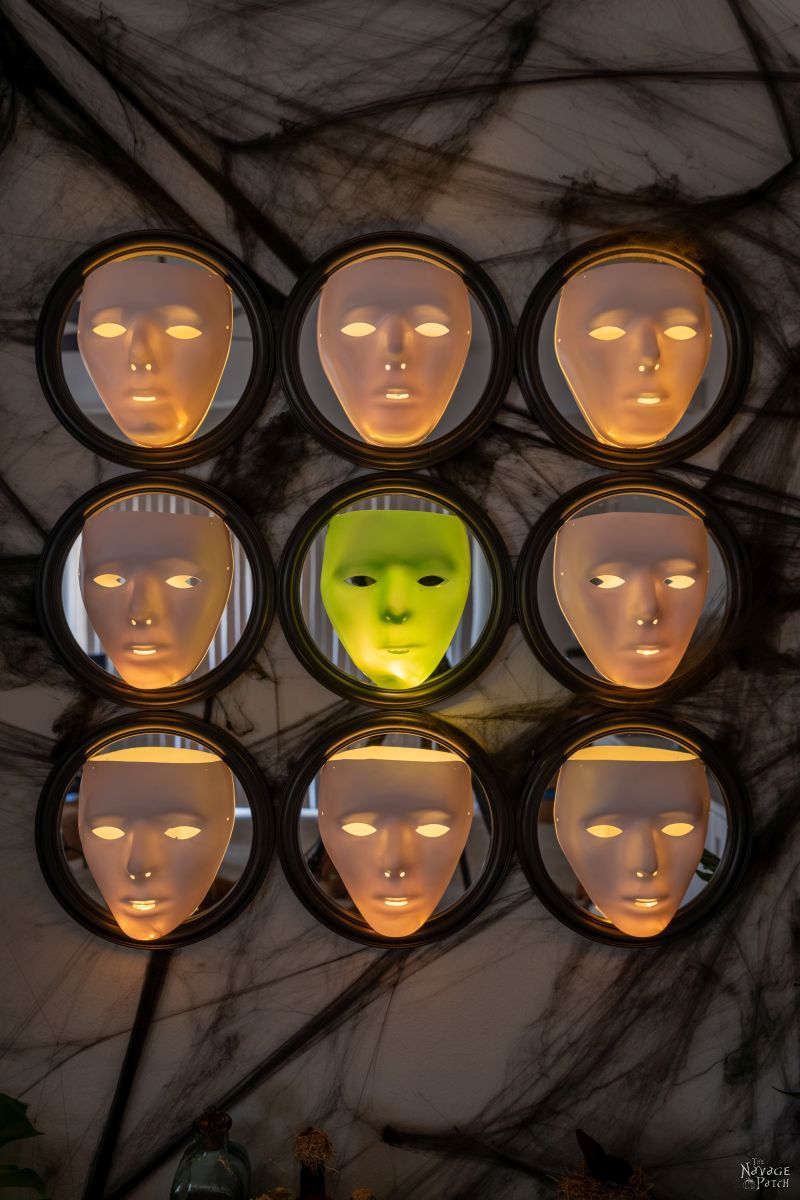
- Gallery Of The Faceless – Easy Halloween Wall Decor
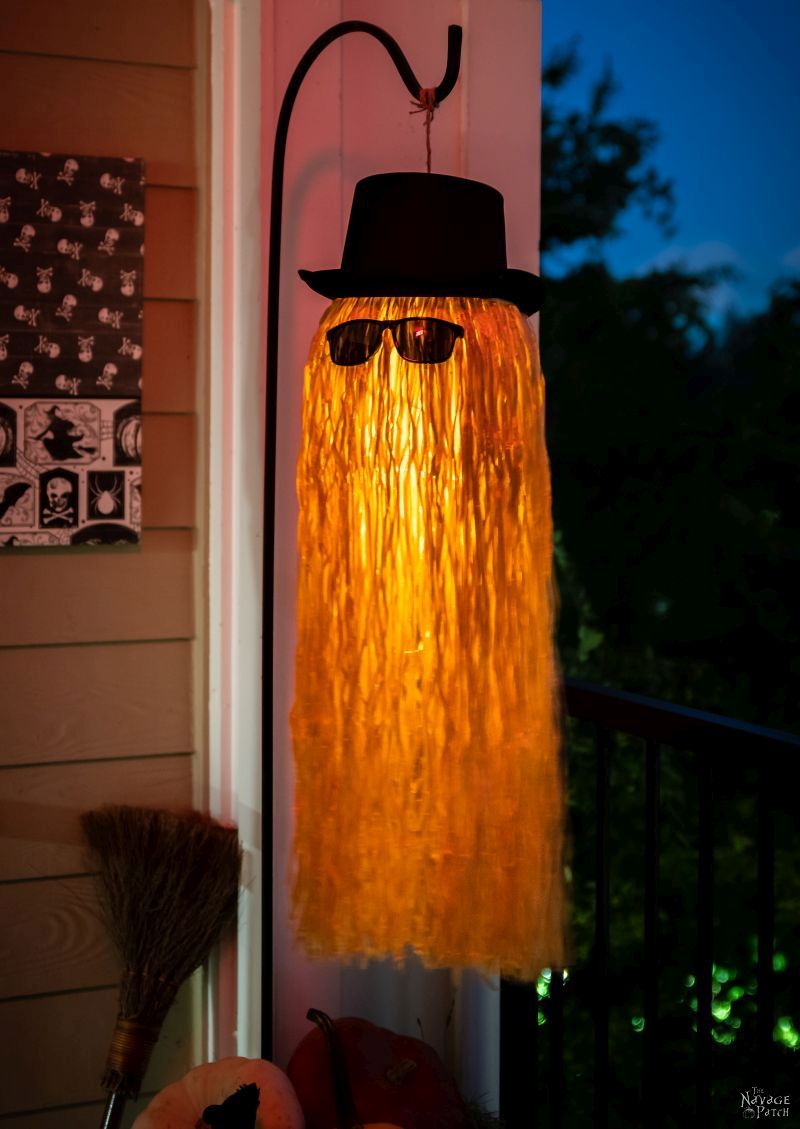
- DIY Cousin Itt Pathway Light
- DIY Skull Sunflower Halloween Wreath
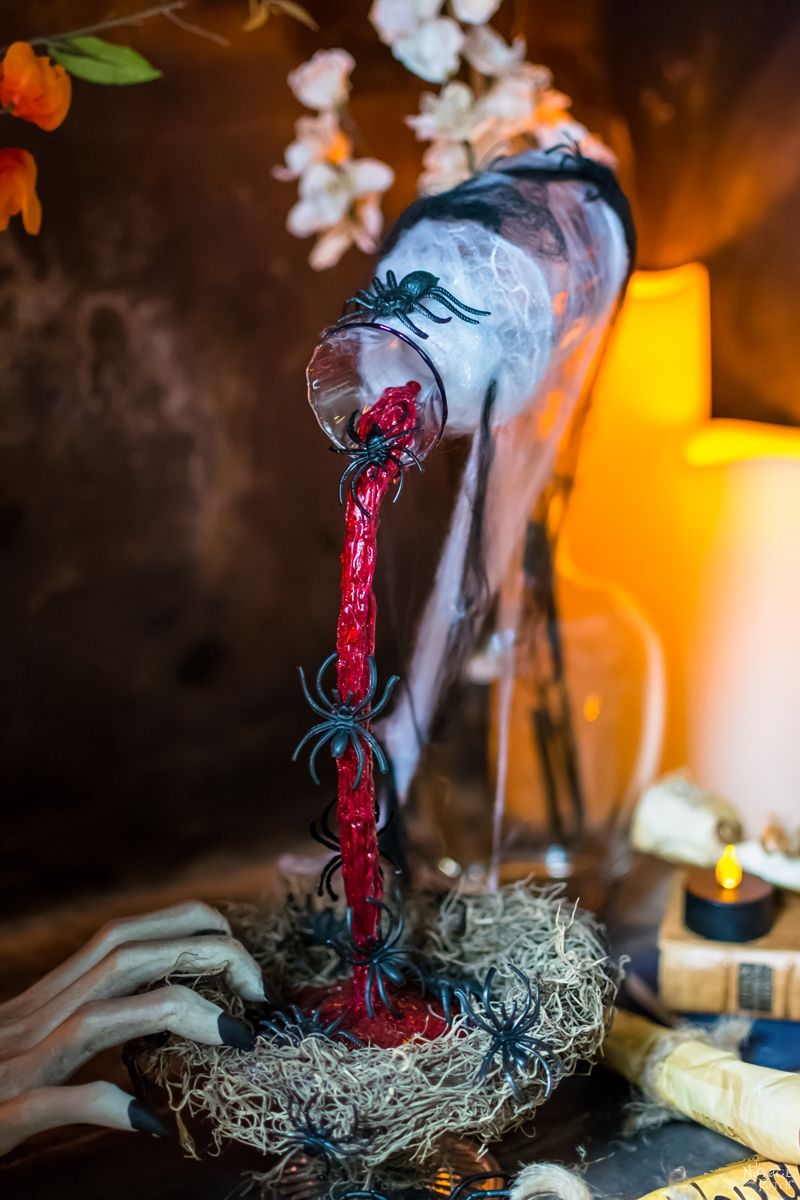
- Floating Potion Bottle
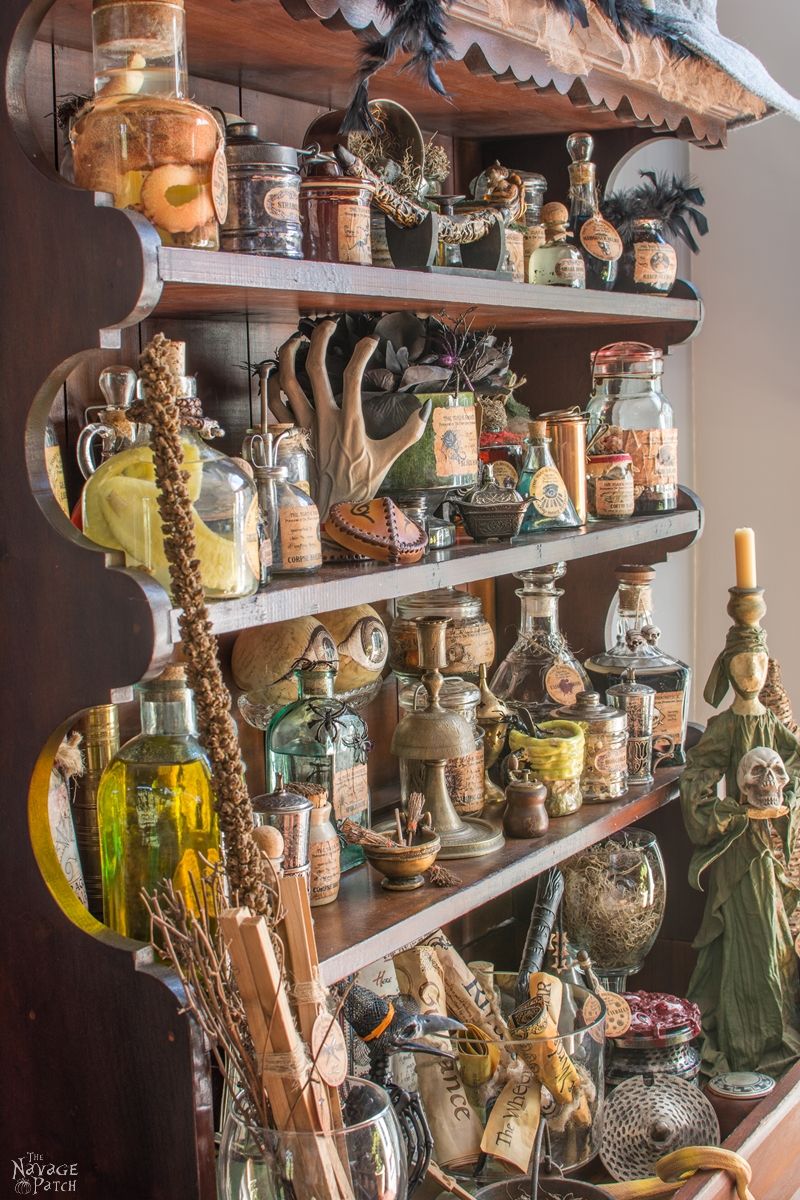
- Apothecary Jars And Free Printable Labels
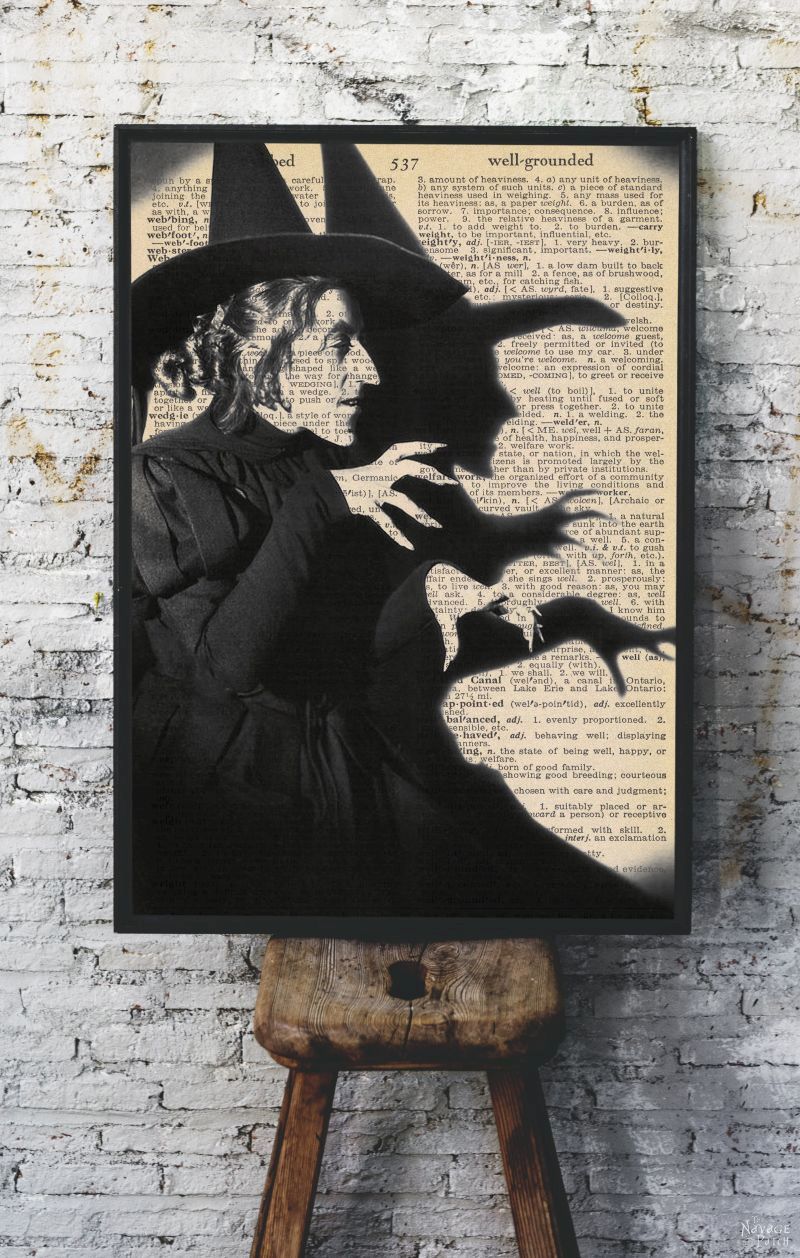
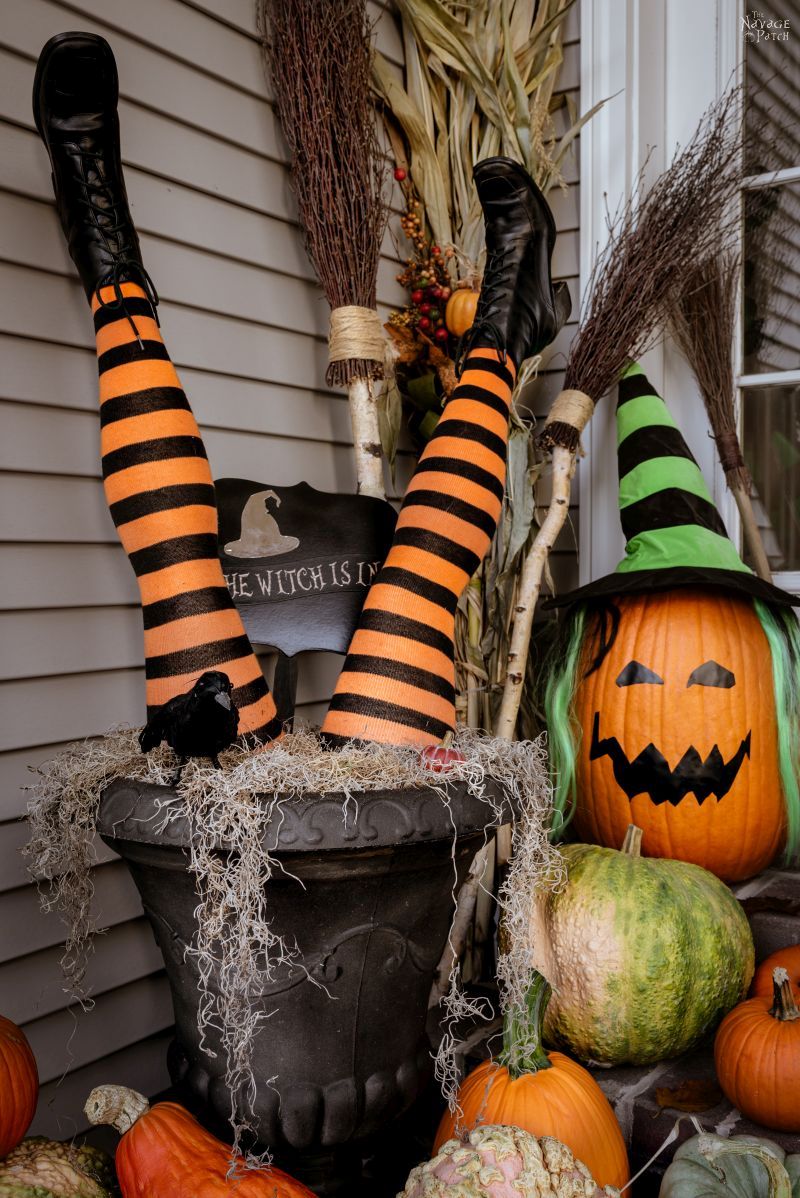
- DIY Witch Legs (Grandin Road Inspired)
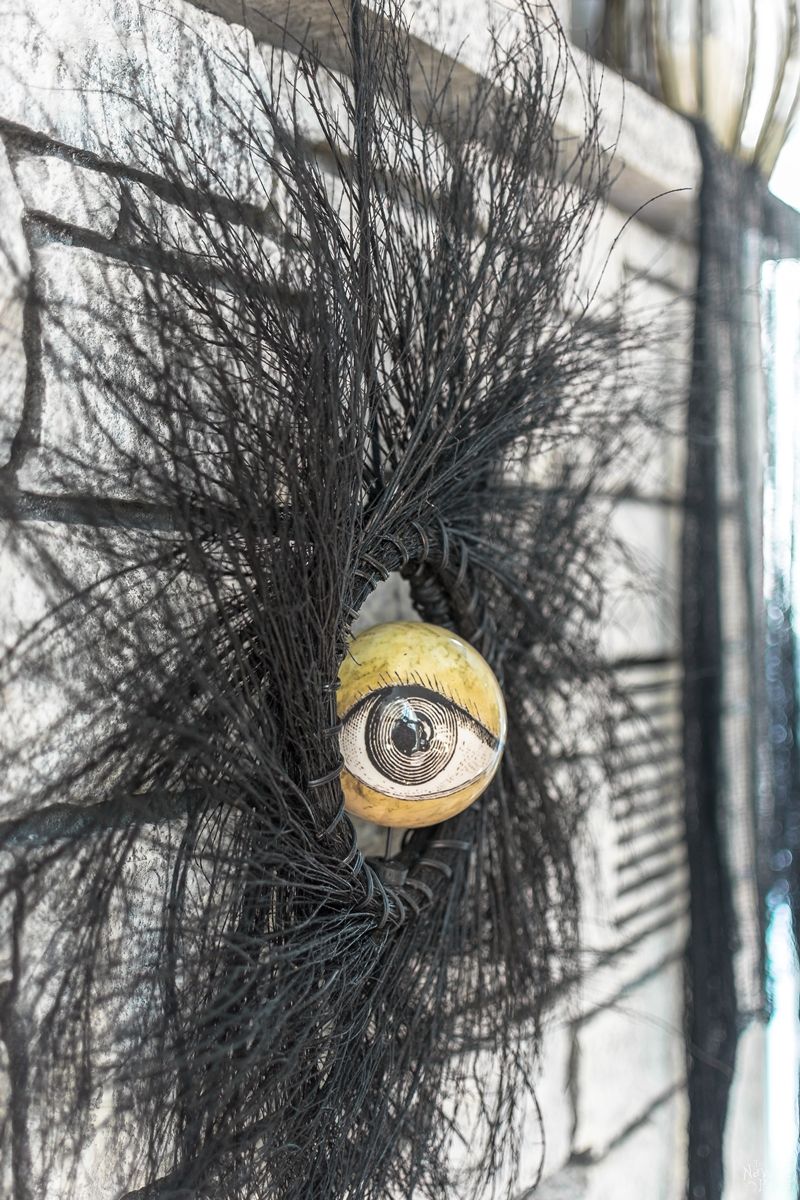
- Eyeball Orb Halloween Wreath
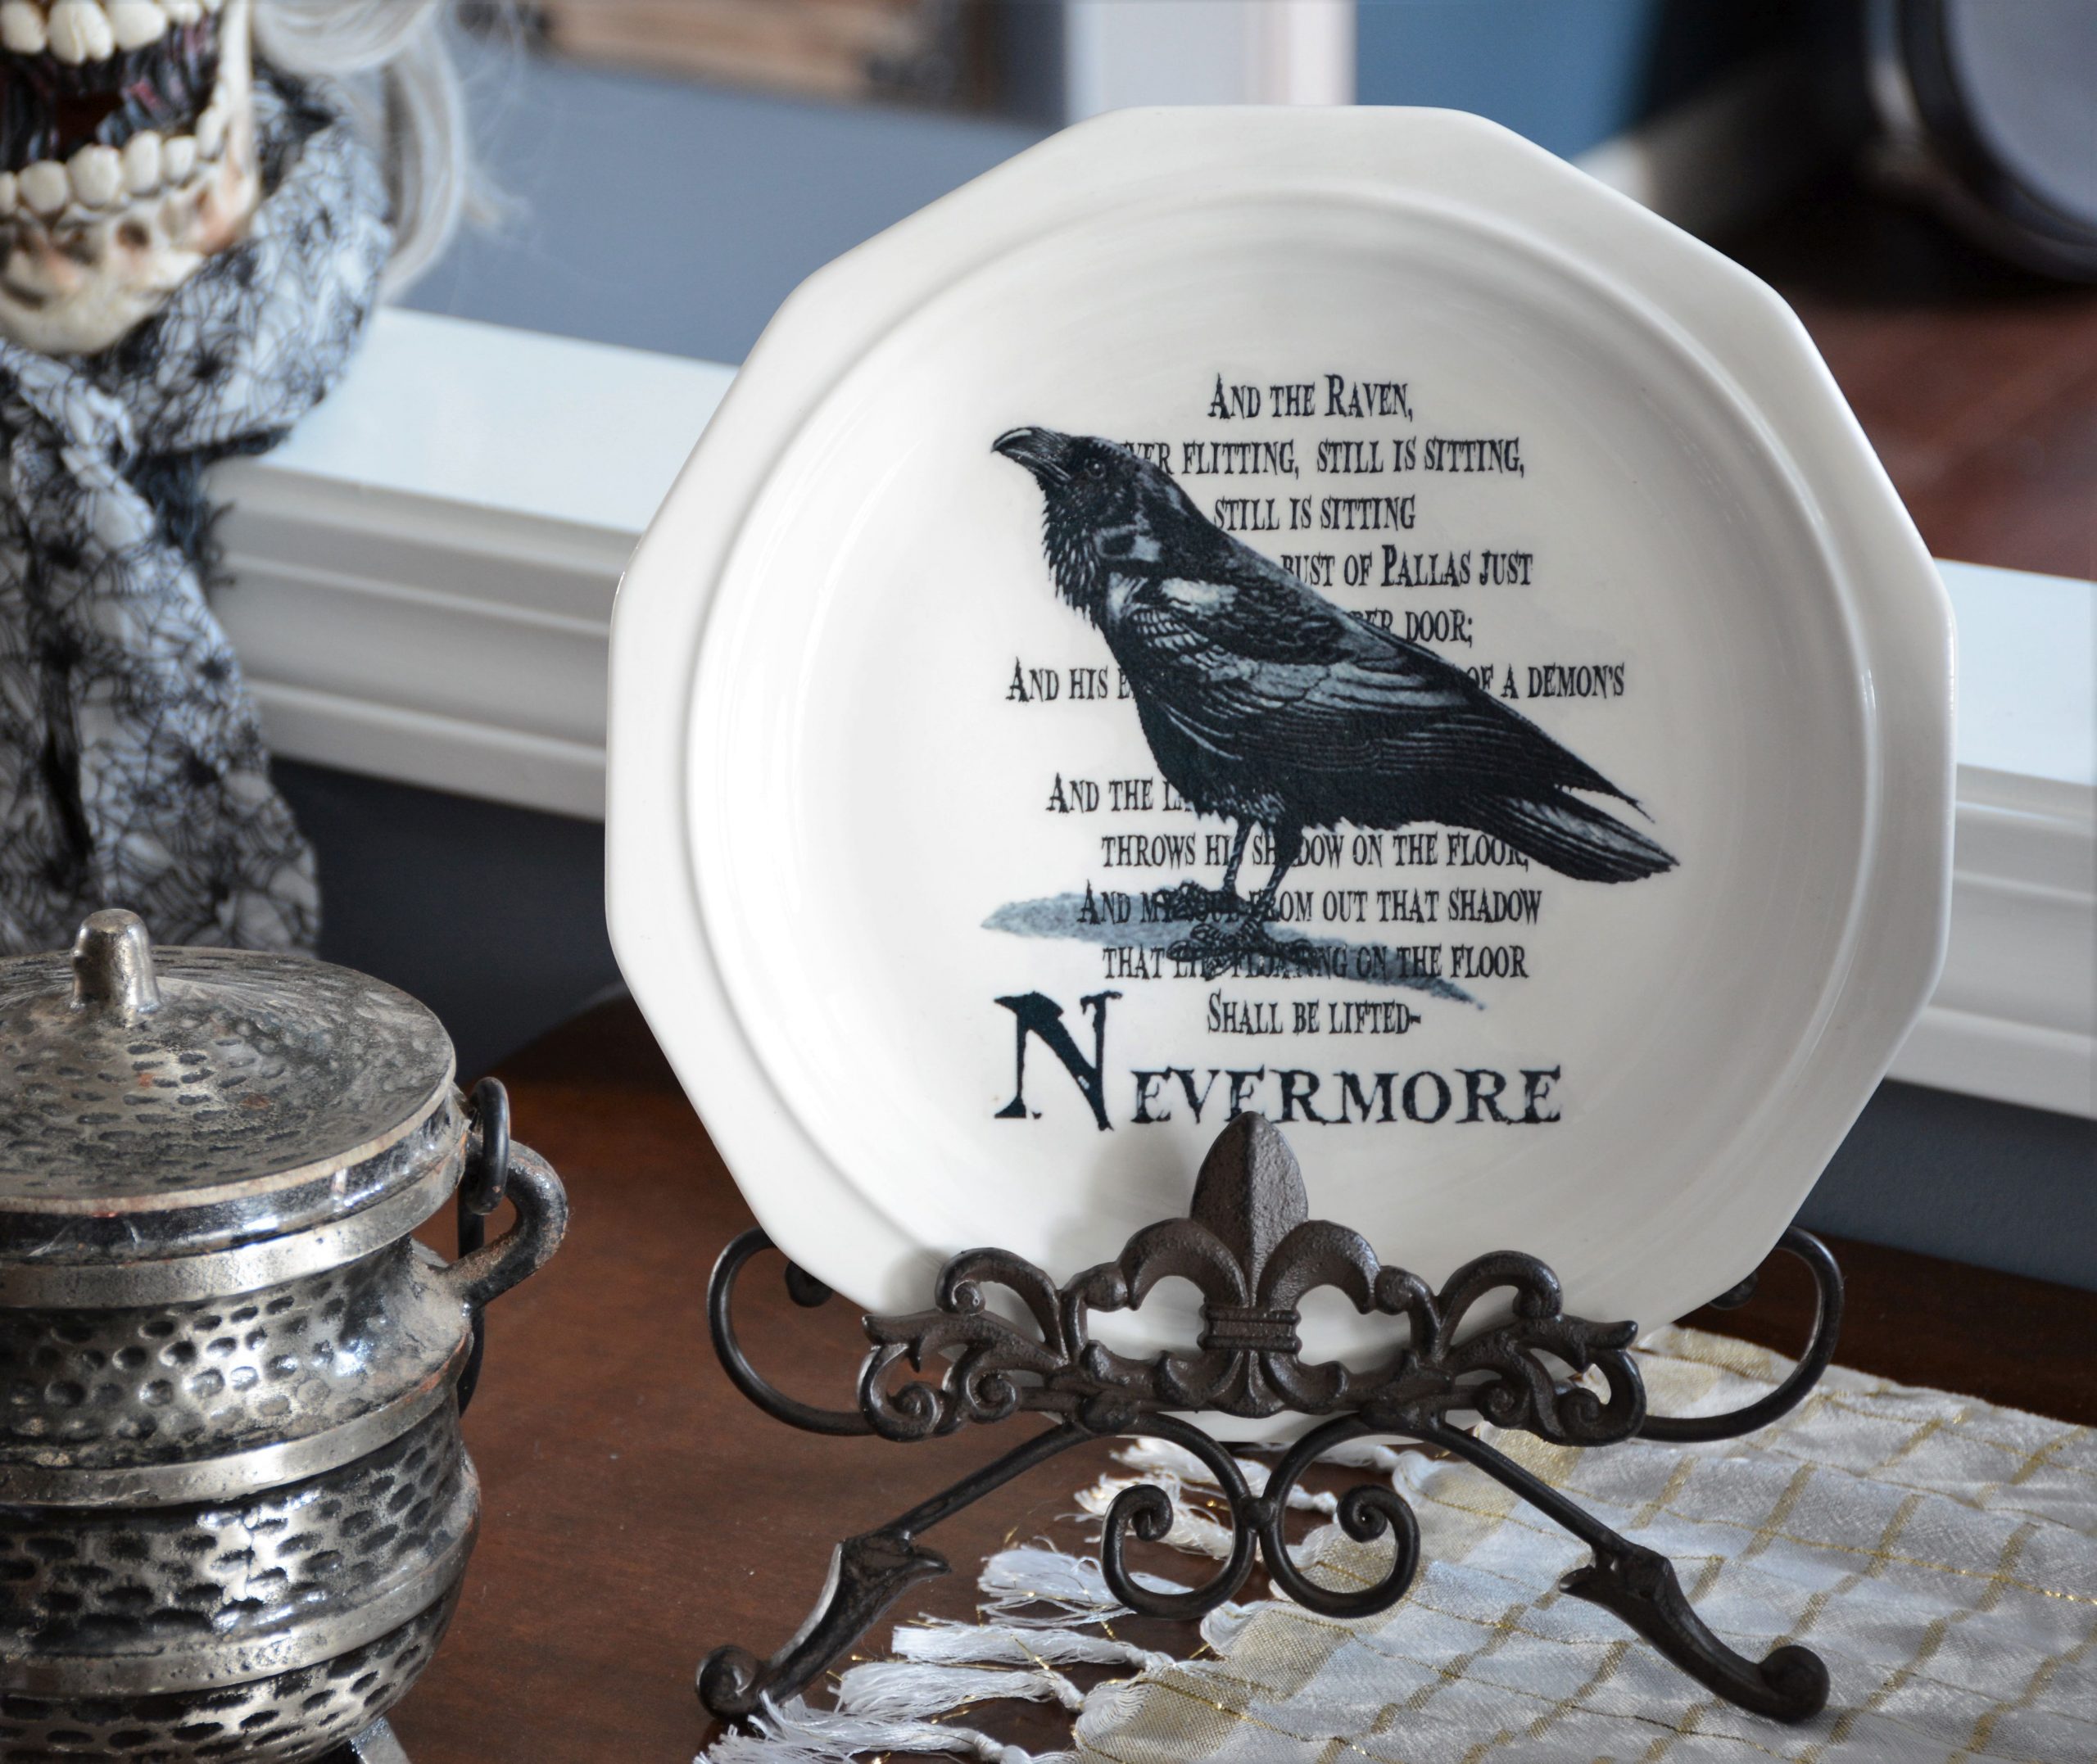
- Dishes Of Darkness: Pottery Barn Inspired Halloween Plates
DIY Lighted Witch Hat (Grandin Road Inspired) VIDEO tutorial
You may want to watch our short video below for an overview of our Grandin Road inspired lighted witch hat before you read the detailed step-by-step tutorial.
DIY Lighted Witch Hat (Grandin Road Inspired) tutorial
We experimented with using a 12 inch, 18 inch and 24 inch grapevine wreaths but decided the witch hat looked best with just the 12 and the 18.

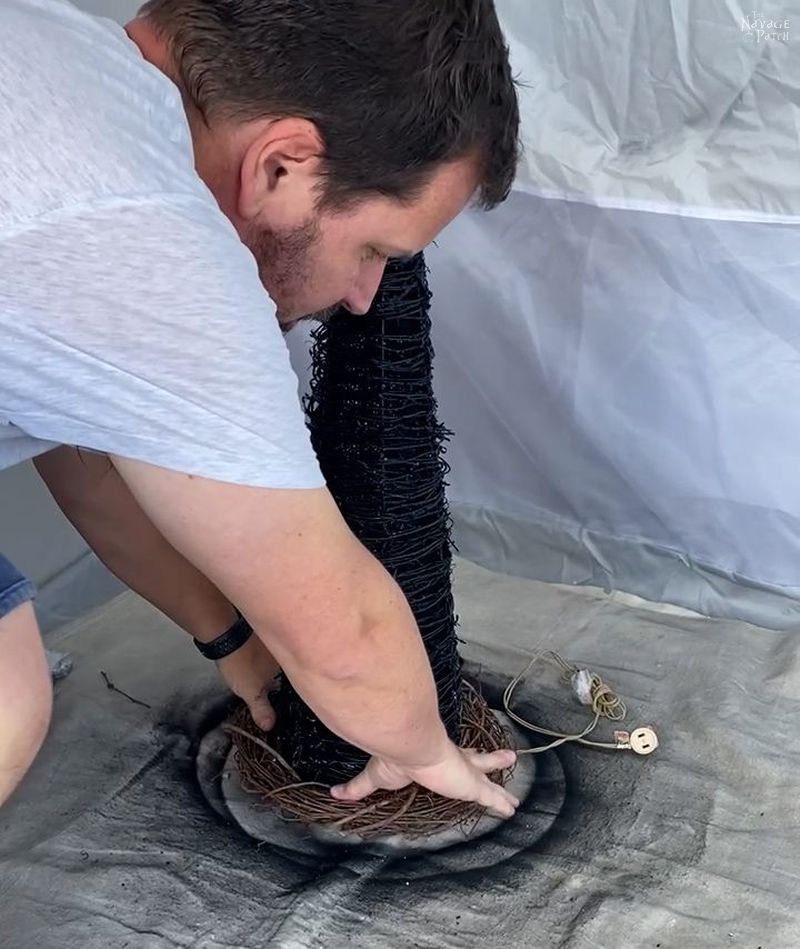
Here’s one of the cone trees. In the background are the 24 inch and 18 inch grapevine wreaths.
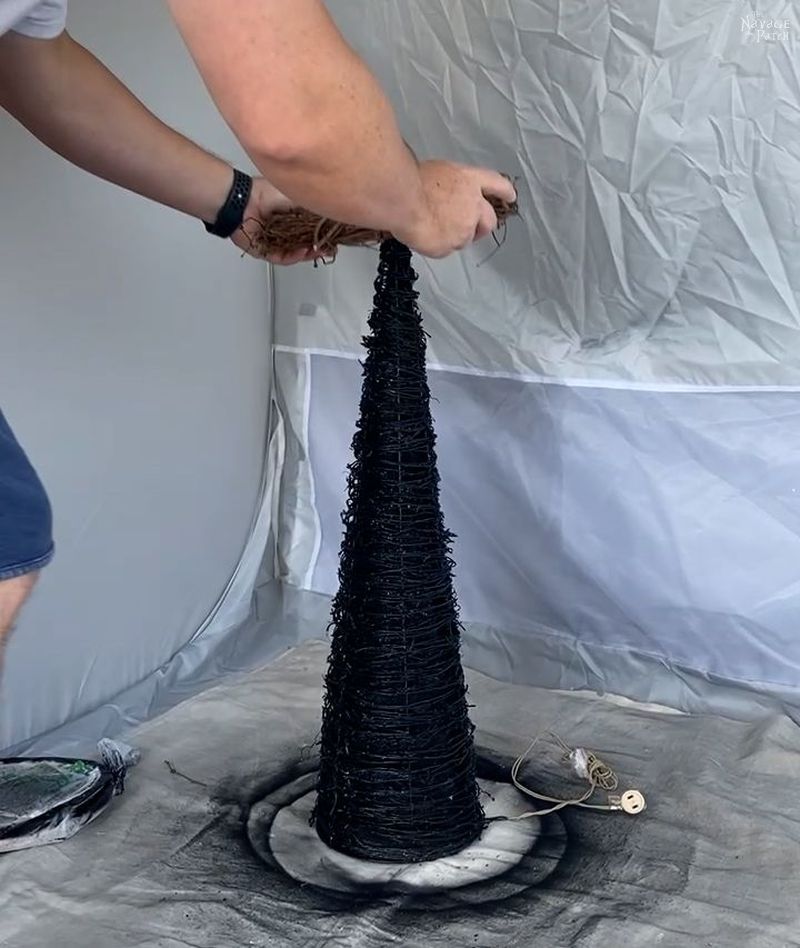
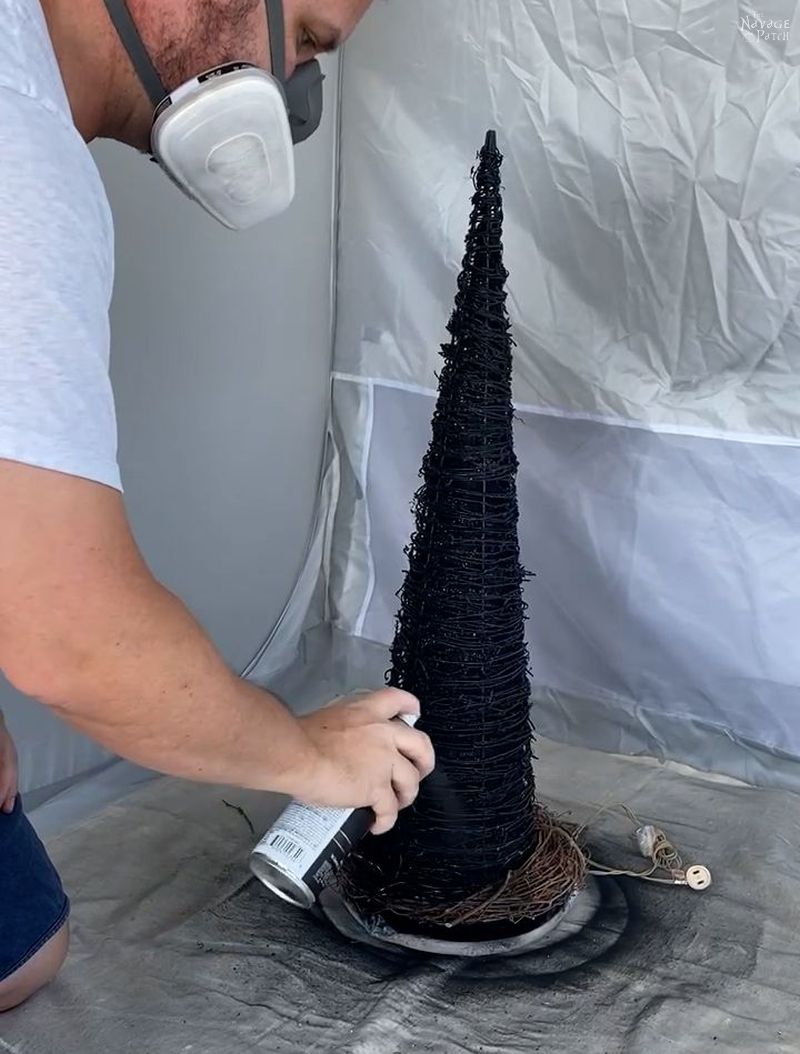
In the paint shelter, I prepped the cone tree by removing the bow and placing it on a lazy susan. I love painting on a lazy susan – it really makes it so easy to paint all sides.

A short while back in Georgia, we bought a bunch of Krylon spray paint when we couldn’t find what we were looking for from Rustoleum. I’d never given Krylon a second glance. I’ve always considered myself a Rustoleum man through-and-through. But we figured what the heck? Might as well give it a try. Besides, you get a full ounce more for a cheaper price.
Well, I have to say, I love this Krylon Matte Black! The coverage was fantastic! Based on this experience, I will be switching my spray paint buying from Home Depot to Lowe’s and trying out more of the Krylon line.
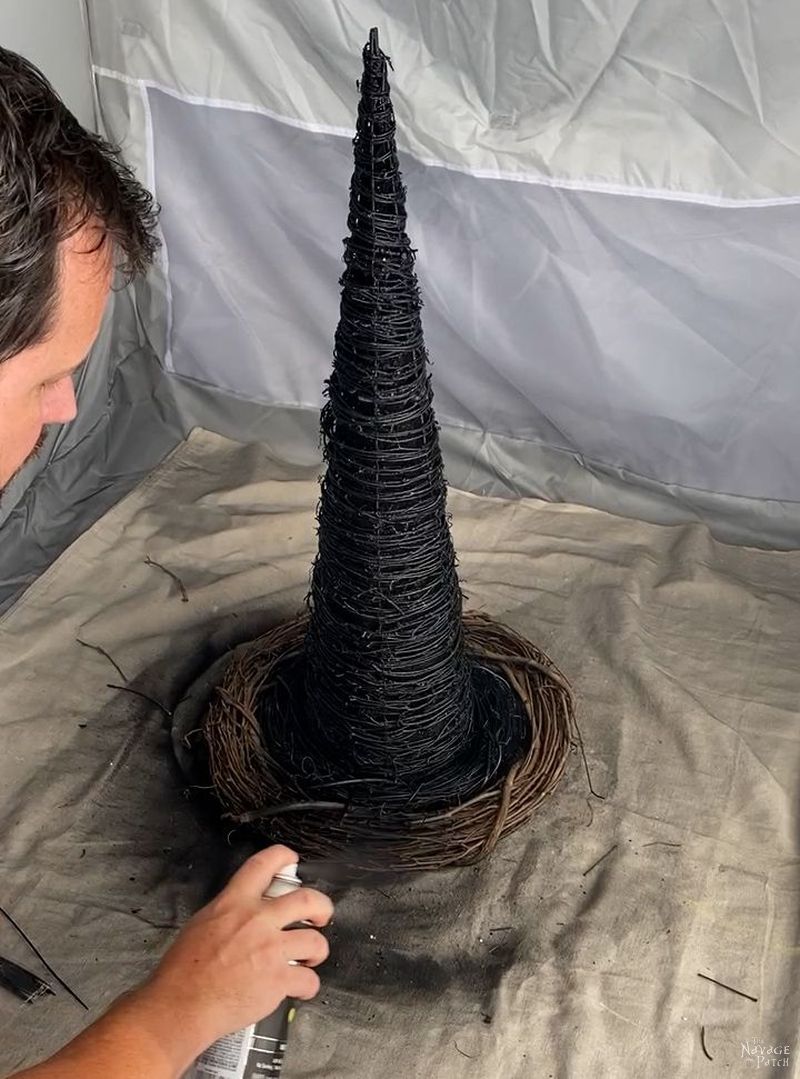
To get the deep black shown below, I gave the cone two coats of paint.

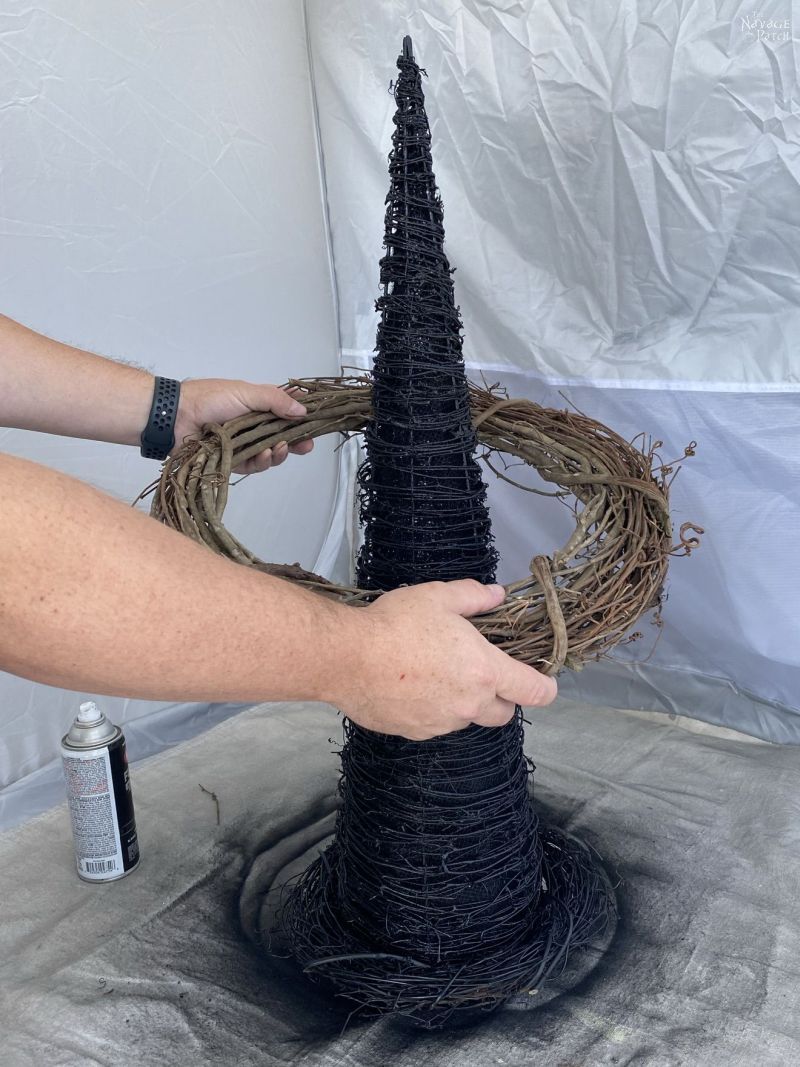
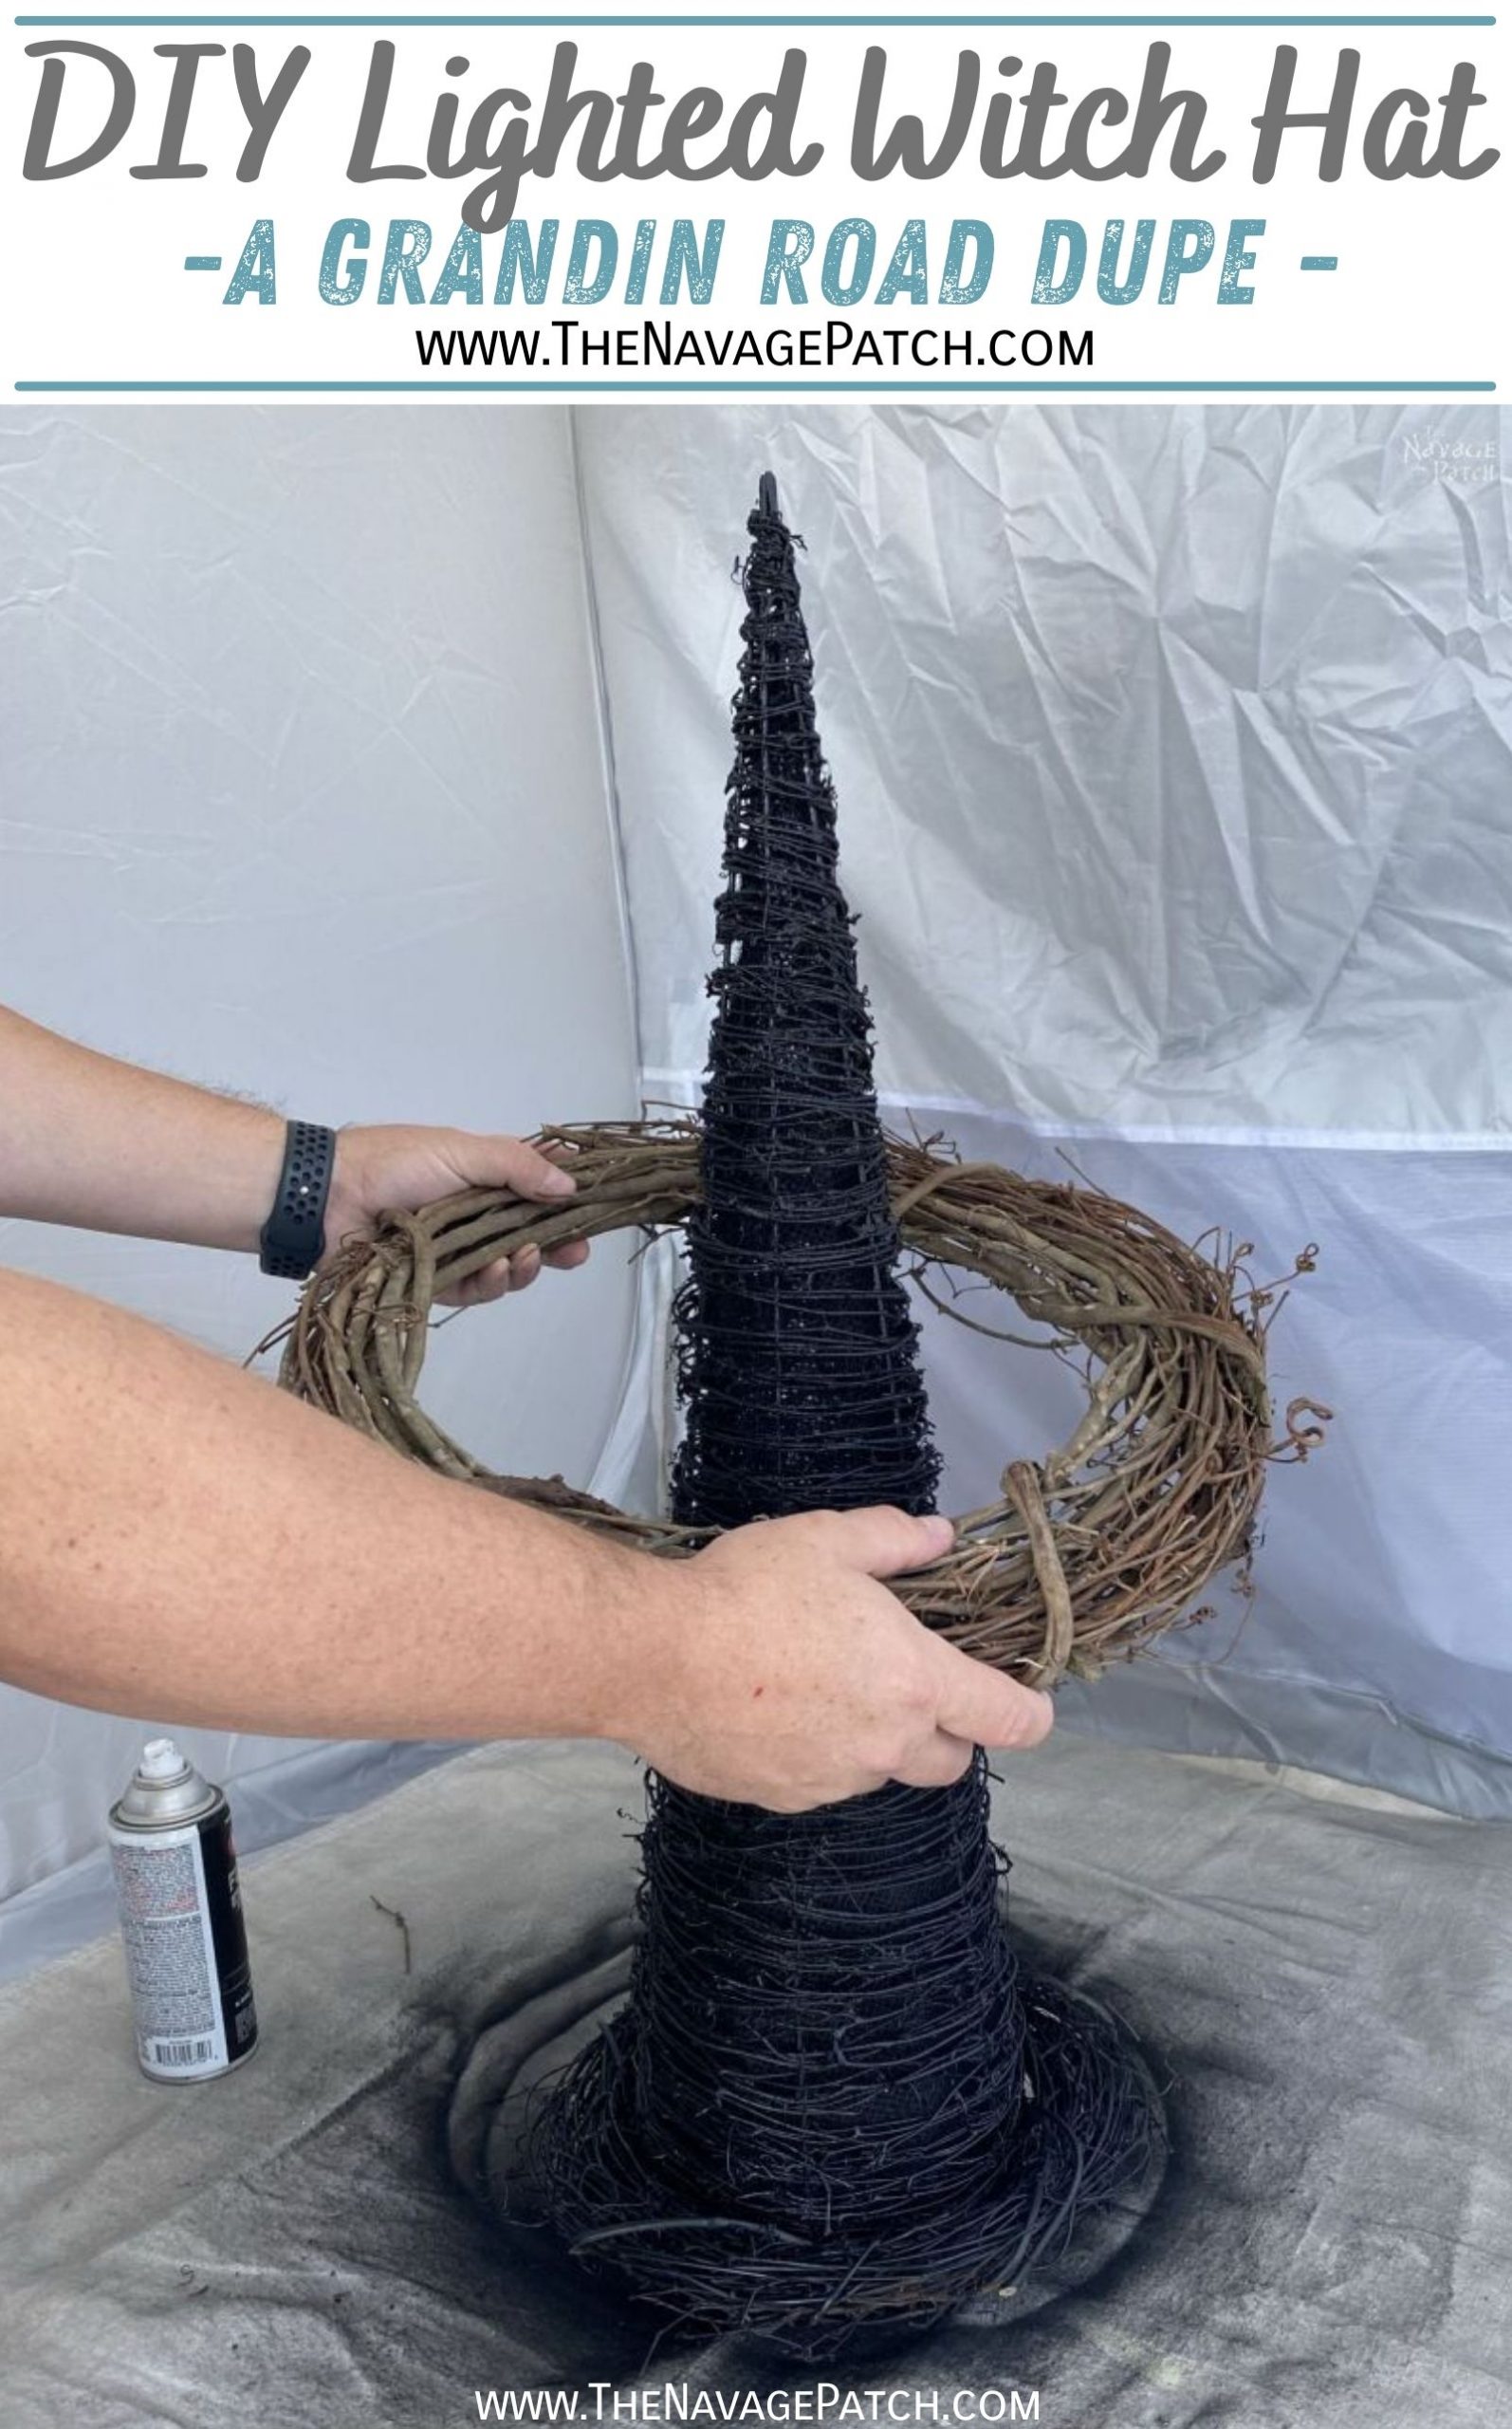
When the paint had dried, I placed the 12 inch grapevine wreath over the cone tree and nestled it in at the bottom.
It’s a very snug fit – there was no need for zip ties to hold these two together.
Next, I painted the 12 inch wreath. If you’re wondering why I didn’t build it first and paint later, you get better coverage with all those twisted twigs by building it piece-by-piece and painting as you go.
When the paint was dry, I placed the 18 inch wreath over and nestled it around the 12 inch. I could have also placed the cone and 12 inch wreath onto the 18 incher – two ways to accomplish the same goal.
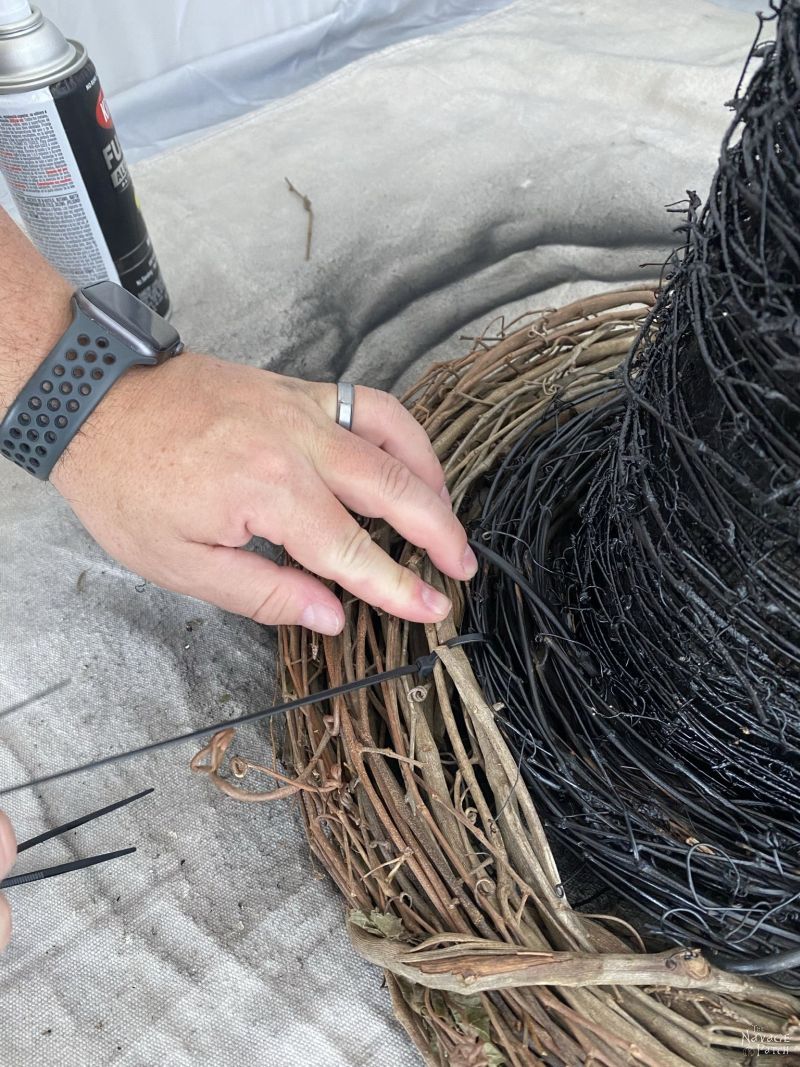
I then ran a zip tie through a group of twigs on each wreath.
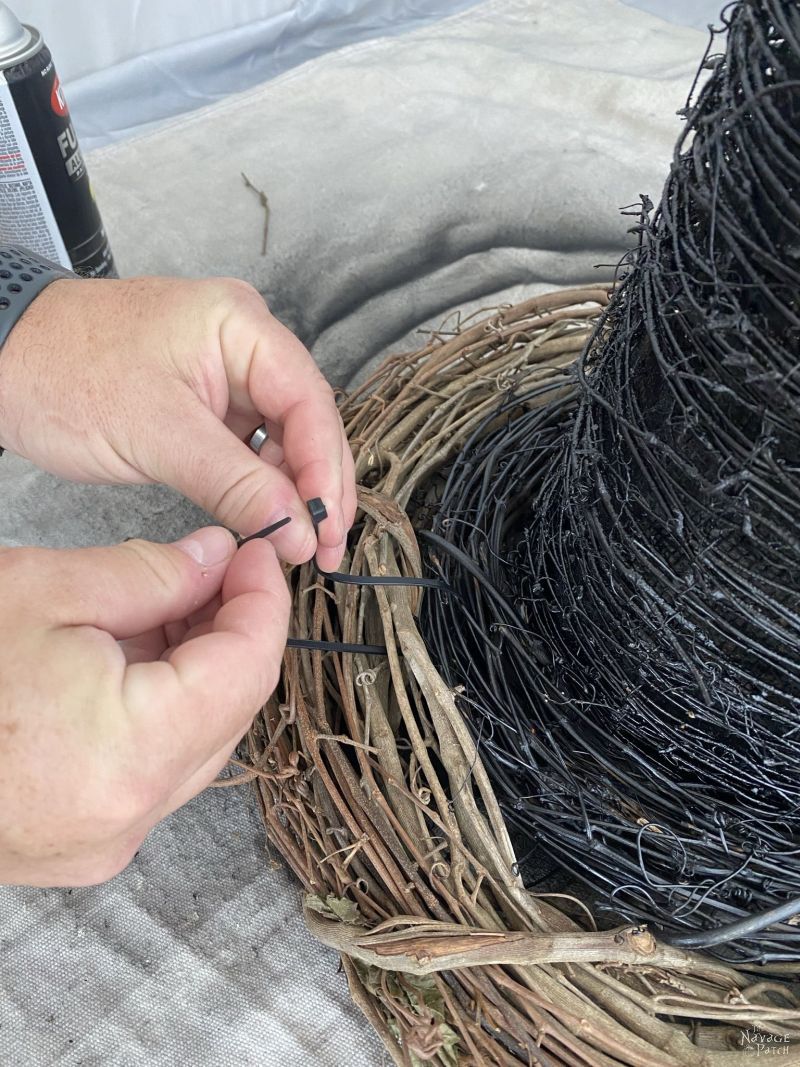
I pulled until it was snug but not tight. Pulling too tight will cause the wreaths to deform. I then trimmed off the excess and rotated the zip tie so that the protrusion was hidden. I repeated this two more times at even intervals around the hat.
As before, I spray painted the grapevine wreath.
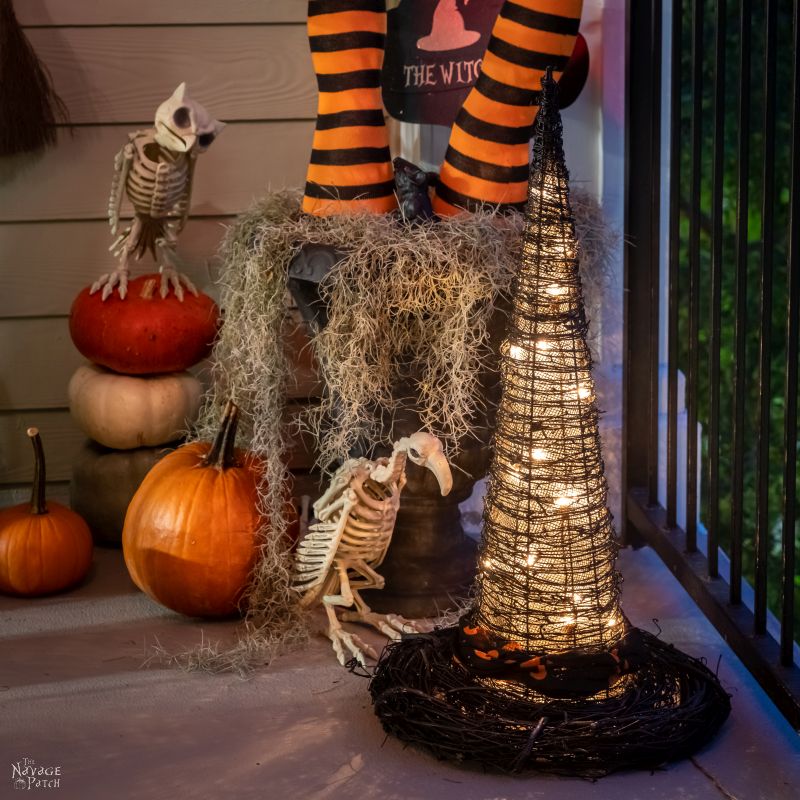
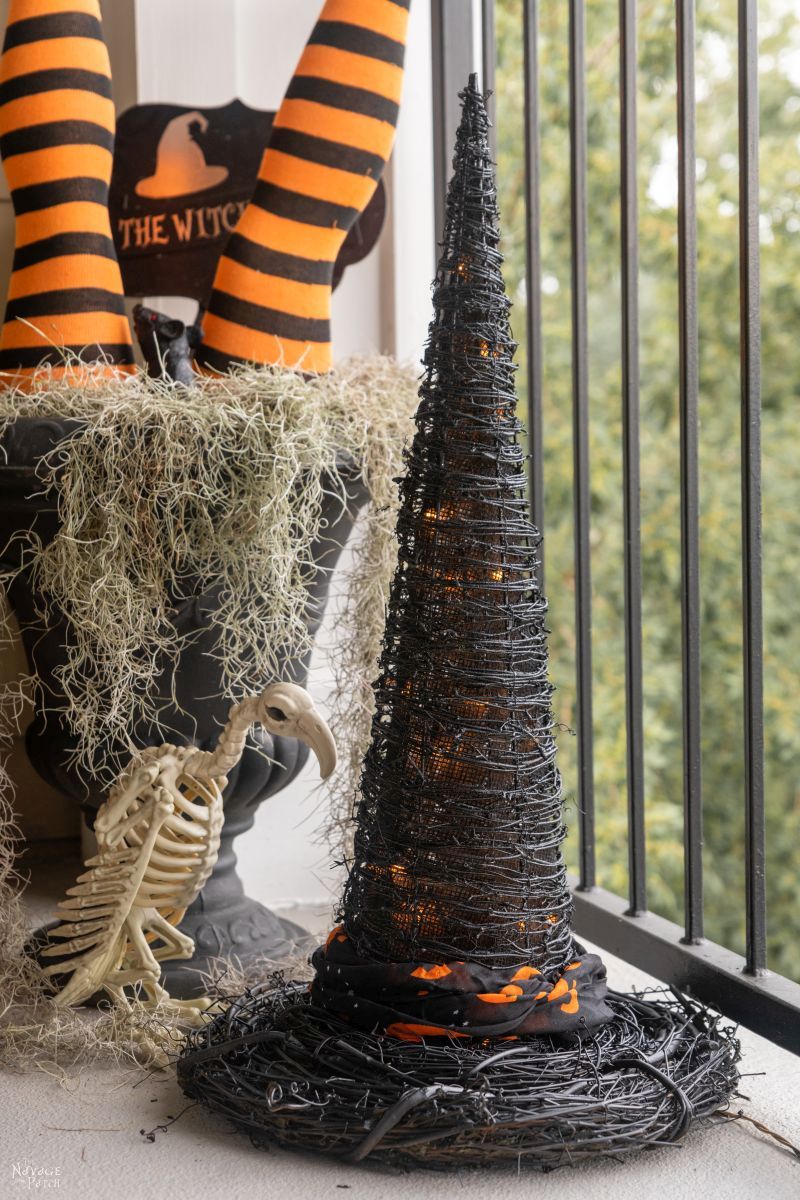
The lighted witch hat was finished and all it needed was something like the belt and buckle in the inspiration piece. Instead of copying the exact look, we chose a cheaper and easier solution: a Halloween scarf from Dollar Tree.
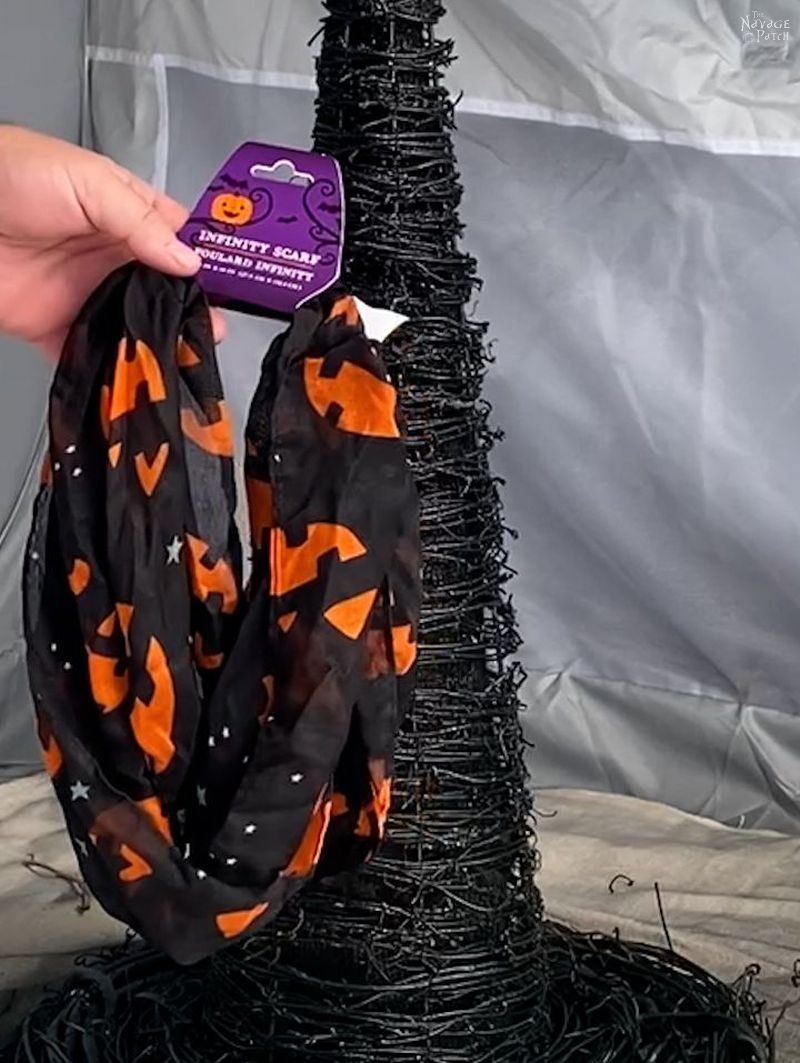
After cutting the infinity scarf, I wrapped it around the base of the cone and tucked the ends into the wrapping.
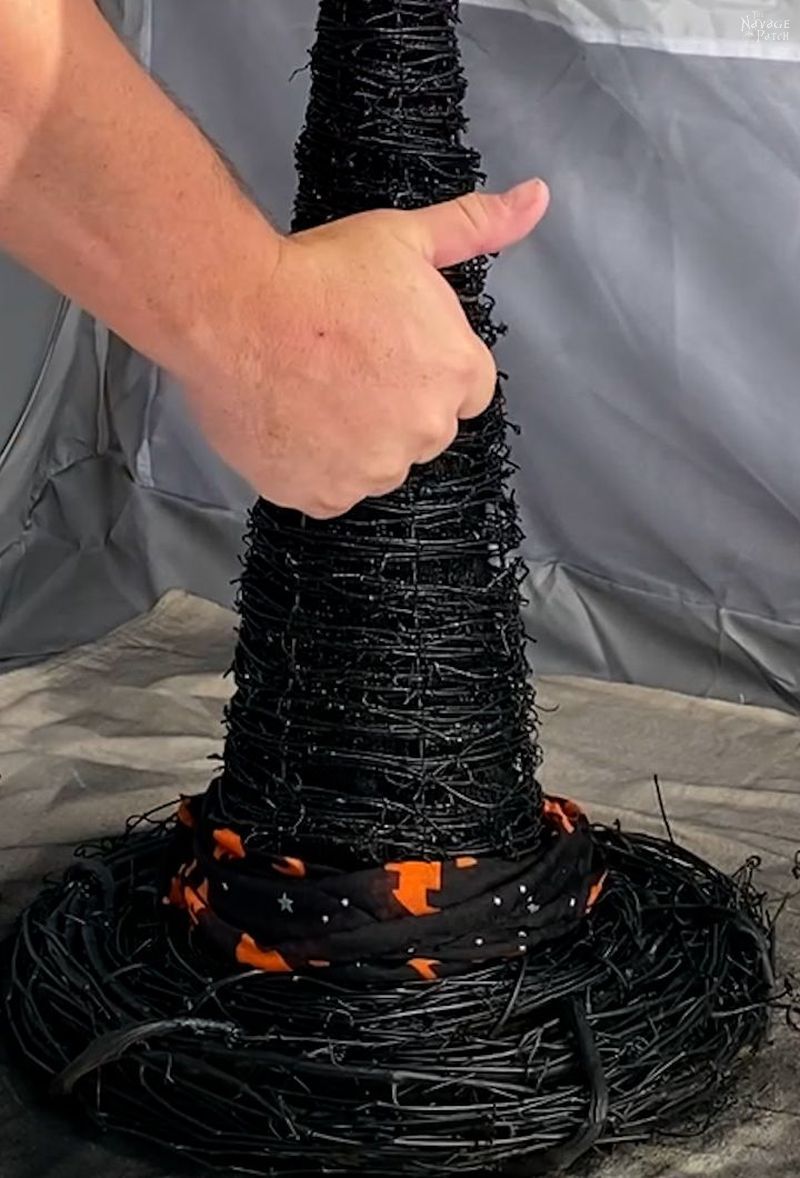
And that was it! This was a perfect upcycle for one of those cone trees and a couple of the spare grapevine wreaths we had. Now my babes just has to think of projects for the other two cone trees!
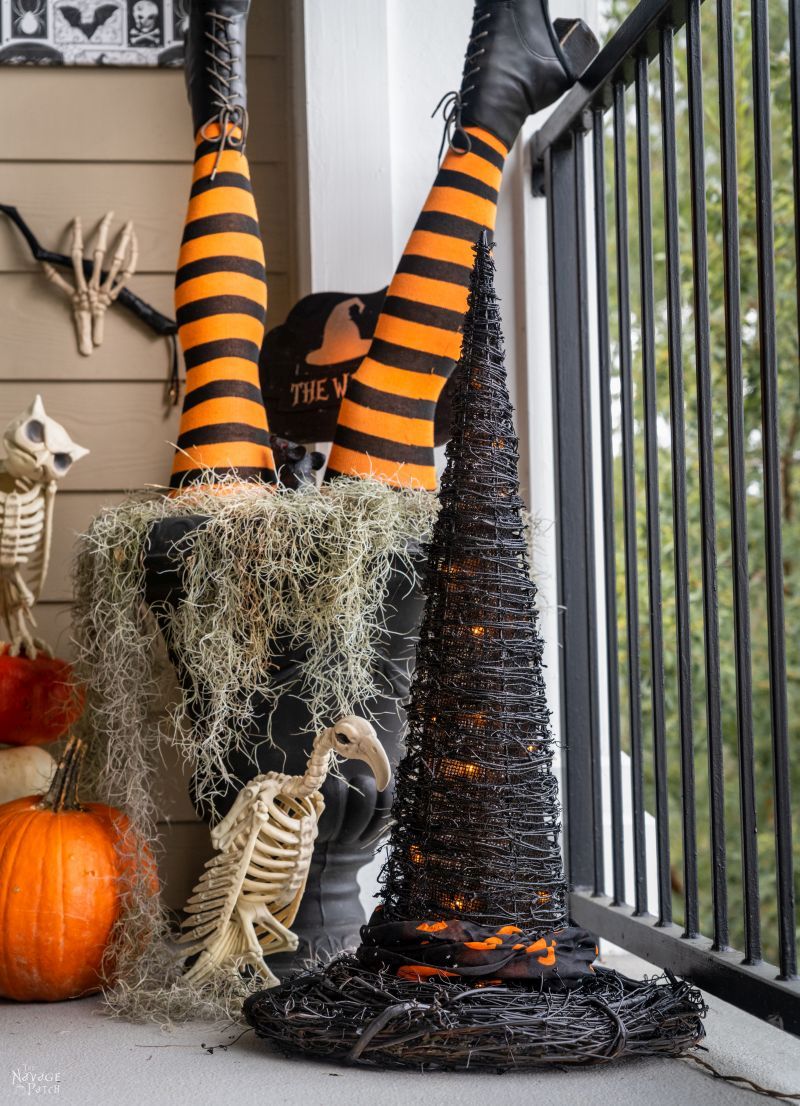
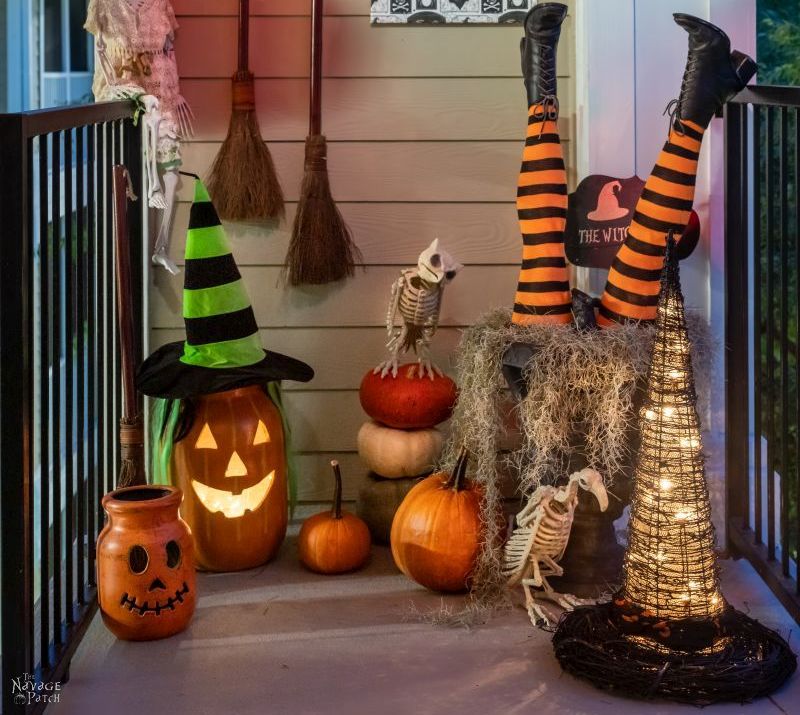
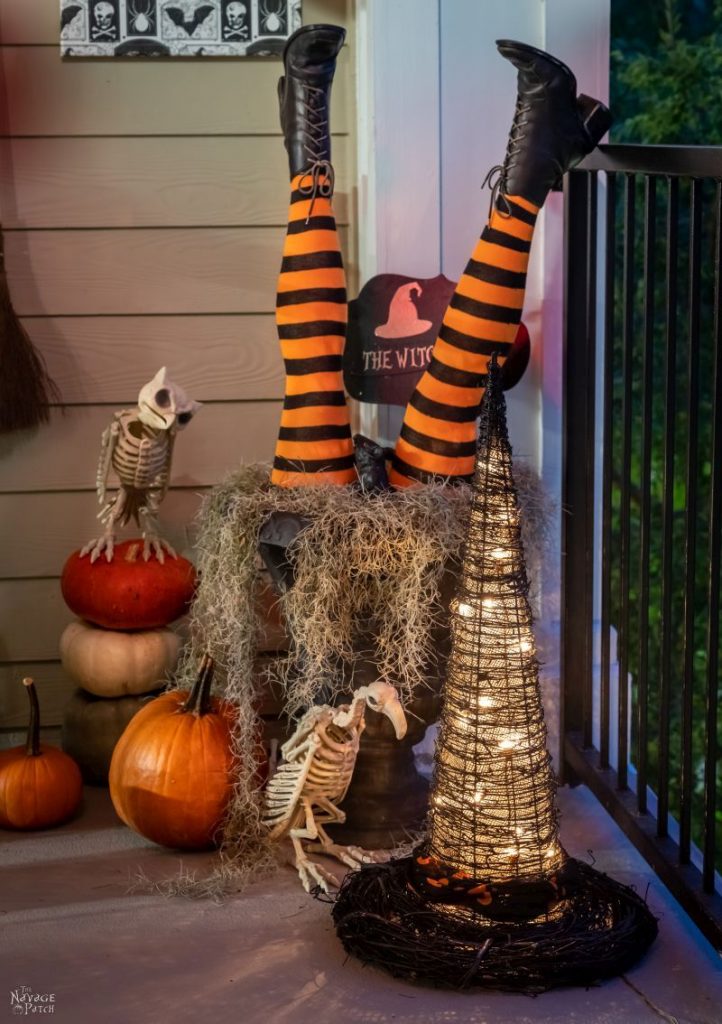
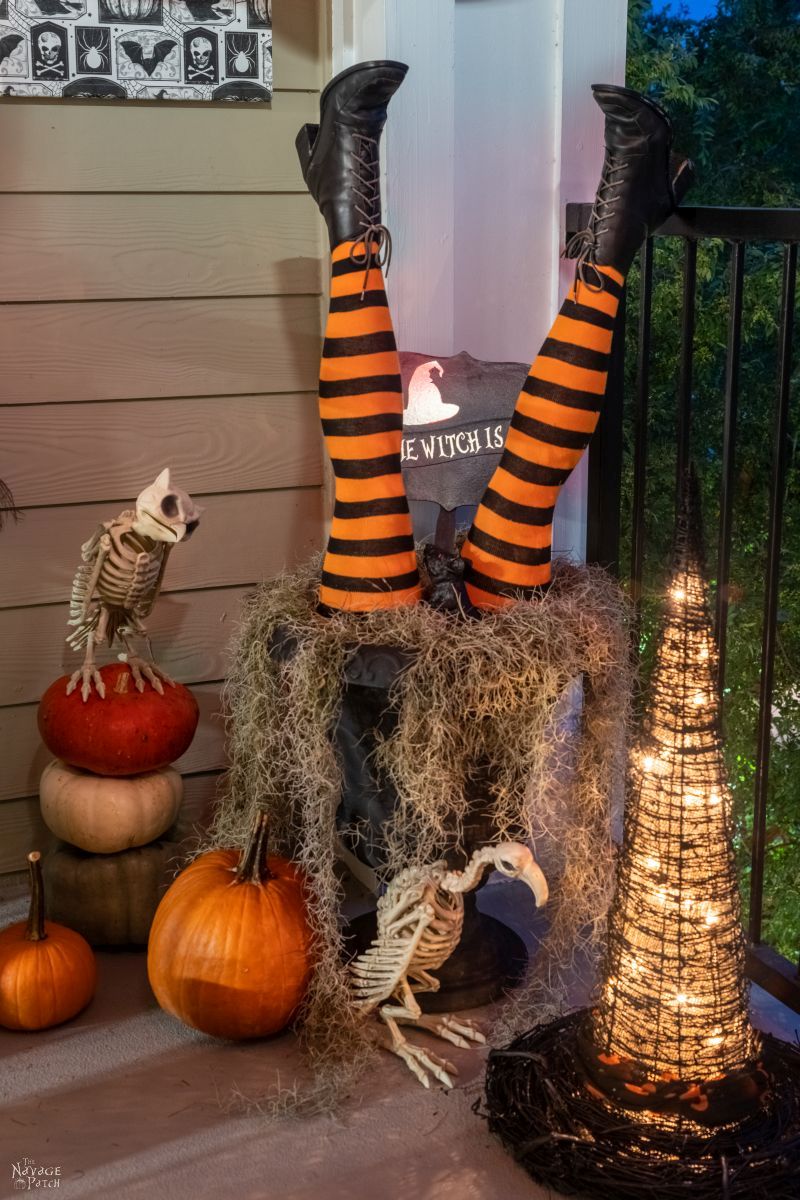
This DIY lighted witch hat is a great addition to our cozy little Halloween display outside our Jacksonville apartment.
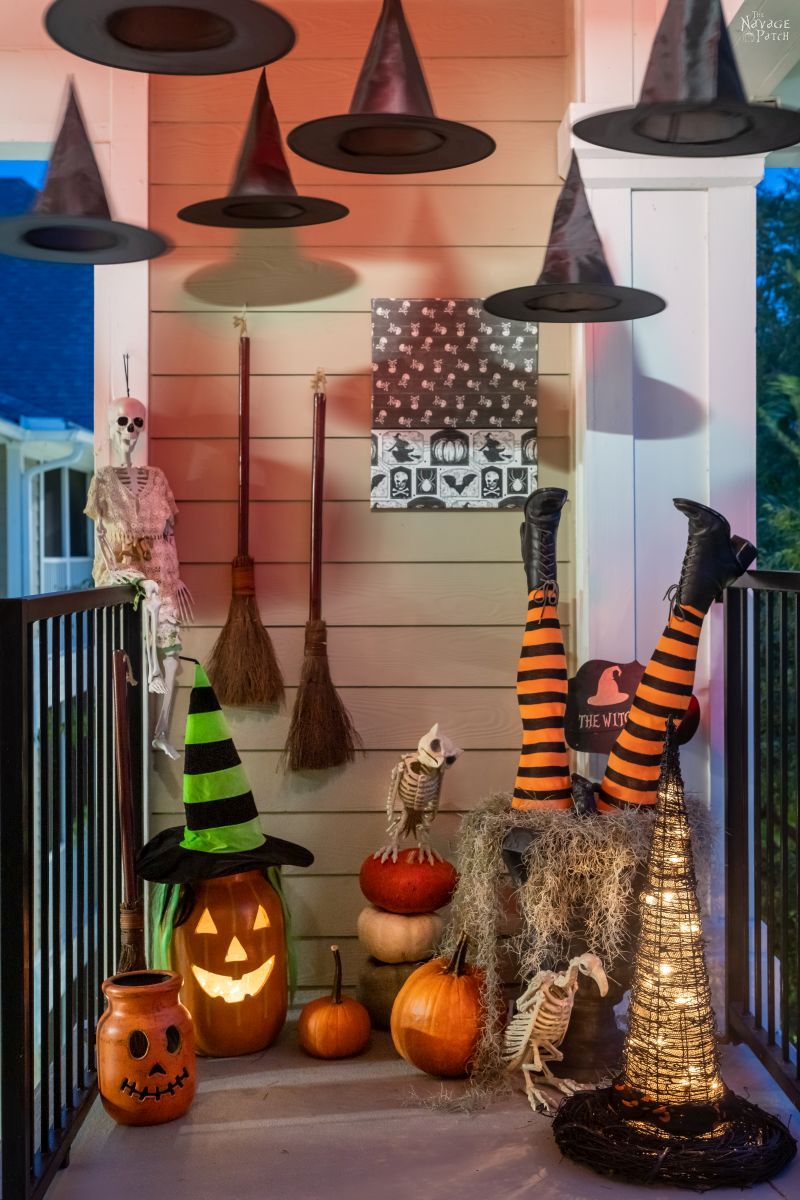
The neighbors probably think we’re nuts. There is nothing…and I mean nothing like this anywhere around here!
We love to see our DIY Halloween decor out in the wild! If you make this Halloween DIY decor for your home, take a picture or video and post it on Instagram, be sure to tag us – thenavagepatch

Let’s hope they get used to the loons up on the balcony, cuz they ain’t seen nothin’ yet!
Share it on Pinterest & Facebook!
Great dupe! Love it!!
Thank you so much, Shannon! 🙂
This is genius. I love it!
Thank you, Beverly! 🙂
This turned out super cute!! I love the hanging witch hats as well. The whole display looks awesome!!
I love making Grandin Road dupes!! I recreated a $268 wreath that I fell in love with. Mine wasn’t cheap, only because I added some real jewelry to it, but it was about a third of the cost.
Now to figure out how to dupe their pre-lit broomstick pathway markers for less
…🤔
Thanks, Mo! Yeah, that little display came together pretty nicely! Send me a pic of that wreath – we’d love to see it! As for the pathway markers, is that a wink wink hint hint? 😀
Maaaybeee…😄
LOL, Handan’s already working on that one!
Here’s Mo’s wreath!

Wow-that’s gorgeous!
Thank you 😊
Very nice! The balcony is looking great. The tutorial is easy-to-follow and the pictures are super helpful. Thanks. Don’t sweat the neighbors; they’re probably Snowbirds. Welcome to Florida!
Thank you, Melissa! We love it here! 🙂
Great upcycle! And I do think yours looks better than Grandin Road!
Thanks, Audra! 🙂
LOVE IT!!! I WISH, MY HUBS, would HELP ME, on DIY’S…I’m JEALOUS!!! LOL!!! KEEP UP the KOOL STUFF!!!
Vicki in NC
And…to MO…I’d LOVE to SEE YOUR WREATH DUP…PLEASE!!!😁
Thank you, Vicki! I posted a picture of Mo’s wreath in her comment thread.
Oooops, MO…I meant “DUPE”!!! DUH!!!🙄
Did you just spray the lights on the cone also? It looks better with the scarf than belt!!!
The lights are inside the cone, and the spray didn’t reach them through the mesh and glitter!
Just want to tell you Greg that your project turned out great! I very rarely read all the verbiage leading up to DIY instructions, mostly because they are just boring. But I always read yours. You are hilarious! I also enjoy the loving way you describe Babes. It’s very sweet that you consider all of her crazy ideas and agree to participate in them. My husband helps me with my projects but not always so willingly. From one JUNK lover to another, keep up the good work! PS. I’ll bet your neighbors appreciate the whimsy you bring to the apartment complex. Spread the joy for every season!
Thank you, Shelly, I’m flattered and so happy to learn that you read and enjoy my ramblings! Those intros are my favorite parts of the posts I write! 🙂
Love this. How did you stop the paint from covering up the lights inside?
I didn’t do a thing, Karen! There is a burlap-like fabric wrapped around the cone under the grapevine, and it was enough to block the spray from reaching the lights underneath.
Greg….you should really consider writing a book. Your bantering and funny quips keep me entertained and laughing. You and Handan are a great duo. Keep creating! Your neighbors might think you’re nuts, but who cares? And you might just inspire someone!
I’m pretty sure by now, everyone thinks I’m nuts! But that’s okay by me! 😀
I don’t believe how many of your Halloween posts I have missed (or forgotten!!). Love this one, too. I make my own grapevine wreathes from wild grapevines that insist on growing where I don’t want them (Like onto my rose bush!). Now to thrift a tree!!!
Lol, grapevines are a pain in the ass! They grow where you don’t want them, but then when you try to cultivate them, they get black rot and you lose all the fruit. Experienced that for 4 years in CT before ripping them out and re-planting grass! 😂