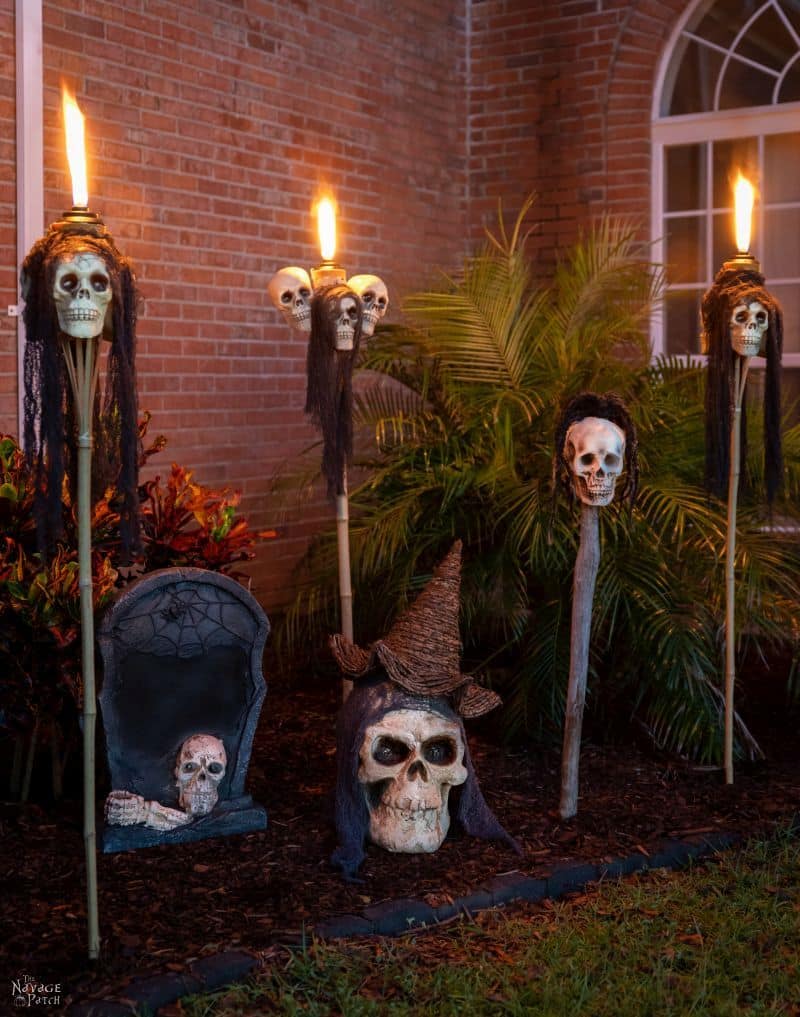
DIY Skull Tiki Torches
These skull tiki torches will add some creepy fun to your yard this Halloween while lighting the way for all the little ghosts & goblins.
Yes, we’ve reached that point.
We’ve become those people.
While most sane individuals on this watery rock can content themselves with one, maybe two skulls each Halloween season, we’ve reached the point where we’re buying them in bulk.
That’s right, folks. While the rest of America receives boxes full of underwear, toasters, Keurig coffee pods and this thing on their doorsteps, we’re getting skulls by the caseload.
We just can’t get enough bony brain boxes around here because they’re so damn useful for Halloween props and decorations! We’ve got some great skull crafts brewing, and these skull tiki torches are just the first of many this year.
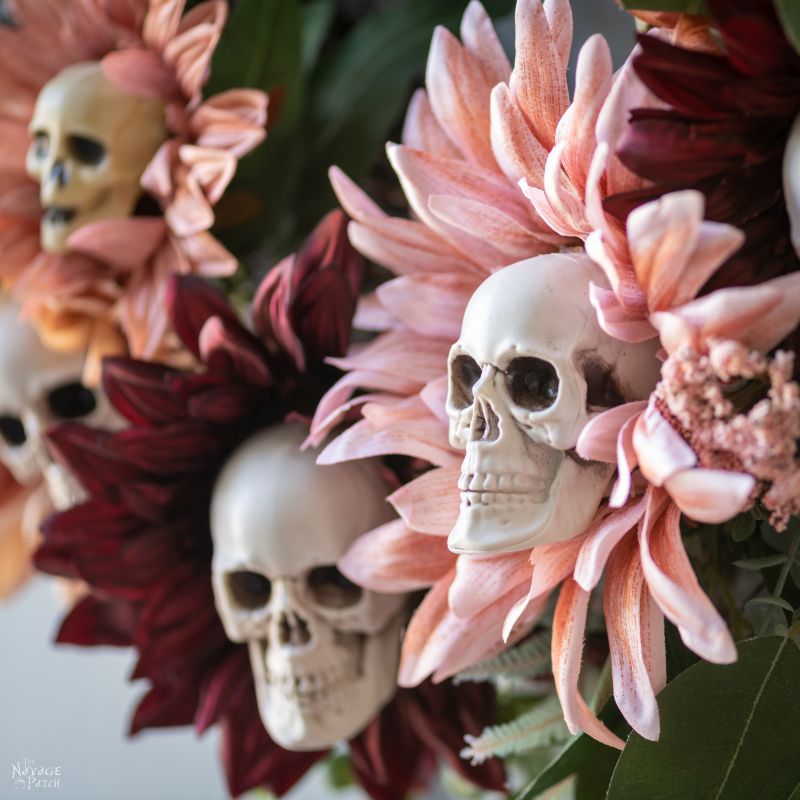
Don’t Miss: DIY Skull Sunflower Wreath
This skull sunflower wreath is one of the easiest Halloween wreaths ever, and it can be made with a store-bought wreath or one you made yourself. Click here to read more.
The beauty of these cranial masterpieces is that they can be made with Dollar Tree materials for very little money. But if you want to up the realism and don’t mind spending a few more clams, you can make this and all of our other skulltacular sensations with any hardtops you like!
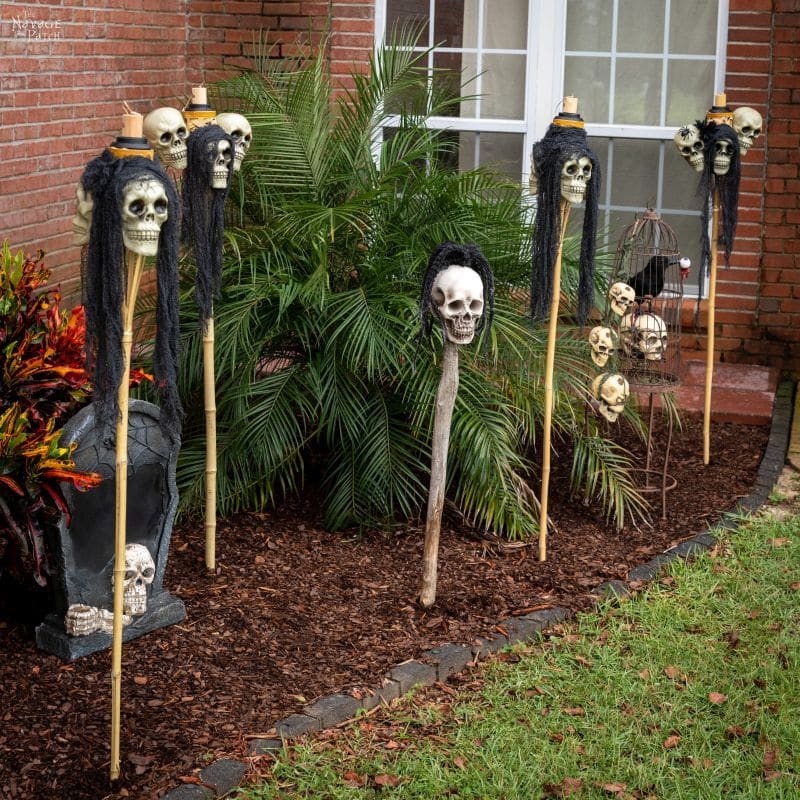
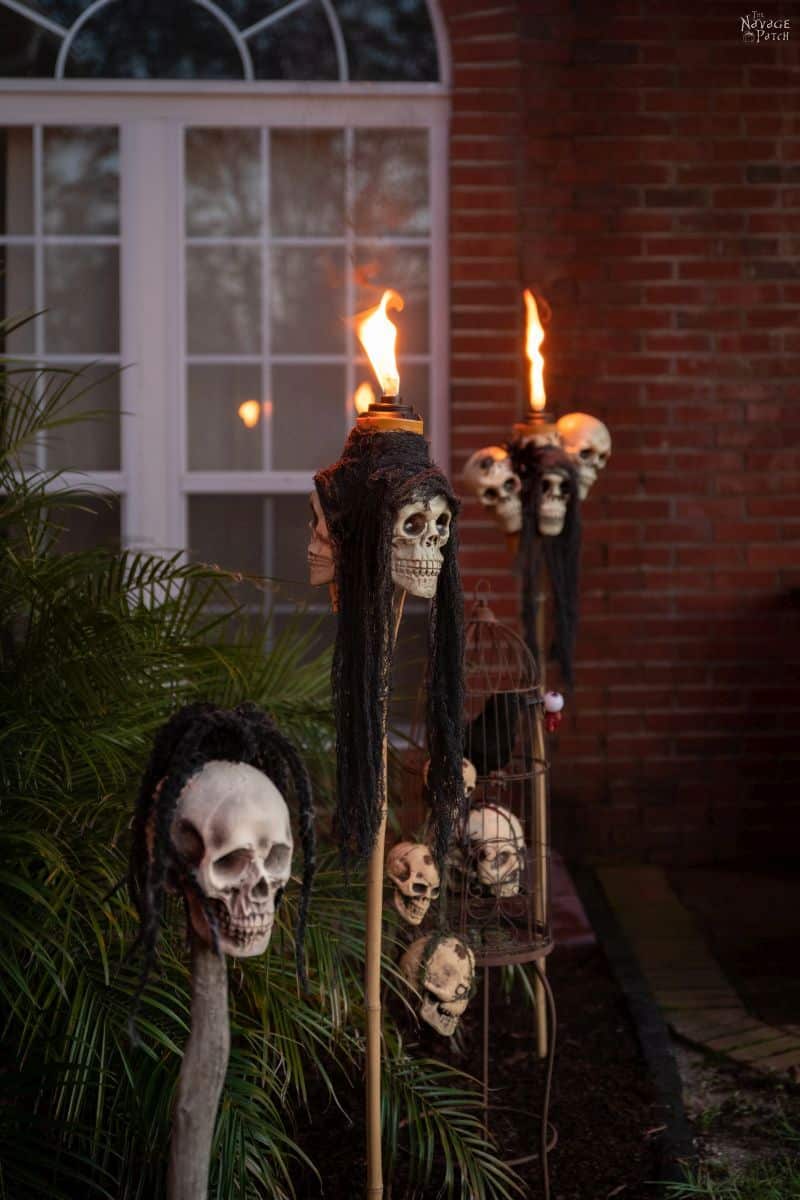
I’ll be showing you two ways to make these skull tiki torches. I made two of each, and they look amazing in our front landscape bed near the pygmy date palm we recently planted.
We’re a fire-loving family, but if you have safety concerns about combining open flames with Halloween, these skull torches can also be made with solar tiki torches.

Skull Tiki Torches SUPPLIES LIST
Affiliate links are provided below. Full disclosure here.
- Tiki torches or solar tiki torches (some Dollar Trees carry tiki torches)
- Plastic skulls (can order as few as 4 from Dollar Tree)
- X-Acto knife
- Scissors
- Hot glue gun
- Black creepy cloth (can also find at Dollar Tree)
- Embellishments (optional)


More Easy DIY Halloween Decor Ideas
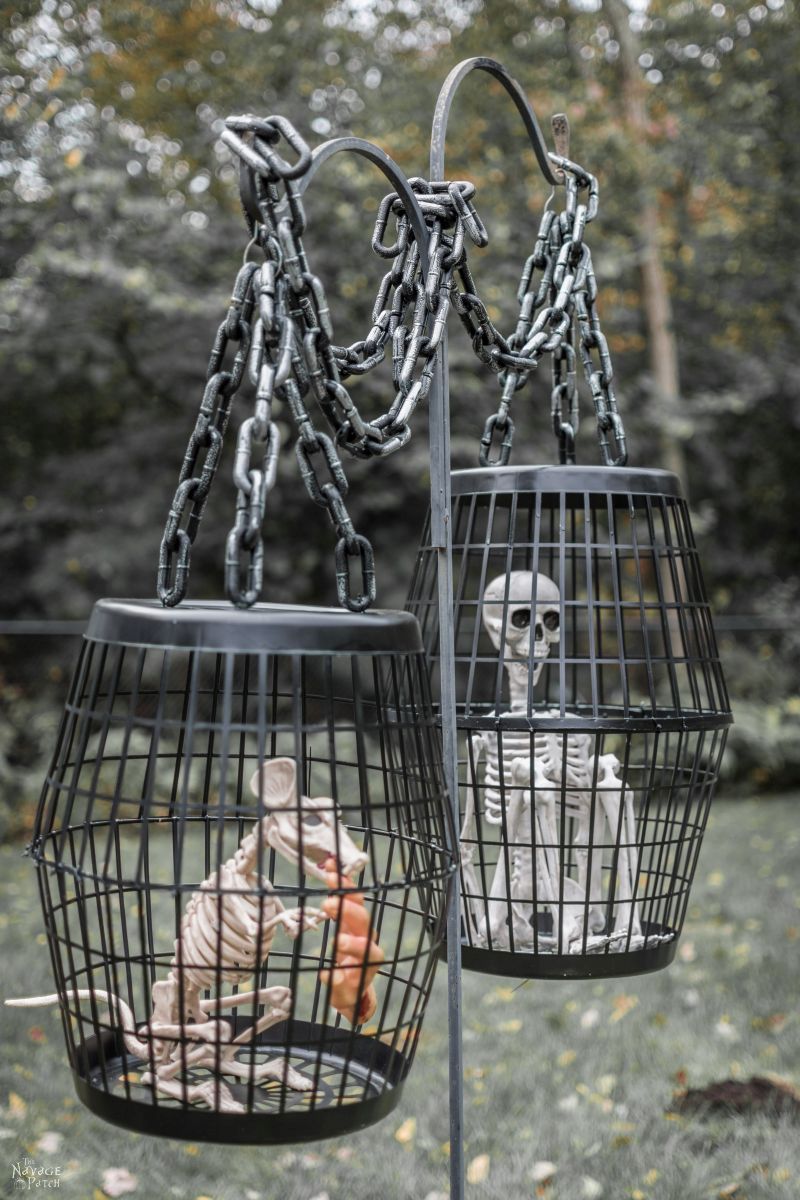
- Hanging Cage Halloween Prop
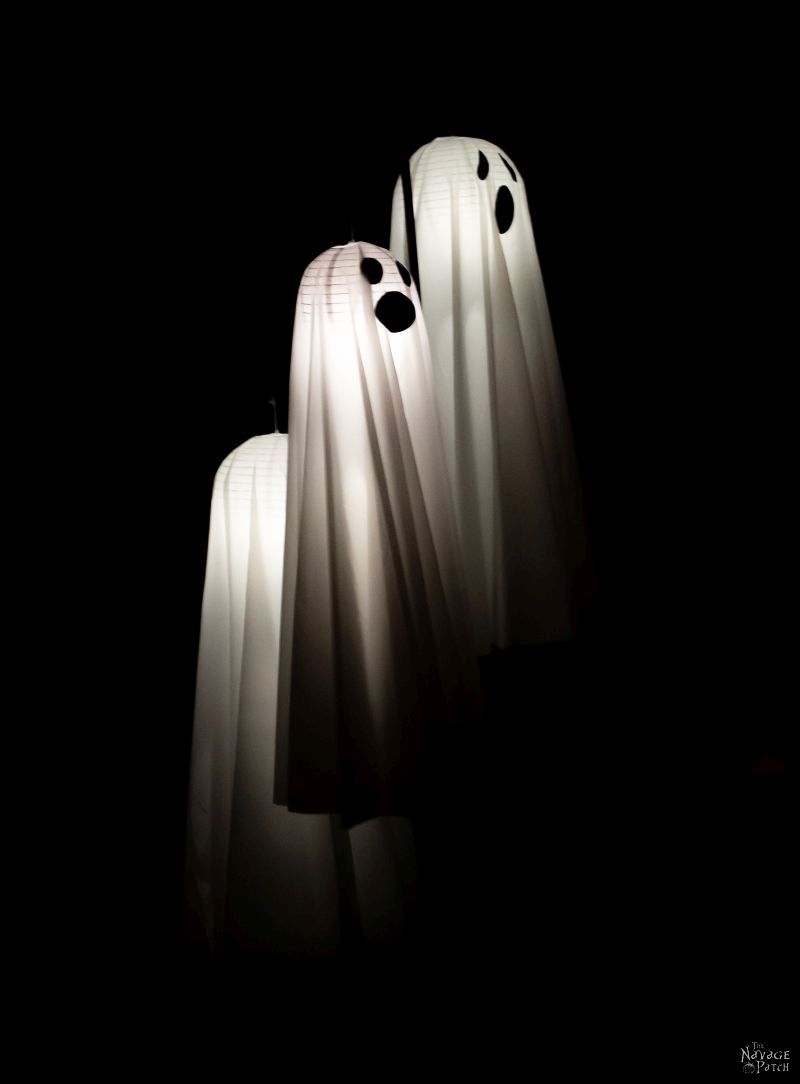
- Easy Lighted Hanging Ghosts (A Dollar Store DIY)
- Free Vintage Movie Monster Printables
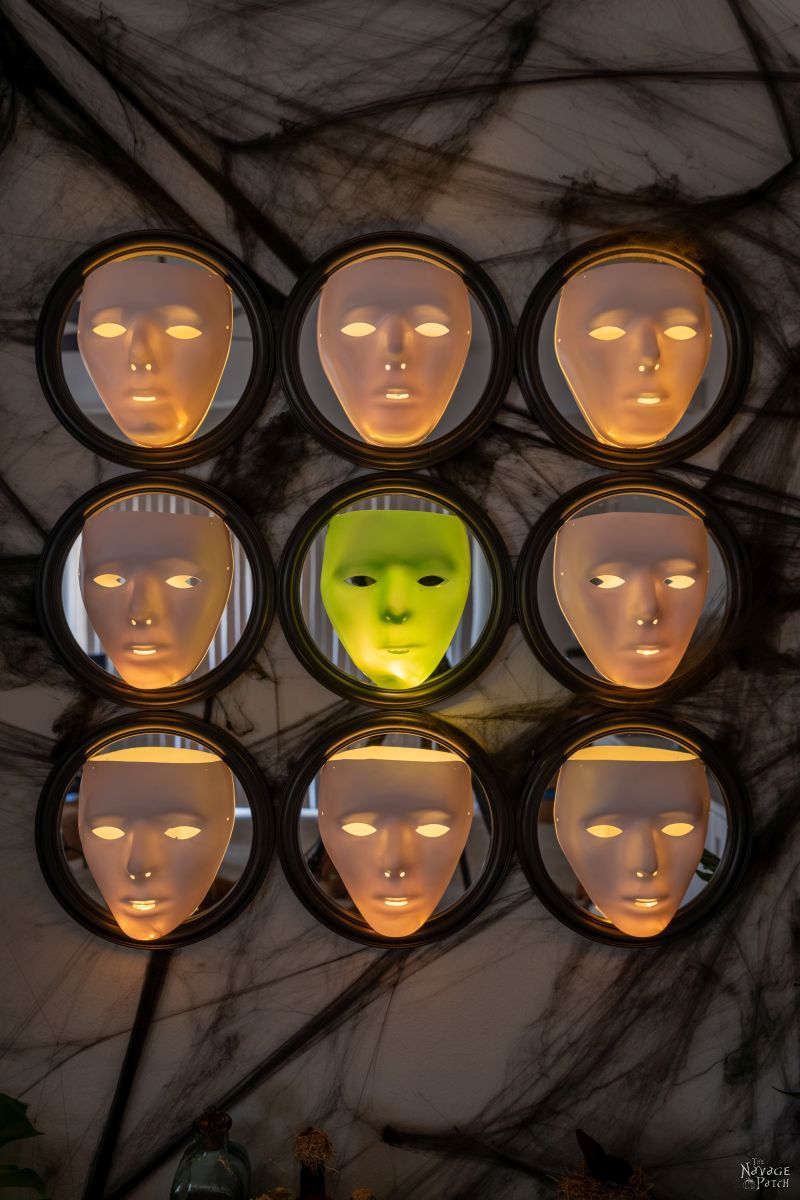
- Gallery Of The Faceless – Easy Halloween Wall Decor
- DIY Cousin Itt Pathway Light
- DIY Skull Sunflower Halloween Wreath
- DIY Lighted Witch Hat (Grandin Road Inspired)
- Apothecary Jars And Free Printable Labels
- Floating Potion Bottle
- DIY Witch Legs (Grandin Road Inspired)
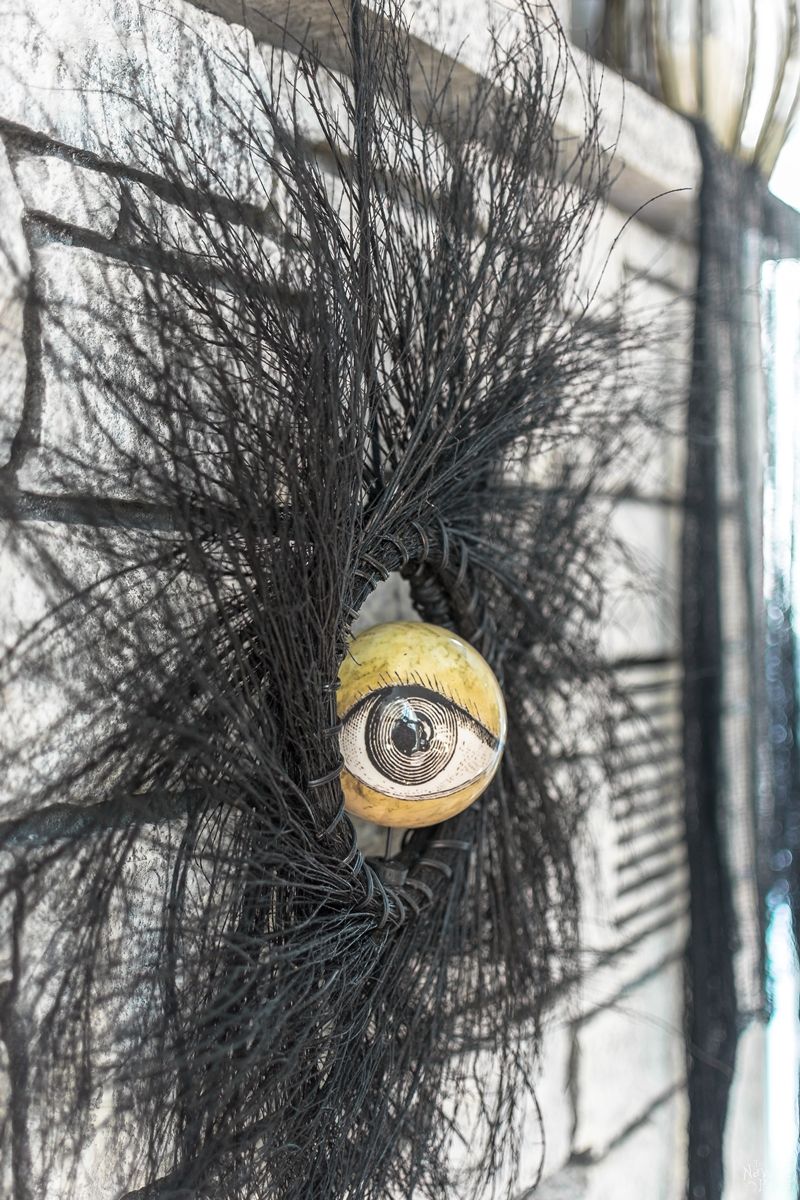
- Eyeball Orb Halloween Wreath
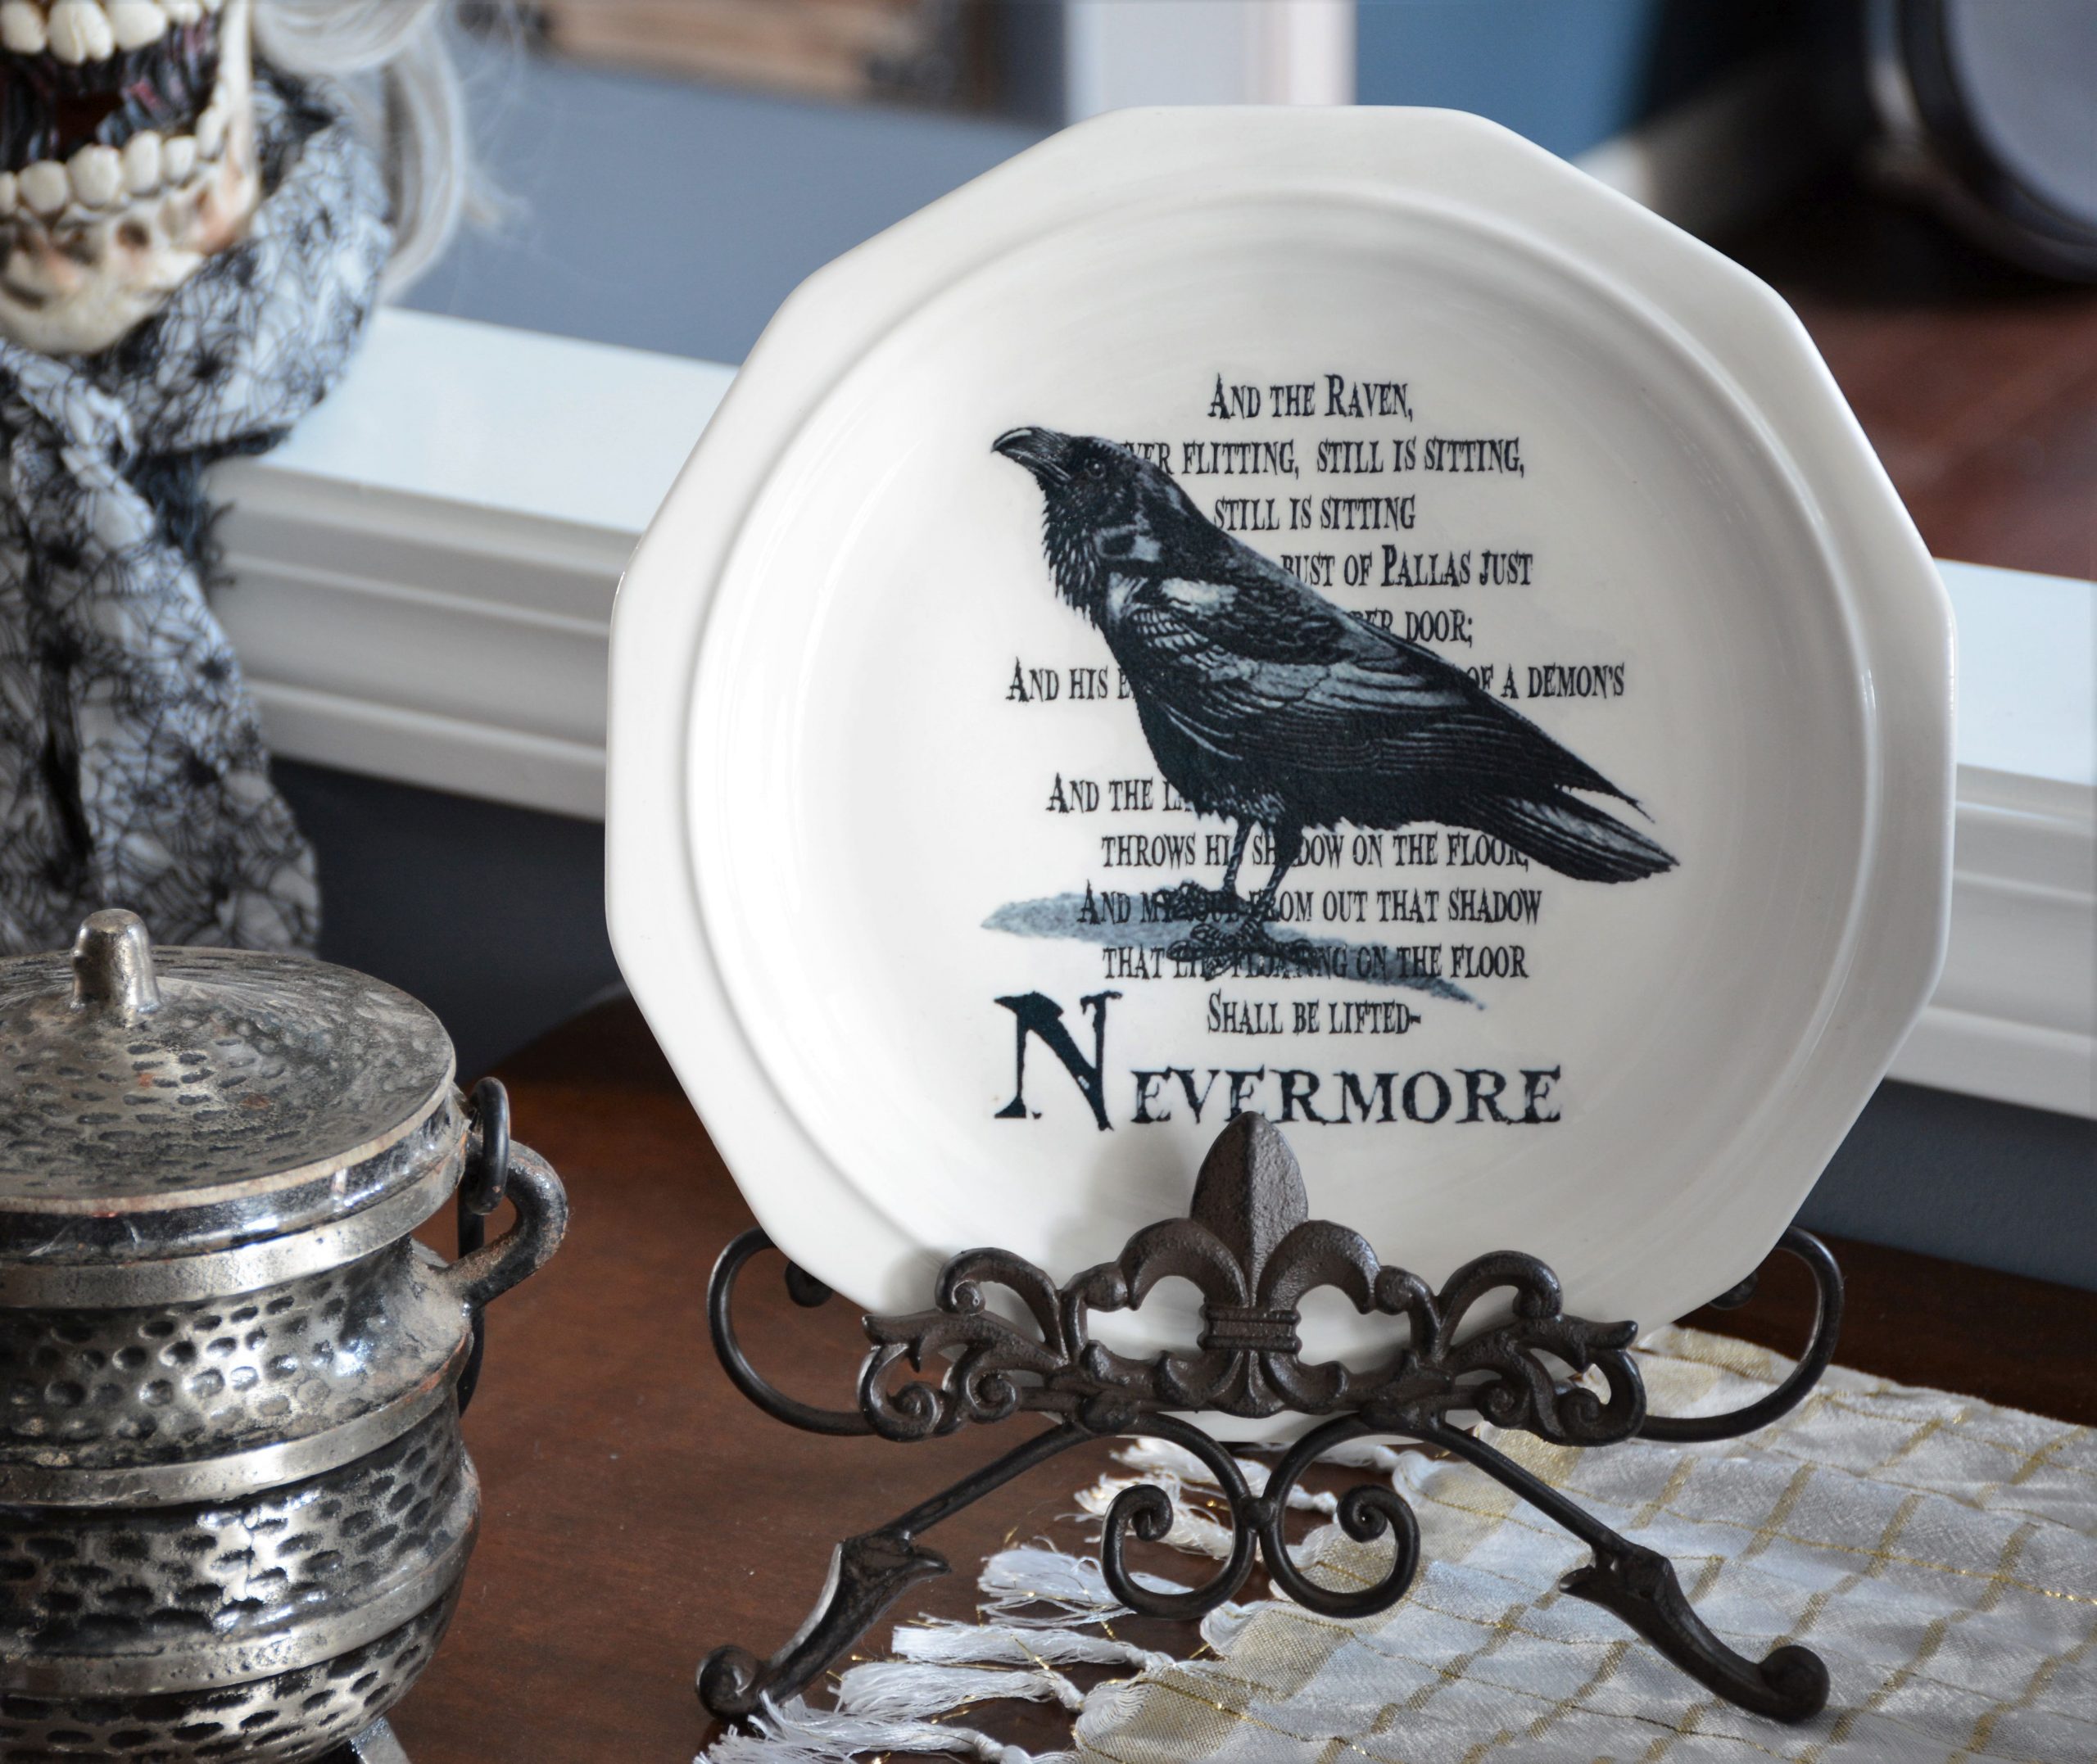
- Dishes Of Darkness: Pottery Barn Inspired Halloween Plates
DIY SKULL TIKI TORCHES VIDEO Tutorial
You may want to watch our short video below for an overview of our DIY skull tiki torches before you read the detailed step-by-step tutorial.
We love to see our DIY Halloween decor out in the wild! If you make this Halloween DIY decor for your home, take a picture or video and post it on Instagram, be sure to tag us – thenavagepatch
How to Make Skull Tiki torches – Method 1

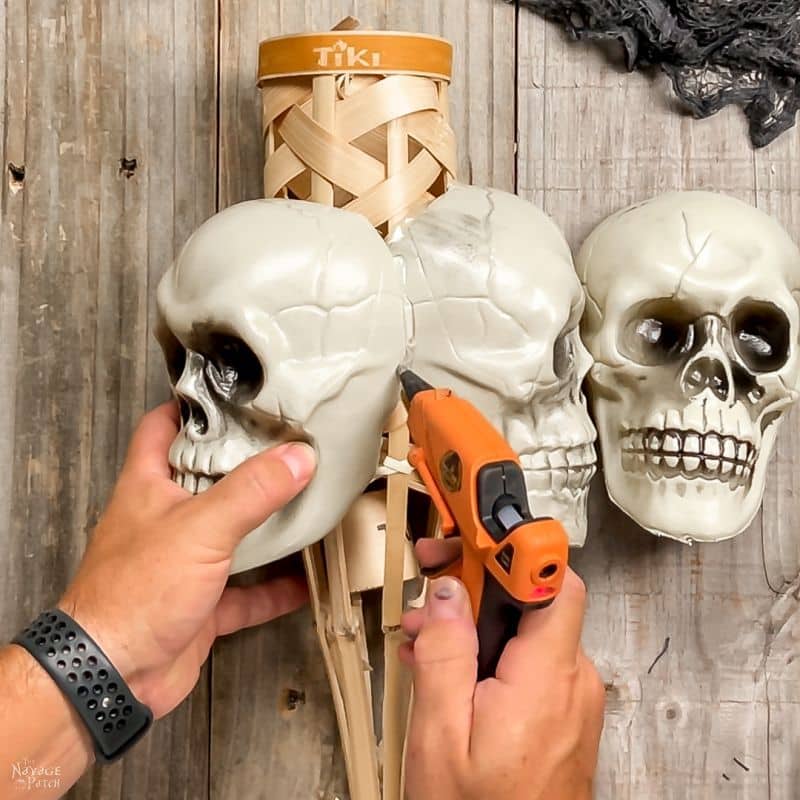
We played around with different configurations for these skull torches – everything from one to three – and decided we liked three skulls per torch best, but if you want to save a few bucks or even a little time, you can make them with just one.
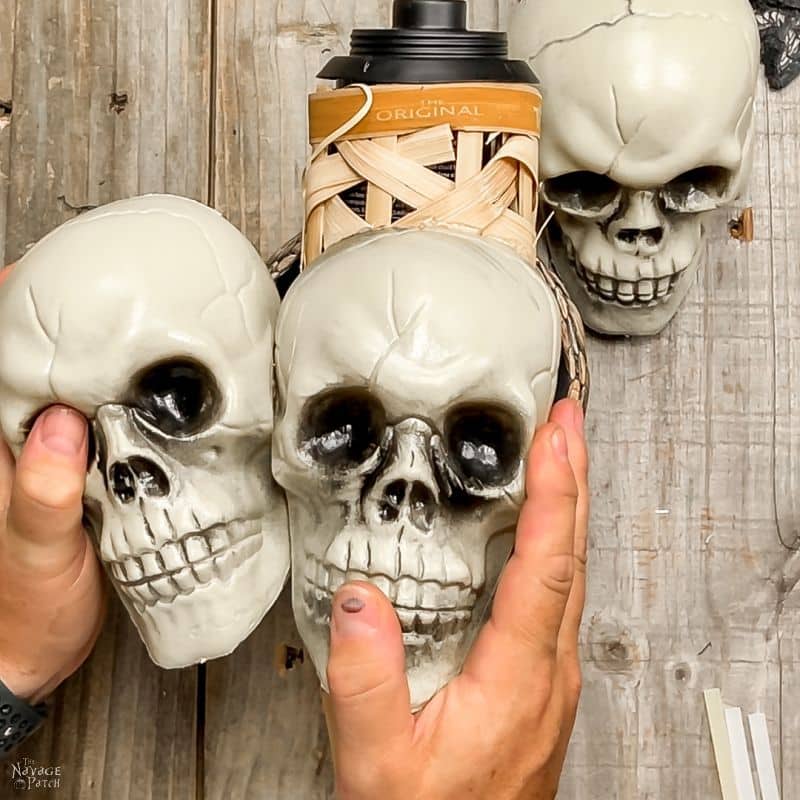
Step 1 – Cut the skulls
When fitting the skulls to the torch, I cut one skull to fit as snugly as possible around the wicker cylinder, and then I cut the other two a bit smaller. I cut the first one as shown below. I imagined a cylinder thrust up through the skull, then drew a line with a pencil and then cut it out with an X-Acto knife and scissors.
In the picture below, you can see the curved pencil line. I made this first straight cut with an X-Acto to make it easier to cut the curves with scissors.


Then I went in with the scissors and cut out the section of skull I had marked with pencil.

One half done…

All cut. These next few photos will give you a better idea of the shape you want to cut out.


For the other two skulls, I started with the same basic shape, but then I trimmed the sides a little more.

Here’s a comparison of the two different cuts.

Step 2 – Glue the first skull to the torch
Before starting to glue the skulls, I removed the fuel canister from the torch and set it aside.

I applied hot glue all around the exposed edge of the skull.

Then I placed the skull as shown below with the jawline at the bottom of the torch.

I held the skull against the torch until the hot glue set.

Then I ran hot glue around the the edges to set the skull firmly in place.


Step 3 – Glue the remaining skulls to the tiki torch
After letting the glue on the first skull cool and harden, I placed the second skull 1/3 of the way around the torch from the first…

…and then I ran hot glue along the seam with the first skull and where it met the torch.


Note: You may find you have to trim a little more off certain areas of skulls 2 or 3 to make them fit snugly against the other skulls and the torch. This is normal since we’re just eyeballing our cuts. Trust me, all will be hidden, and your skull tiki torches will look fantastic!
When skull two’s glue had hardened, I placed number three between one and two and glued the edges.


Here are the three skulls glued to the torch.

Now let’s make it look creepy cool!
A note about plastic skulls: There are some out there who take great pains to make plastic skulls “look more realistic” by first painting them white and then smudging them up with black or brown paint. While you’re free to do this, we find it to be a waste of time, especially with the number of skulls we’ll be working with this year. We think these skull tiki torches look amazing with untouched skulls during daylight hours. At night, no one will notice all the work you put in to paint them white and then dirty them again. So paint them if it makes you happy, but don’t sweat it if you’re pressed for time!
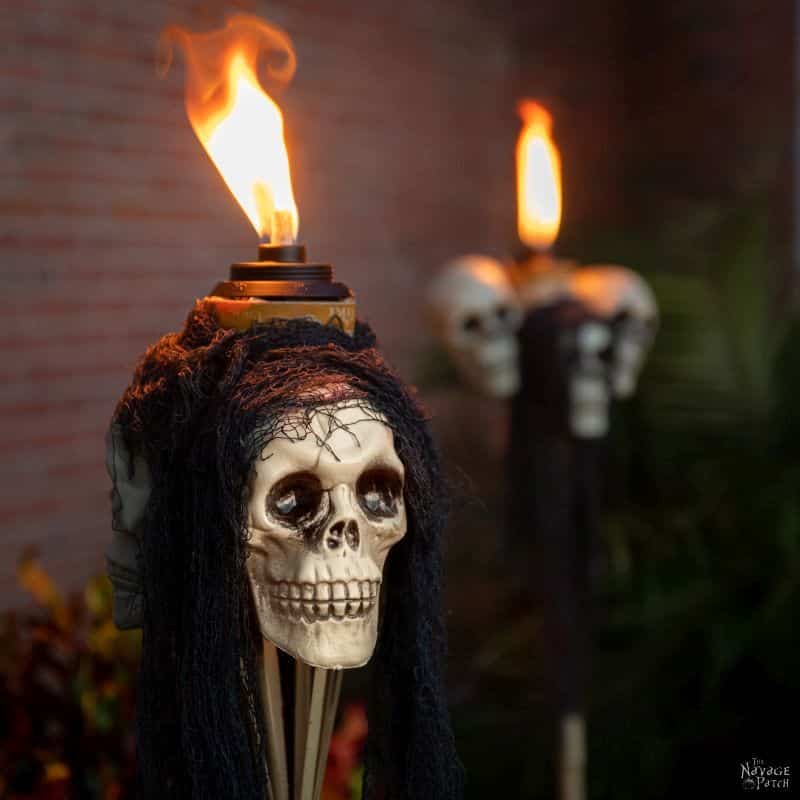
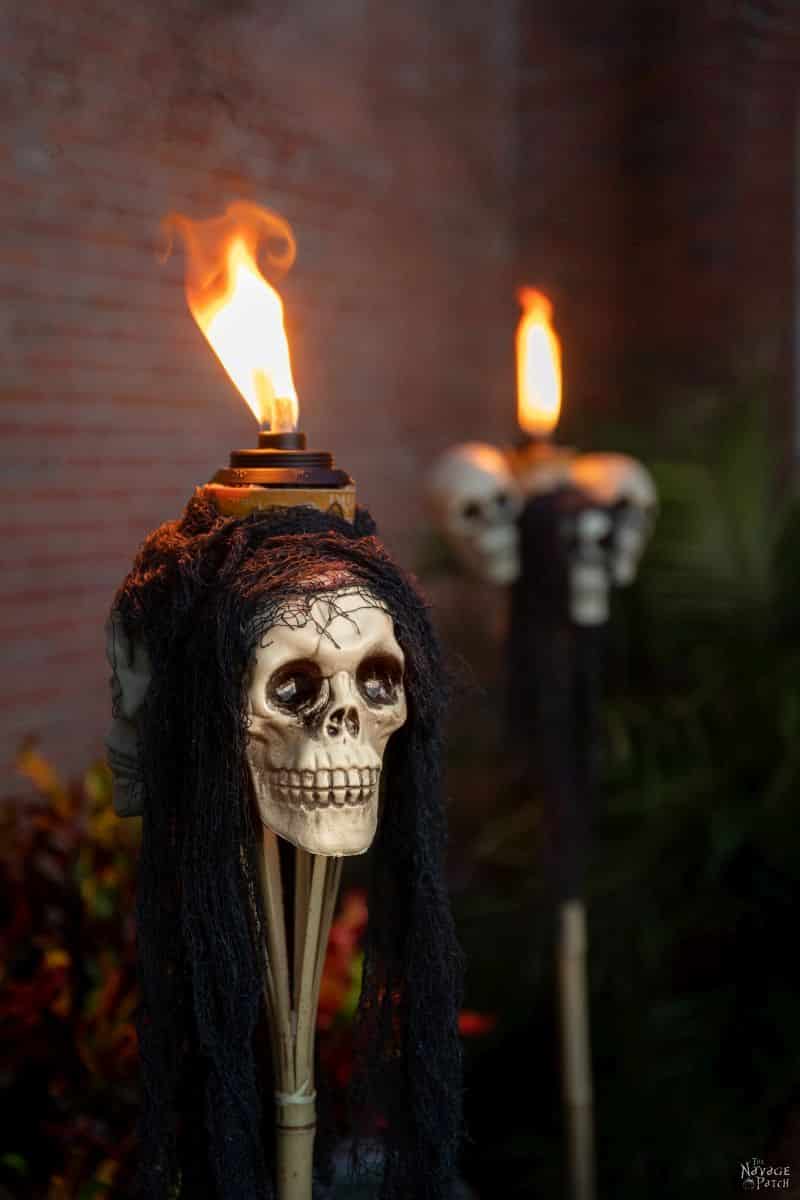
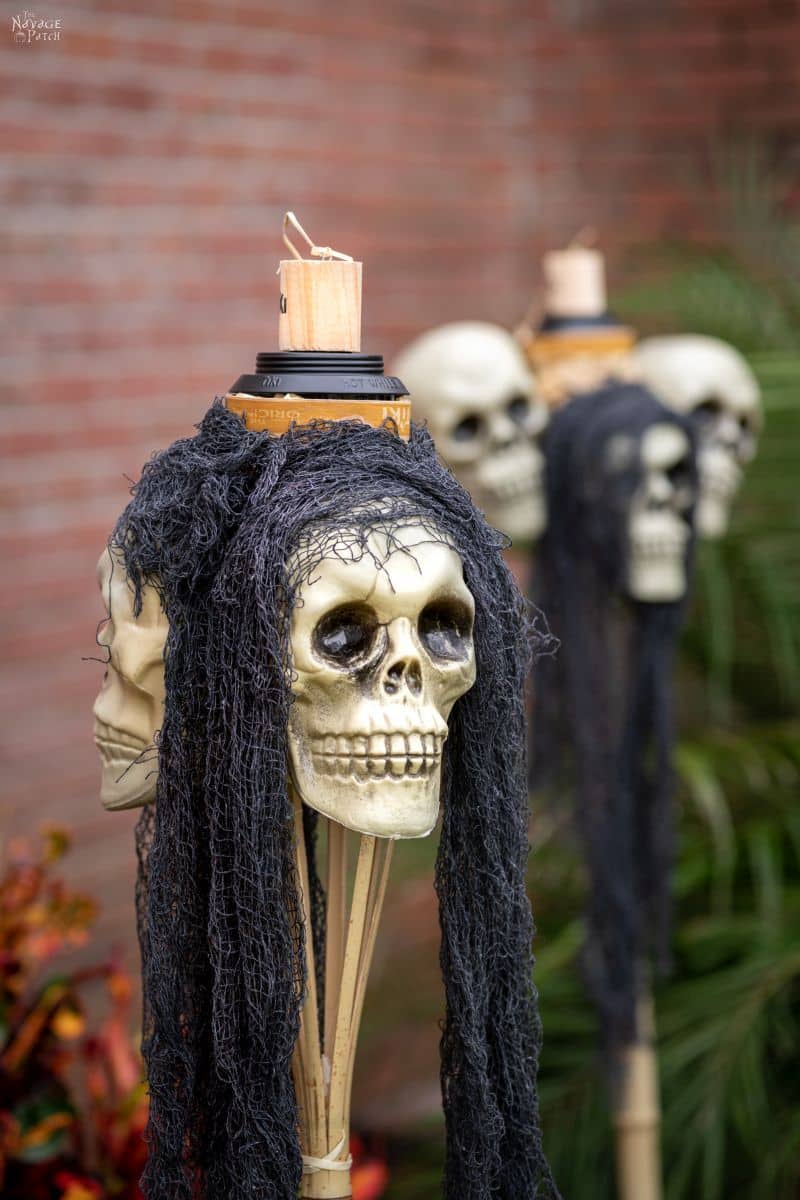
Step 4 – Add creepy cloth
I unwrapped a Dollar Tree creepy cloth, folded it in thirds and then cut it into three pieces.


Then I glued each piece onto a skull as shown below.


I repeated with the remaining two strips of creepy cloth.


And then I cut another small piece of creepy cloth from a new package – just enough to wrap around the exposed top of the tiki torch. After running some hot glue around the torch, I pressed the cloth into place.


I then replaced the fuel canister, and my first skull tiki torch was done!

How to make a skull tiki torch – method 2
For a little variation, I made a second style of skull tiki torch. This one is quicker and easier than the first, as it only requires cutting one skull instead of three.
Step 1 – Cut one skull
For this skull torch, I only cut one skull to fit snugly against the torch. I glued the skull as shown below.


Step 2 – Glue the other skulls
I glued the first full skull next to the cut skull as shown below.

You can play around with the placement of the skulls and put them higher or lower – there’s no wrong way!
Here’s a look from the back.

Next I glued the third skull higher up than the other two.


Step 3 – Add creepy cloth
I cut a piece long enough to drape over the first skull and hang down a bit, and then I glued it to the top of the skull and sides.


This creepy cloth looked like a cool reaper’s cloak hood, so I gathered it under the chin and put a dab of glue to keep the cloth in the hood shape.


Step 4 – Embellish (optional)
After turning off the camera, we decided to add a little embellishment to one of skull torches – some black flowers from Dollar Tree and a plastic spider from one of the Dollar Tree Halloween flower arrangements.
And with that, our fun and spooky skull tiki torches were finished.
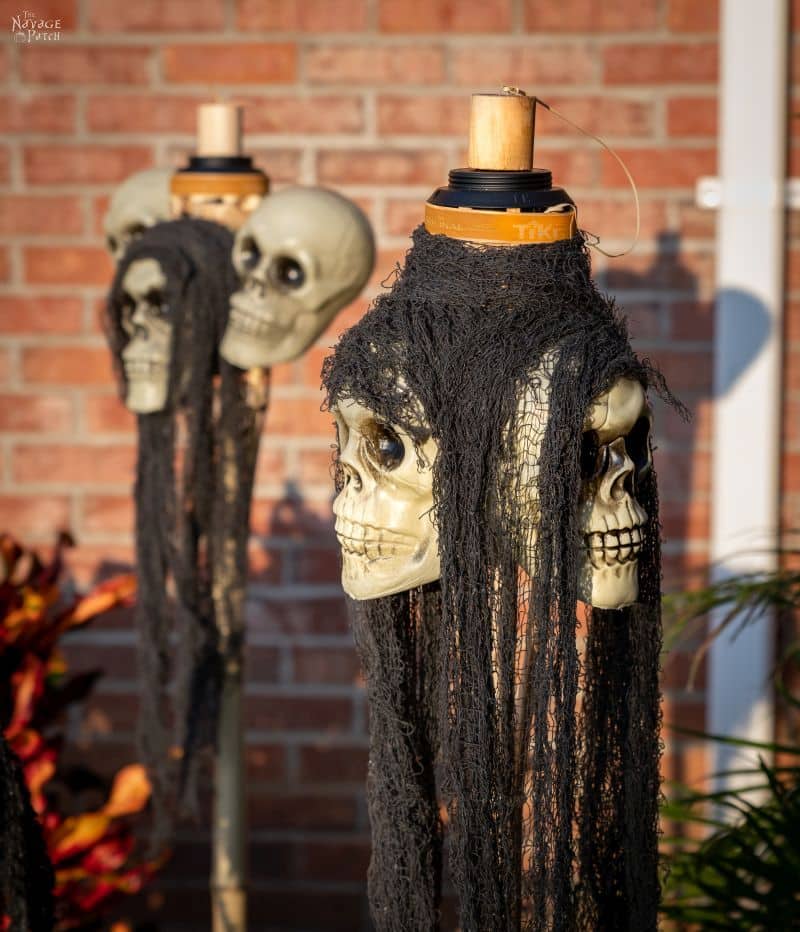
We love how they turned out!

So simple to make, but wow! what a statement!
And like I mentioned earlier, there’s really no need to paint the skulls – they look perfectly amazing just as they are – even these super-cheap Dollar Tree skulls!

Because these days, that’s what Halloween crafts are all about for us. We want to make beautiful decorations, and we want to make them quickly and for as little money as possible.

You can have it all – incredible-looking Halloween decor that doesn’t take all day to make and won’t send you packing for the poor house.


We hope you like our skull tiki torches as much as we do. Let us know what you think in the comment section!
We’ll have tons more Halloween DIYs coming your way, including several more skull crafts!
Love your ideas & creativity! Looking forward to more affordable creepy & fun crafts. Thank you
Thank you so much, Charlotte!
I love these torches! Thanks for a great idea!!!!!
Thanks, JoElen – have fun making them!
Love them ! They look awesomely creepy! And a simple and inexpensive decoration to boot👏 For some reason, Gilligan’s Island popped up in my head 😁 I’m so glad you have a permanent🤞home to decorate! FYI… I’ve been getting ready for Halloween since the beginning of August🤪73 more days to go!! WooHoo!
Cindy, have you seen the Halloween/Christmas countdown clock at the Disney shop? It is NBC themed. You should check it out, I am thinking you might dig it.
Cheers!
Thanks, Cindy Lee! Yeah, we think they’ve got the whole Caribbean VooDoo vibe going on, lol! Glad to hear we’re not the only nuts putting out Halloween decorations in 100 degree heat! 😂
These are so cool!!! We do a mini graveyard for Halloween and these will be a perfect addition. Thanks for sharing!
Our pleasure, Mo! I don’t know if you’re on Instagram, but we mentioned you in our stories the day. Last year you challenged us to make Grandin Road witch broom pathway lights. Challenged accepted – they’re underway!
****squeals with joy****
I have not been on Insta this week – but I will check it out. I am so excited. We were just talking about the brooms when we saw this post. We are excited to see what you guys come up with and thanks so much for taking on the challenge!!
You’re gonna love it, Mo!
OH MY!!
These skull tiki torches are some of my favorite decorations ever, so far!! Thank you so much for sharing!
Thank you so much, Peggy! 🙂
Did you ever think you would be giving a tutorial on craniotomies online??!!
I have no idea how you two come up with these ideas, but even though I’m not a Halloween person I am happy to say these are fabulous!!
Can’t wait to see what’s next!
Thank you so much, Linda! We’ll make a convert of you yet! 🙂
Very cool idea!!!!!!!
Thanks, Darlene!
Way cool! You two come up with the best decor, inside and out!
Loving the skull with the dreadlocks!
Lol, he’s the best! We call him Ziggy! 😀
OMG! These are great! You come up with the best ideas! Love the one with braids! How’d you do that one?
Hi Susan, that is one of my guys – Ziggy! He is not a torch though because he is made from foam skull. So anyway…to create Ziggy, you’ll need black heather filler bush (here is the link to it so you can see what I mean by black heather filler bush), a foam skull (mine was from Party City but amazon also should have these) and some bamboo skewers. You simply pick the black dreadlock looking stems from the floral pick you got, then glue them on to skewers and insert those skewers into the foam skull in the way you want your arrangement. Pretty easy, huh? Have fun! 🙂
I would like to know how to change my password. Can’t see a place. Thanks
Diane, do you mean the VIP Patch password? If so, you can’t, because this website is not a “paid subscription based website” where you can create your own login credentials and password.
If you don’t know the password for the VIP patch, then please check the latest email we sent to you and you’ll see it on the top of that email. If you can’t find our emails, (which I think that’s the case as our records show 7 sent and 0 open) please check your spam folder and move our email from your spam folder, so you can get the latest password and the future password updates which we do regularly.
I hope this info helps 🙂
These are great. You have a whole VooDoo Village vibe going on with this one. So are they still in front of the house, or was this just for the photos, and then removed so the neighbors don’t start wondering how creepy the new neighbors really are in mid-August? I can’t wait to see all the other outside decor put in place, because it’s going to look uber spooooky!
The tiki skulls are back inside to keep them pristine, but there’s tons of other stuff out there for various other photoshoots. I’m sure the neighbors think we’re weird, but hey, what can you do, lol!
I shared this idea with my son while visiting him last week and he’s already made some! I wish I could share a photo because they turned out awesome!!!! Thank you so much for always Shar such fabulous ideas!!!! I have loved them all!
sharing*
Hi Terri, send a photo to greg@thenavagepatch.com!
You made skeleton with crow sitting on top also spider. Can you tell me what else you put on him. its black. I have vison problems. Do you have tutorial for your skulls? He’s with the short ones in yard with tiki torches.
Hi Kandy, we made that a while back. It was skull with barb wire we bought from Spirit Halloween. We just placed the raven on top and stuck a bleeding eye prop that Handan made on its beak. We don’t have a blog post about that, but there are better pictures of it here: https://www.thenavagepatch.com/halloween-apothecary-jars-free-printable-labels/
I absolutely love these and want to make some for indoors (my office is a tropical theme!). I’m just wondering how to do these with solar torches since they don’t have a flame on top (just the solar panel). Or do you know of torches with faux flame on top that can be either solar or battery operated? I just can’t picture how to do them.
Hi Darlene, I don’t know of any that have a fake flame just coming out the top. Perhaps you could use fairy lights?