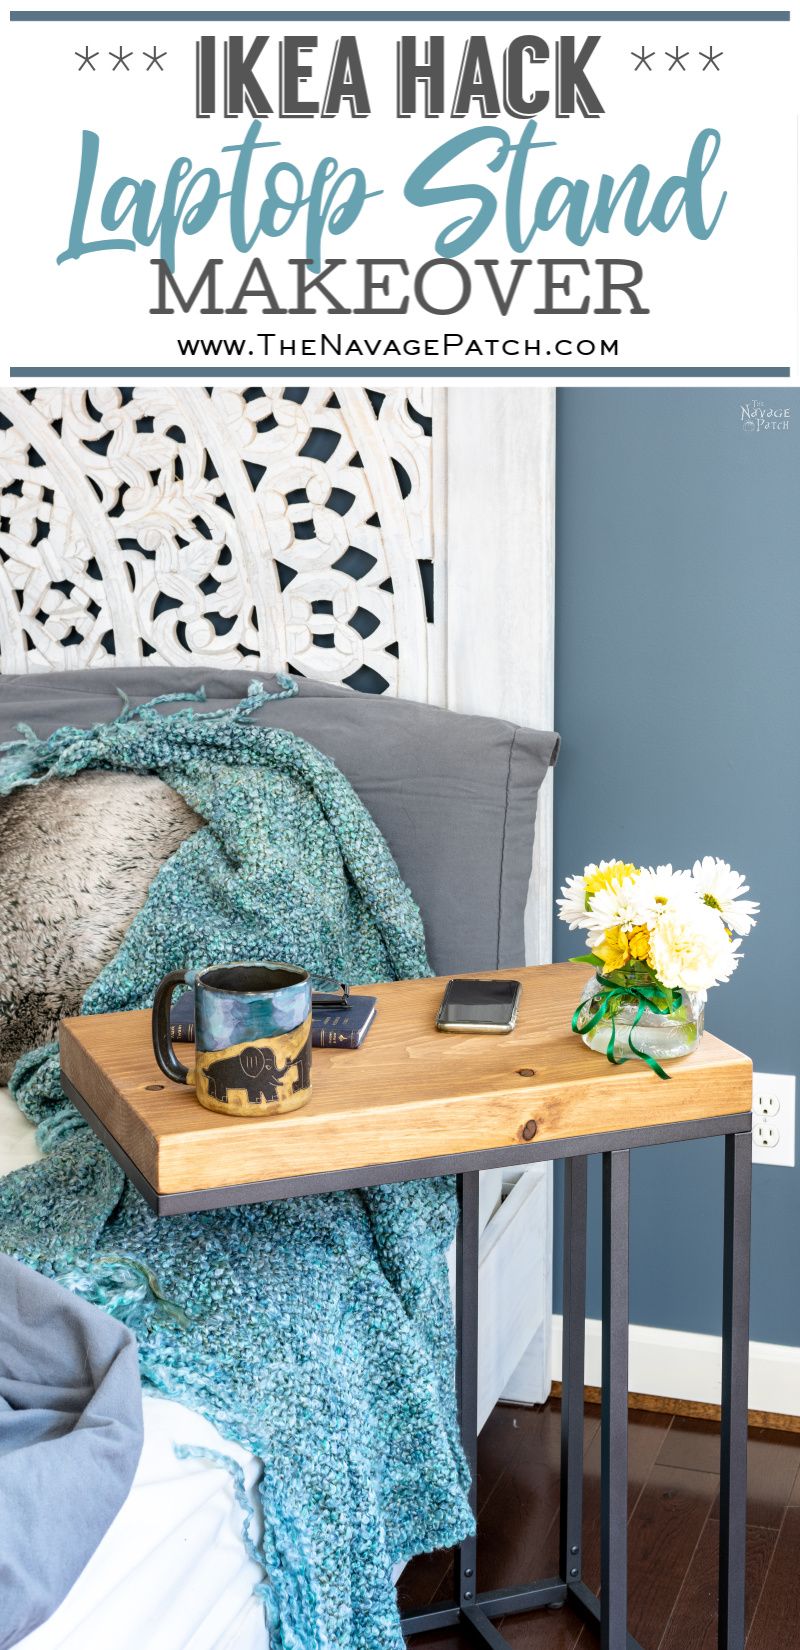
IKEA Laptop Stand Hack
Here’s a simple and beautiful IKEA laptop stand hack that looks exactly like a $200 stand sold at a high-end boutique! Make your own and save money!
My wife has this amazing and wonderful and totally annoying ability to remember every single thing we own, where we got it, when we got it and how much we paid for it. If you saw our overstuffed basement, you’d realize just how truly remarkable is her gift.
The downside to her power is that I can’t get away with breaking something or throwing something in the trash without her eventually sniffing out my crime and calling me on it.
And if that ability weren’t frustrating enough, she has this ancillary power of somehow sensing when something has gone missing and then either asking about it or deciding that it would be the perfect time to use that something in a project.
Such is the case with today’s IKEA laptop stand hack.
We bought two of these stands back in 2013.
I have no idea why. You’d have to ask Rain Man Handan about it. I think we bought them for general use in the living room, but eventually they migrated up to Barish’s room, and there they lived until a couple of years ago.
How or why they left Barish’s room, again, I couldn’t say. All I know is that they appeared outside.
I know, I know, I know what you’re thinking.
I saw those stands in the ‘before’ pictures of Barish’s room makeover plan!
Well, yes you did. But some of those pictures were taken a while ago. A long while. Anyway, let’s not get caught up in a few rogue photos.
The laptop stands found their way outside, and that is that.
Maybe I carried them there. Who knows? Not me. I know nuthin’!
I vaguely recall them being used on the patio for a while, and then I remember removing the glass one year when they were threatening us with the remnants of some hurricane that had just laid waste to a more southerly portion of the globe.
We battened and secured and tied down everything that might blow away. Fearing two shattering missiles, I carried the glass tops to the basement, but the frames stayed outside.
The hurricane glanced off with little more than a few halfhearted gusts. We unbattened, unsecured and untied everything, but the glass tops remained in the basement, while the metal frames began an odd migration around the yard.
Seasons passed. Birds migrated. Flowers bloomed and blizzards blew.
The IKEA laptop stands stood amidst it all.
One season here, another season there. They were unused and always in my way, so I kept shifting them farther and farther away.
This past fall, I at last moved them out of sight behind the shed.
As far as I was concerned, those two stands were dead and buried. All that remained was to quietly sneak them to the dump one day when the weather warmed up. It was the perfect crime, silently carried out over months and years.
Surely Handan had forgotten about them long ago!
And then we embarked on Barish’s bedroom makeover, and all of a sudden, those two IKEA stands were back in play.
Crap.
I’d known about this plan for a while now, but I guess I hadn’t really thought about it.
Furthermore, I’d kinda forgotten about them.
So when Handan announced recently that it was time to hack those two IKEA laptop stands, I froze, and my heart leapt up into my throat.
Crap. Crap. Crap.
She wanted those stands and she wanted them right then and there.
Crap.
Then I remembered. The shed! Yes!
It had recently snowed about a foot. Then it got a little warm. And then it got really cold.
Crap.
I told her where they were, and we trudged out in the waning sunlight to recover the stands.
“You see my babes?” I said. “They’re right there where I left them. All is good!”
“And why are they outside?” She said.
I coughed and sputtered and tried to come up with an explanation that would make me seem wise and heroic for leaving them outside for two years, but I probably just looked like a braying donkey.
I clomped through the snow in my sneakers and extracted one of the frames.
Yes! It was in perfect condition! IKEA makes pretty good stuff apparently!
But when I went for the other stand, I discovered that its base was encased in several inches of ice.

It wasn’t moving until spring!
Fortunately, I only needed to hack one stand for Barish’s room and this post! Phew!
I carried the stand inside, washed off the snow and gave it a good cleaning.

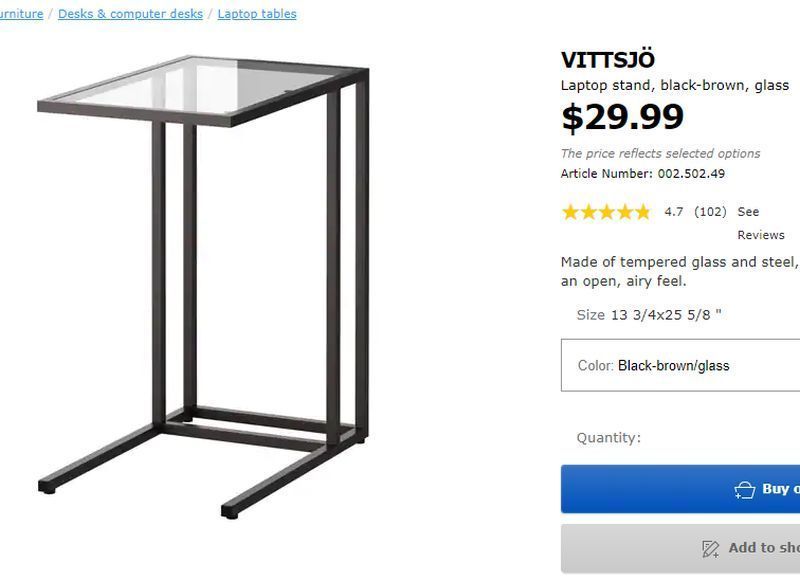
Handan already knew how she wanted me to hack this IKEA laptop stand. During one of her nightly forays into the realm of Pinterest, she came across a pin that led to this product:

It was basically an IKEA laptop stand with two pieces of wood instead of glass.
For $200!
I’ve said it before, and I’ll say it again, ladies…
JEEZUM CROW!
Who pays $200 for some square tubular steel and a bit of lumber?
I had my hack!
Though our laptop stands had weathered the elements well, the metal was a bit faded, so a new coat of paint was in order. I went down to our Rustoleum stockpile to see what we had.
Soft Iron looked good, and we had a couple of cans. Soft Iron, it was!
Though the sun was setting, the afternoon was warm(ish) compared to the deep freeze of mid-winter, so out we went to spray the stand.

Of course, you all know what happens when I give my phone to Handan.
Here’s when I discovered I got snow in my sneakers.

Here’s when I discovered I had sticky paint on my fingers.

Here’s when I tried to get the sticky paint off my fingers.

Here’s when I discovered the paint wouldn’t come off so easily, so I had to grab more snow.

Here’s how we New Englanders wash our hands in the winter. I hear you softies down south like to use something called “warm water.” Pfffft.

So there you have it. One picture of the project, the rest of me futzing around the job site.
I let that paint dry in the last warm(ish) rays of sunshine while I headed down to the basement to see about some wood for the top.
My original thought was to glue or Kreg-screw two or three boards together, like they did with that $200 deal pictured above.
But sometimes you get lucky.
Remember our DIY pipe shelves from last summer? That was the project that introduced you all to our new philosophy of Simple Stupid. If you’re not familiar with the phrase, please go read that post. Well, as it turned out, I had bought a little too much pine from our local wood shop, and I had a piece left over that was almost exactly the size I needed for this Simple Stupid project.
Really, folks, this project is about as simple stupid as it gets: spray paint, piece of wood, done. Well, there was some screwing and staining going on (o_0), but you get the point.
Anyway, back to my big hunk of wood.
I measured the stand and then trimmed the wood to size. Here’s the piece just sitting on the stand. It’s not attached.
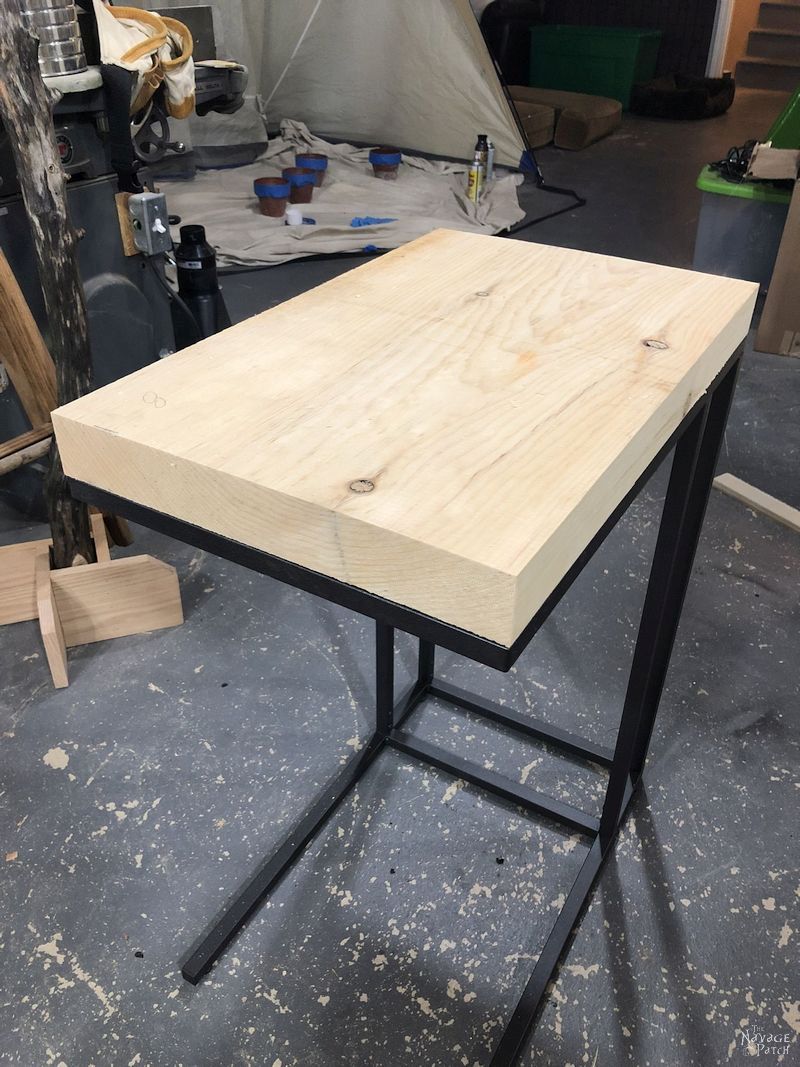
The pine was nice and thick and more than wide enough for the stand. You wouldn’t be able to find a board like this at Home Depot or Lowe’s. You’d have to go to a proper wood shop. You could certainly use lumber from Home Depot – you’d just need to join the boards together with glue or screws.
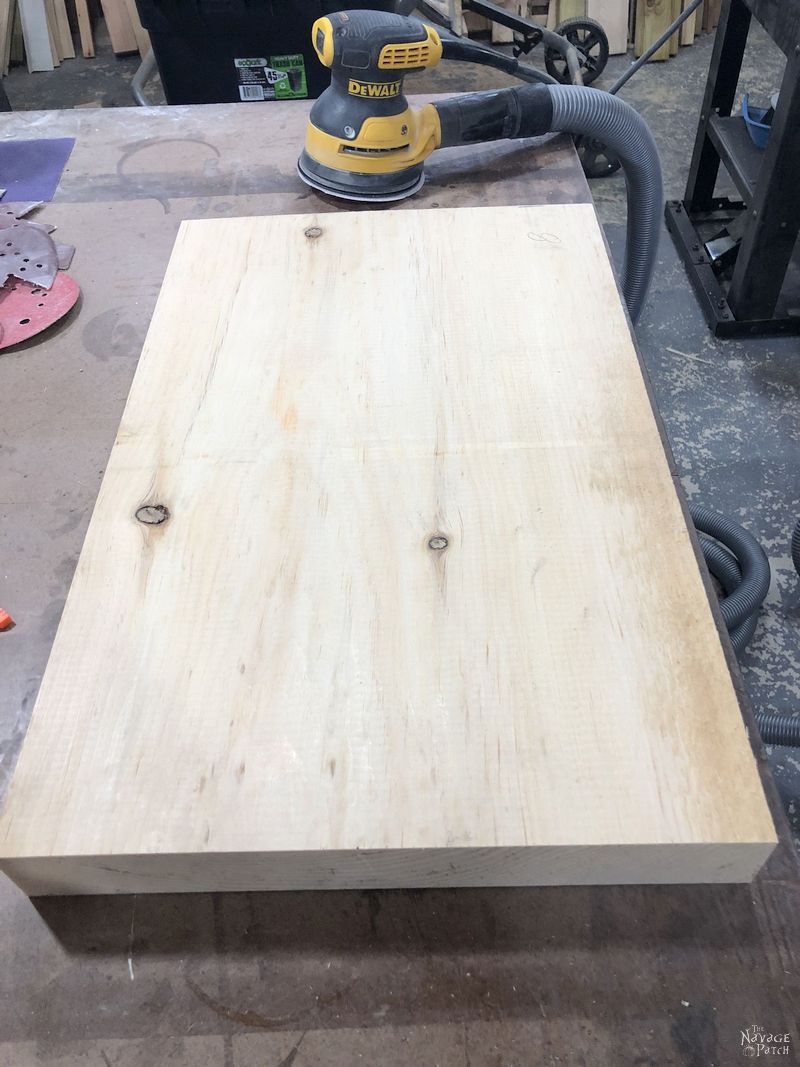
I sanded off the mill marks and rounded the corners and edges.
Handan had a particular color in mind for the top. She sent me a picture, and I endeavored to match it.

I used 5 stains to try to match the color: Minwax Weathered Oak, Minwax Golden Oak, Varathane Special Walnut, Varathane Provincial and a bit of Varathane Light Walnut for some red hues.
This is what I got.
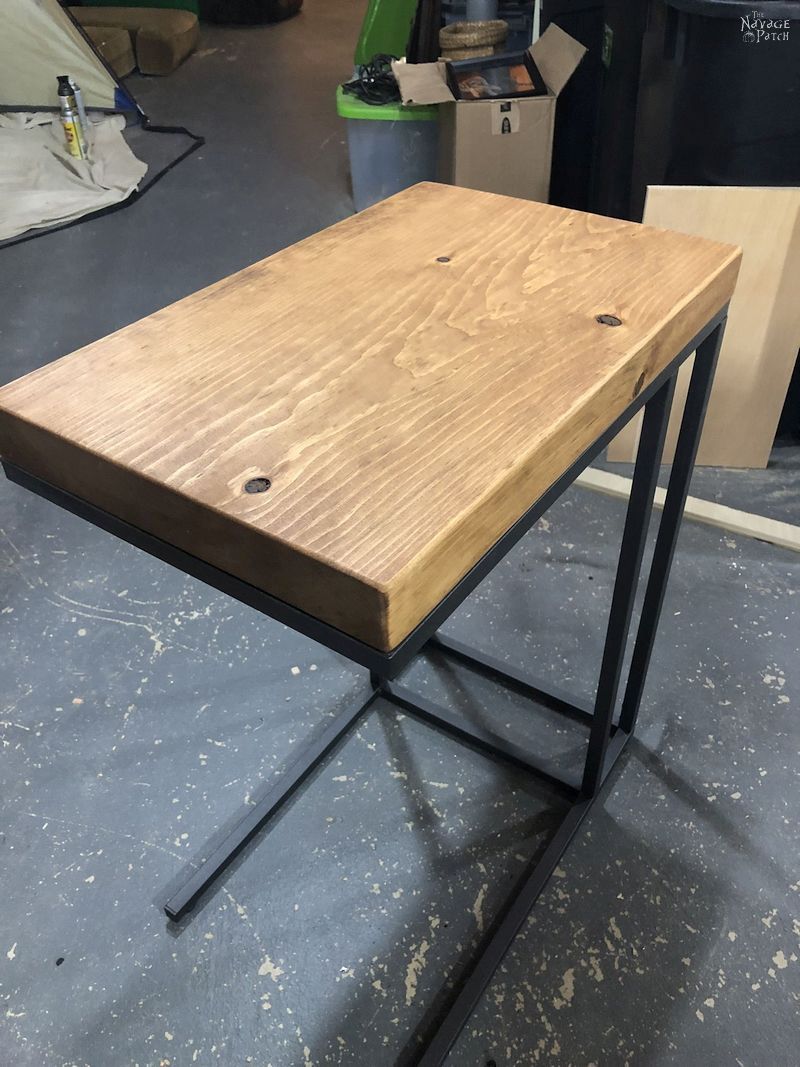
I figured it was close enough and the best I could do considering the stand in the picture she sent was made with an entirely different species of wood.
Before attaching the top, I put on a few coats of Greg’s Wonder Finish – a mix of equal parts Satin Spar Urethane, Boiled Linseed Oil and Mineral Spirits. All the cool people are using it these days.

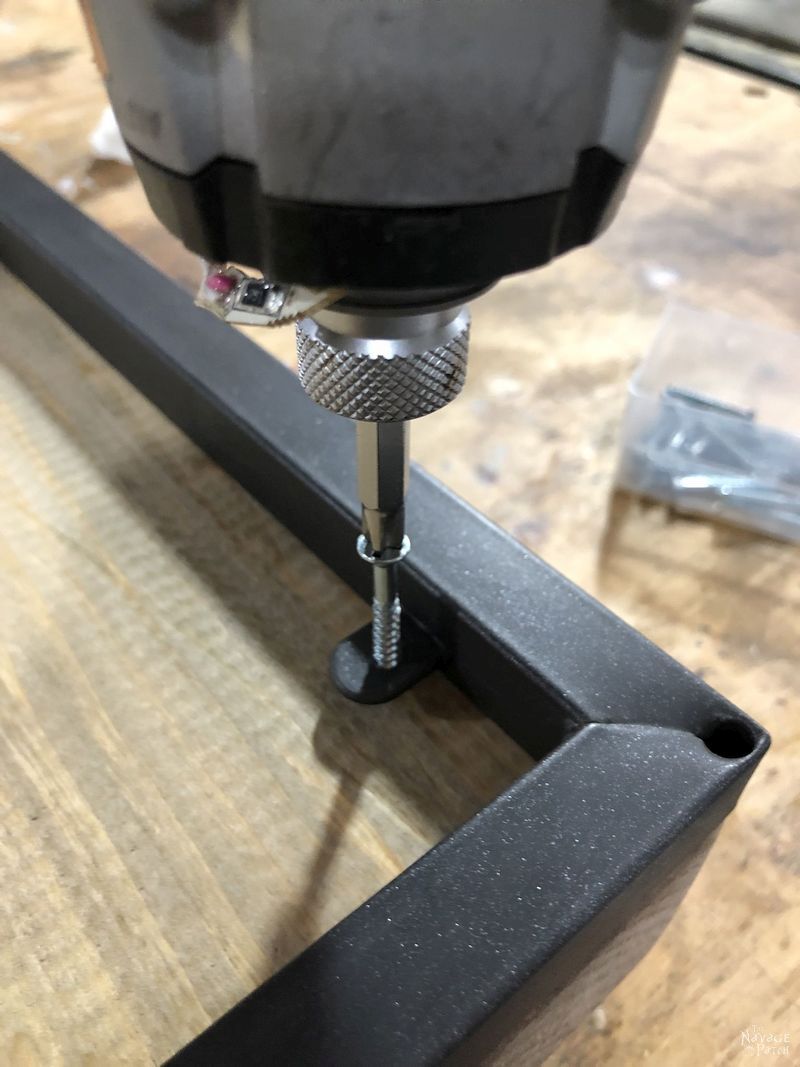
To prepare the base for the top, I drilled screw holes into the six tabs that previously supported the glass top.


The holes were rough and sharp, so I filed them down.

When the final coat of finish was dry, I lightly sanded the top with 3000 grit sandpaper just to get it smooth.
I then flipped the top over and aligned the stand.
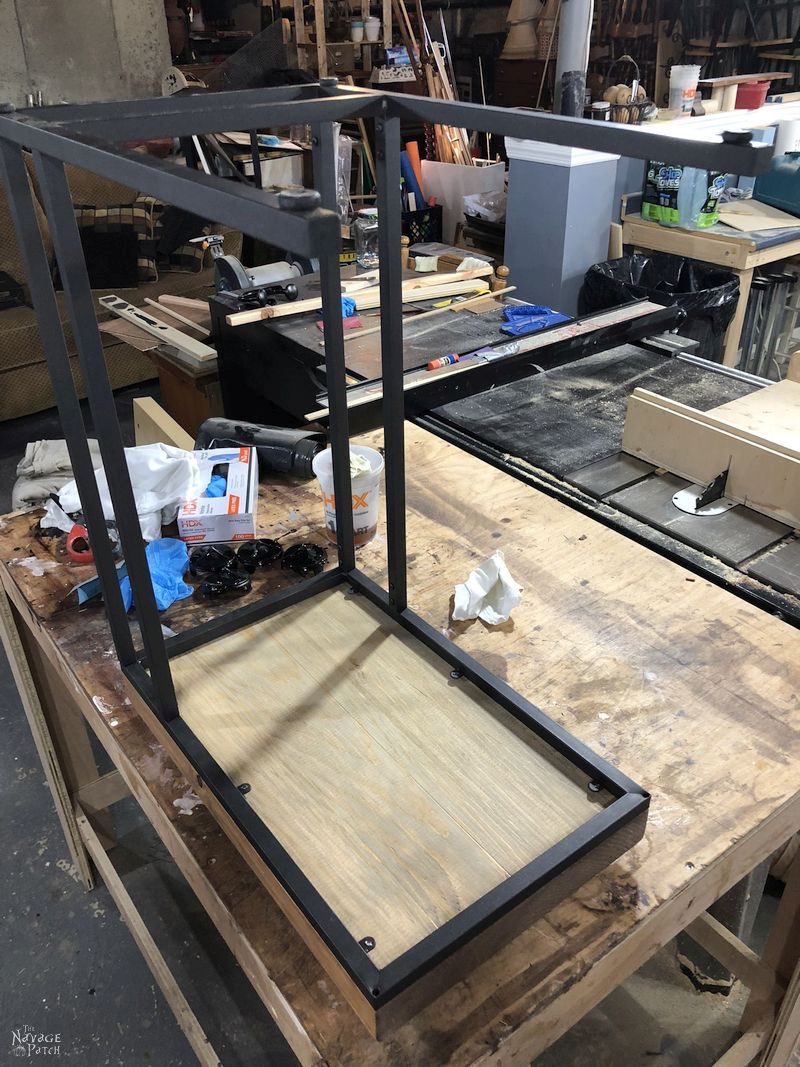
I put screws through all the tabs.
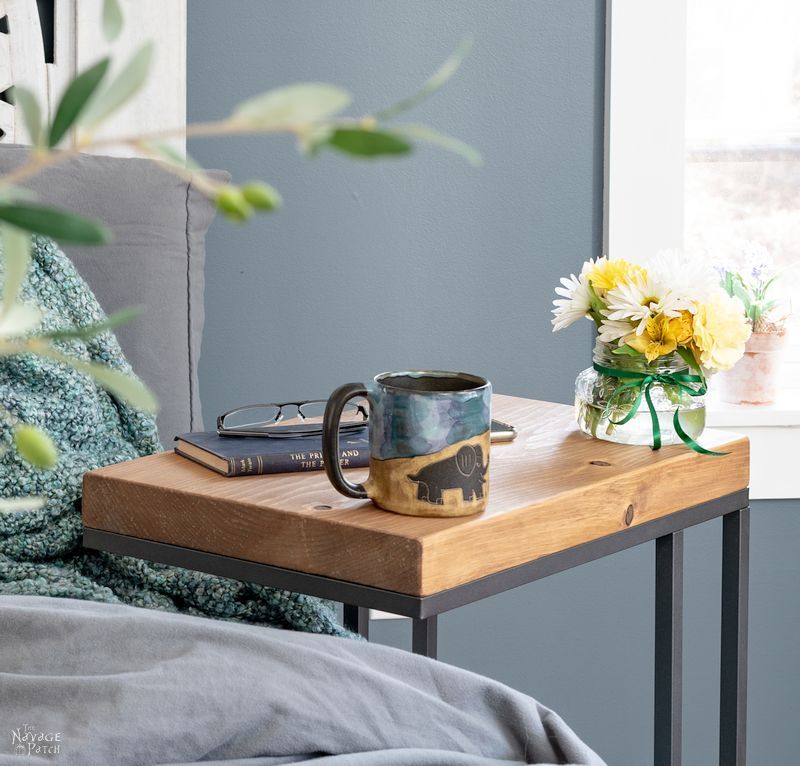
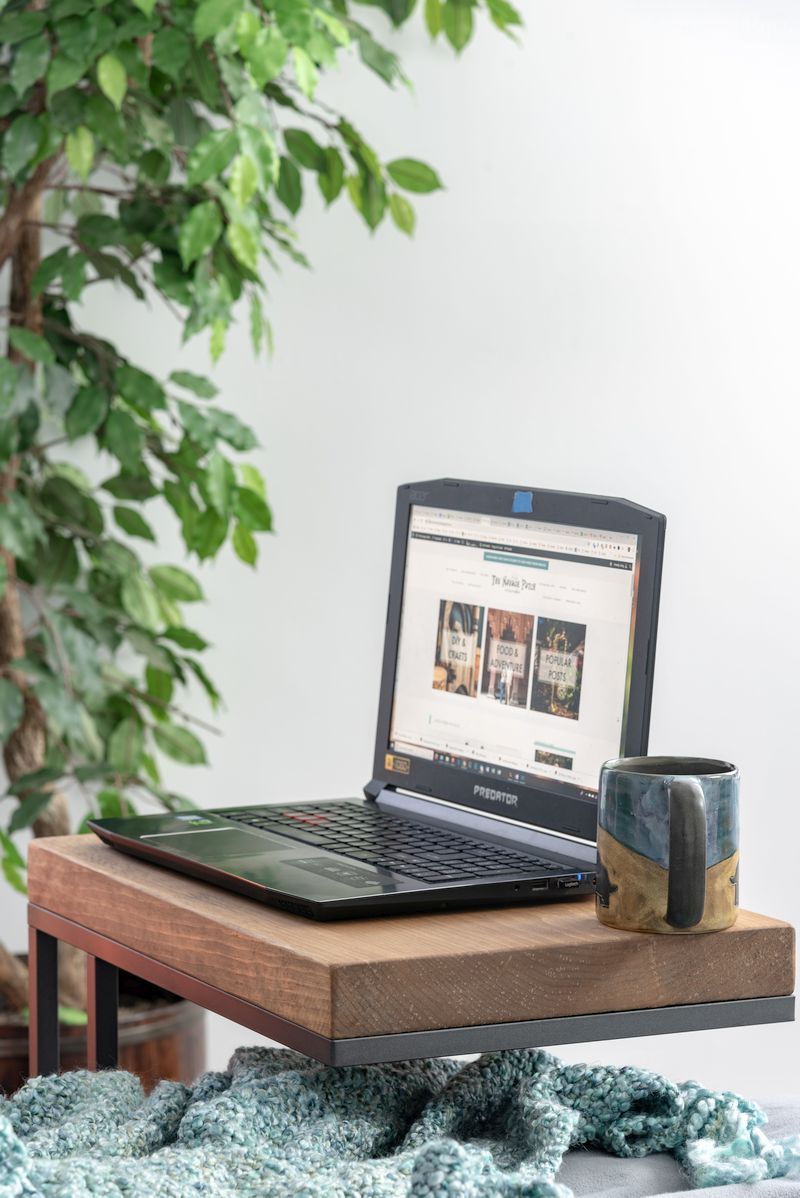
And that finished it off! My IKEA laptop stand hack was done!
There was just one problem.
Handan and I liked it so much, we sorta stole it for ourselves.
At least for now.
Hey, The Boy is getting a whole new room – I think he can spare the hacked IKEA laptop stand for a little while!


If you’re following along with the teen bedroom makeover, here’s how we stand:
Teen Bedroom Makeover Checklist (for The First Room)
Teen bedroom ideas and laying out the game planDIY alcohol ink switch plates- Paint the walls
Build 2 IKEA Billy bookcasesBuild a daybedHack IKEA Kallax into a TV standCreate an accent wallBuy or DIY plugin sconcesMake wooden wall artBuild a vertical chess boardBuild 2 guitar display framesBuy a new deskChange the fanBuy or DIY colorful artHack IKEA Laptop Stand- Buy throw pillows
- Add greenery: faux plants, air plants, DIY air plant holders
- Metal filing cabinet makeover
- DIY Craftsman style trim
- World map wall art
- Small closet makeover
- Barish’s first room reveal
Click here to see more teen bedroom makeover posts as we continue to cross items off our checklist!
We love it when you share our posts on Facebook and Pinterest!


Very Cool Guys. Came out Awesome! Well Done.
Thanks, Shaun! 🙂
Very neat idea. I have an aquarium stand that this article reminded me that I had! This would work wonderfully with it. Got the wheels moving anyway!
Thanks, Peggy! Good luck with the aquarium stand! 🙂
Just amazing! You and Handan are brilliant, and you do beautiful work!
I’m totally knocking off your knockoff!
Thanks so much for sharing!
K
Thank you so much, Karen! Go for it! 😀
Love it!
Thanks, Dido!
Fabulous job as usual you clever people it looks stunning, i’m jealous of all that lovely snow.
Thank you so much, Catherine! We’re supposed to get a few more inches of snow tonight. You are welcome to come take it all tomorrow morning! 🙂
I loved what i could see of your headboard. What is it?
Hi Carla, we got that at Home Depot:
https://fave.co/2Fx4OIb
We didn’t pay what it’s going for now though. We bought it on sale on Black Friday. It’s been sitting in a box in the garage until just last week when we started our Master Bedroom Refresh. I’ll start posting about that soon!
This makes me think I should browse Ikea sometime soon. Haven’t been there in years (not a convenient drive from me).
Yours is so much better with the single, thick board. Me likey.
You are so lucky the frames didn’t rust out behind the shed!
Hey, I have that same tribal wood drum table in my family room. World Market find? I love that table. It fit perfectly between my two sofas as a spot to hold the remotes.
Hi Laurie, yes, they are World Market, lol! We just picked them up the day I took those pictures – they’d only been set up for about 5 minutes in that later afternoon pic, lol!
Beautiful job I love it…
Thank you, Laurie!
Hi..this is so serendipitous…I had been looking at those stands recently….I definitely love yours better. Am curious…evidently the bottom supports the weight of the top. I was wondering about that when I was looking online. I don’t think yours will bounce or move which was my concern with the online.
AND. I have not seen Connecticut snow since 1962!!! We get weather news over here in Oregon about the east coast..like ….lots of snow in Connecticut is something new. I remember it well,and my teen body handled it well. Yup,I remember “ washing” my hands in snow..face too. And ice skating on ponds..building fires on the ice,( New London) and feet so cold skating I thought they would break!
Anywaaayy..
Oh by the way.. I would have thought you would have a laundry room sink instead of heavy duty washing in kitchen sink?
Handan..thank you for keeping this guy moving and creating! ???? we love seeing what’s going on! ?
Hi Bernice, oh yeah, the stand is stable enough for any type of use. You are not missing anything not seeing CT snow. It’s the same as you remember, but dirtier, lol! Regarding the sink – our laundry room sink is a littl smaller than the one in the kitchen, so it was easier to clean the snow off the stand in the kitchen 🙂
I just love the humor you add to your posts! The humor makes the posts more “human” and interactive versus the mechanical “here’s what I did and how I did it.” The mechanical DIY posts are very useful, just not as fun. And as far as “stupid simple” projects go, they are the best!
Aww, thank you, Nona! I agree, without the humor, this would be one booooorrrrring blog, lol! Thank you so much for this lovely comment! 🙂
Greg you can make a piece of pine look like walnut. You are a master!!!
I don’t know about master, but thank you for the compliment, Karen! 🙂
I wish we had snow! It doesn’t get anywhere near cold enough here. I’ve never seen snow in person. The idea of not being able to move something until Spring when the ice melts is surreal!
I’ve actually been looking for something very similar to this table so I think I might have to add it to my list of projects. ? You make everything look so good, I want to try everything!
Jay, you are not missing anything. Do you want to know what winter is like? Open your freezer and insert your head and hands. Stay there until your hands are numb and your snots are frozen. Snow is just the occasional bone Old Man Winter throws your way to briefly cheer you up while he prepares another week-long deep-freeze to send your energy bill skyrocketing. LOL, I used to love it when I was young and spry and able to operate a snowboard. Now snow and winter mean nothing bit work and money 😀
Barish can wait until the other one thaws! I’m told spring is coming. Eventually.
Eventually, Nicole! Maybe next month, lol! 🙂
As a Canadian I totally relate to washing my hands in the snow. For all the commenters wishing they had snow, trust me, after a day or two you will be over it! Lol!
I have seen those tables online for $200 and always shake my head. We had one when I was a teenager and it was considered “cheap” furniture back then! Your makeover totally elevates it!
Thank you, Giselle! I agree, lol! Snow is fascinating until you have to shovel it!! :D:D:D
If Barish is your and Handan’s child, he is out behind the shed with your heat gun, running up you electric bill, melting the other table out of the ice! And then, he’ll probably organize all the stuff and tools you’ll need to make his table! You’re lucky you are in CT; here in Maine, the stupid robins have come back and the lawns are still all covered in snow with occasional bare ground with 2-3′ snowbanks. CT is about right for new England!
Oh, yeah! You guys got it bad, this year! I guess I can’t complain. Our winter is nothing compared to Maine’s! 🙂
Love this IKEA hack. I hadn’t actually noticed this piece and looked it up online. It’s selling for $39??, and like those before me, I love the thick wood top better than the original glass. Question: If I went to a wood shop or cabinet place, what thickness would you suggest asking for? Thanks for the inspiration !!! 🙂
Hi Joan, the piece of pine I used was 2 inches thick, and I bought it from a wood shop. In a wood shop, thickness is measured in quarters, so a 2-inch-thick board will be listed as 8/4 or eight quarters. If you don’t have a saw that can cut lumber that thick, any wood shop can cut your board to the size you need for an additional charge.
LOVE LOVE LOVE THAT….super job!!!
Thank you, Rhonda! 🙂