Of Pipe and Pine: DIY Industrial Bookcase
And looked upon the room did she,
Spun ’round and uttered her decree,
She pointed there, her eyes ashine,
Then spoke the words, “Of pipe and pine.”
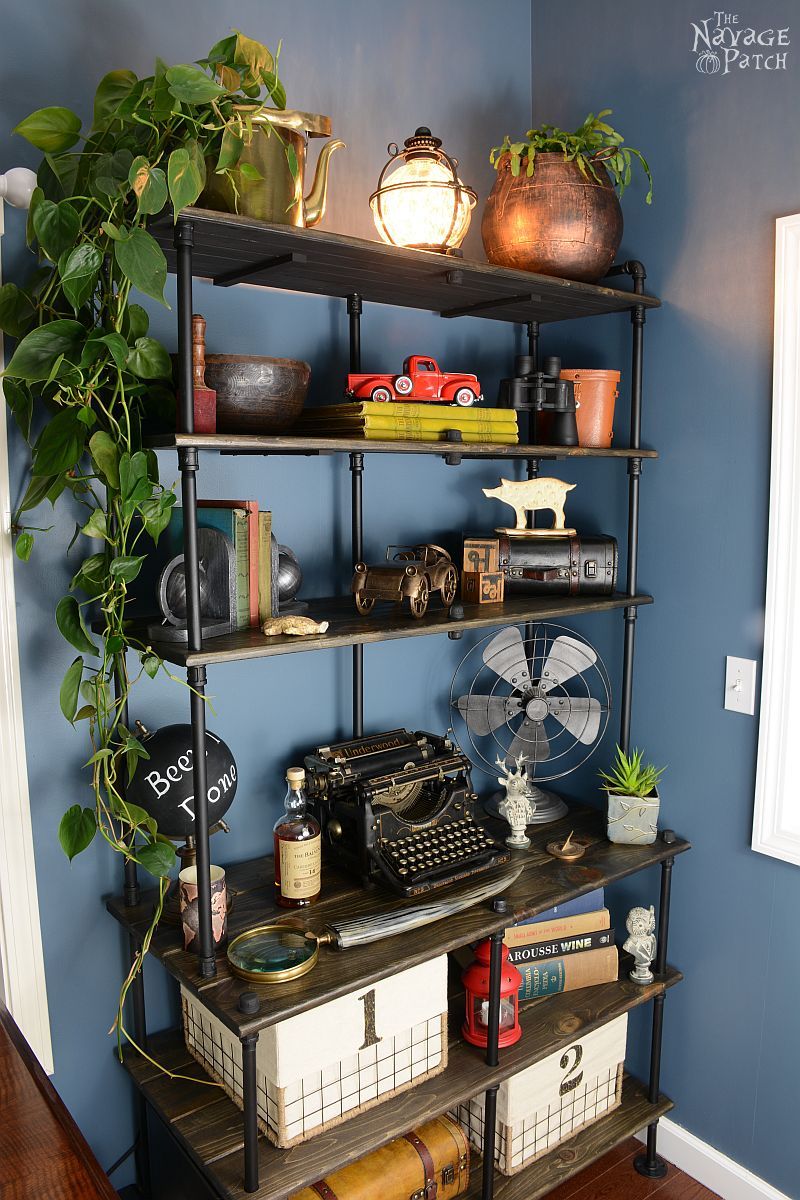
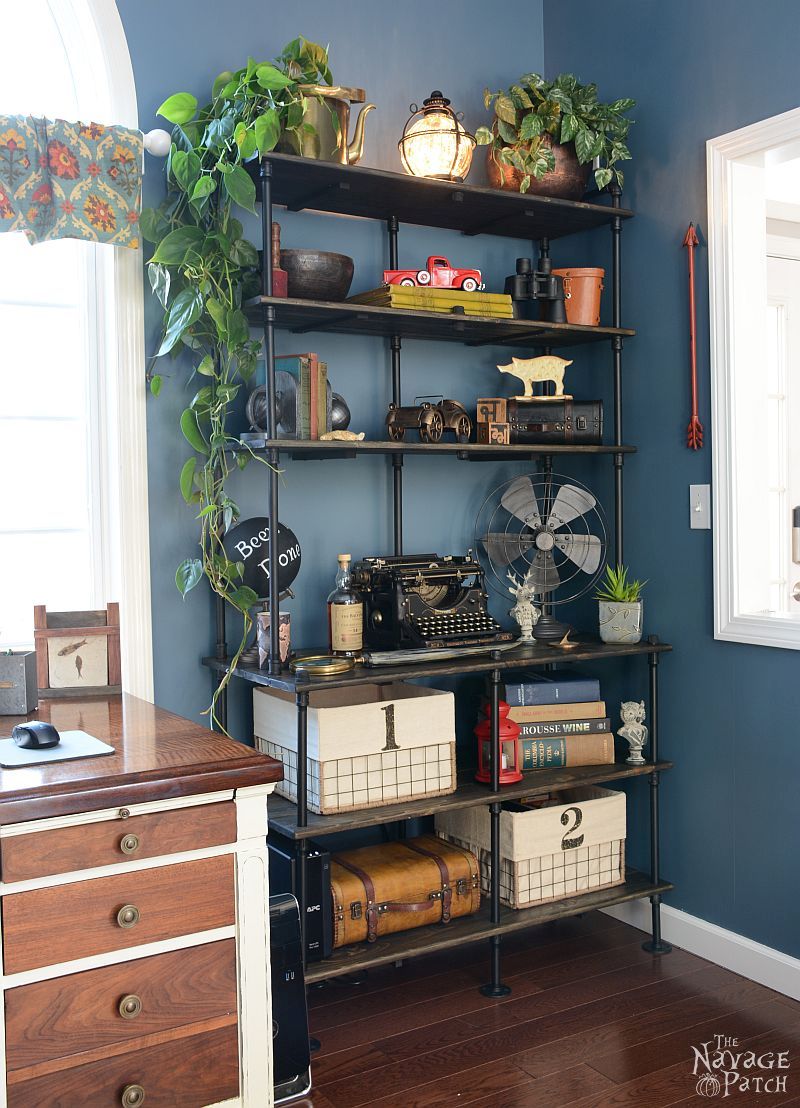
And so it was commanded, and so it would be done: my home office, with newly refinished desk, would receive an industrial-rustic shelving installation made from pine boards and black pipe. Handan really wanted my office to have black pipe and pine shelving that attached to the wall. I had built some smaller pipe and pine shelving and tea carts on casters, but she had grander visions for this version. As with all wifely matters, who was I to disagree?
As I had done with some of my earlier dabblings with pipe and pine, I opted for 1 x 6 tongue and groove boards from Home Depot, the knottier the better.

I cut them down to the length I needed. For these shelves, 44 inches was the magic number.
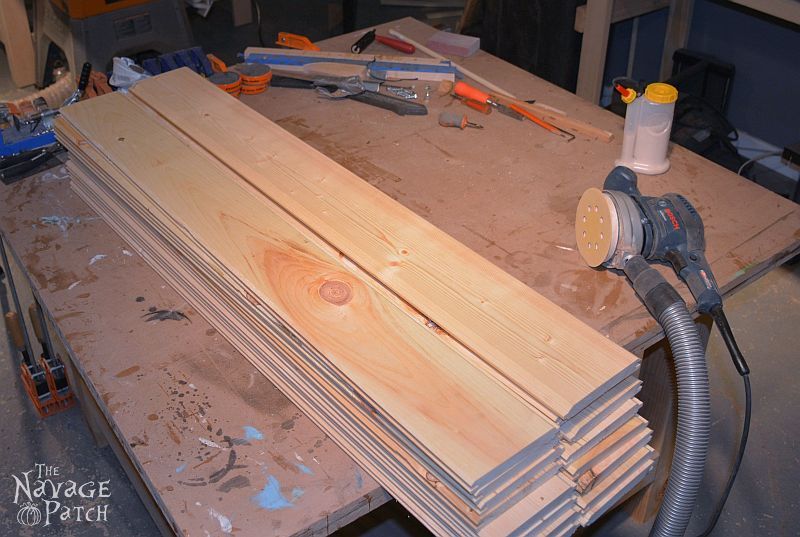
I then sorted them according to knot density and appearance. The knottier, more rustic-looking boards would be placed more front-and-center than the plain boards.
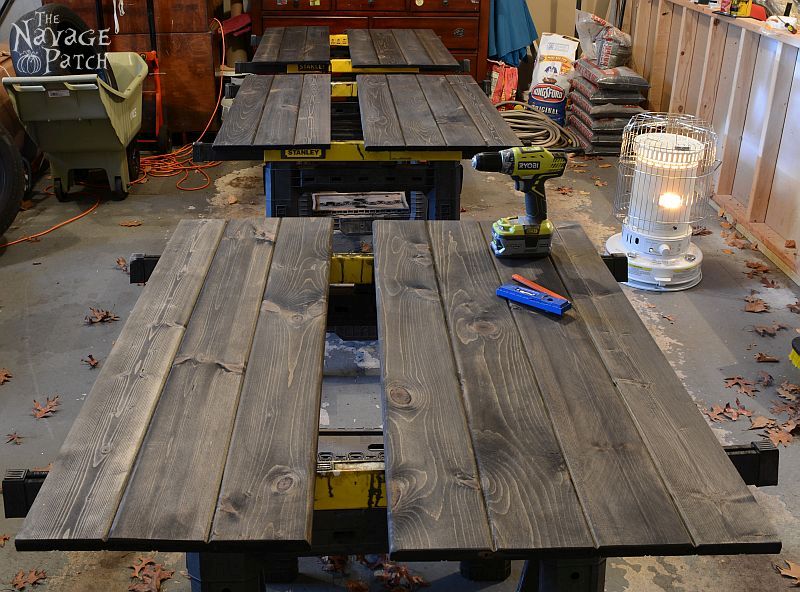
There would be six shelves in all – the bottom three would be 4 planks wide, and the top three would be 3 planks wide. The wood shown above was not enough, so I had to run back to Home Depot to complete the set.
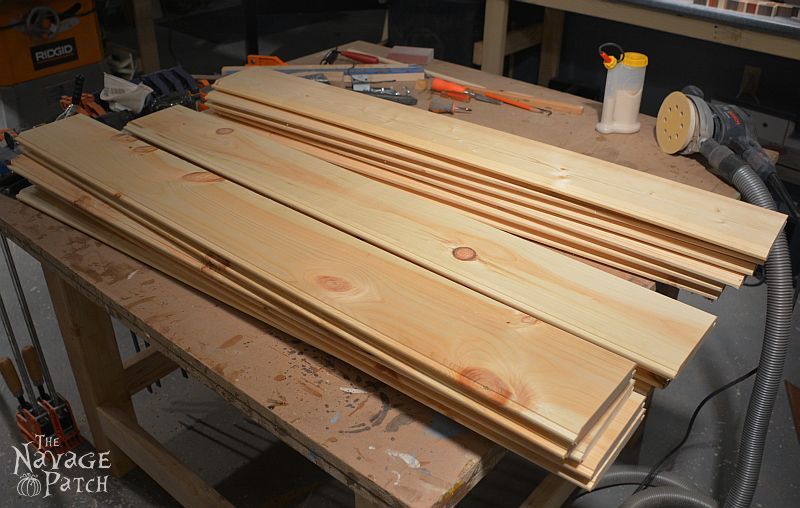
Once I determined which pieces would be in front and which in back, I used the table saw to cut off the extra tongue from the front pieces and the extra groove from the back.

I added a bead of glue down each groove, then fit the boards together.
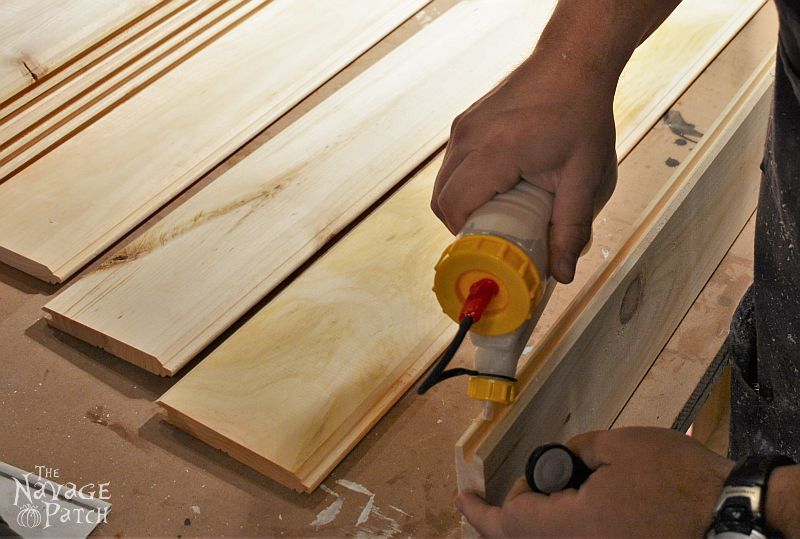
Once together, I clamped them and attached braces made from scraps of maple and poplar that I had laying around.
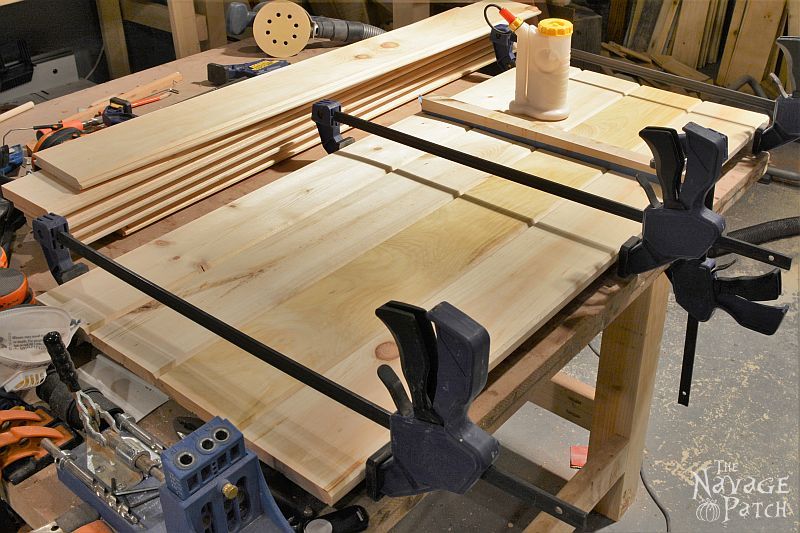
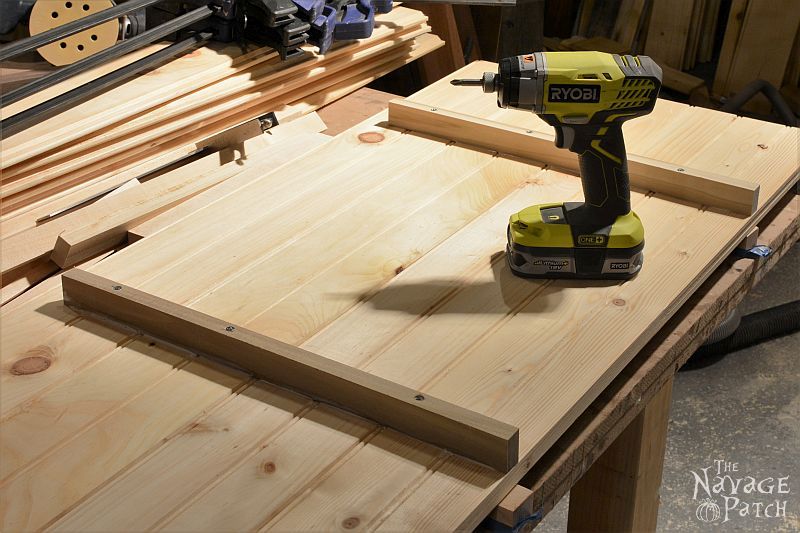 For the shelf pictured above, I clamped, waited for the glue to dry, then removed the clamps and fastened the braces with glue and screws. For all subsequent shelves, I clamped the boards and affixed the braces before the glue was dry, while the clamps were still attached.
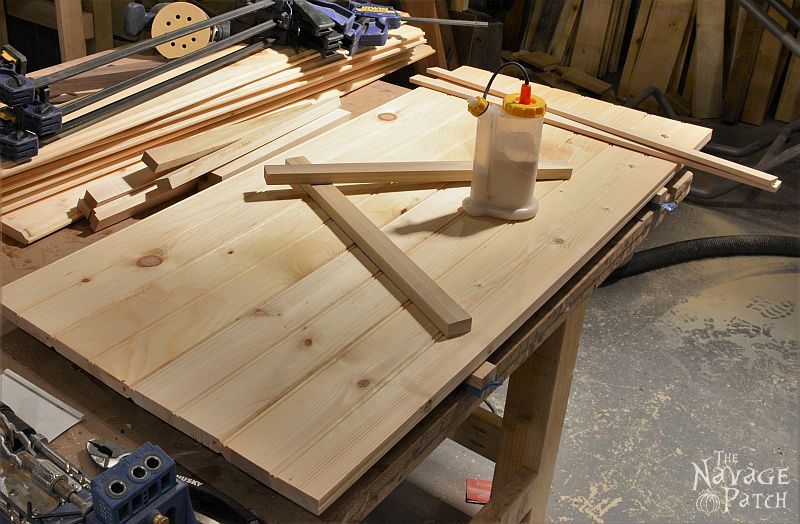
Here are the shelves, ready for the next step…

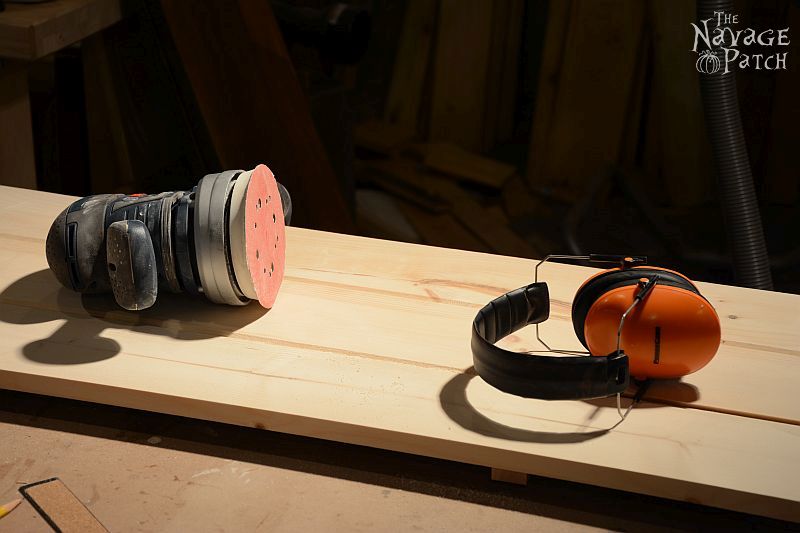
…sanding. I sanded the shelves to 150 grit. Since the piece is rustic, I wasn’t overly concerned about a flawless finish.
I stained the shelves with Minwax Ebony![]() .
.
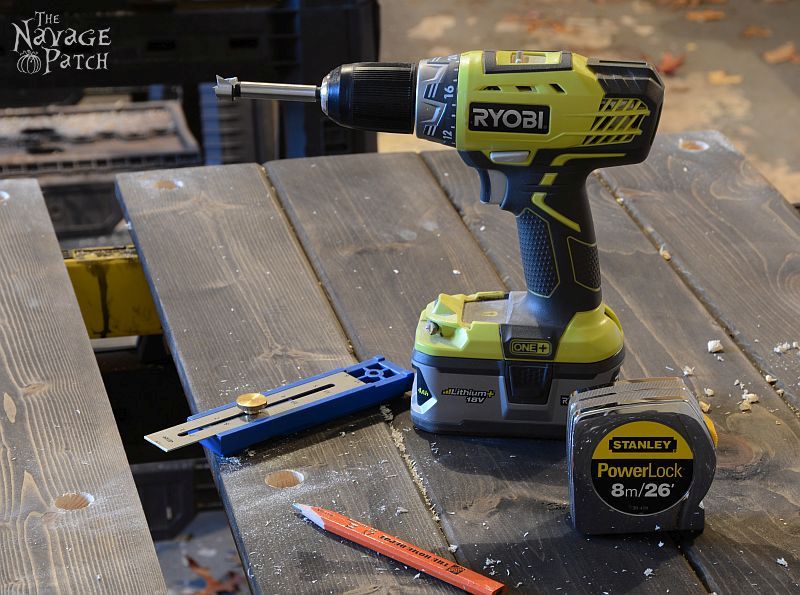
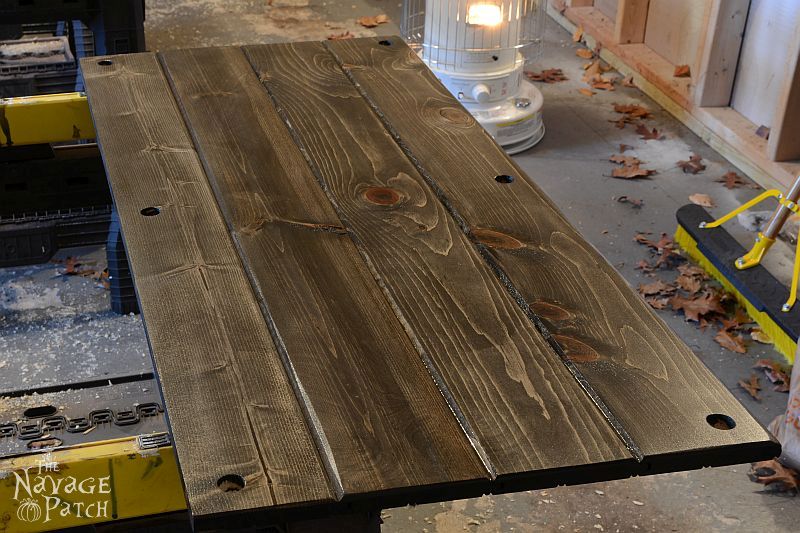
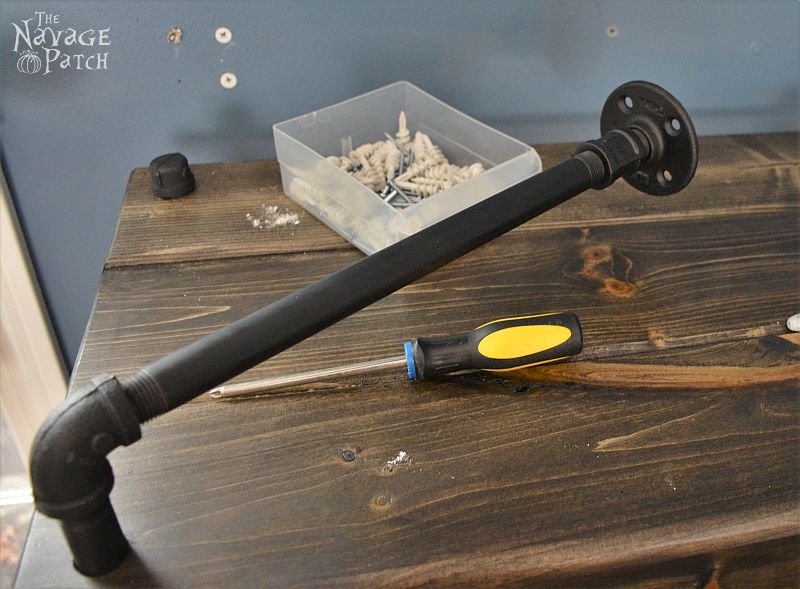
The black pipe would run through the shelving, so I needed to mark and cut six holes in each shelf. I used a 7/8″ Forstner bit to cut the holes. The pipe has an inner diameter of 1/2″ and an outer diameter of 0.78″ so 7/8″ (0.875″) was a perfect fit.
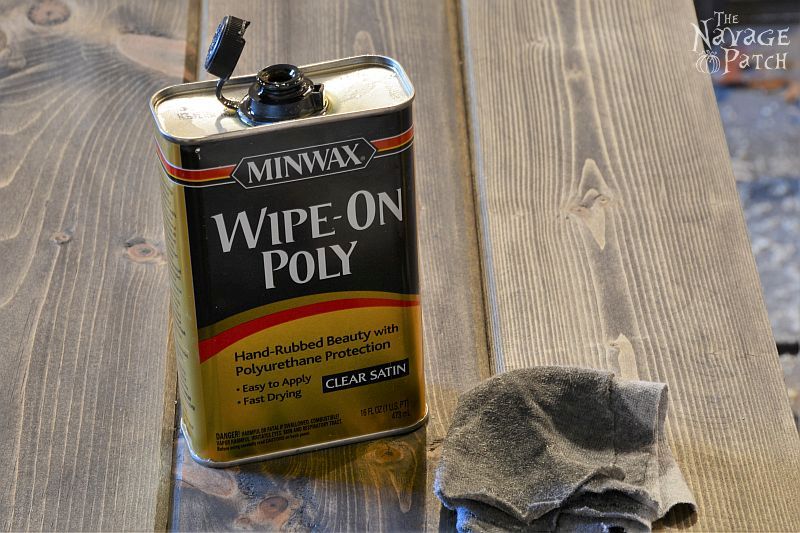
Now that the holes were drilled, I applied a little stain around the rim of the holes with a Q-tip, then put on two coats of Minwax Clear Satin Wipe-On Polyurethane![]() . I’ve become a big fan of wipe-on poly. It is far more forgiving than brush-on.
. I’ve become a big fan of wipe-on poly. It is far more forgiving than brush-on.
Still wet, but you get the picture.
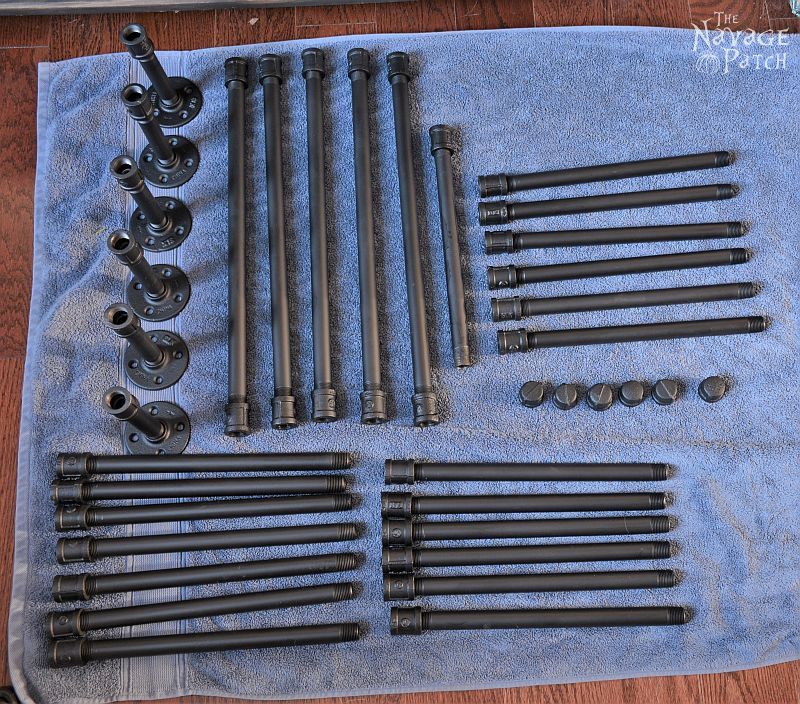
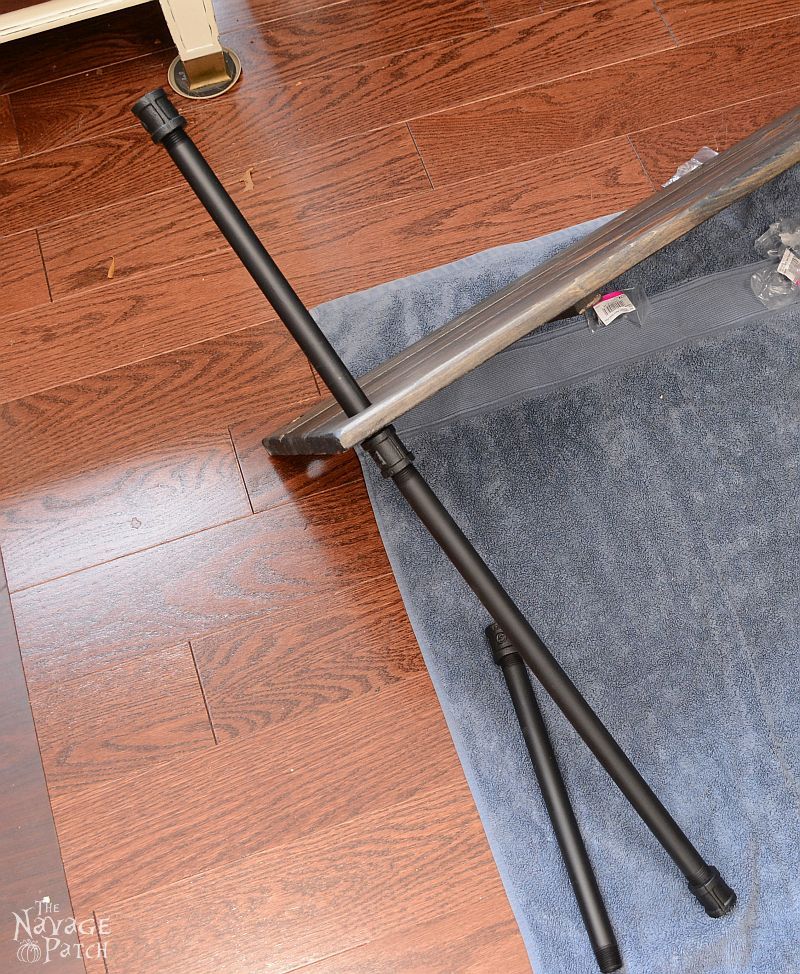
This completed the “pine.” Now on to the “pipe.” We used 1/2″ black pipe from Home Depot, with floor flanges, elbows and couplings. Most of the pipe was 12″, but some was 18″ for the main “showcase” shelf. For this part of the project, I enlisted the Handan’s help. She is my go-to girl when I need something spray painted properly. She has patience. If I spray painted the pipes, they’d look like dripping black candles. Once she painted the pipe pieces, we were ready to assemble.
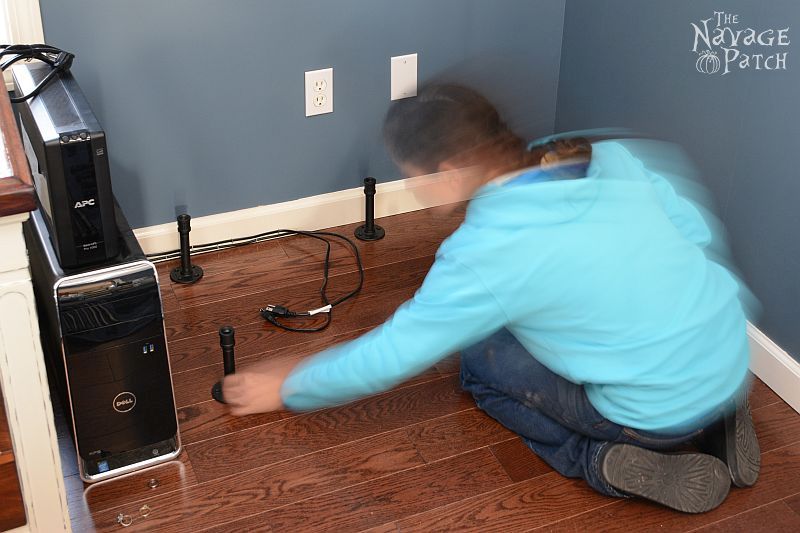
First the floor flanges and risers…
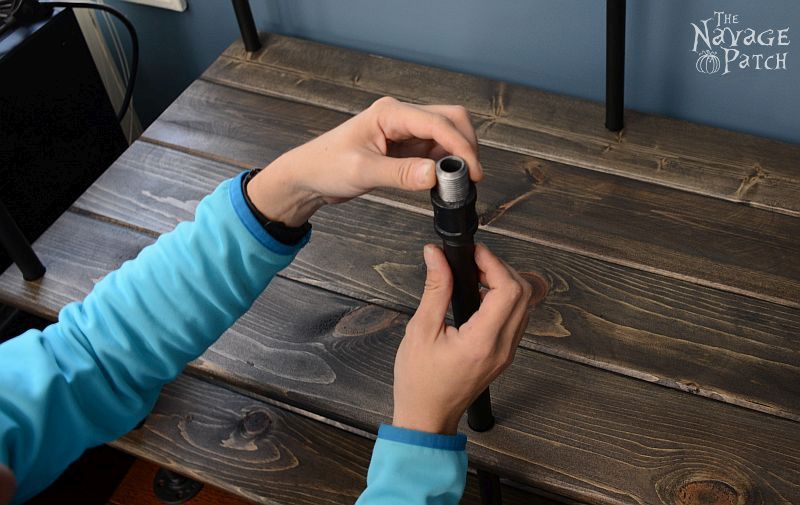
The shelves rest on a coupler underneath each of the holes.
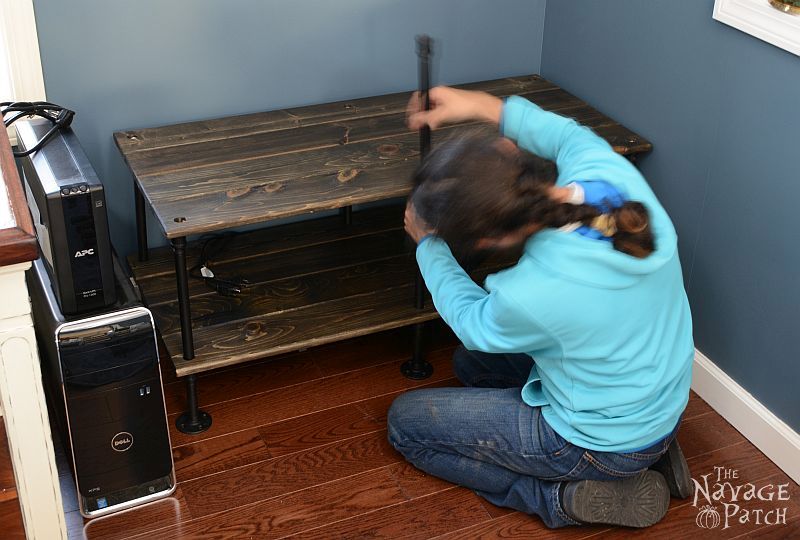
The third shelf was the last of the 4-slat shelves. Here we capped off the front row of pipes by first inserting a 1 1/2″ nipple into the male coupler (keep your jokes to yourself), placing the shelf, then screwing in an end cap.
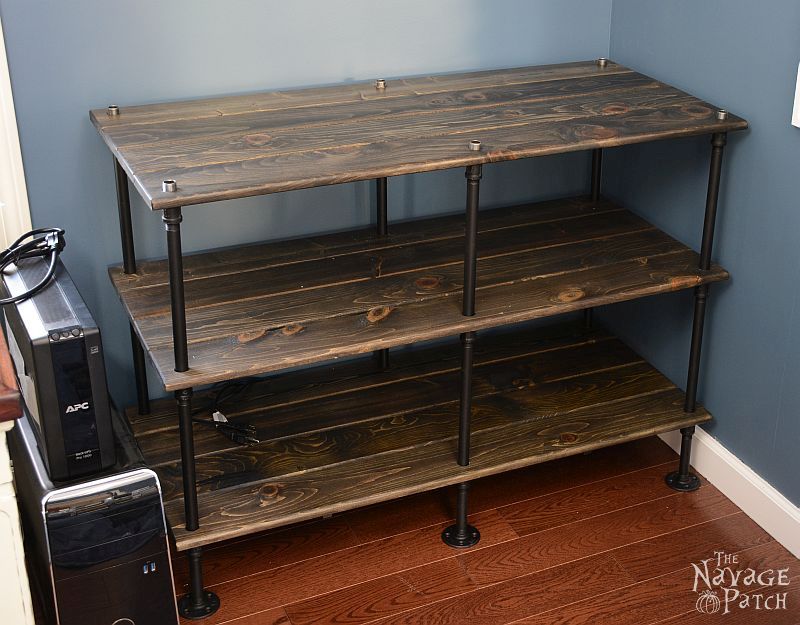

Moving on, we next attached three 18″ pipes to the back row. All the other pipes used were 12″, but since the top 4-slat shelf would be the showcase shelf, it got a bigger space.

The front pipes of the fourth row (that is the first row to have 3 slats instead of 4) drop down and rest on the showcase shelf, but only on the sides, not the middle. Here it is pre-assembled.

Building higher, the showcase shelf becomes clearer.

Okay, here is where we stopped while the final pipe pieces were drying from their black paint shower. I poured a drink (Manhattan), went to the family room and watched the movie Pixels with our son (loved the movie – I was a child of the 80s, and I played all the video games featured in the movie). While we watched, Handan continued to work. Unbeknownst to me (okay that’s a lie. I heard what was happening, but chose to focus on the movie), she assembled the rest of the shelves, so I have no pictures until the next day when we secured the unit to the wall and floor.
Here we are up top. I’ve marked the wall and started inserting drywall anchors.
Once the flanges were screwed into the wall, Handan dabbed some black paint on the screw heads.

Okay, check this out. Handan grew up in a warm climate in Turkey. She’s always cold. Even in summer! So there she was, building the shelving, wearing a winter jacket and snow pants. It was about 67 degrees in the house.

Two screws in the wood floor, one on each end.

Then a little paint in the remaining screw holes.

And we’re done!

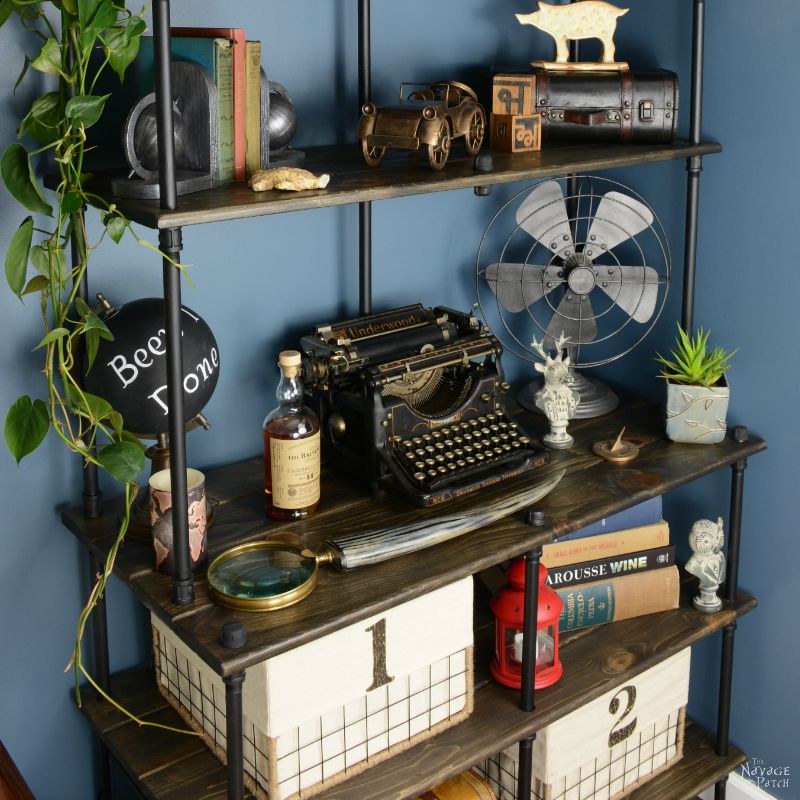
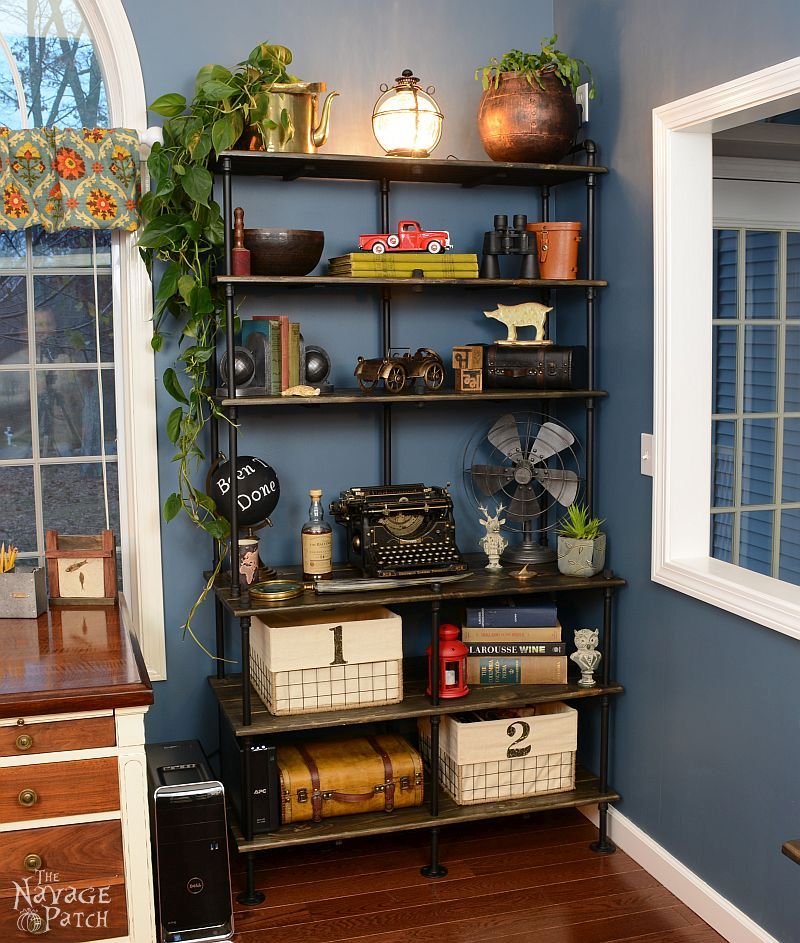
Then Handan put on her decorating hat, and the end result is this! (Handan also made those awesome “1” and “2” baskets. She’ll be writing about them in a future post.)


What kind of pipe did you use?
Hi Sue, we used 1/2″ black pipe from Home Depot.
Oh my gosh. The shelf is Amazing. I love everything about it. Great job!!
Thank you, Stacy!
Wow! This is turned out great and I love the extra storage and display space. My kitchen has some vintage/industrial pieces so this is project is inspiring me!
Thank you, Karla!
Love the project, especially the tongue and groove boards.! Your directions are easy to understand, and it turned out gorgeous! Stopping by from Made by You Monday!
Thank you, Teri! 🙂
I love the look of rustic pine and industrial pipe. Your shelves look amazing!
Thank you, Vineta!
This is beautiful! I love the stain you chose. And this is such a detailed tutorial – what a fantastic resource.
Thank you so much, Catherine!
Love these!! What a great job! Would you mind sharing this at my link party? My readers would love to check out this and other projects you’ve done!
http://www.thestonybrookhouse.com/2016/05/dishing-it-digging-it-link-party-97.html
wow this came out so awesome! I wish I was as crafty as you haha. I want one of these shelves! great job ♥
Thank you, Tianna!
What a great tutorial–love how you styled it too! Thanks for linking up to the Talk of the Town party!
Hi Becky, thank you so much!
This is just awesome, I love this look. I have need to learn how to use a drill.
Thank you, Celeste! 🙂
I absolutely love this project! It turned out beautifully! Thanks for linking up to our Pretty Project Party!
Thank you, Sarah!
Love them ! They are awesome and what a great tutorial. Pinning for later. Thanks
thank you, Claire!
Such a neat design and overall look! Thanks for linking up at our Tips & Tricks Link Party!
Jessica
My Life by Jess
Thank you, Jessica!
I am just awestruck by how fantastic that shelf is! I’m way too nervous to start in on the woodworking and power tools for my DIYs. But, this really makes me want to get there. This looks so amazing!!!
Thank you, Gina! I say, go for it!
That turned out just amazing. You two make a great team! Thanks so much for sharing at Vintage Charm.
Hi Tuula, thank so much! We do make a great team!
The shelf is gorgeous, but oh my goodness, the VINTAGE ACCESSORIES. I’m drooling. 😉 Great job.
blessings,
The How-to Guru {shan walker}
Thank you so much, Shan!
This looks great. It looks like a piece from Dot and Bo. What wonderful talent you guys have! Sharing. Thanks for linking up at Snickerdoodle Sunday!
Thank you, Beverly!
Really great shelves, and fabulous tutorial! thanks for sharing on craft schooling Sunday!
Thank you, Sara! 🙂
OMGoodness!! What a gorgeous job you and Handan did on the shelves. They are absolutely beautiful and styled so beautifully as well. I lived in Izmir when I was a child, so I get here Handan is coming from with the temps. 🙂 I have such fond memories of Turkey and snorkeling in the gorgeous waters of the Aegean. Thanks for sharing at the #ThisIsHowWeRoll Link Party. Pining now.
Thank you, Susan! Lucky you, living in Izmir…I love that city!
I always love to stop by and see what you build while reading your stories. The shelving is lovely and I like the look of the industrial style of with next to that gorgeous desk.
Thank you so much, Pili! Handan and I love when you stop by, too! 🙂
Wow, what a gorgeous statement piece! Featuring it this week!
Thank you, Margo!
That is an awesome piece and I love everything you used to arrange it and how you arranged it. It’s just the type of thing I’ve been looking forin my home. Lately, I’ve been enjoying using older things for decor or making them useful in some way, trying for something unique, just like this. Thanks for sharing.
Thank you, Patty! 🙂
Oh. My. Goodness. This is one of …no scratch that… this IS the most beautiful shelves and styling I’ve ever seen. You guys really knocked it out of the park! Hugs, Holly
Thank you, Holly!!
This look so good! I have been wanting to do something like this for my son’s room, thank you for the great instructions. Also, that lamp is amazing!
Thank you, Dara! 🙂
Great craftsmanship you have! Love the industrial look. Thanks for linking up with Funtastic Friday.
Thank you, Victoria!
Love this project you both did. I have this on my winter to do list. Which is after my summer to do list is done, which will most likely be the year 2020. LOL
Thank you, Christine!
looks fantastic. Love the dark stain you used. It complements the metal pip perfectly.
I am working on some freestanding shelves using your design, but have run into a snag. The shelves are too wobbly because the holes I drilled are a little loose. Do you have any suggestions on how to assemble these as a free standing shelf?
I could not find a detailed list of all the pipe that was used and what size screws
Hi Bea, there is no detailed list, but in the post there is a picture that shows everything I used. Throughout the post I do reference all that I used, from the nipples to the lengths of 12″ and 18″ pipe. For the screws, if you mean what screw size we used to secure it to the wall, we used the screws that came with the drywall anchors. For the floor, I used very small ones, 3/4 inch I believe.
How much for lumber and pipes?
Oh this project was back in 2015, so the lumber or pipe prices wouldn’t be the same even if it was written in the post. The amount of pipes is in one of the pictures and what kind of wood we used is explained in the post. So you can calculate the total cost by just checking the prices from Home Depot as that’s where we bought all the lumber and pipes back in 2015.