Craft Room Painting and Laminate Floor Installation
We paint the walls, ceiling, baseboard and trim and install new laminate flooring in the latest Craft Room Makeover update.
Okay folks, we have a lot of ground to cover in today’s post, so I will skip my usual pre-game ramblings and jump right into it!
As you may or may not recall from my scintillating post on Carpet Removal, we left off with an exposed subfloor and a whole lotta painting to get done.

Since we’re putting curtains on the windows, I got rid of the blinds and painted the window trim. I also painted the closet trim and closet bi-fold doors. All this went down around the time I was painting the French door. I didn’t take any pictures of the trim painting, but I used the same process for all, and it’s the method I also used for the baseboard.
I used to dread painting anything glossy – trim, baseboard, interior doors, etc. If you’ve ever tried to paint over old glossy paint, you know what I’m talking about.
New paint doesn’t like old glossy paint – it’s like oil and water! Oh boy, you should have seen Handan trying to paint the window for our guest bathroom renovation a couple of years ago! Things got a little salty, and I feared I may have married a pirate!
But I’ve discovered the secret to conquering the gloss! You can read all about it in my post on painting IKEA furniture in case you missed it.
After painting all the trim and doors, I turned my eyes towards the rest of the room – walls, ceiling and baseboard.
Baseboard Removal
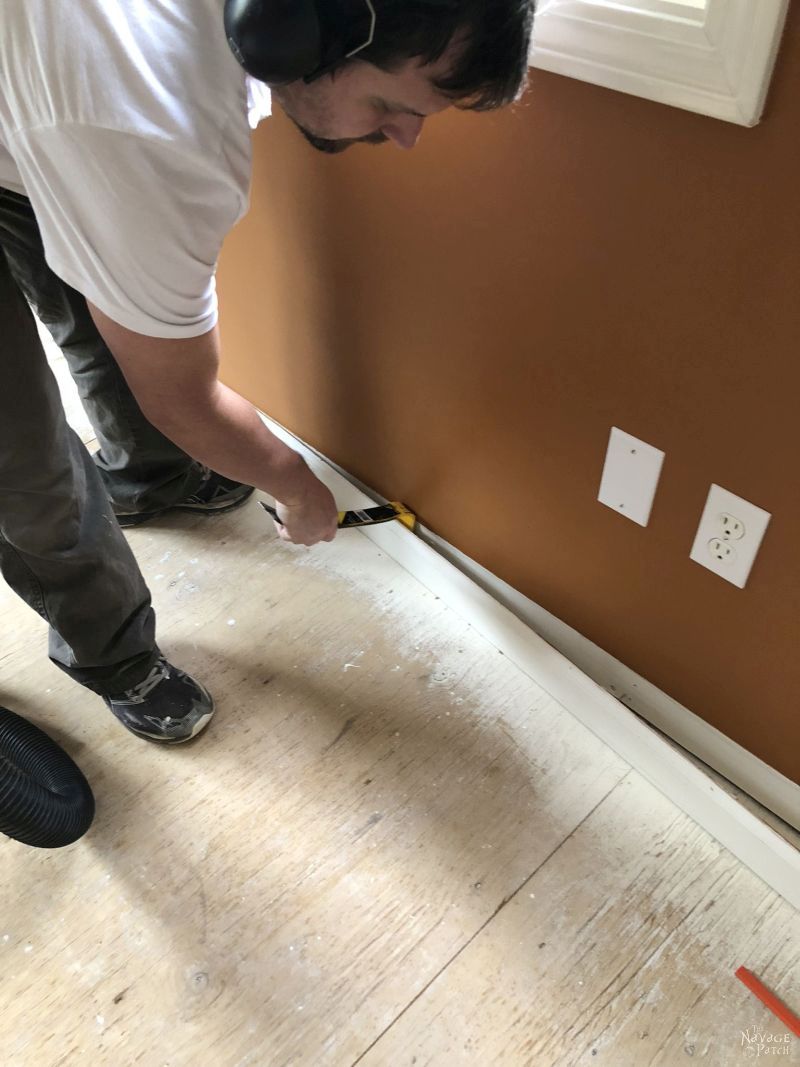
I first removed the baseboard. The first step is to cut through the old caulk with a utility knife. Way back when I wore a dumber man’s shoes, I tried to remove baseboard without cutting the caulk. I peeled off a nice big flap of drywall paper before I figured out the correct way to do it. (And then I became ever-so-slightly less dumb)

The best place to start removing baseboard is to find an end section that’s not in a corner. For this room, it was a small piece abutting the closet trim.
I use my Stanley Wonderbar for all trim and baseboard removal. Just wack it in and yank.
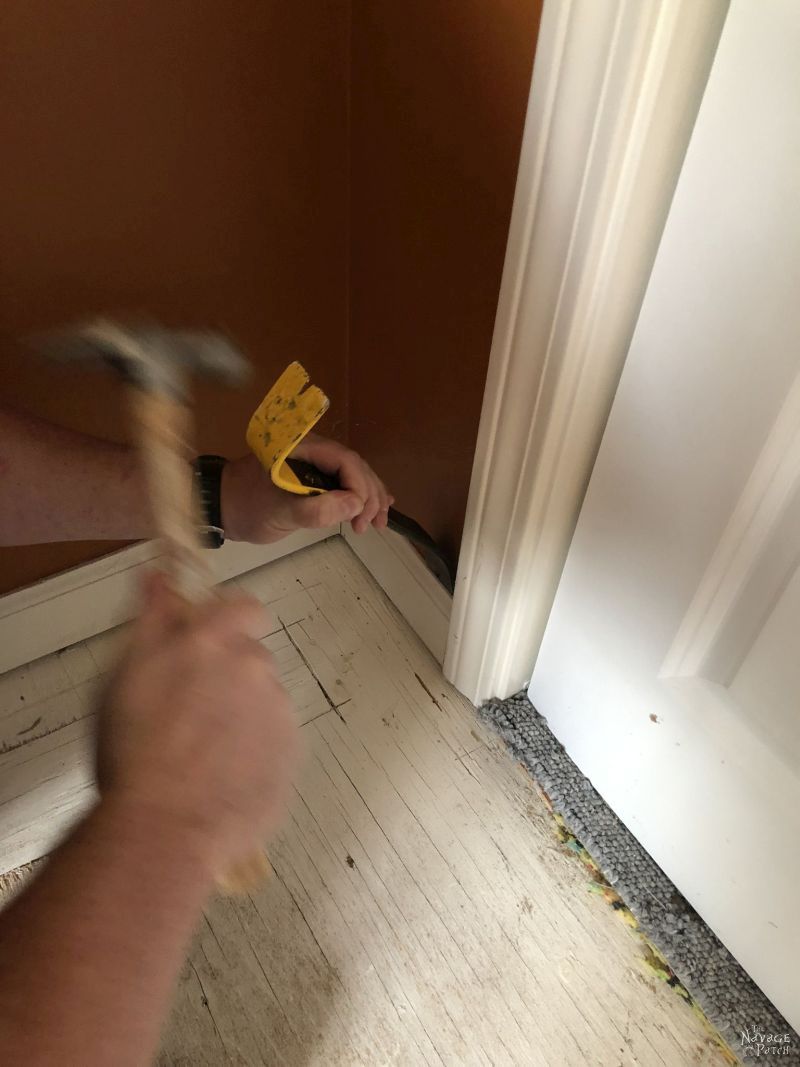
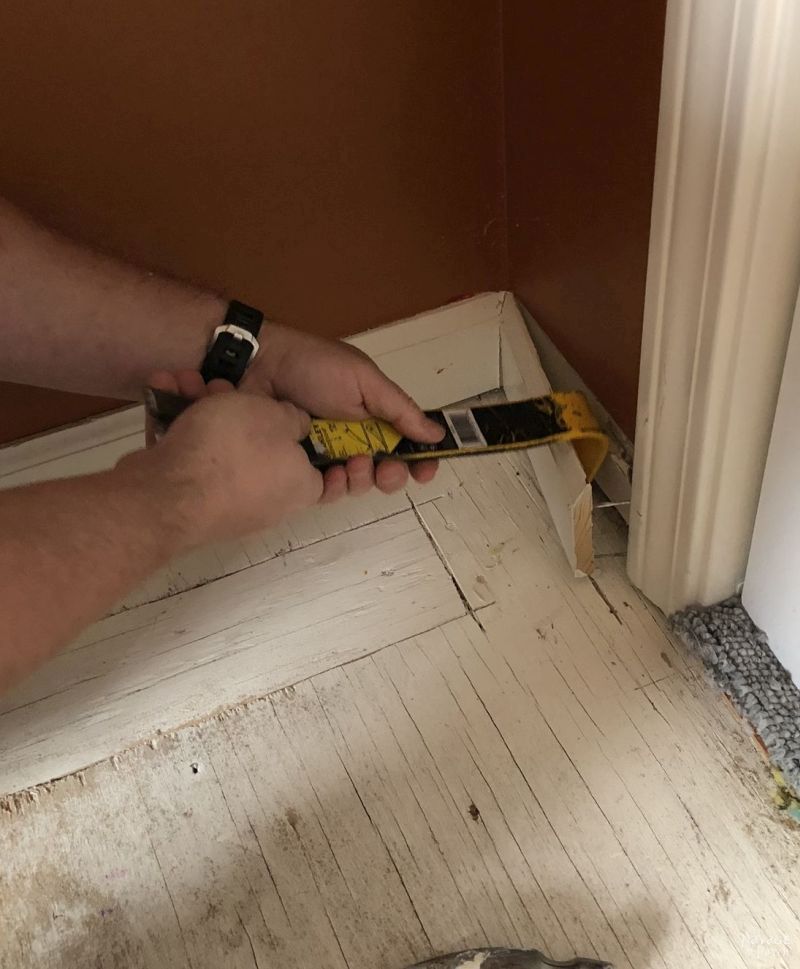

For the longer pieces, I started at one end and pried the board out while walking towards the far edge.
I wear hearing protection when working with pry bars in small empty rooms, otherwise the sound of the hammer on the metal bar sends shockwaves of pain into my thick skull.

Baseboard Prep and Painting
With the baseboard comes nails. Instead of trying to remove them by pounding them back out (leaves holes in the baseboard), I prefer to cut the nails with a Dremel.

This Dremel is a vintage 1980s model. My mom wanted it so she could try her hand at engraving. As far as I know, she never engraved anything, but the Dremel is still going strong! I think this was around the time that she took calligraphy lessons. Spare time was plentiful in the 80s! [Hey Mom, do you want to chime in here in the comments? Did you ever engrave anything? Did you use it for anything else? Can you still write in calligraphy? Inquiring minds want to know!]

After the last nail fell to the subfloor, I flipped the boards over and painted them just like the others.

When the paint dried, I moved the baseboard to the dining room to clear up some much-needed work space. That long piece spanned the room from corner to corner, and I kept slamming it into the walls.
Oh, by the way, you can clearly see that we already bought the flooring in the picture above, but you need to just erase that from your memory, because I’m not ready for you to see it yet. Otherwise the picture coming up of me standing in Lowe’s with a cart full of flooring won’t make much sense, will it?
Jeez, I’m starting to think these bloggers are all full of sh!t.
Honey, you don’t know the half of it!
There is no group of people so full of baloney as bloggers!
Anyway, before slapping some paint on those walls, I had to get the closet in shape.
Closet Prep

I tore out those shelves – literally. There was no other way to get them out! This left some big honkin’ holes.

I didn’t want to spend days patching these holes with drywall compound, waiting for it to dry overnight, sanding, reapplying, waiting, etc.
To speed things up, I decided to try something a little different.
I cut a bunch of little squares of drywall tape.
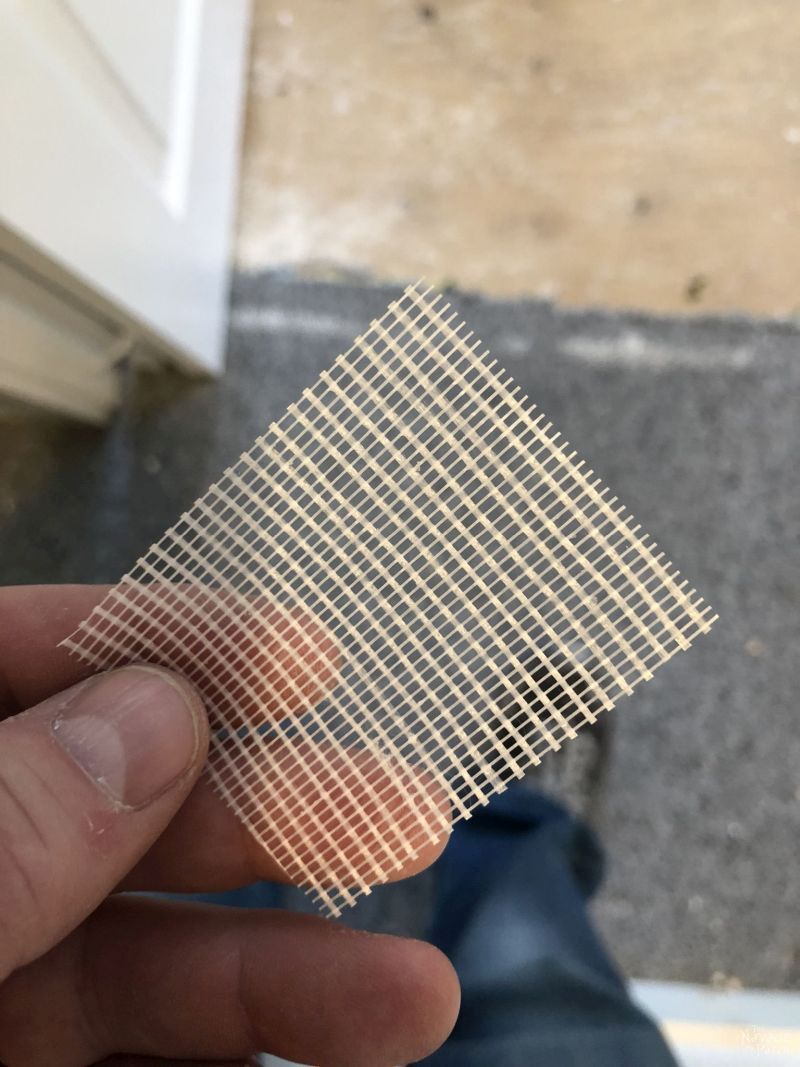
I wadded up the squares and crammed them into the holes.

Some of the bigger holes took two squares.
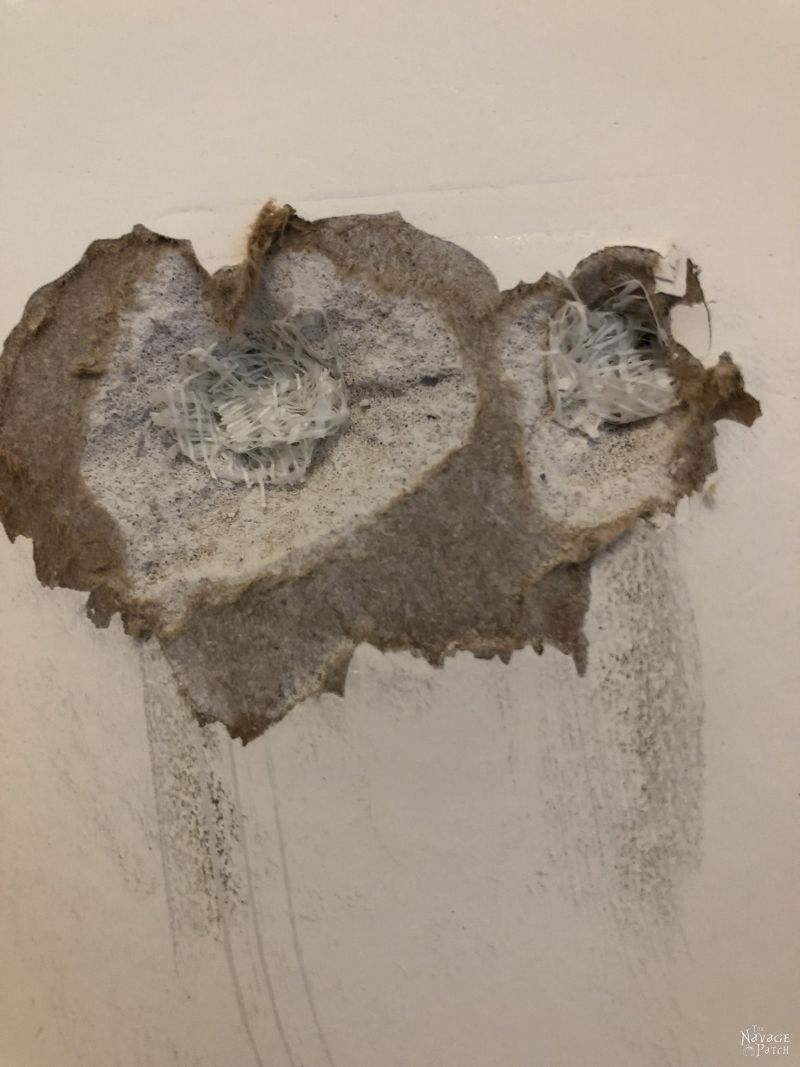
Over the biggest holes, I put a small piece of drywall tape, and then I covered it with a thick layer of spackle.


For the smaller holes, I just used wadded tape and spackle.


Thick dried spackle can be a pain to hand-sand, but I’d be using a random orbit sander attached to a shop vac. It would make quick work of the thickest spackle.
Once I sanded down all the repaired holes, it was time to paint the walls.
Wall Painting
I know, I know, you don’t need to see it – you’ve seen it a thousand times! If you really need to know how to paint a room, my babes wrote the definitive guide on the matter.
There’s one thing I did a little differently this time, though.
So we all know that Behr makes a paint with primer already in it. And we probably all know that their flagship paint – Marquee – claims to have one-coat coverage.
What you may not know is that this claim is so full of horse hay that it makes bloggers look like a bunch of young George Washingtons (remember when he cut down a cherry tree with the new ax he was gifted with on his 6th birthday and when confronted about it, he uttered his most famous words, “I cannot tell a lie, I did cut it with my hatchet?”)1
When we painted Barish’s walls for his bedroom makeover, it took five coats to fully hide the old blue with the new white.
FIVE!
That gets expensive – both in paint cost and our time spent.
For this craft room, we wanted to try something a little different. Even though Marquee has primer in it, I first primed the walls with Zinsser 123, a water-based primer.

We hoped it would cut down on the number of coats of Behr Marquee (Bit of Sugar) I’d need, and we were right! Instead of five coats like in Barish’s room, these walls only needed three coats for full coverage. Total number of coats, including primer: 4. That’s still a lot, but it’s one better than 5! And we saved two coats of paint cost – Zinsser is far cheaper than Marquee!
With the walls freshly white, the yellowed ceiling stuck out like a fart at a perfume convention.
I was about to cross the final frontier of home improvement DIY: painting a ceiling.
1 Would you be shocked and appalled to learn that this, too, is a lie?
Ceiling Painting
I’d been terrified of doing it.
It seemed so illogical and complicated and easy to screw up.
But nothing could be further from the truth.
First, I dismantled and removed the ceiling fan. It was a hideous beast of white and gold. I get 80s flashbacks just looking at it.

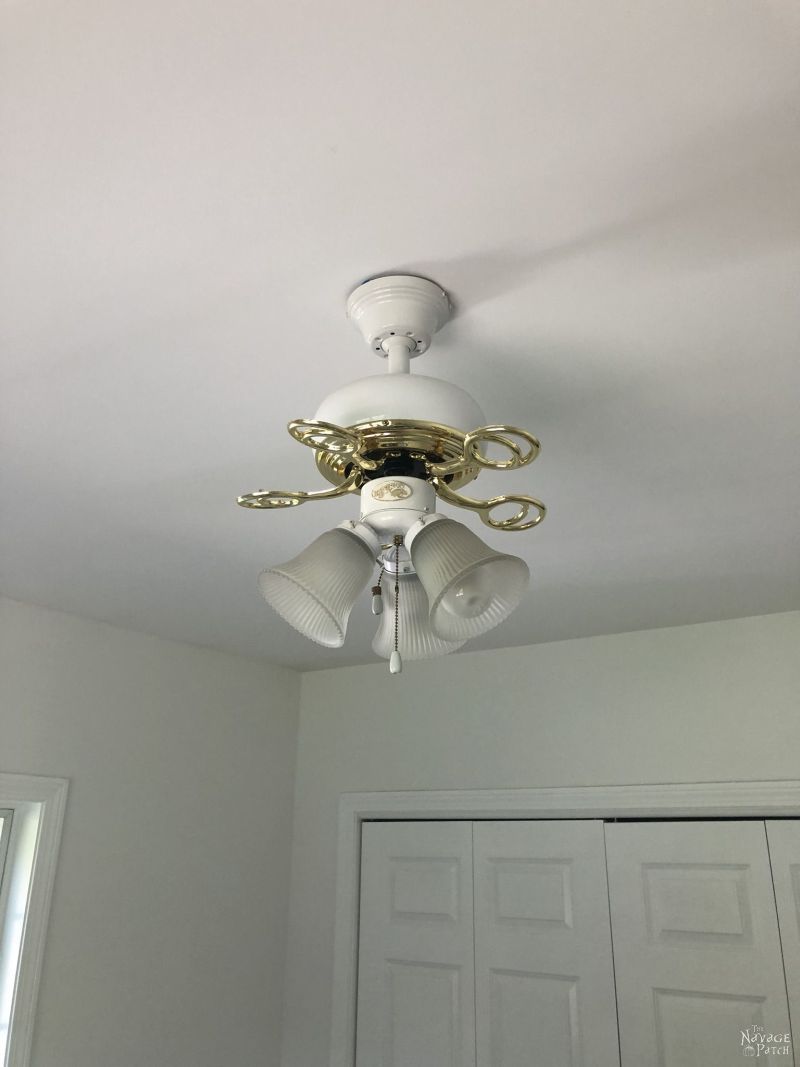
It looks much better as a ceiling hole, don’t you think?

Next, I hung thin plastic sheeting all around the room. Pay no attention to the Pergo. The Pergo is a lie.
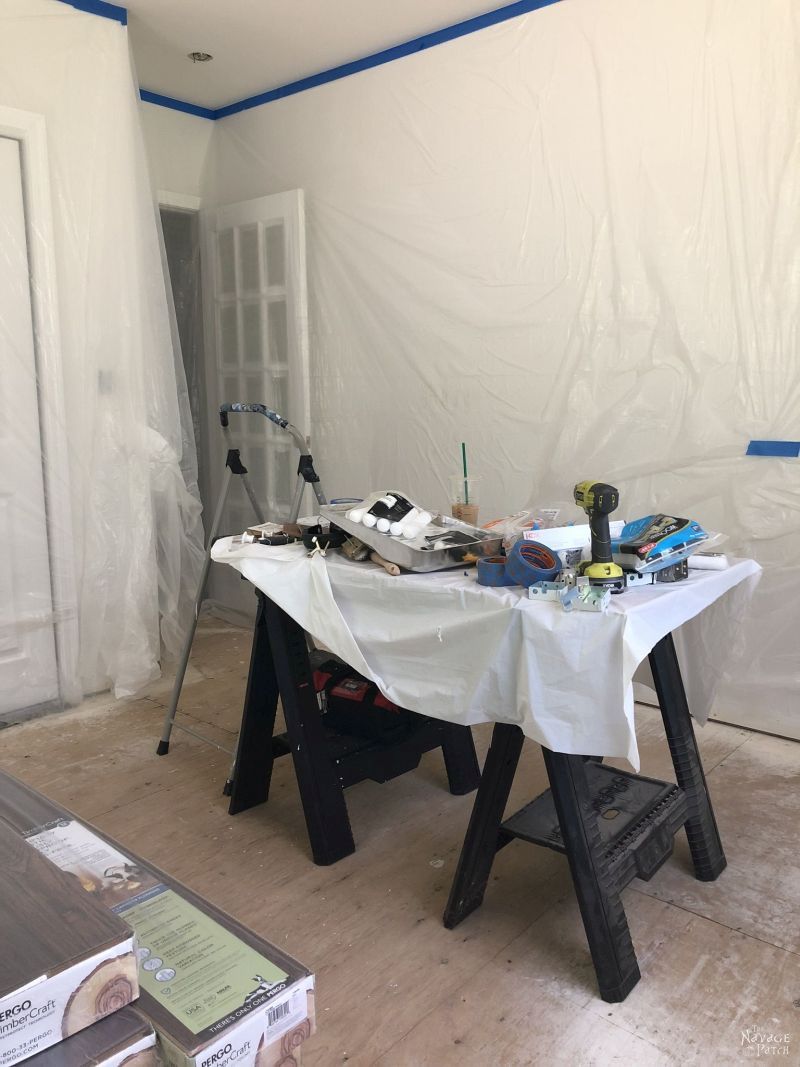
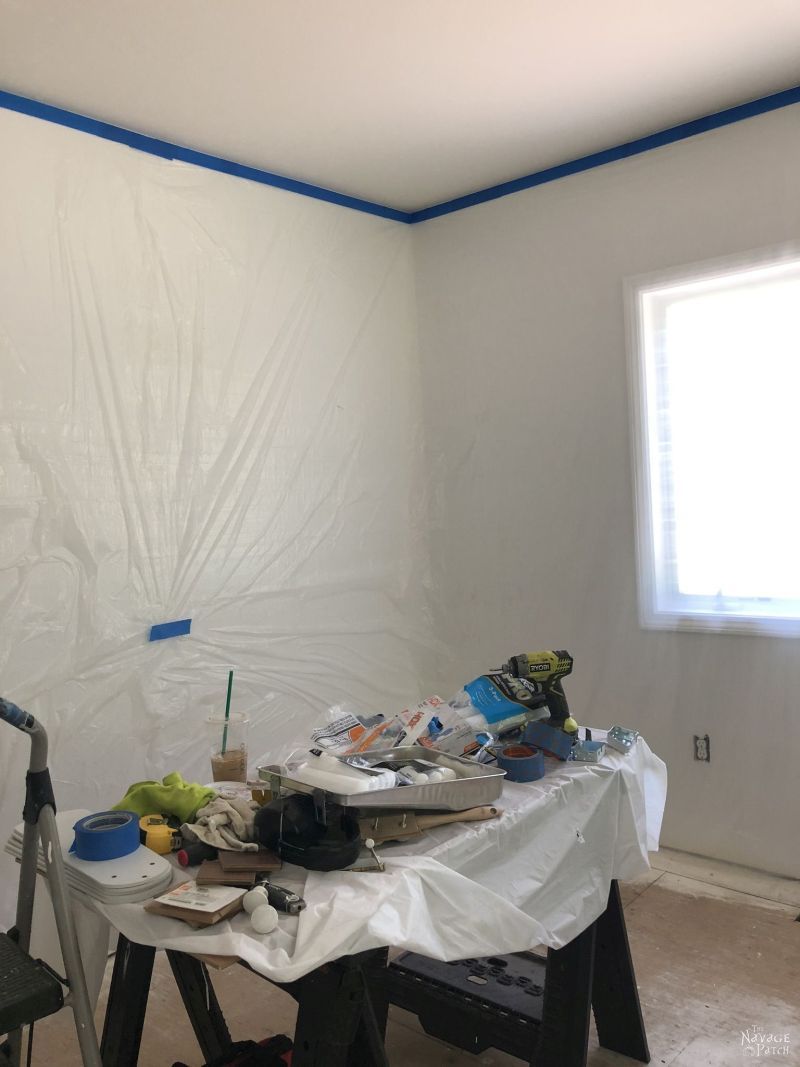
Painting a ceiling differs from painting a wall only in the size of the roller. We use 9 inch rollers on walls, but for the ceiling, I upgraded to 18 inch. Not knowing any better, I bought a 12 inch roller frame. It worked okay, but a two-armed 18 inch frame would have been better. The bigger roller also required a bigger paint tray.

I had leftover ceiling paint from hiring a couple of guys to do a couple of other ceilings in the house – back when I was still afraid.

I set to my job, first with a 4 inch roller around the edges…

…followed by the big one.

The job went quickly with that huge roller! Two coats was all it took, and the ceiling looked perfect! It’s still wet in the picture below, so it appears blotchy.

Laminate Floor Installation
So obviously we already had the flooring picked out and brought home by the time I started painting. But here’s a gratuitous shot of me in Lowe’s with cart full of our flooring supplies: Pergo TimberCraft, Pergo Gold underlayment and a transition strip.

When we got it all back home (and after I painted), I took out a piece to see how closely it would match up with the engineered wood flooring just outside the craft room. Now keep in mind that the entire first floor used to have the same white tile that you can see in the first Guest Bathroom Renovation post. Instead of removing the tile when they wanted to change over to wood flooring, the previous owners just laid the engineered wood floating floor on top of the tile. This is fine – in fact it’s one of the main selling points for floating floors – but it does raise the overall level of the floor.
Our new floor would be just under an inch lower than the existing floor outside the room.
No deal.
You know that feeling when you’re all geared up to tackle a huge project that you’ve kinda been dreading, but now that you’re committed, you’re more excited than nervous and you just want to start it so you can get it over with?
Yeah, we had that feeling, too.
But then we discovered that the subfloor wasn’t high enough.
And we realized we had to raise the subfloor.
By adding another subfloor on top of it.
And that awesome feeling flew out the window and was replaced by weariness and anger.
Why the hell was the whole first floor tiled???
Ugh. Instead of starting to lay laminate flooring, I hopped in the car and went to Home Depot to buy some OSB (oriented strand board) – it’s like plywood’s country bumpkin distant cousin.
Oh, and since I needed full sheets of OSB, I needed to rent a pickup truck.
And then I needed to return the truck.
Oh yeah, and then I needed to install the new subfloor.
FML.
Anyway, I got the OSB and returned the truck only 2 minutes after my first hour. Thankfully, I only got charged for one hour!
While I was bombing down the hill in that rickety rental towards Home Depot, I got to thinking about how many screws I’d need to properly secure the subfloor – dozens of screws per board.
Ugh.
I thought of drilling pilot holes for all those screws, and my lips curled downward in disgust.
I thought of trying to drill them without pilot holes, and visions of screws shooting sideways danced through my head.
It was then I remembered a video I had once watched on YouTube. Some guy was building a table or some such thing. But he had this attachment on his impact driver that made driving screws so easy!
After returning the truck, I ran to the tools aisle to see if I could find it.
And there it was!
I grabbed this little piece of magic and hauled my butt back home.
Click on ‘Next’ to continue.
We love it when you share our posts on Facebook and Pinterest!


I’ll be attempting this myself soon enough and dear Lord, it scares the heck outta me! You did a very nice job. That cut on the joiner piece? Dang. Fantastic work! I might have missed it but where did you start in the room when laying the flooring? At the wall and just work your way across the room?
Hi Jay, I updated the post with that info plus a few extra photos.
Thanks so much for the additional info and photos! We plan to do our whole (one bedroom) unit but to afford it, we gotta do it ourselves. ? But if I do get totally stuck, I CAN always ring Dad (I hear they’re good for that).
It’s easier than it looks, Jay. I think you’ll be good!
‘Stuck our like a fart at a perfume convention! ?? You crack me up every time. Great work…and a LOT of work! It will be beautiful like everything you guys do.
Thank you so much, Erin!! 😀
Hey Greg wanted to share my experience with paint and painting. In two years I have painted 3 houses inside and out and completed a load of one and two room painting. I use only Sherwin Williams paint and never ever have I had to paint more than two coats, usually only one, with or without a primer, usually without. I wait until they have the 30% and 40% sales which are very frequent. Even if a project doesn’t fall during a sale I buy it anyway as I buy less and spend less time doing the actual deed. They have several “models” of paint and I find my favorite is Durations. Also, their primer Extreme Bond is the best I’ve ever used. They even tint it up to 75% with the paint color I’m going to paint (Kelly green paint of unknown finish required primer)!
By the way you taught this old dog a new trick with your masking liquid! I don’t usually tape of anything but older I get window panes are a LOT tedius and this masking liquid was awesome!
So thank you sooo much!
Hi Rita, I’m curious if you’ve used Benjamin Moore and how it compares to Sherwin Williams? At this point, we’re a little fed up with Behr, and we’ve used Benjamin here and there with good results. But I’d love to hear how it stacks against Sherwin, so if you have the knowledge, please share! 🙂
I have used BM and SW on laminate furniture projects. After using oil based primer on the furniture, BM Advance is a smooth, self-leveling, no brush stroke finish! Hands down better than the SW. I also used the Marquee on a focal wall in my living room, not happy with how it went on and dried. Eventually, I’ll repaint with BM interior.
Can’t wait to see how the craft room turns out!
Thanks for the info, Marlene! 🙂
Love Love Love it! Can’t wait to see the final room! Oh the suspense! Your blogs are always a joy to read!
Thank you, Tracy! More coming up soon! 😀
I am so proud of you and Handan! What a great job you are doing. Can’t wait to see it finished. BTW, did they every find the mold for you? I want to buy one.
LOLOLOL! Pretty sure they threw that mold into the REJECT bin! :D:D:D
It looks great! Love the dog butt at the end too. LOL Pets are such goofs. We have solid oak hardwood in our house, but I plan on installing wood-look vinyl plank flooring in place of the carpet in our basement in the near future (maybe next spring). That install kit will come in just has handy for the vinyl since it installs in a similar manner so I will have to pick one up.
Subfloors are a pain. We had to actually replace some pieces of sub-sub floor with dry rot when we took the ceramic tile out of our kitchen 2 years ago and replaced it with hardwood. We had holes we could see into the basement before we replaced them. And that first layer was thick planks cut on a 45-degree angle. That was not a fun project. But it was worth it in the end because the wood floor looks way better than the tile.
That may have been a pain, but those thick planks sound like a way better subfloor than crappy OSB. I take it your house was built back in the days when builders had pride, LOL! 😀
Yeah it was built in 1954 with an addition put on in 1989. When we bought in in 1998 it had some fugly decor from that 1989 remodel.
What a fun room redo!!! Loved the hole filler inspiration!!! Will definitely use this tip!!! Can’t wait to see finished room.
Thank you so much, Frani! Yeah, that’s a neat trick for the drywall holes. I’m all about saving time when it comes to prep! 🙂
It’s coming along great.
First…FML….hahaha that is the code for my water filter replacement….I never have a problem remembering it.
Second, why didn’t you paint the ceiling first? I may have missed that explination..
Third, no comment from Mom yet.
???
Keep sharing. It motivates me.
Hi Margie, I was really hoping I wouldn’t have to paint the ceiling when I painted the walls, so I did them first. But, wow, once they were white, there was no avoiding it, LOL!
I love seeing the progress with this project. I’m planning something similar myself. All tips are welcome. Regarding the paint- I can’t offer a comparison of Sherwin-Williams to Behr. However, I have used Benjamin Moore and I am so impressed by the quality of their paints. I will use it again for future projects. I even used it for my chicken coop and the hens have yet to destroy it!
Yep, we’ve liked what we’ve seen so far with BM. We’ll give SW a try, just see how it compares though! 🙂
‘Mom’ here……
As for the Dremel, I tried engraving on something made of wood. It didn’t look right.
Every once in a while, I play with writing a few letters in calligraphy. They don’t look right either.
But with a PTA group long ago, I learned how to make a macrame hanging plant holder. It looked great!
Then she had a son…and he didn’t look right either, lol! 😀
You may have thought your last post was boring but I read it and even showed it to my husband. We are ripping up carpets and it was super helpful. I’m loving this process and. Your posts always make me laugh.
Thank you, Angel! Well, good! I’m glad it helped!! 🙂
Curious how the laminate is holding up to doggie claws? Any reason you didnt choose the laminate with attached backing vs underlayment separate? With a house full of boys, we all laughed at your perfume convention humor. Love your blog – keep the inspiration coming!!#
Hi Marcia, so far it’s holding up great to doggie claws! The colors and styles we liked were all of the type that needed underlayment, so it wasn’t really a conscious decision not to use the kind with the attached backing. Now that we’re aware of that type of flooring, we may be using it when we makeover the upstairs guest bedroom. 🙂
I have to admit, I hadn’t read your carpet removal post only because I don’t have any carpet left in my house, but I have read it now! I am so surprised you were worried about painting a ceiling considering all the tricky woodwork you do! I recently learned that when painting ceiling you should paint it starting on the wall with the window(s) and go lengthwise so if there is any stroke marks the sun and light won’t highlight them. Fortunately, I have always just done this instinctively! I love colour so I am waiting to the end to decide if I like the white walls. I do like how they brighten the room! I can’t wait to see the final product! BTW, I love the floors!
I was terrified, Giselle! But no more – ceilings are a breeze! I love your tip about which direction to go. Fortunately this room has windows on two sides, so I’m safe! 🙂