DIY Halloween Chandelier
Learn how to make a spooky Halloween Chandelier from Dollar Tree materials that will impress everyone on your street this year!
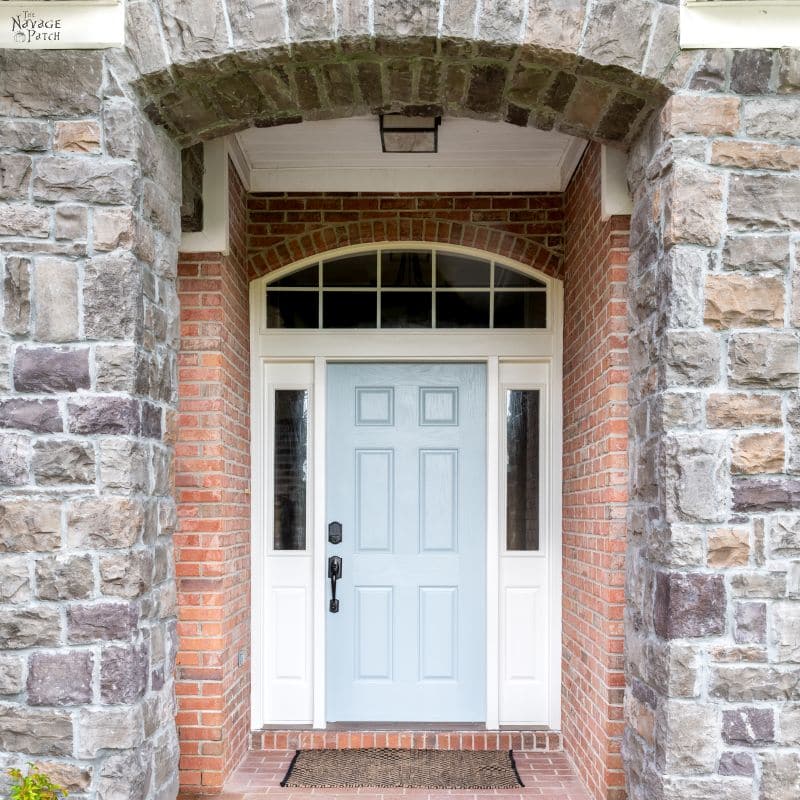
Our brick front entry has two grand stone columns, a stone arch, a beautiful blue front door and white plastic ceiling from which protrudes a sickly wimp of a light. The weak and wheezing thing only manages to throw out a few lumens of jaundiced yellow light – hardly enough to penetrate more than a few feet in these dark Northwest Florida nights.
I suppose the upside is that the pale anemic light is too dim even to attract bugs. Why would they bother with such a pathetic thing when the stars above offer so much more illumination?
Recently, the light bulb inside burned out. Burned out, because of course such an underwhelming fixture was powering a yellow incandescent bulb from last century.
When the frail and elderly bulb finally threw out its last photon, no one was there to see it. The world turned for an untold number of days and nights until one bedtime I noticed that the front entryway was ever-so-slightly darker than usual.
Instead of wasting calories to climb a ladder and feed the whimpering thing another bulb, we decided to upgrade it with an outdoor pendant light from Amazon.
But just as your ladder-climbing, bulb-slinging author was about to mount the first step, a call rang out from inside the house.
“Hey Babes!” I froze, foot poised above the first step of the ladder. Then, footsteps in the distance.
“Hey Babes!” Closer now. More footsteps.
Just then, the door flew open. My wife stood framed in the doorway.

“Stop!” she bellowed, though I stood mere feet from her mouth. “Don’t hang that yet!”
“My eyebrows aren’t going to raise themselves any further, woman! What is it you want?”
“I want you to make me a Halloween chandelier,” she said and then she smiled.
I placed the pendant back in its box to await November.
“Let’s do it,” I said, and we lit out for Dollar Tree to gather our supplies.
DIY Halloween Chandelier SUPPLIES LIST
Affiliate links are provided below. Full disclosure here.
- Hula hoop – small size (Dollar Tree)
- 3 Dollar Tree garden fences
- Glue gun and hot glue sticks
- 2 creepy cloths (Dollar Tree)
- 6 Dollar Tree plastic skulls
- Zip Ties
- Dark color gel stain (can also use regular stain)
- Battery operated taper candles (we used these remote controlled ones from Amazon, but Dollar Tree has battery operated taper candles 2 for $1.25)
- 2 plastic chains (Dollar Tree)
- Battery operated waterfall string lights (optional)
- 2 plastic tinsel spider nets -Dollar Tree (optional)
- Wire or small plastic chains (optional)
- 4-5 plastic Halloween necklaces – Dollar Tree (optional)

We love to see our DIY Halloween decor out in the wild! If you make this Halloween DIY decor for your home, take a picture or video and post it on Instagram, be sure to tag us – thenavagepatch
DIY Halloween Chandelier VIDEO Tutorial
Watch our 2-part short and fun videos below for an overview of our DIY Halloween chandelier before you read the detailed step-by-step tutorial.
VIDEO TUTORIAL PART #1
VIDEO TUTORIAL PART #2
More Easy DIY Halloween Decor Ideas

- DIY Halloween Fire Wreath
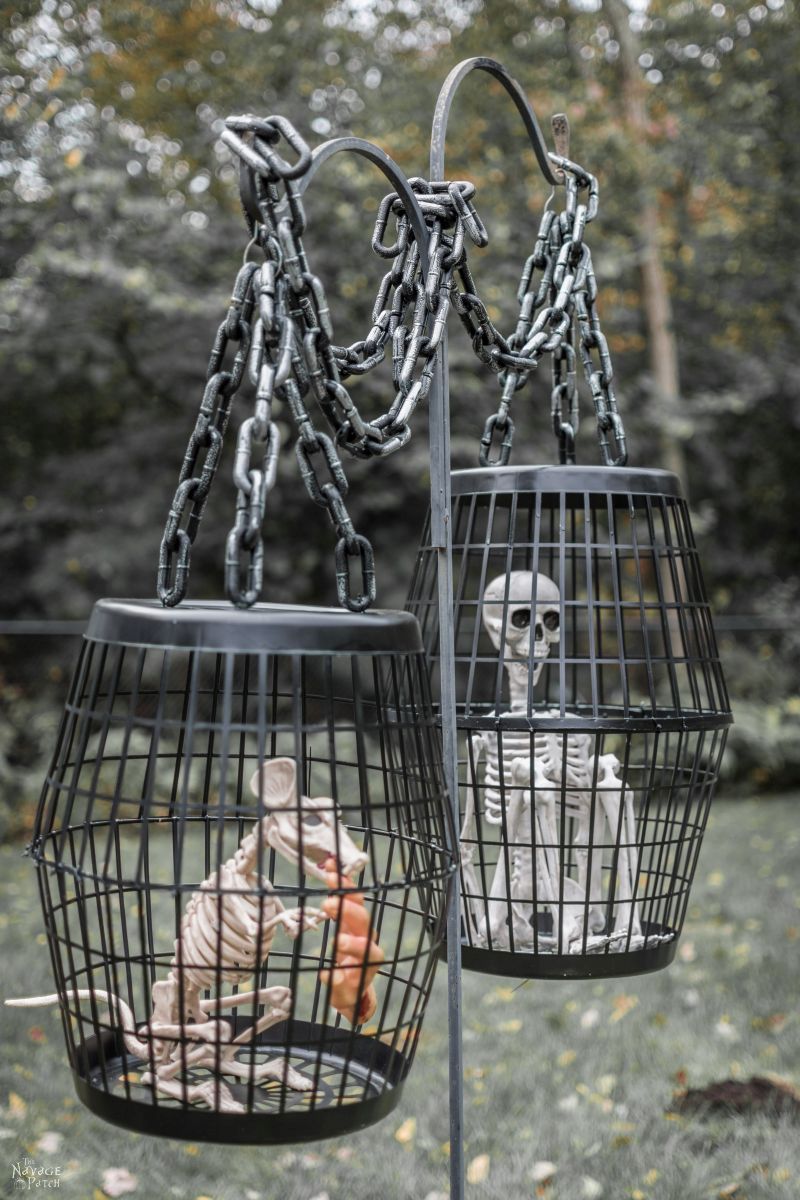
- Hanging Cage Halloween Prop
- DIY Dollar Tree Halloween Lights
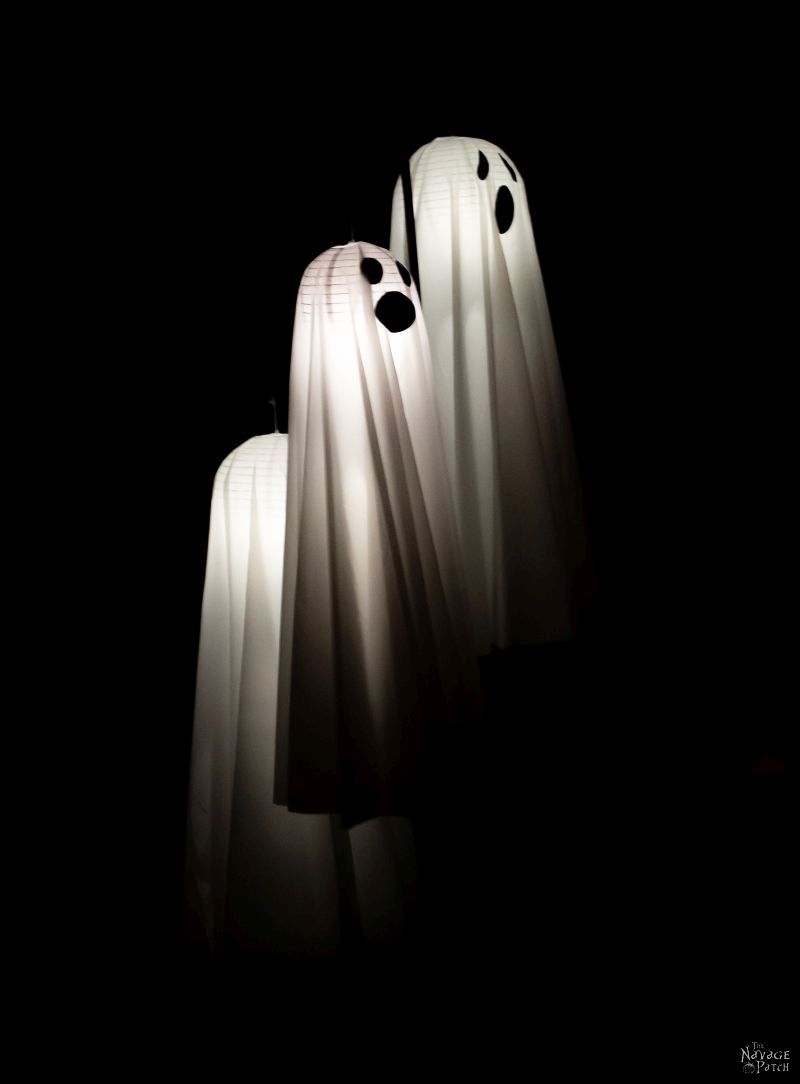
- Easy Lighted Hanging Ghosts (A Dollar Store DIY)
- Free Vintage Movie Monster Printables
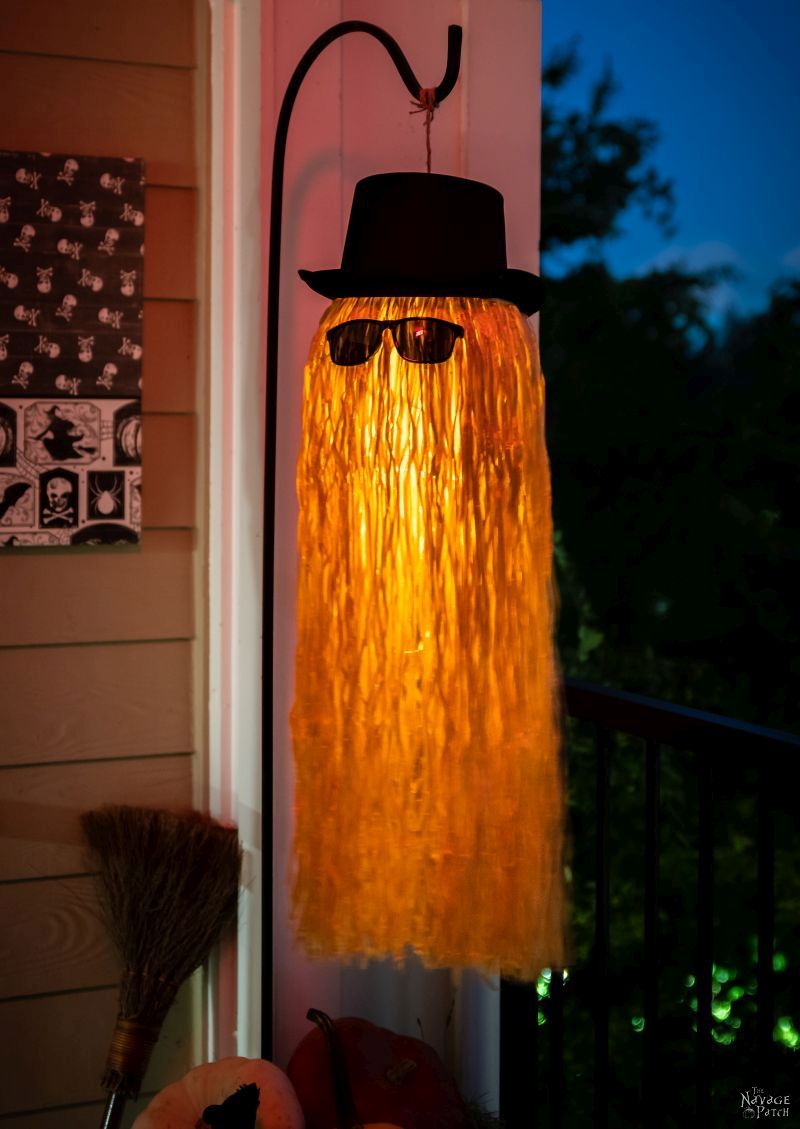
- DIY Cousin Itt Pathway Light
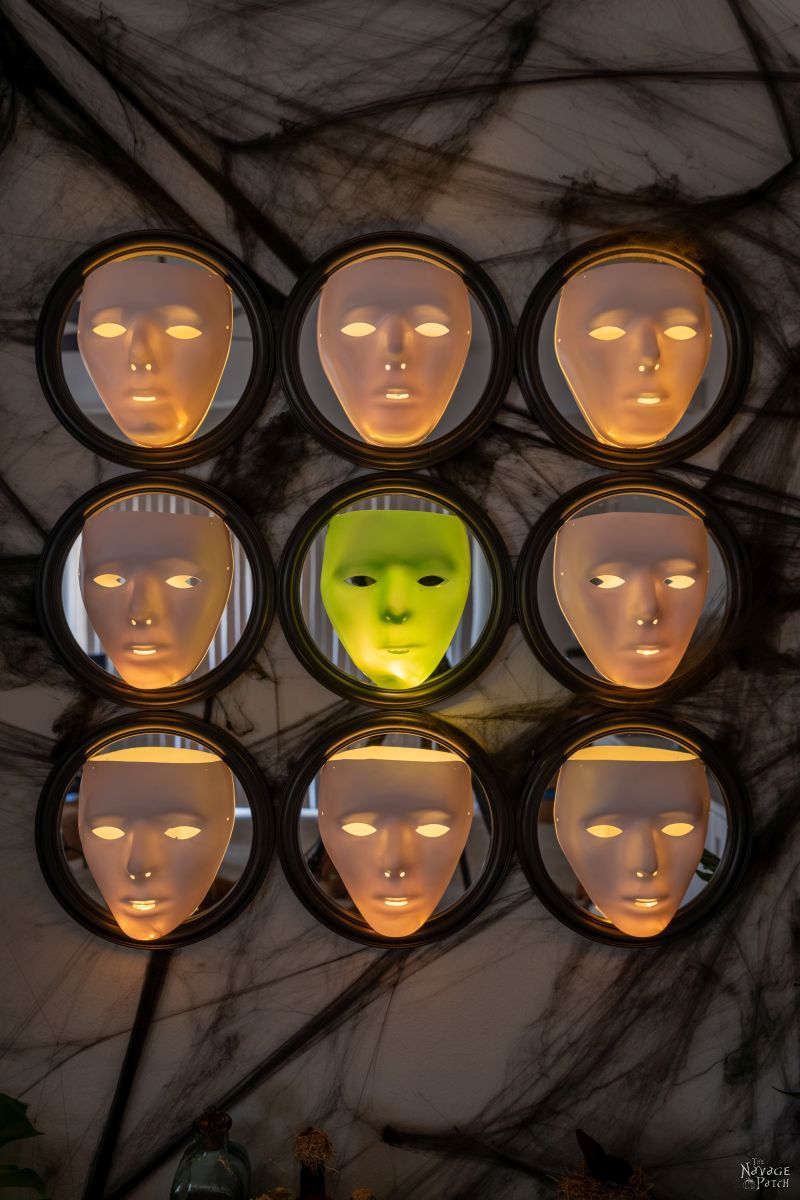
- Gallery Of The Faceless – Easy Halloween Wall Decor
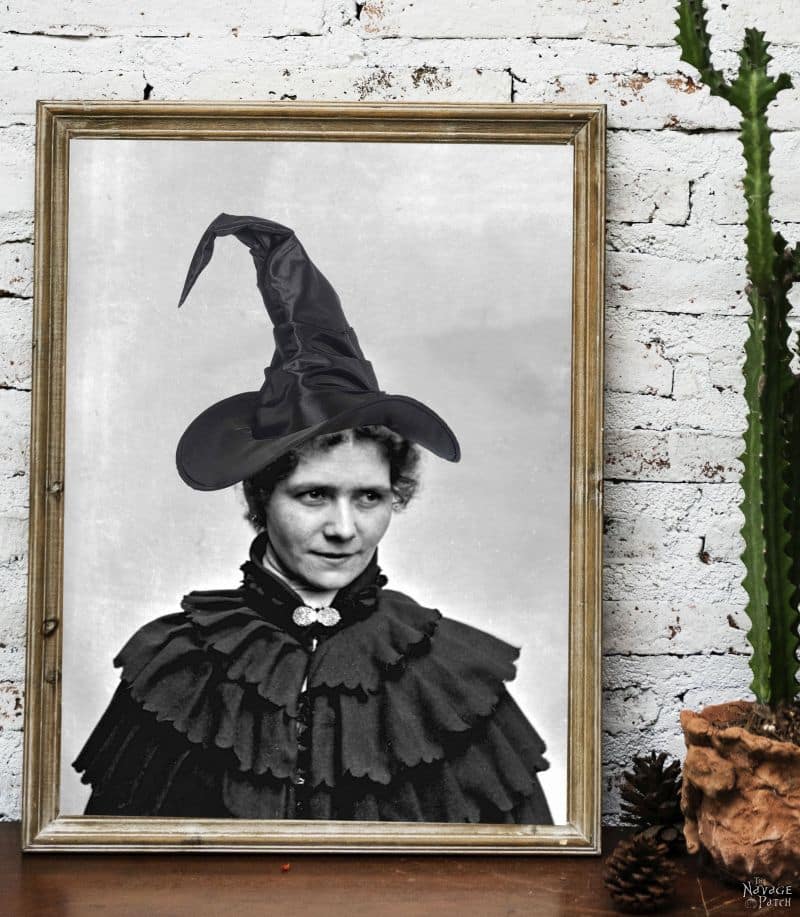
- DIY Lighted Witch Hat (Grandin Road Inspired)
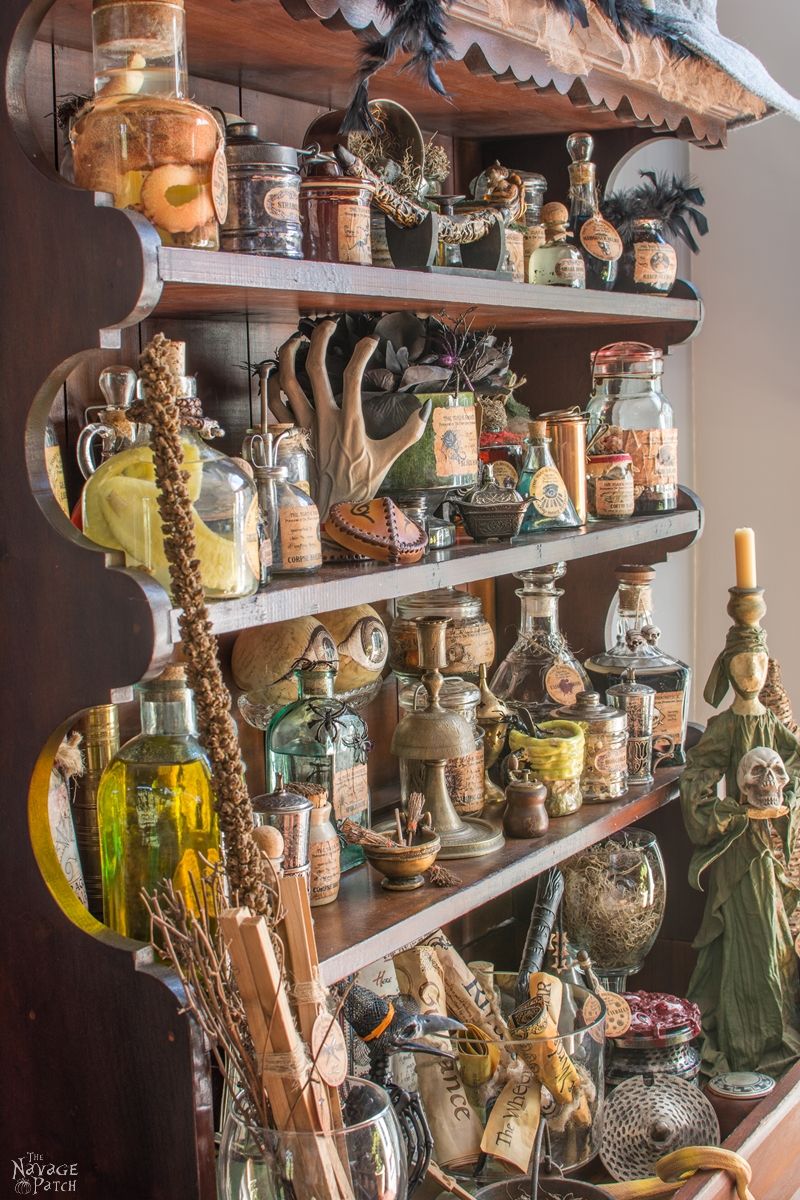
- Apothecary Jars And Free Printable Labels
- Free Vintage Witch Printables
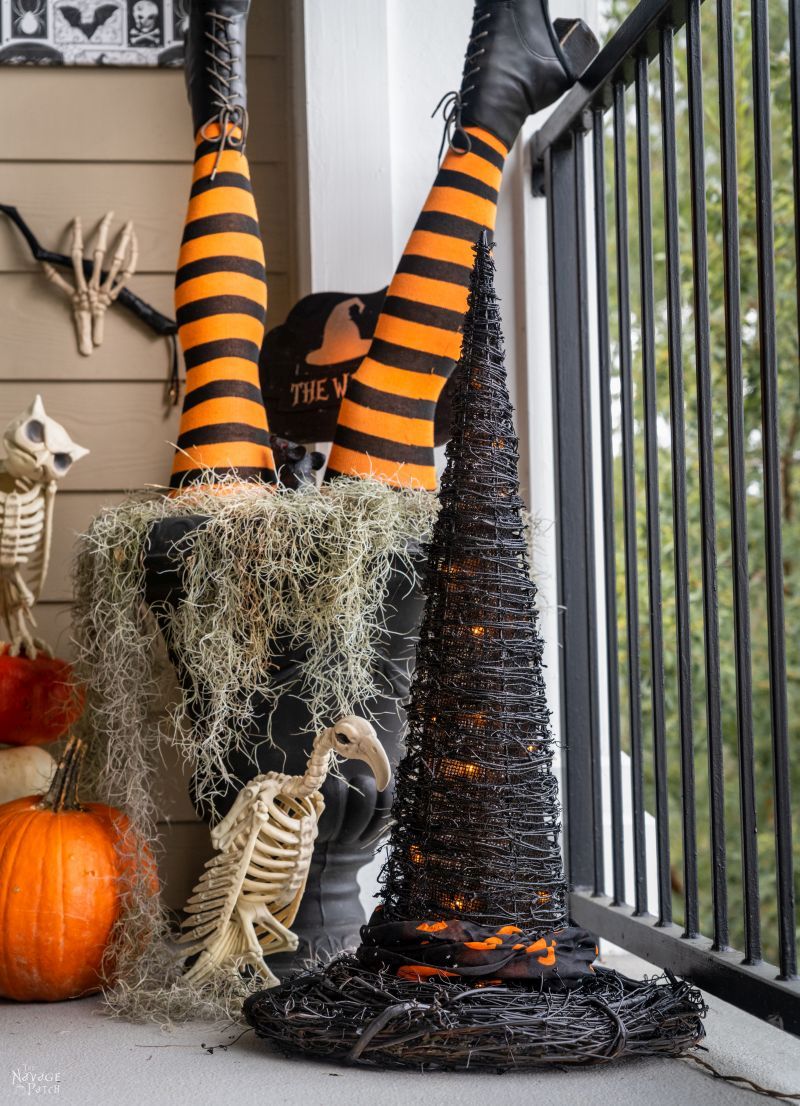
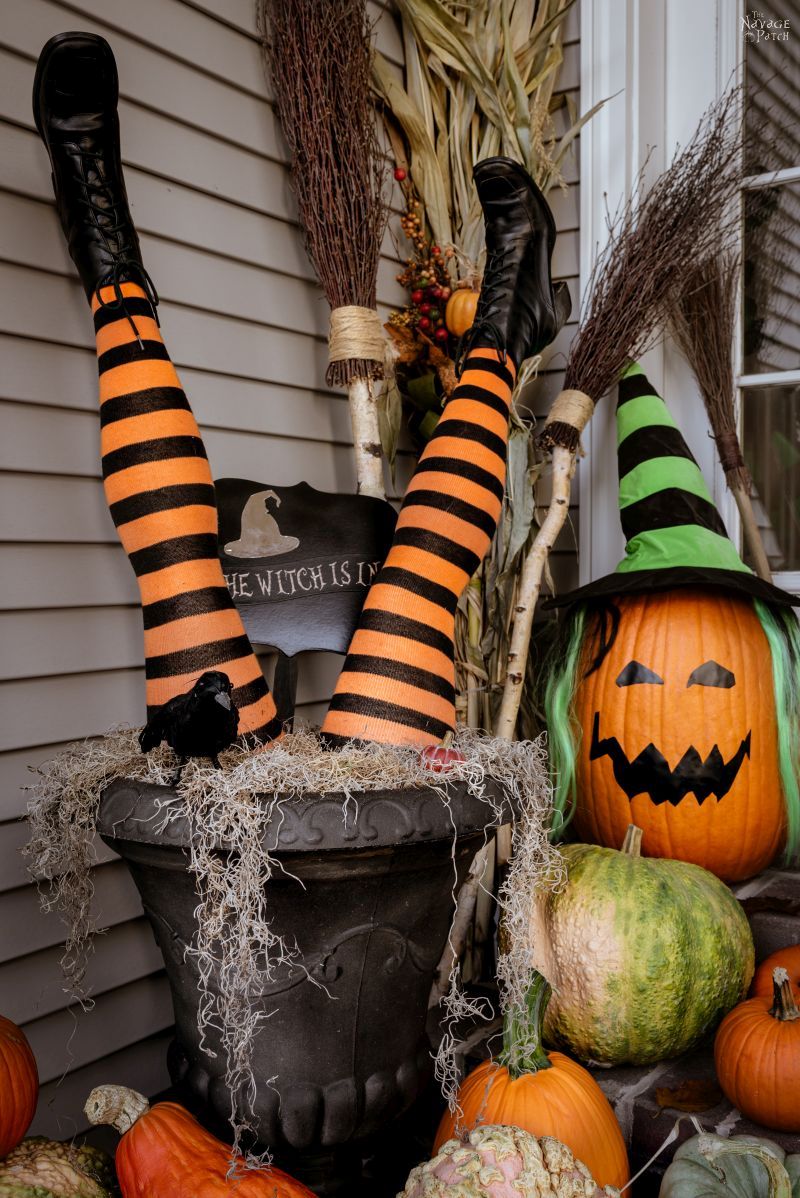
- DIY Witch Legs (Grandin Road Inspired)
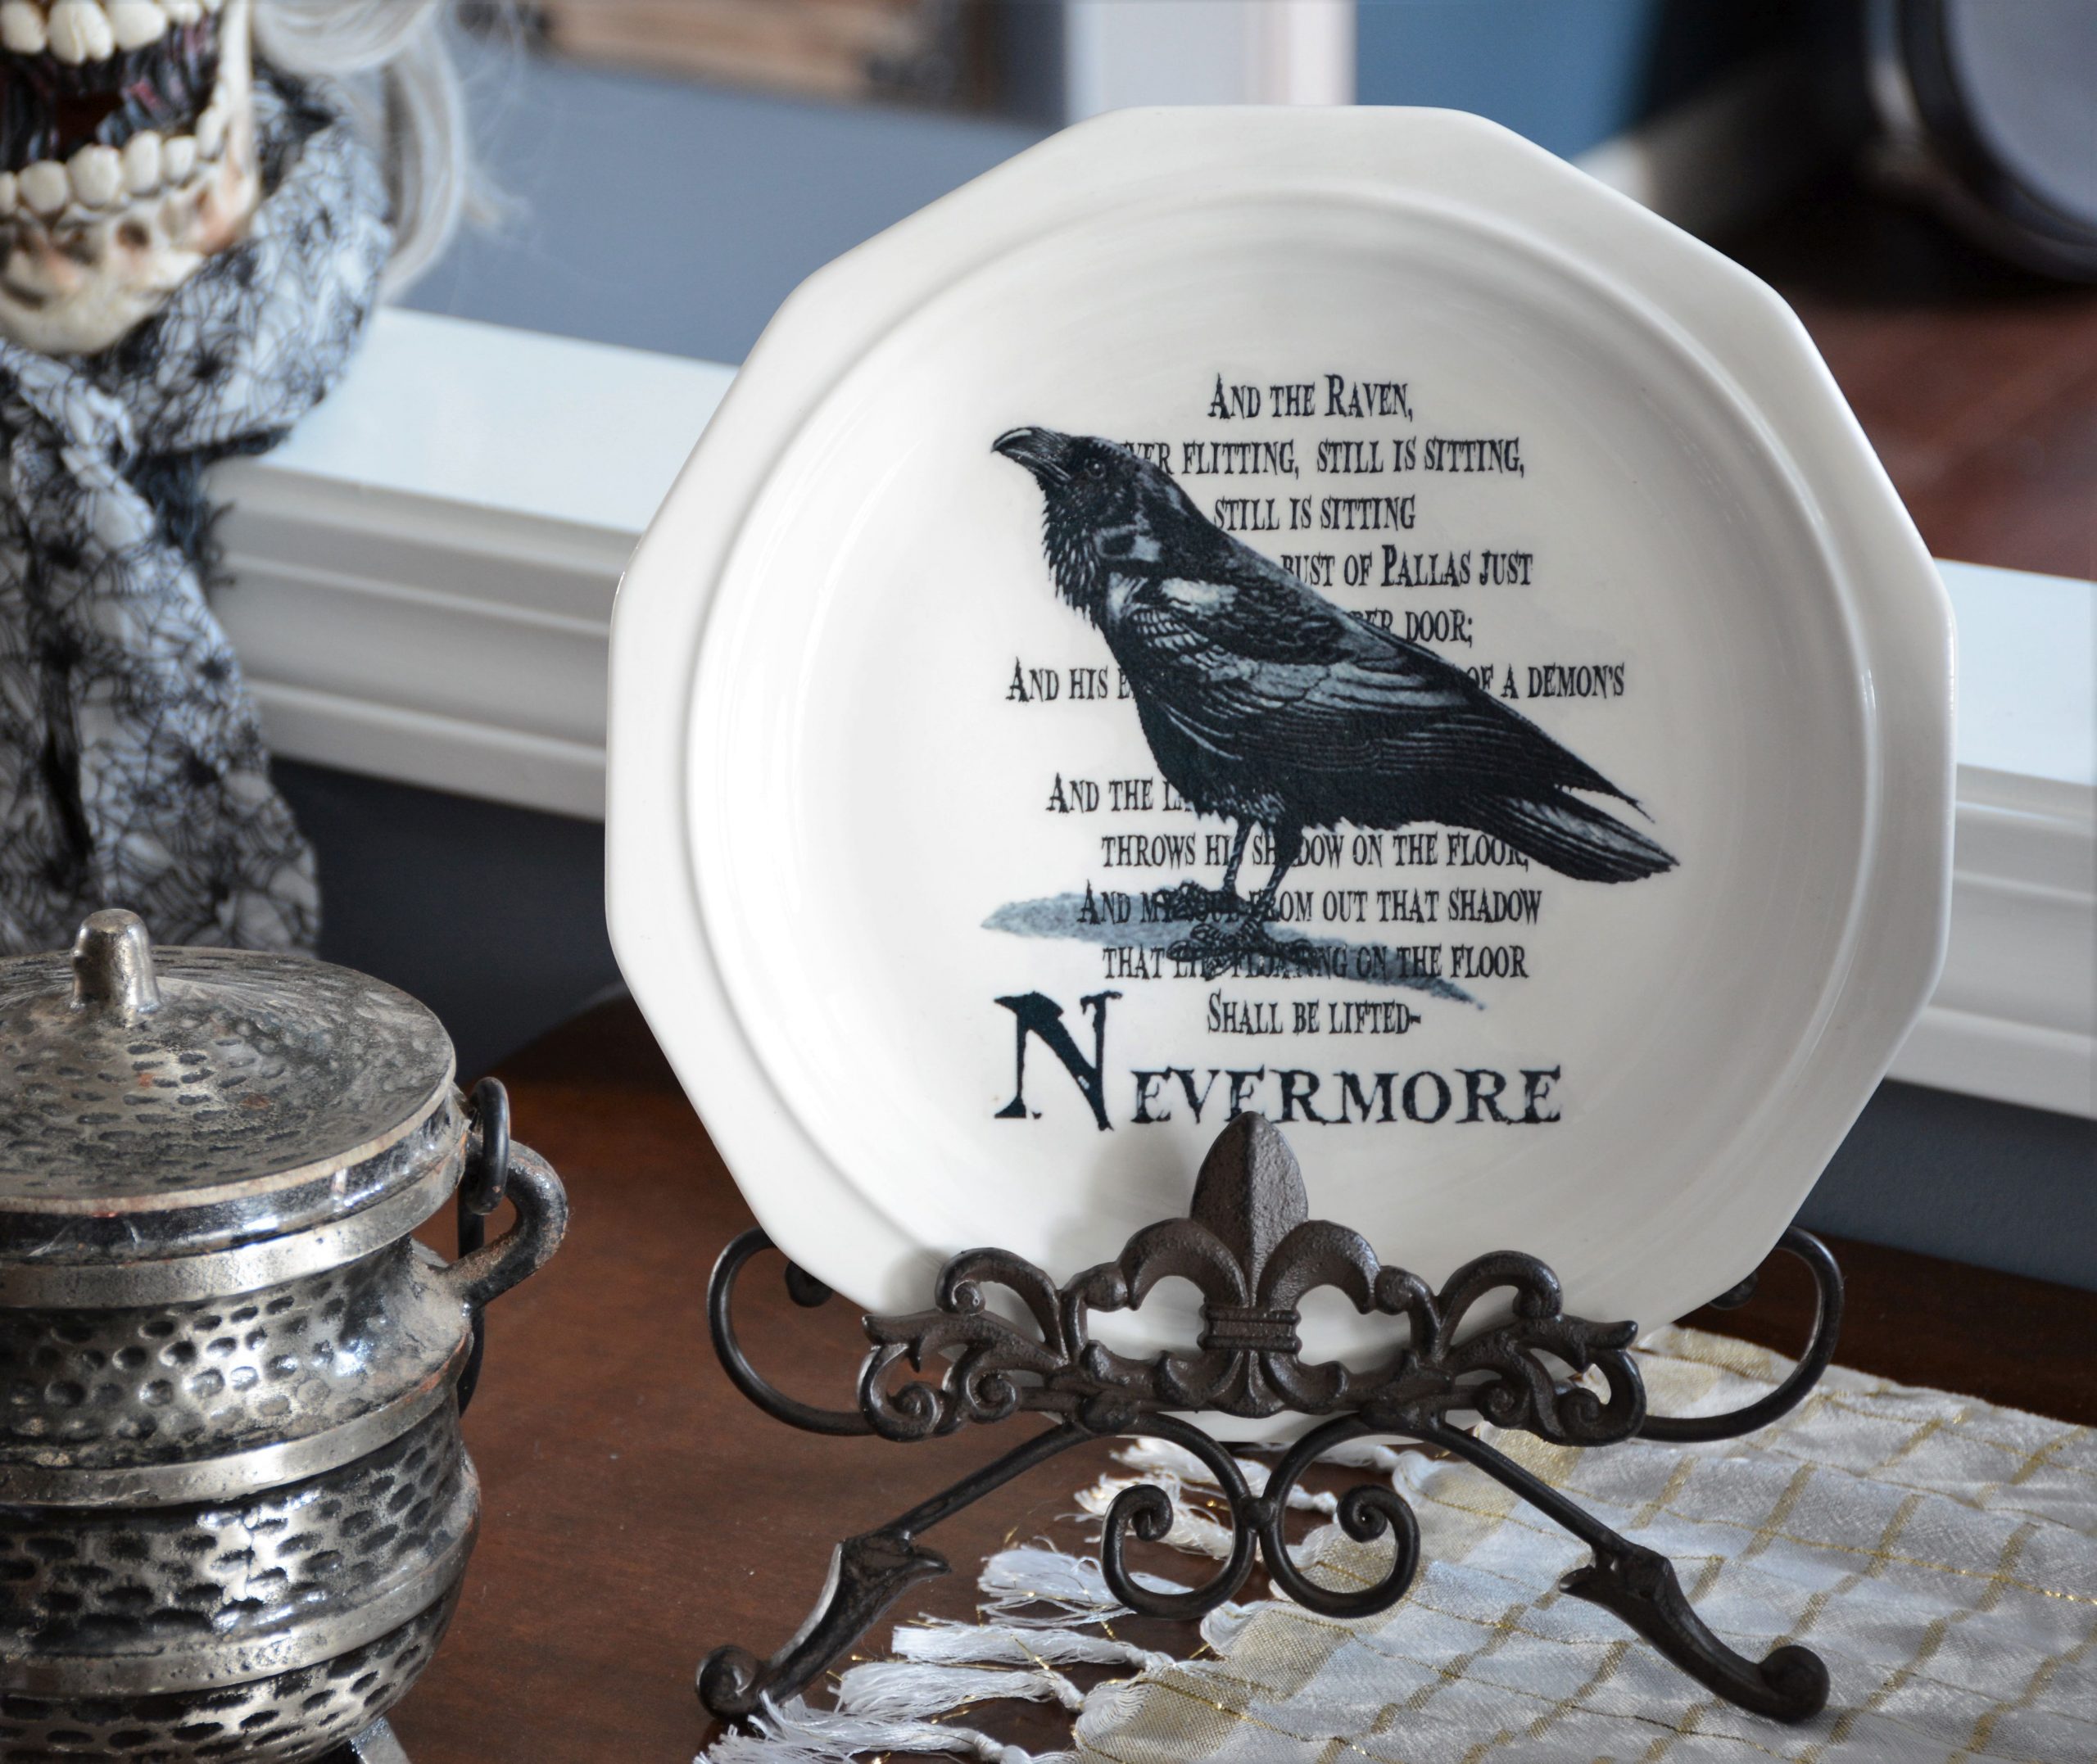
- Dishes Of Darkness: Pottery Barn Inspired Halloween Plates
How to Make a Halloween Chandelier
Step 1 – Remove the hula hoop wrapper
The hula hoop comes wrapped in a psychedelic holographic covering. Fortunately, it’s easy to peel off!
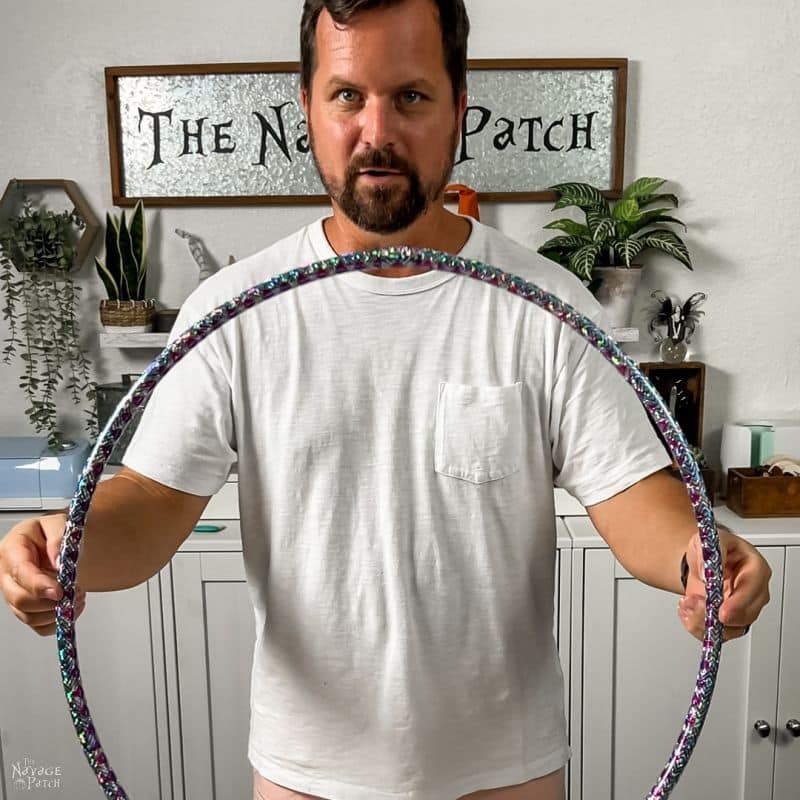
And there’s a beautiful black hula hoop underneath. Just think of all the goth and emo kids that never got to enjoy hula hooping because the hula hoop industry never cared enough for them to make a simple black version! They’re so misunderstood.

Step 2 – Cut the fence ground stakes

I used snips to cut the three ground stakes from three Dollar Tree garden fence sections.

Step 3 – Wrap and tie the fence
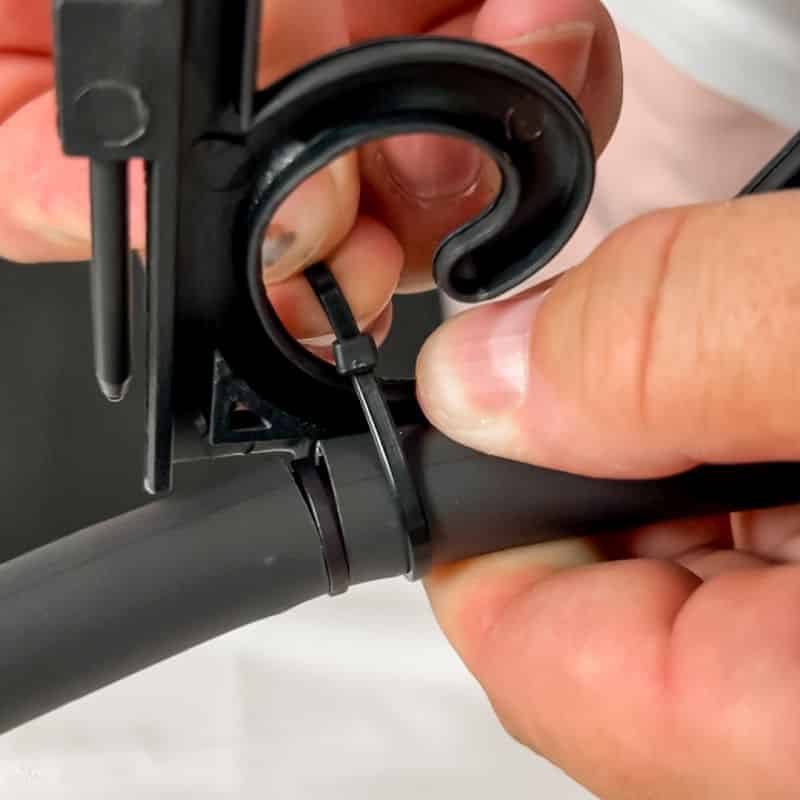
Starting at the connector joint on the hula hoop, I wrapped the fence around it and secured it at intervals with black zip ties.
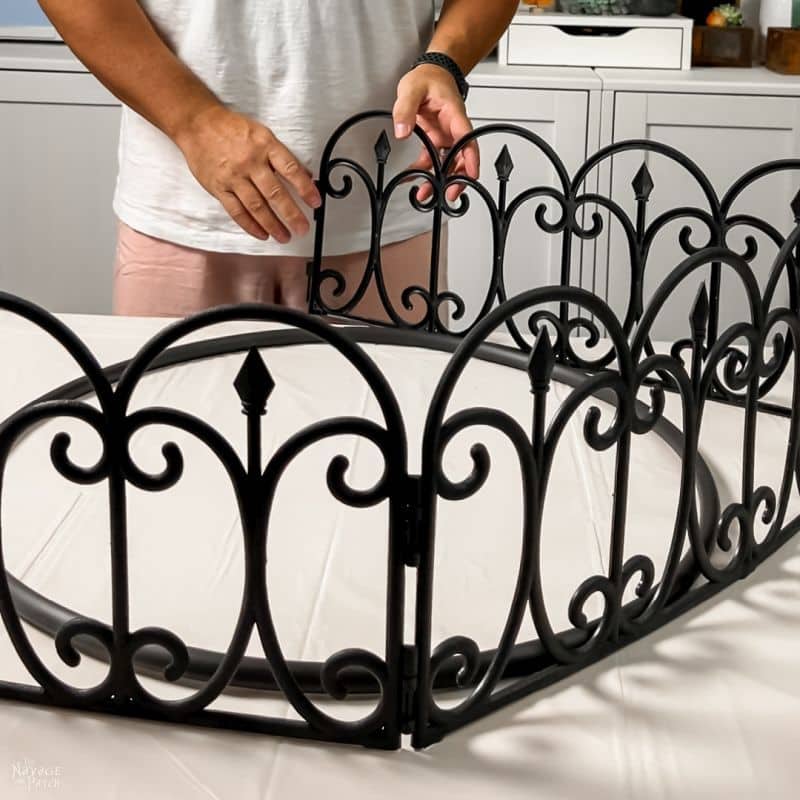
Notice the connector joint below. This is where you want to start zip tying the fence.
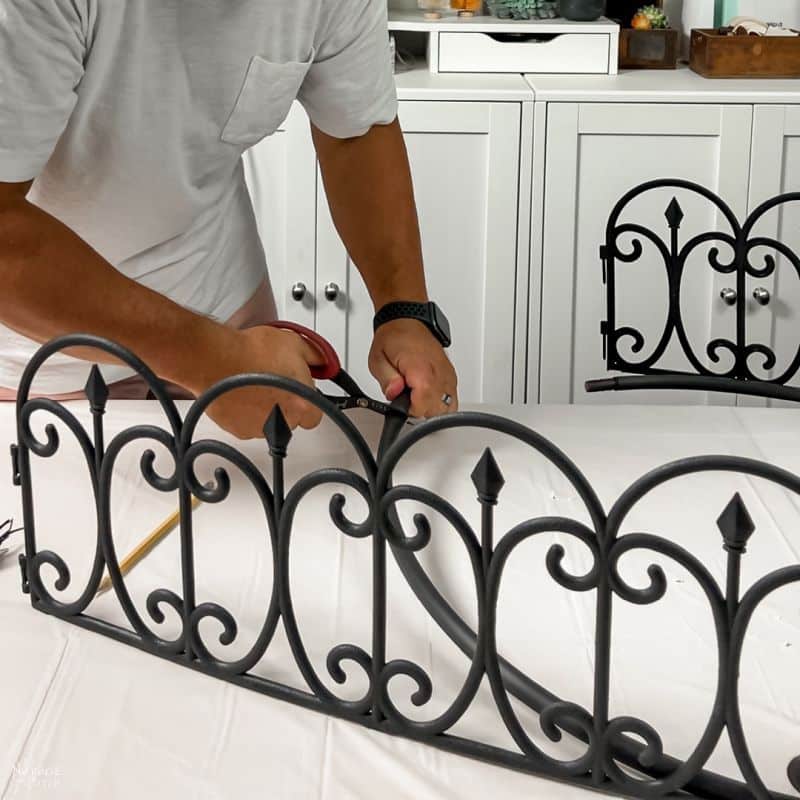
The hula hoop is larger than three fence sections, so I had to cut it down to size.
I marked past the connector joint how much extra hoop there was.

Then I pulled apart the hula hoop, cut off the extra with snips and reconnected it.
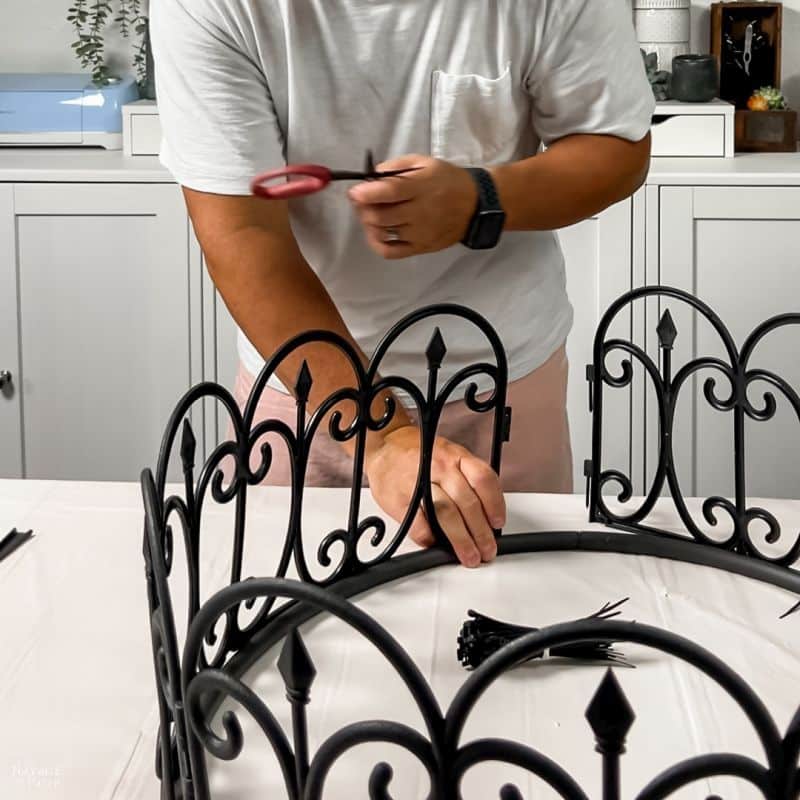
After zip tying the fence all around, I trimmed the excess from the zip ties.
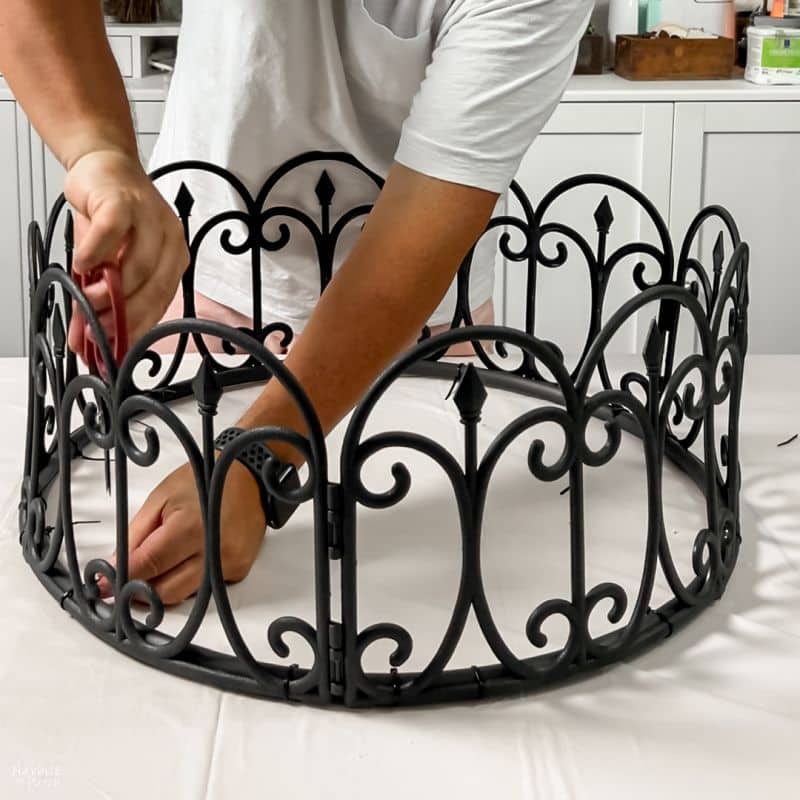
Here is the finished frame – so many ways to take it from here!

Step 4 – Cut the skulls
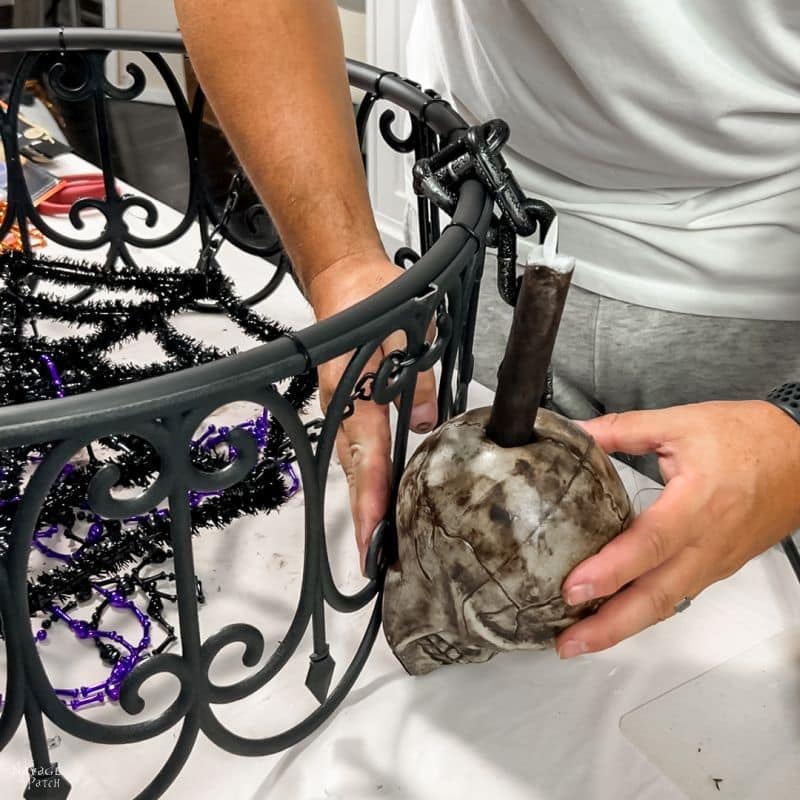
I placed a skull up against the chandelier in the orientation I wanted, then I placed an LED taper candle on the uppermost part of the skull and traced around it with a pencil.

Then I cut an X in the circle.

Here, I’m testing to see how the candle fits. With this method, you won’t need anything else to secure the candle in the skull – it’s a snug fit, and the candle won’t move.
Now, you could leave the skulls and candles as they are in the picture below. Briefly, we considered doing this, and I even glued the skulls to the chandelier at this point. But I wanted to up the creep factor, so I pried all the skulls off and made them and the candles look much better!

Step 5 – Stain the candles and skulls
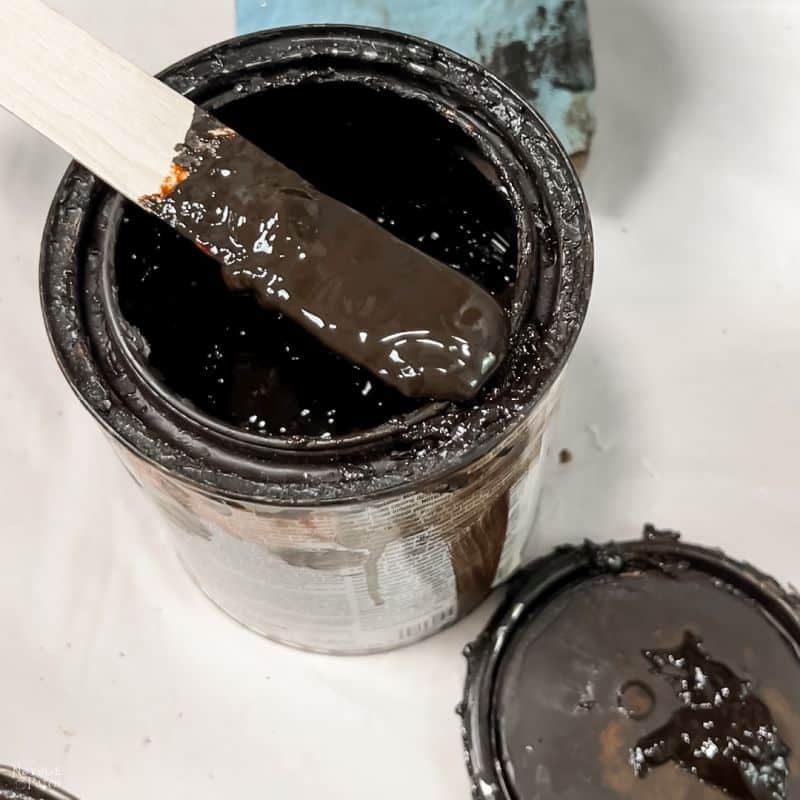
I used gel stain to darken the candles and skulls. Okay, to be more precise, I used Kona colored regular stain that was so old (it has moved from CT to GA to Jacksonville, FL to Freeport, FL) that it had coagulated to a thick pudding consistency. I imagine plain old-fashioned gel stain would work just the same.
My technique for the candles was to slather it on with nitrile gloves and leave it at that. I didn’t bother trying for a consistent color or coverage. This is a Halloween chandelier – it needs to be off-balance and creepy!

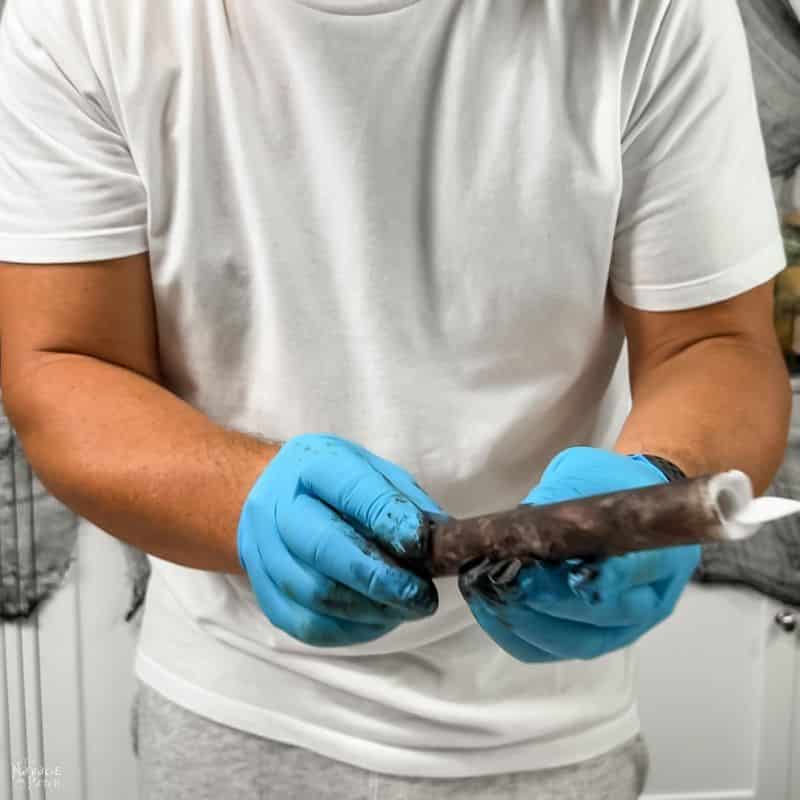
My “gel stain.”
Perfection! And just wait until you see how the light shines through the stain!

I tried a few methods for the skulls, and the one that worked best for me was to completely cover the skull in stain using my gloved hands and then using baby wipes to subtract stain until I reached my Handan’s desired level of grave dirt.


I started rubbing off the stain with a shop towel until my babes suggest I use baby wipes. It shouldn’t surprise you to learn that her method was much easier than mine.
Baby wipes are a handy thing to keep in a craft room. We started keeping them on hand back in Jacksonville, and we use them constantly.

A side-by-side comparison.

You can go as dark or as light as you want with the skulls. If it were up to me, they’d be much darker. But my babes gets what my babes wants!

Much better than the Dollar Tree original!

Step 6 – Prepare the inner chandelier (optional)
If you want to save a little time and money, you can skip this step and head right to step 7. But we wanted a chandelier with sparkly dangly bits – after all, isn’t that what chandeliers are all about?
To hang our dangly bits, we used 2 Dollar Tree tinsel spider webs. I removed the spider from one and glued them together. We used two glued together simply for strength, as one is pretty flimsy.


We kept the pink spider because we thought he looked good, but after a week outside, he fell off. So if you’d like to keep him, you’ll need to reinforce the dinky amount of glue he was attached with back in China with some of your own higher-quality hot glue.

I attached the web to the chandelier with this small chain we got from another DT Halloween prop.

This spider thing donated its chain.

I wrangled and wrestled with the small chain trying to attach it to the much larger chandelier. It would be much smarter and easier to put a zip tie around the chandelier and connect the small chain to the zip tie. Or you could skip the small chain altogether and simply zip tie the spider web to the chandelier. Remember, this is only a Halloween prop – there are many right ways and very few wrong ways to do it!


Step 7 – Attach the hanging chains
Don’t worry about the attached skulls in the picture below. As I mentioned, I did it one way, dismantled it and then re-built it. So I originally attached the hanging chains after gluing on the skulls, but it can be done before or after, so here ya go! From 3 points along the chandelier, I attached 3 lengths of 9-link chain.

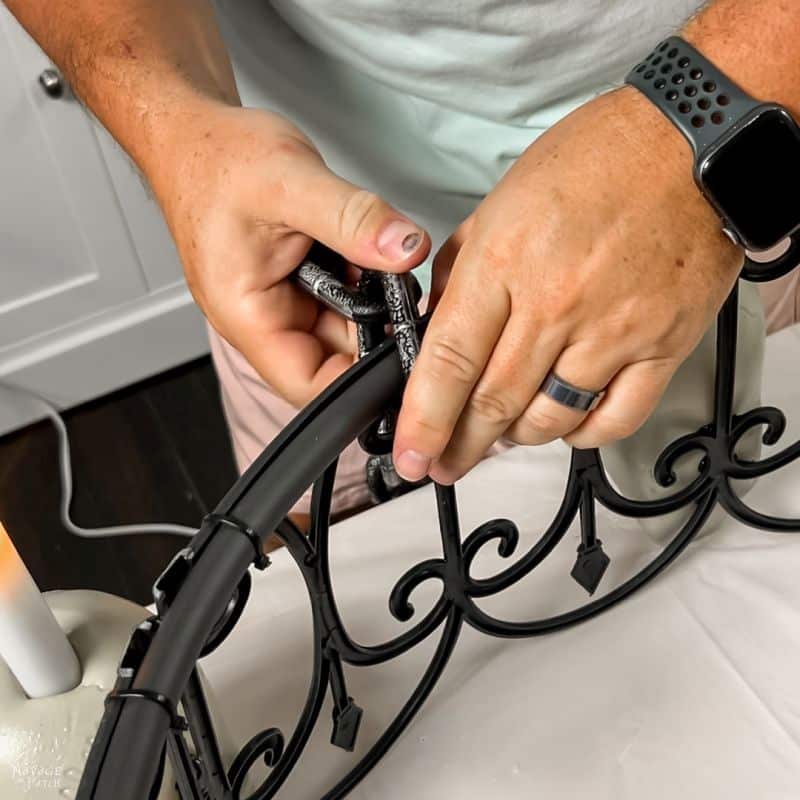
Then I made zip tie loops at the ends of each of the 3 chains.

And then I slipped those 3 zip tie loops onto another longer length of chain. This longer length is the one from which the Halloween chandelier will hang.


Step 8 – Attach the skulls
Using a lot of hot glue (make sure you have high temp sticks and the glue gun set to high), attach the skulls to the chandelier.

The kind of glue you use matters here, especially if you live in a very hot or very cold climate. We’ve made a lot of Halloween props already this year with hot glue and everyone and their kindly grandmothers told us the hot glue would melt in hot weather. This may be the case for the crap they use when making stuff in China or with low-temp and/or low-quality glue sticks, but if you buy high-temp glue sticks and use enough glue, you won’t have a problem. Ours has been hanging almost two weeks in Florida with temps near 100 every day, and the only part to fail was the spider glued on in China.
But just to be on the safe side with our skulls, After the initial glue had set, I also glopped more hot glue from the inside of the chandelier, essentially locking the skull from both sides.
Step 9 – Hang the dangly bits (optional)
I used Dollar Tree Halloween necklaces and fairy lights for our dangly bits.

I draped purple and black necklaces from the spider web in random places and curled and dangled battery-operated remote-controlled fairy lights as well.

The fairy light strands we bought were long enough to allow us to run some of the lights along the top of the web for even more light.

A happy guy holding his nearly-completed Halloween chandelier!

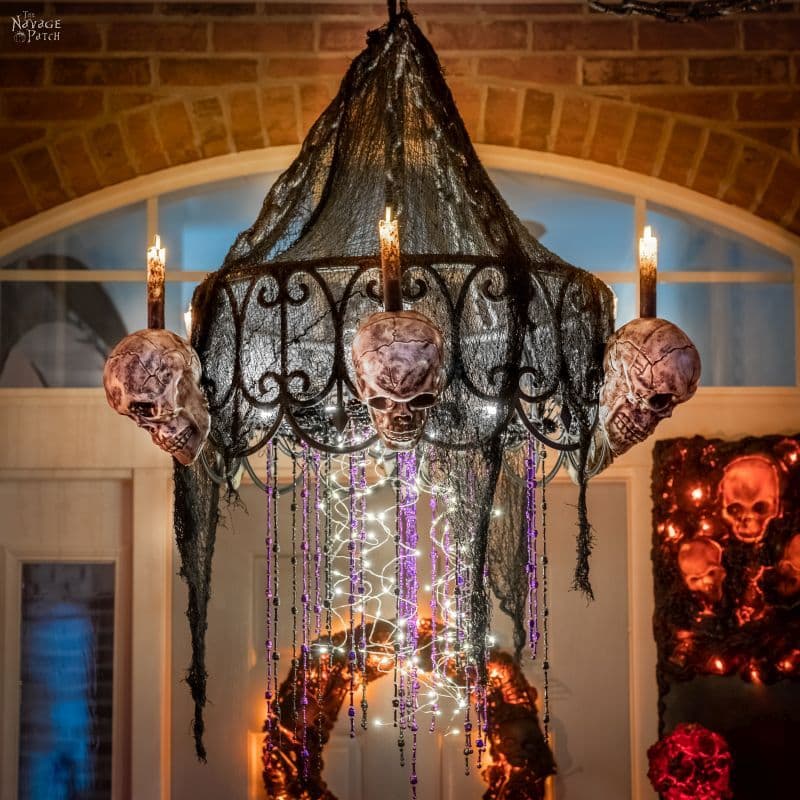
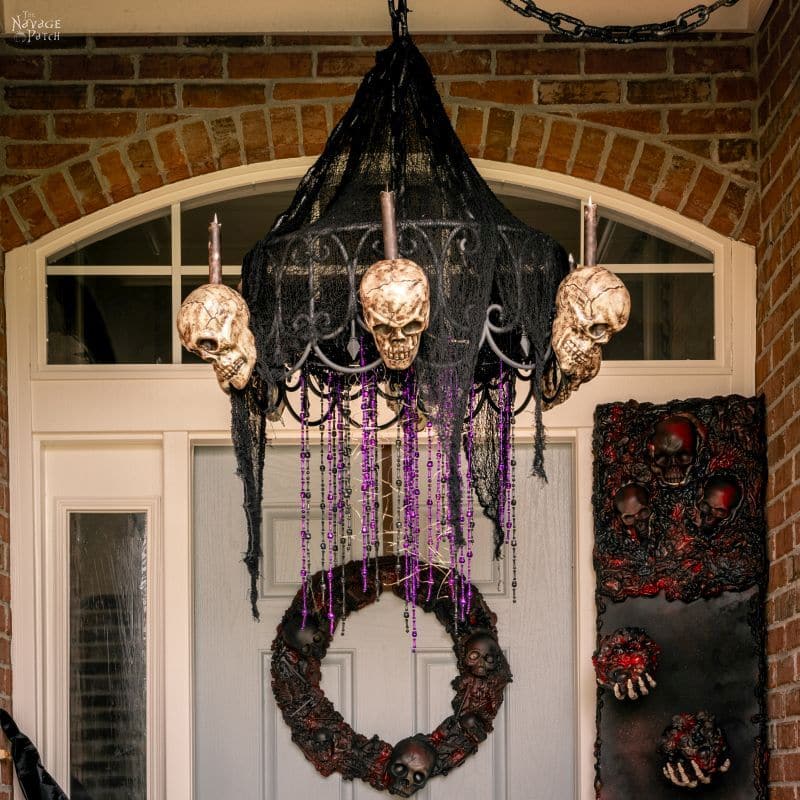
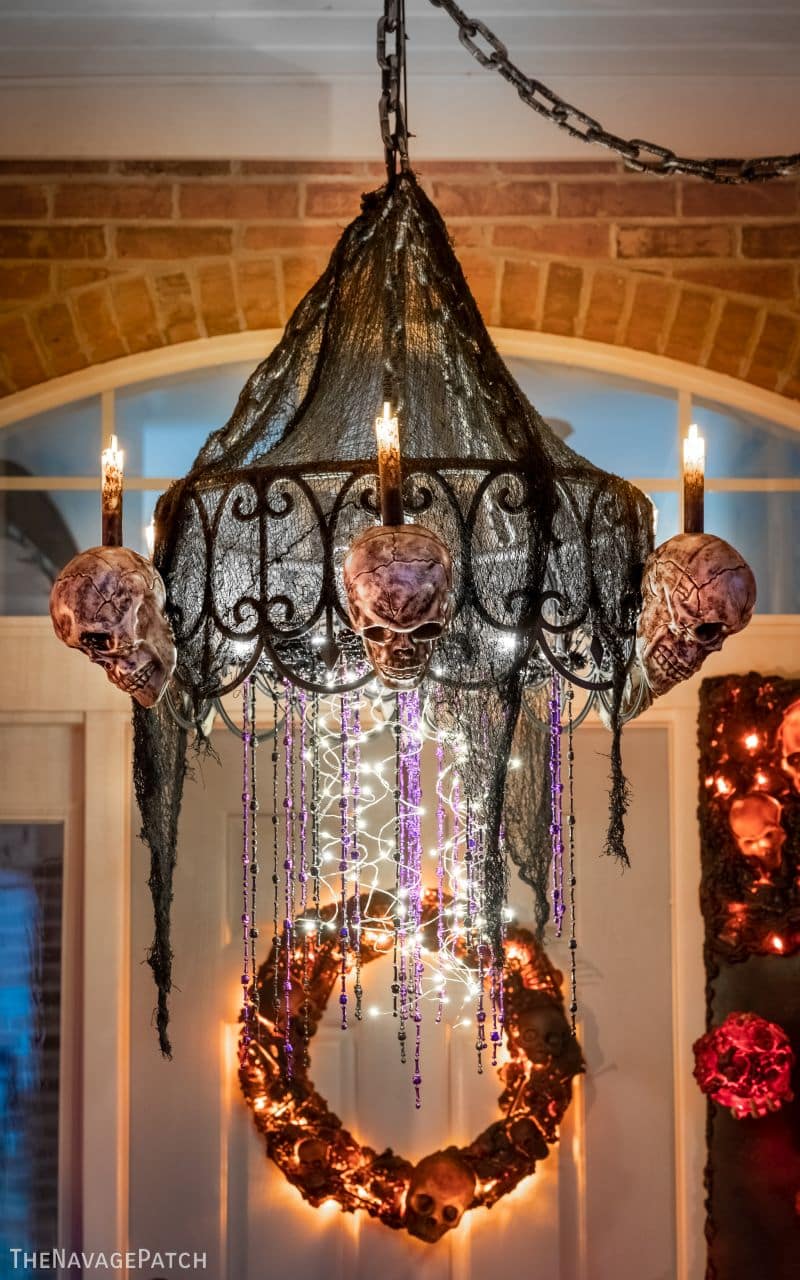
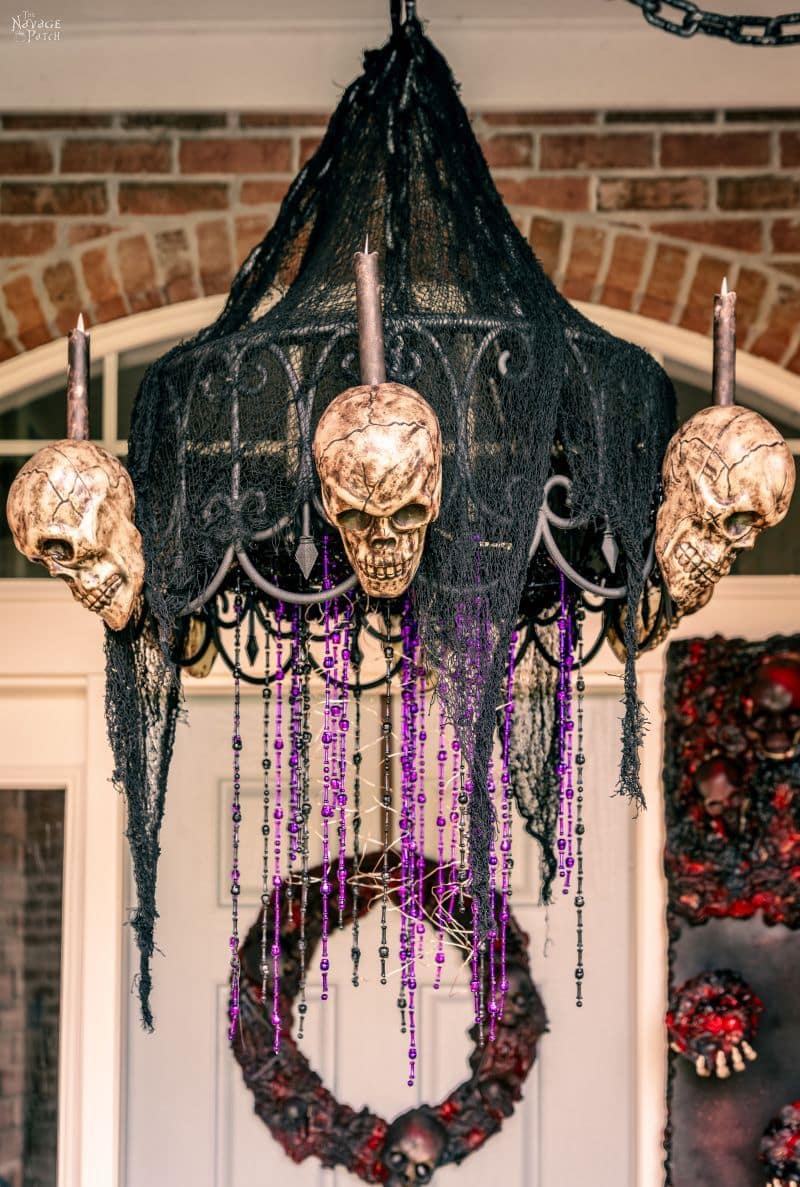
Step 10 – Hang the Halloween chandelier and add creepy cloth
I hung our chandelier from the frame of the old light fixture. To be on the safe side, I reinforced the chain links with zip ties, just in case a wind whips up and puts more stress on the chain than it can handle.
As a final step, I draped creepy cloth over the chandelier. Creepy cloth makes everything better!

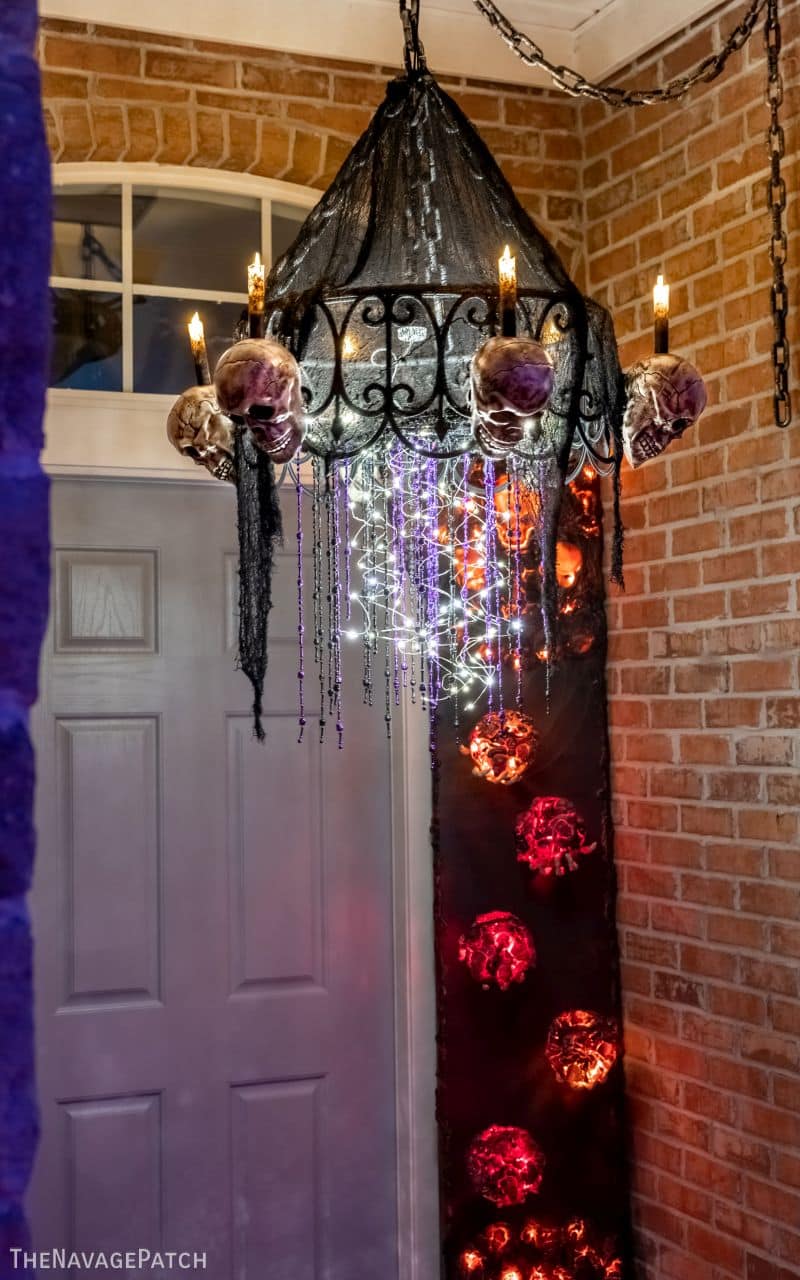
Let’s see how it looks at night!


Oh, that is so cool!!! Your doorway looks super wicked in the best way 😍
Thanks, Mo! It’s starting to feel like Halloween around here!
Oh that’s just too spooky cute! Our outside light also went the way of the Dodo. The problem is the dang light is located 15 feet up.🤪
They’re never in an easy spot to fix!
I LOVE this project! I can’t wait to give this a try – I love Halloween and this is a perfect DIY since hubby hates Halloween – this way I can say I made it for about $10! Take that Halloween hater! LOL Thanks for the step by step, too – it’s awesome!
Thank you so much, Ariel and have fun with it! Post a pic to IG and tag us when you finish! 🙂
I’ve made a few of these for myself and the kids homes. Did it from yucky light fixtures from Habitat. Added the skulls and candles and voila’! (found skulls at Big Lots that are motion activated, someone walks up and they start howling. LOL!
Oh that’s great! Good idea to use old chandeliers!
Ahhhhmmmmazing!!!! Will stock up on everything because if I don’t have time to make the chandelier this year, can make it next year. Thanks to y’all for the brilliant ideas!!!!
Just made 2 caged skeletons for my daughter’s house. She, her wife, and children LOVE them!!!
Thanks, Julie! We’ll be revisiting our caged skeleton prop this year with a new update and new twist! 🙂
It’s stunning! I think you need to leave it up all year!!
I wouldn’t be opposed to that!
Yeeees, yes! This is good stuff. The close-up pic of the skull reminds me of “The Goonies”, so bonus points for a visual pop culture reference. Question– I wondered if you ever get randomly inspired to redo an older project into something new, or go through old decorations and dismantle parts to incorporate into new projects? I always have leftover pieces from project that get thrown in a box and eventually used for something, so I wondered if you did, too.
We do, Deb, though it depends on what the older project is made of! We even recycle certain Dollar Tree crafts if the materials are still good. 🙂
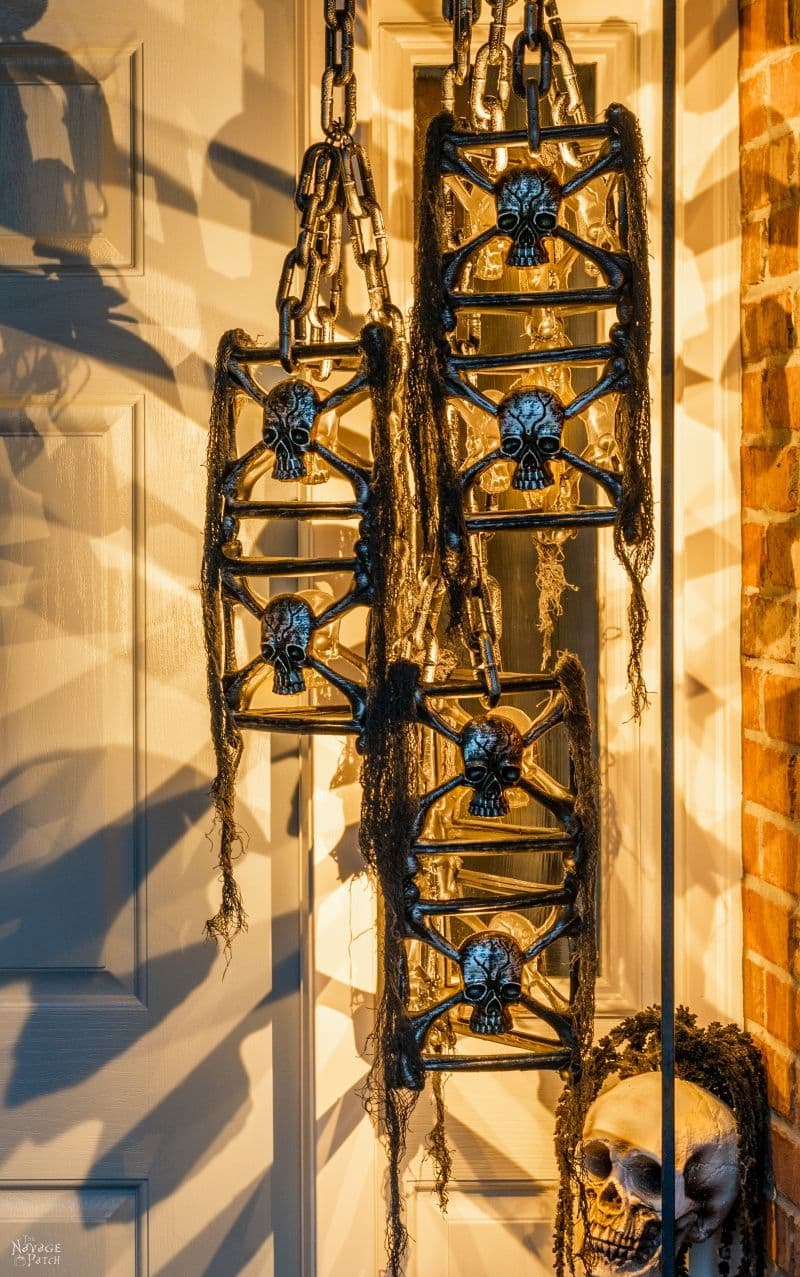
Love, love, love this! Something that I will definitely try! Hey, can’t help but notice the awesome prop beside the front door! Will you be treating us with a DIY for that one?
Thank you, Sandra! That prop next to the door is coming this weekend (or tonight if you’re on TikTok!) 🙂
Oh this is so magnifico!! Two of my skeletons (Frank and Francesca) are getting married this year.😁This would be great above their heads for a bit more extra of the creepiness factor!! One question, besides the zip ties, how did you attach the chains at the top, to your porch light?
Thanks, Cindy Lee! I attached the chain/zip tie to the metal from of the existing light – I just pushed the glass out of the way to exposed it.
I say this with love. You two are “weirdos”. Great job on the chandelier! I can’t make out what that long board propped up in the corner but I bet its something good!
Thanks, Mona! 🙂 That other long board project is coming this weekend (or tonight if you’re on Tiktok!)
Well…while it is downright awesome, for the approximate $75 you spent on supplies, not to mention time, you could have purchased a creepy pendant light online.
Hi Diana, it’s good to see you again. While I get where you’re going with your comment, we didn’t spend anywhere near $75 even with the upgraded candles, and if you use Dollar Tree emergency candles, it’s only $25. And yes, we could have bought one in Spirit Halloween or somewhere else, but that wouldn’t have gained us 100,000 followers and 5 million views on TikTok, so I’m thinking it was time well spent. 🙂
OMG, just when I thought your earlier Dollar Tree light were the best Halloween light idea ever, you come up with this. Wickedly awesome. I too am more than intrigued by the prop beside the door. You make it hard for us mere mortals. So many great ideas to chose from to add to our Halloween decor.
Thank you! The blog post for the prop next to the door will be published this weekend, but part one is on TikTok right now!
I know this won’t be a popular comment but I HATE Halloween. BUT with that said I got to tell you your ideas are amazing. It intrigues me what you come up with, with Dollar Tree items! What imaginations you and Handan have. I have a friend who lives for Halloween and she will loves these but for now I will just skim past the pictures and wait for some Christmas projects 🙂
Oh, you’re not the only one in that boat! Thank you so much for the compliment despite disliking the holiday! 🙂
I always look forward to your posts and DIY projects, but this one is truly a standout! Wow, the creativity you guys have is amazing. Thanks for the inspiration:)
I’m not a big fan of Halloween decorations but your creativity is beyond amazing! This is really cool!
And I never know when your impressive creativity might spark some tiny flickering flame of creativity in my brain… right now, I’m thinking of a white chandelier with wisteria trailing off amidst fairy lights… 😉
I love the wisteria idea, Julie!
Love, Love Love this! Can’t wait to try it (although I’m quite sure my DT will be out of stock on almost everything…LOL).
I just wanted to mention that you shouldn’t ever again wear peach-ish/pink-ish shorts in your pictures…I realize that my mind is perpetually in the gutter, and I realize that you would NEVER!, but (especially in the first photo) it looks like you’re not wearing pants and then, when I got to the section where it said “Hang dangly bits” I about fell out of my chair in a fit of laughter…you can remove this post if you’d like…but just know you gave me a great laugh today…and I needed it!
LOLOLOL! You’re not the first to notice, Annie! 😀
Creepy cool! Those plastic garden edges have inspired more craft projects than I’m sure the creators ever thought they would! Perfect goth/Victorian/classic piece for so many things.
I know, right? They’re so versatile for Halloween and any other time of year!
Wow! This is amazing, creative and very unique! It’s also a bit creepy, too! Lol! I wonder what your neighbors think.
Thanks, Gail! Yeah, Our neighbors have stopped to stare a few times, but I know their kids love it (they talk loud!) lol!
Awesome!
Thanks!
I am trying this myself. Your’s is great
I ADORE this idea & I appreciate the writing too!!!
Super clever & could easily be. transitioned into a Mardi Gras decoration too❤️🤔☀️
Absolutely Heather! With all those beads, it’d fit right in! 🙂