DIY Halloween Graveyard
Learn how to make a Halloween tombstone that looks real enough to raise the dead, and then get cracking on your very own DIY graveyard!
Back in 2010, Handan visited America for the first time. I took her out for a drive around my hometown of Glastonbury, Connecticut. At some point we passed a cemetery, and I said to Handan, “Hey babes! Look at the marble farm!” It was a term I learned from my father back in the 70s and 80s. She nodded her head and looked thoughtful.
Years later, we moved to Connecticut with 10-year-old Barish. As we drove from point A to point B one day, we passed another cemetery, and Handan turned to Barish and asked, “Do you know what that is called?”
He shook his little head.
“In America, that’s called a Marble Farm.”
He nodded solemnly. I spit iced coffee out my nose.
“Jesum crow, NO!” I said. “Babes, that was joke!”
“What? I’ve been saying it at work! I thought that’s what Americans called a cemetery!”
I laughed. Handan glared.
Well, here we are years later attempting to build our very own Halloween marble farm, and lemme tell you, it’s been a hoot!
We built this creepy DIY graveyard last year, and not only did the headstones survive several months outdoors (we built early), but they survived in a non-climate-controlled storage locker over the off-season.
So why build a graveyard? Why spend hours perfecting tombstone design?
The answer, madam, should be obvious.
It’s for the children.
We did it all for the children.
So what does it take to build a kick-ass creepy cemetery so realistic, you actually may start fielding prospective resident applications?
I can break it down into 3 main components: building, weathering/aging, and installation. Let’s look those components below.

But first, why DIY the headstones? Why not just buy them? Everyone from Home Depot to Lowes to Party City to Walmart sells foam tombstones, so why bother making them?
In a word: quality.
The ones sold in stores are flimsy foam wafers of crap that couldn’t stand up to a sparrow fart, let alone a windstorm. They are useful as starting points, however. I’ll show you how to make two types of headstones – one is fully DIY and the other uses a cheap store-bought tombstone as the seed for something much bigger, stronger and creepier!
Let’s get to it!
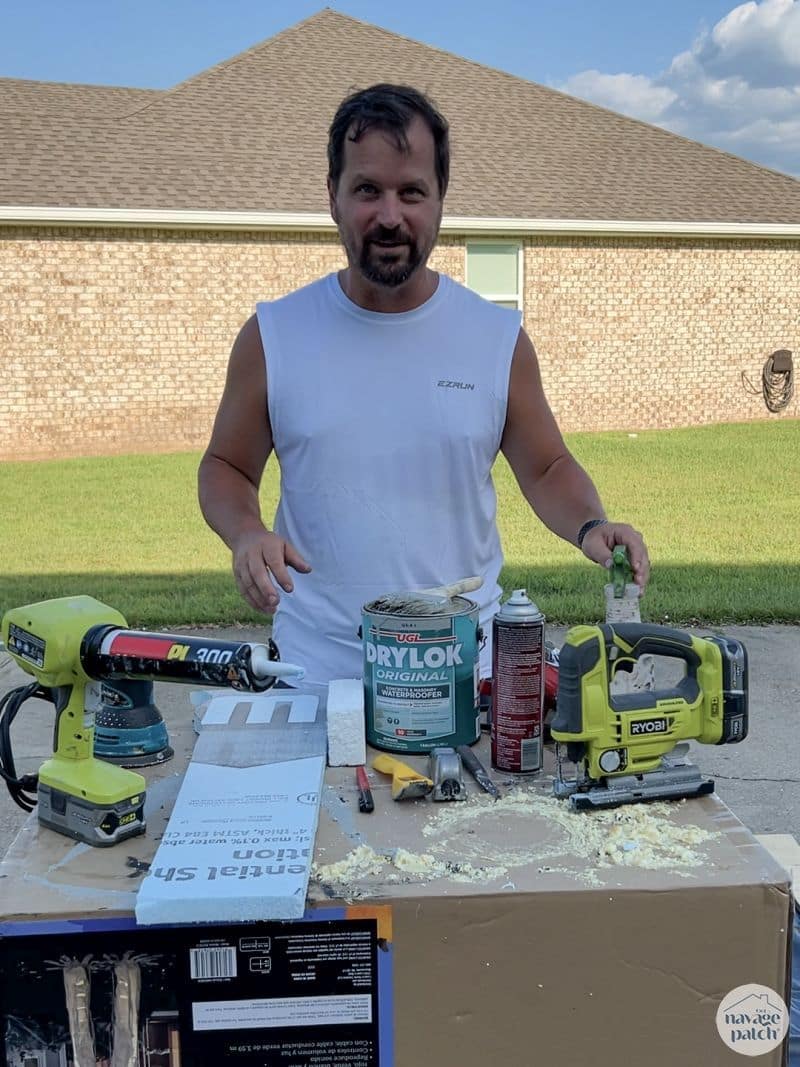
DIY Halloween Graveyard SUPPLIES LIST
Affiliate links are provided below. Full disclosure here.
- 1-inch 4×8 foam insulation panels
- 2-inch 4×8 foam insulation panels
- Assorted store-bought tombstones
- Plastic skulls and other spooky props
- Sharpie marker
- Long thin non-serrated knife
- Jigsaw (optional)
- Serrated knife
- Loctite or 3m spray adhesive
- Loctite Foamboard adhesive (optional)
- Surform tool
- DryLok – gray with sand
- Spray bottles for water + paint
- Heat gun
- Random orbit sander (optional)
- Black, brown, mossy green and rust colored paint
- Garden stakes
- VELCRO Extreme Outdoor Mounting Tape
We love to see our DIY Halloween decor out in the wild! If you make this Halloween DIY decor for your home, take a picture or video and post it on Instagram, be sure to tag us – thenavagepatch
DIY Cemetery VIDEO Tutorial
Watch our short and fun video below for an overview of our DIY graveyard before you read the detailed step-by-step tutorial.
Watch Our Tutorial On YouTube
On Tiktok
More Easy DIY Halloween Decor Ideas
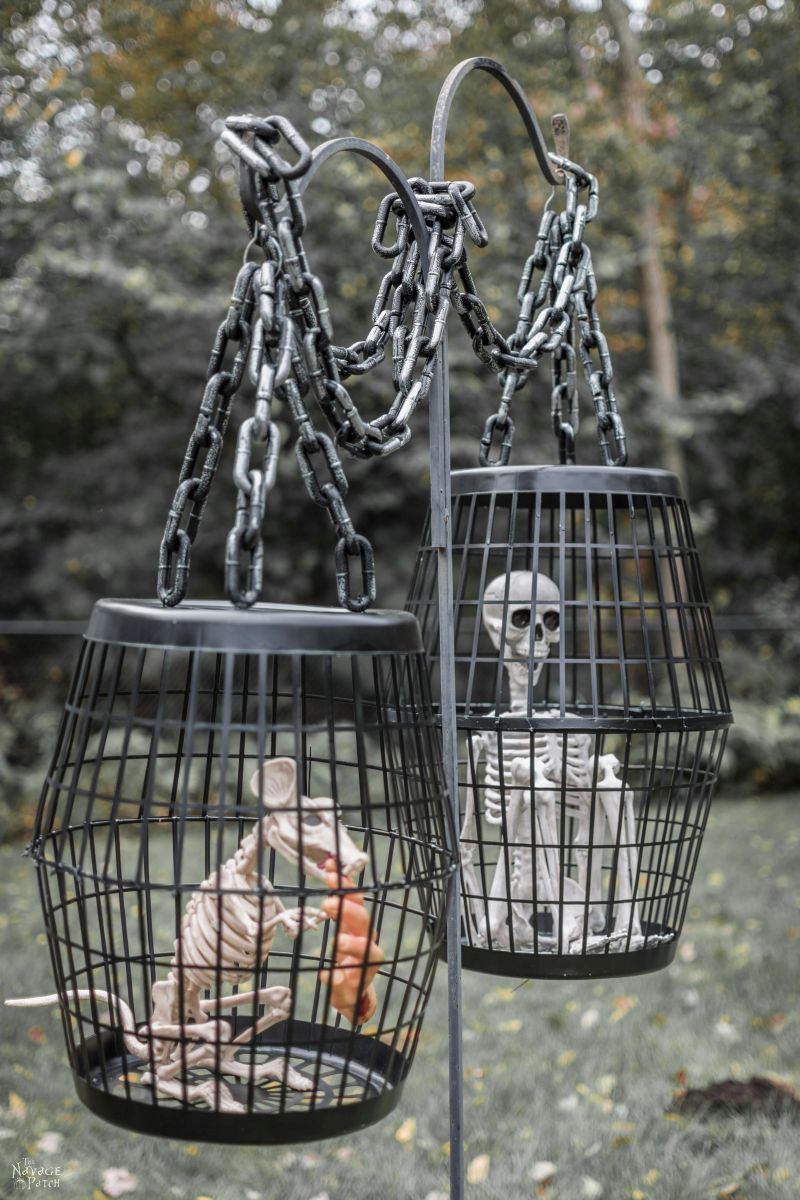

- Hanging Cage Halloween Prop
- DIY Dollar Tree Halloween Lights
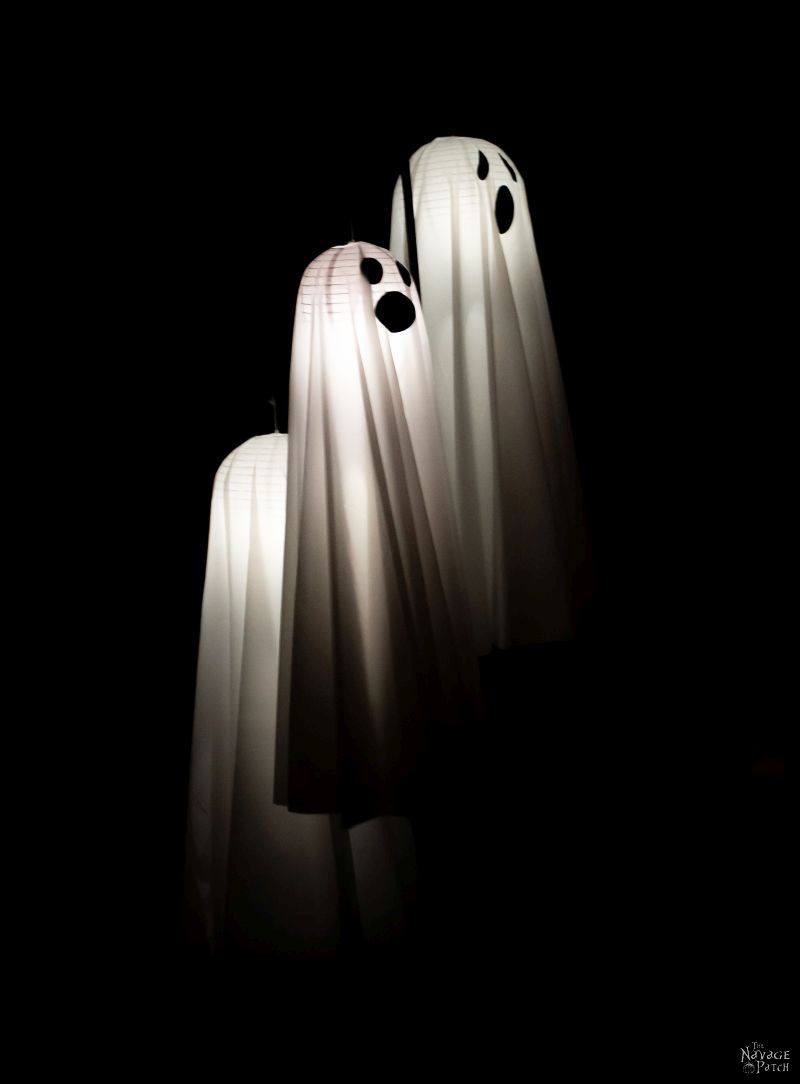
- Easy Lighted Hanging Ghosts (A Dollar Store DIY)
- Free Vintage Movie Monster Printables
- DIY Halloween Fire Wreath
- DIY Cousin Itt Pathway Light
- Gallery Of The Faceless – Easy Halloween Wall Decor
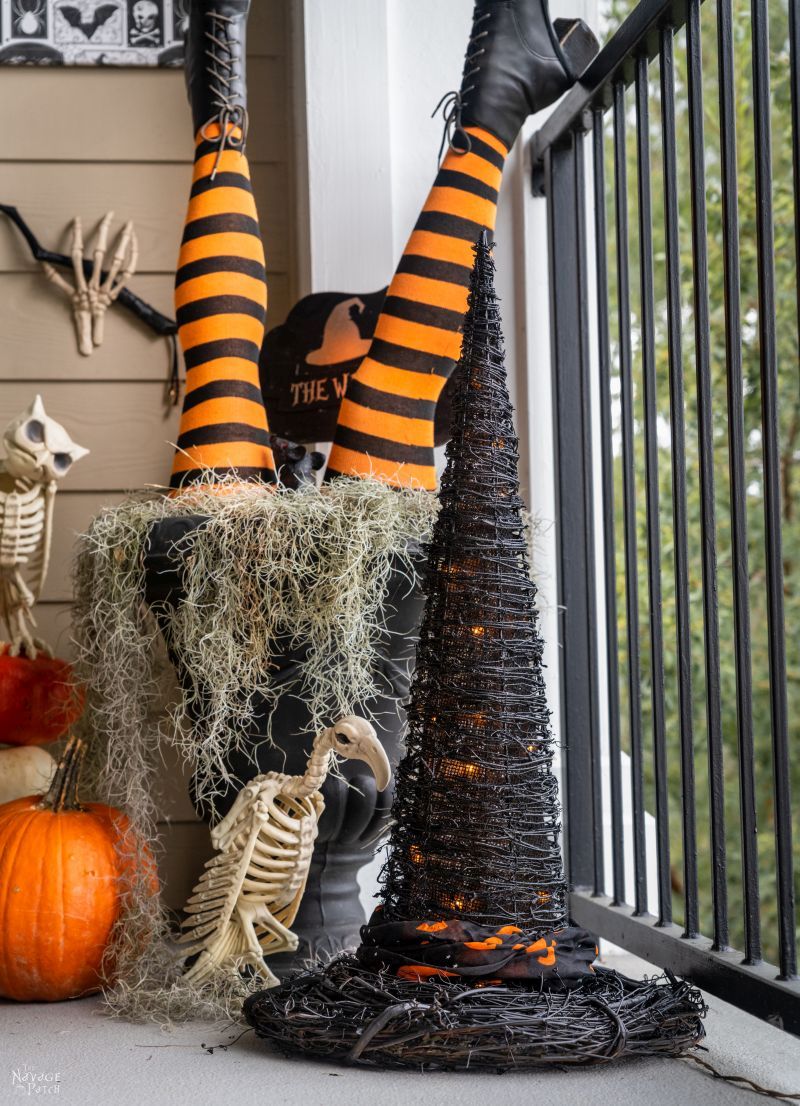
- DIY Lighted Witch Hat (Grandin Road Inspired)
- Apothecary Jars And Free Printable Labels
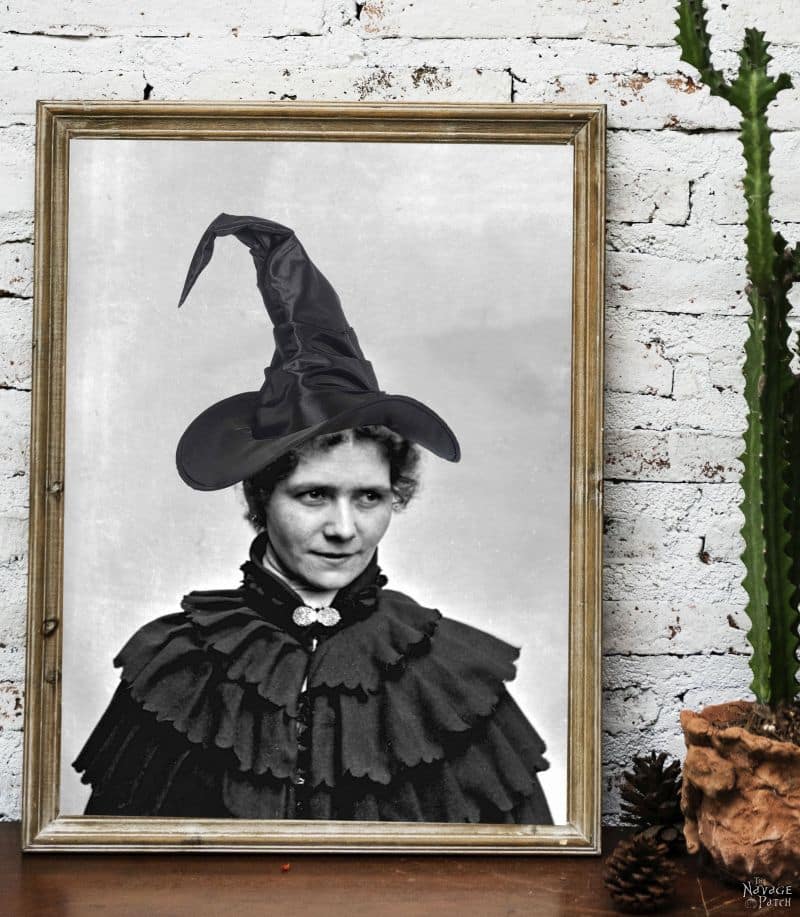
- Free Vintage Witch Printables
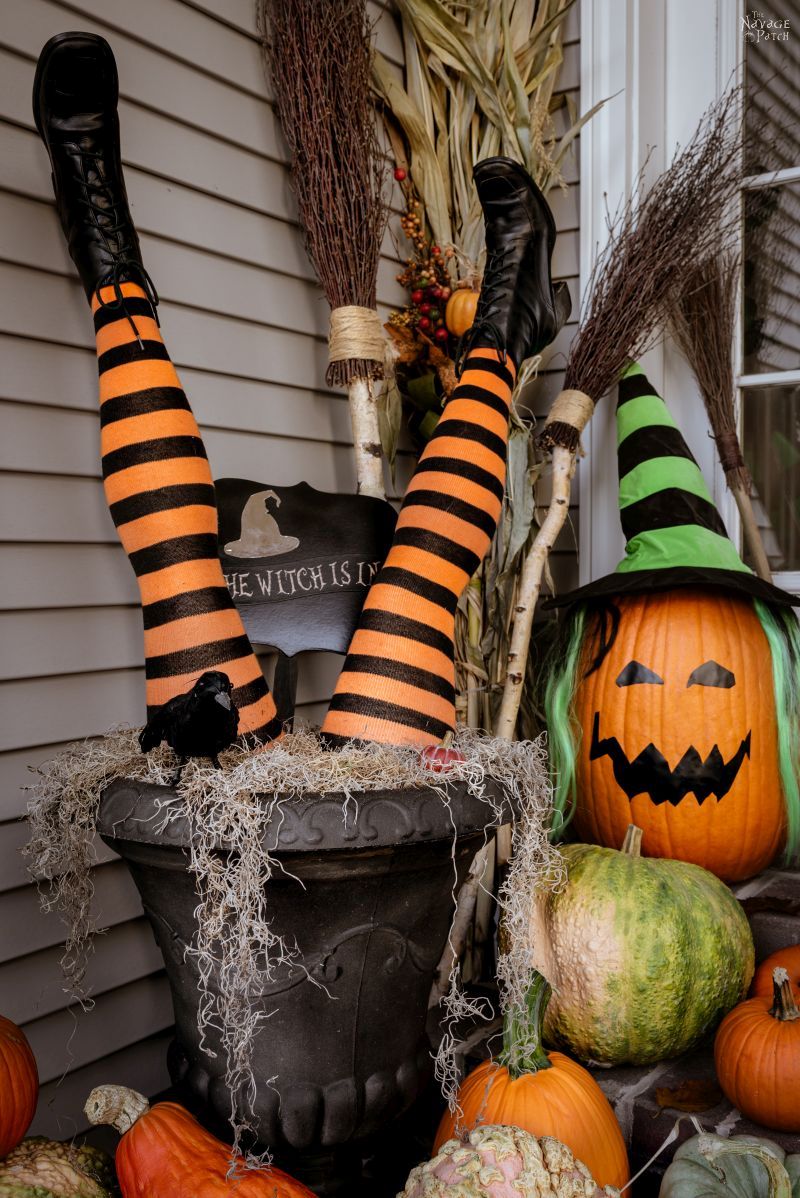
- DIY Witch Legs (Grandin Road Inspired)
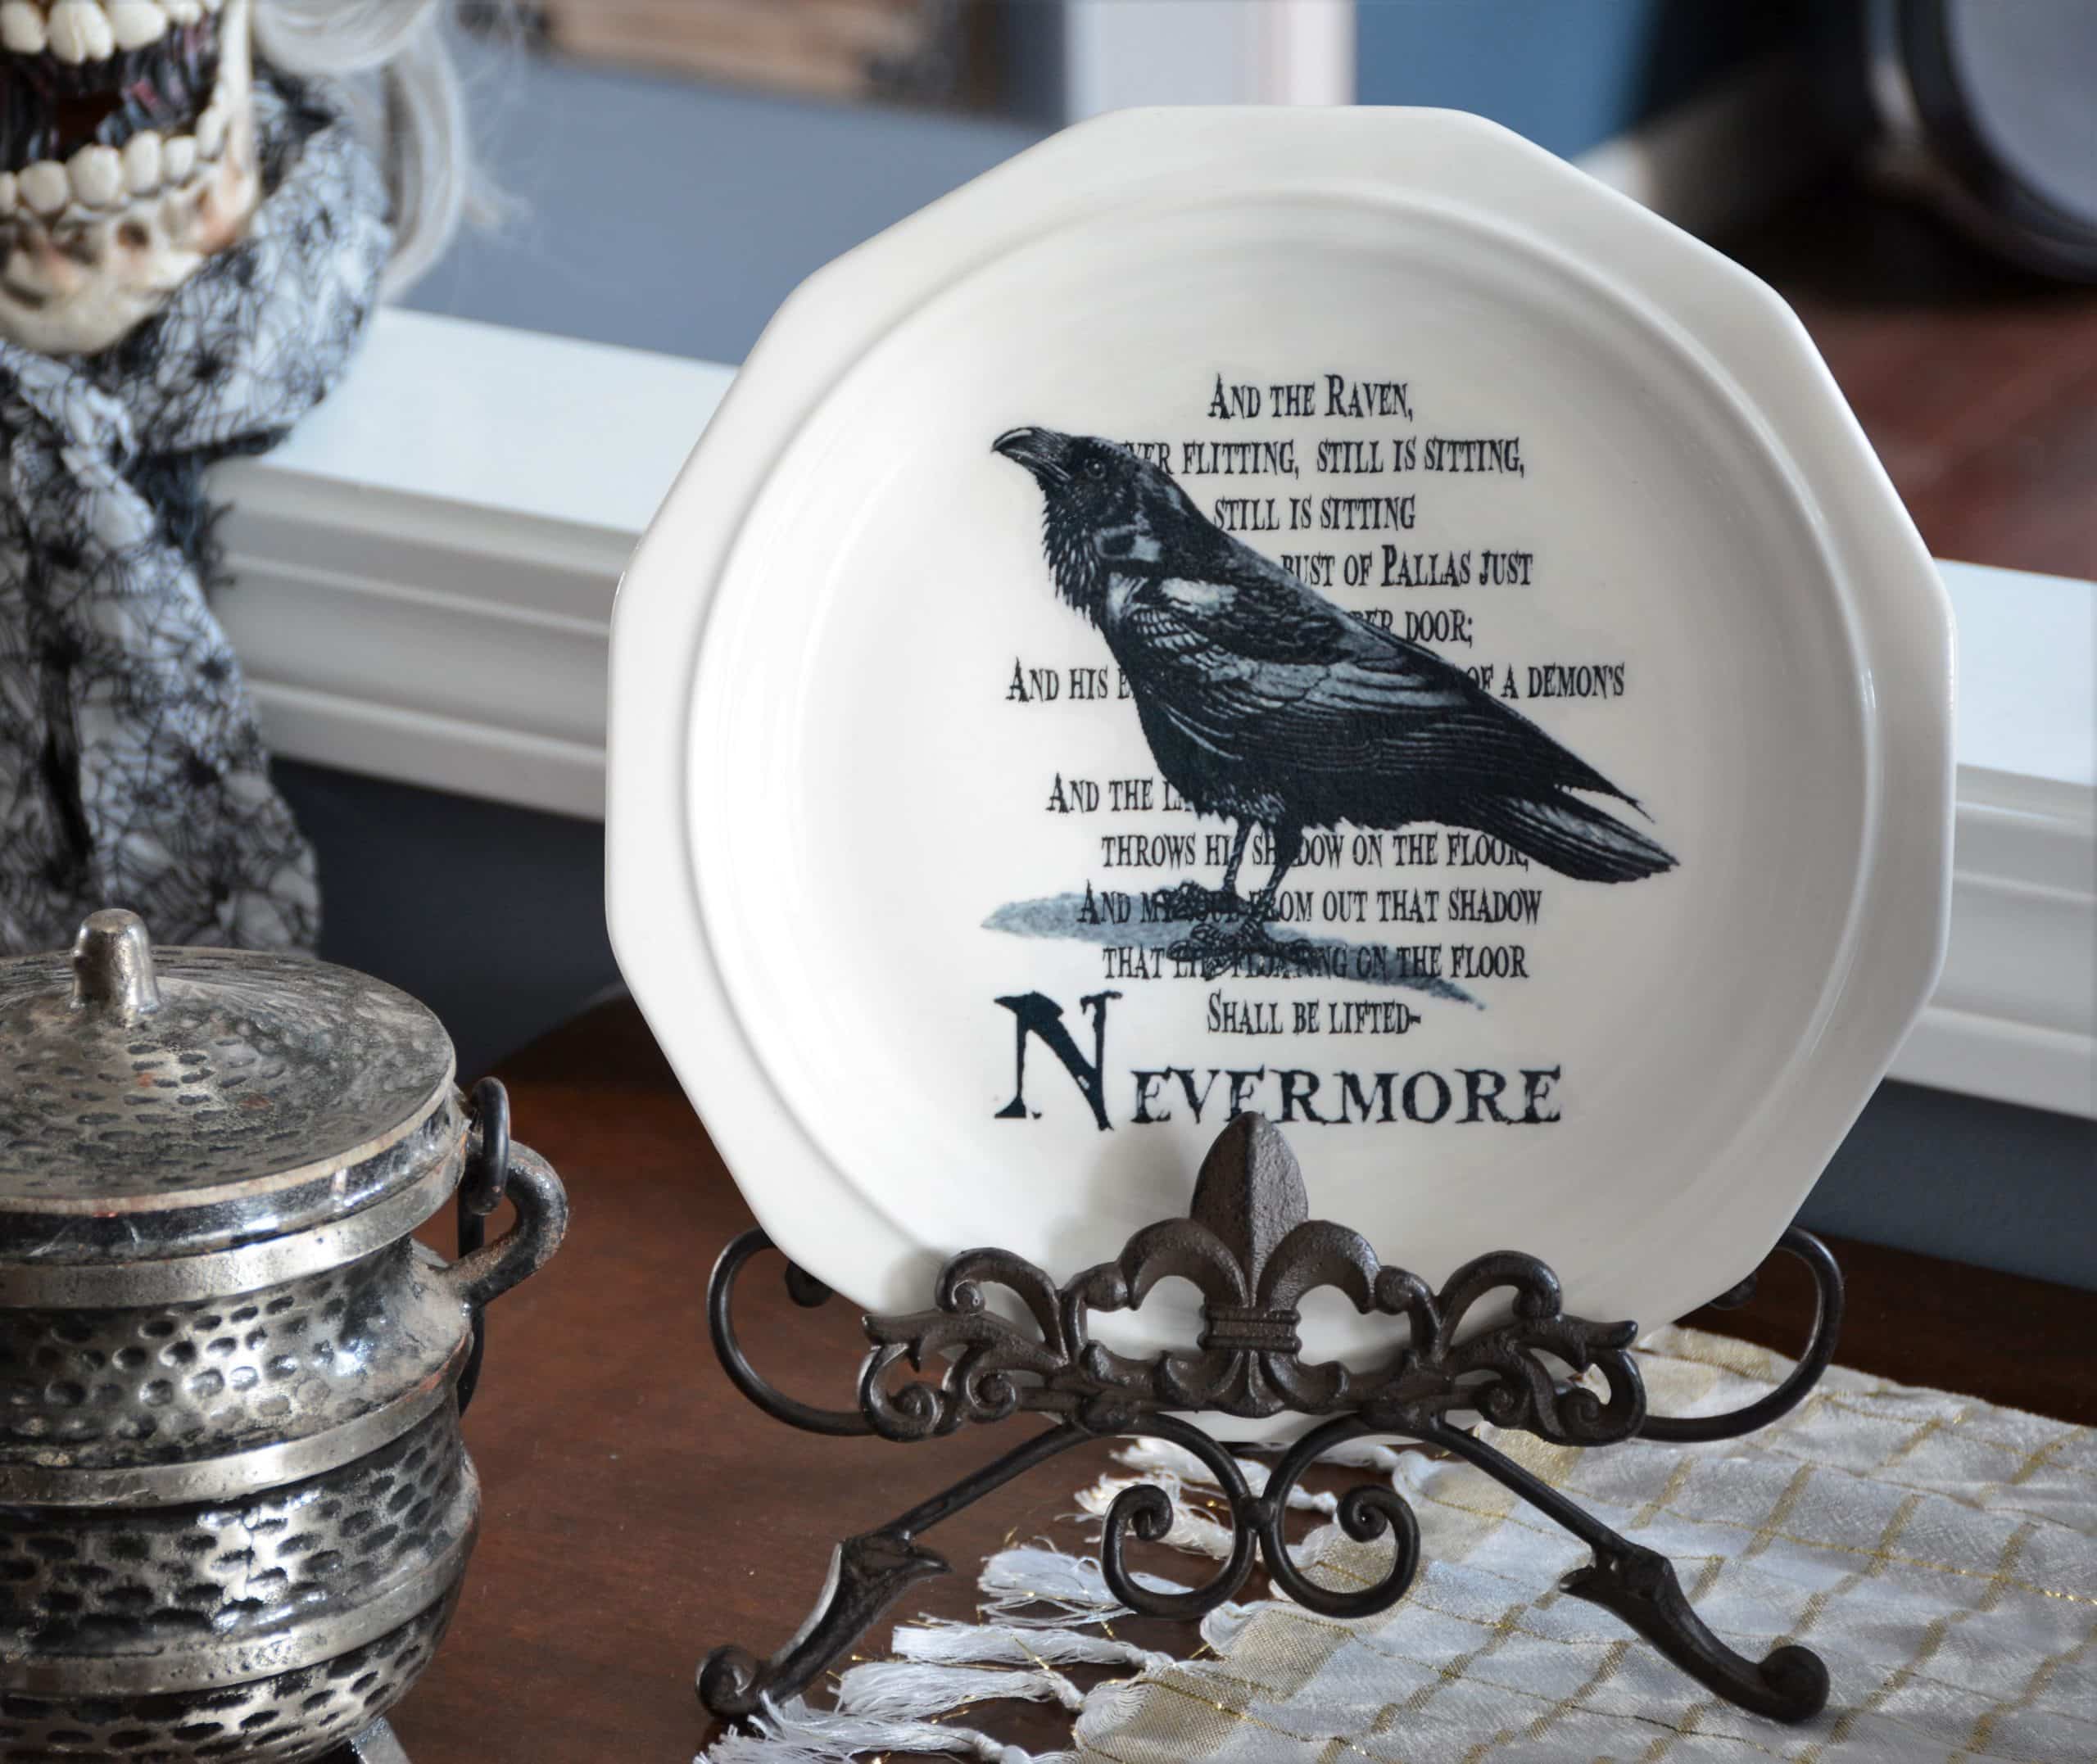
- Dishes Of Darkness: Pottery Barn Inspired Halloween Plates
Halloween Graveyard Part 1 – Tombstone Build
Step 1 – Trace the tombstones
Even if you want to build a 100% DIY graveyard, it helps to have some store-bought stones to use as templates. Unless, or course, you’re an artist, in which case, you can freehand them!
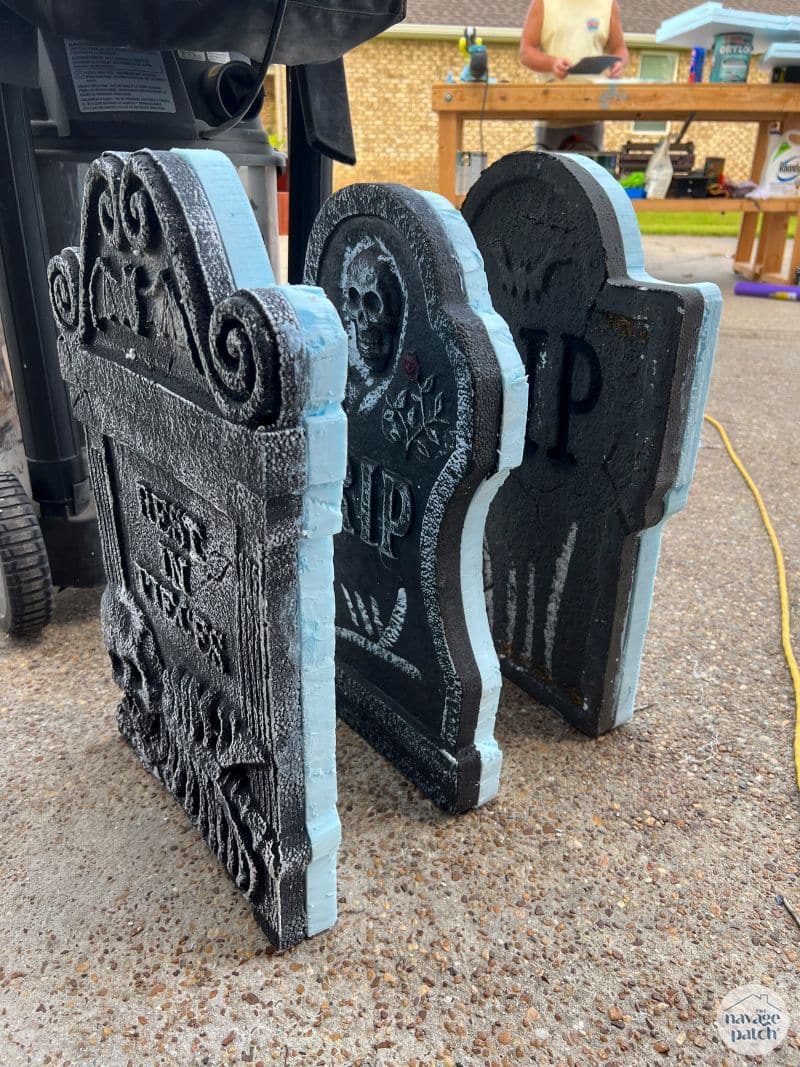
I started by tracing several different shapes and sizes onto 1-inch foam insulation for my DIY cemetery.
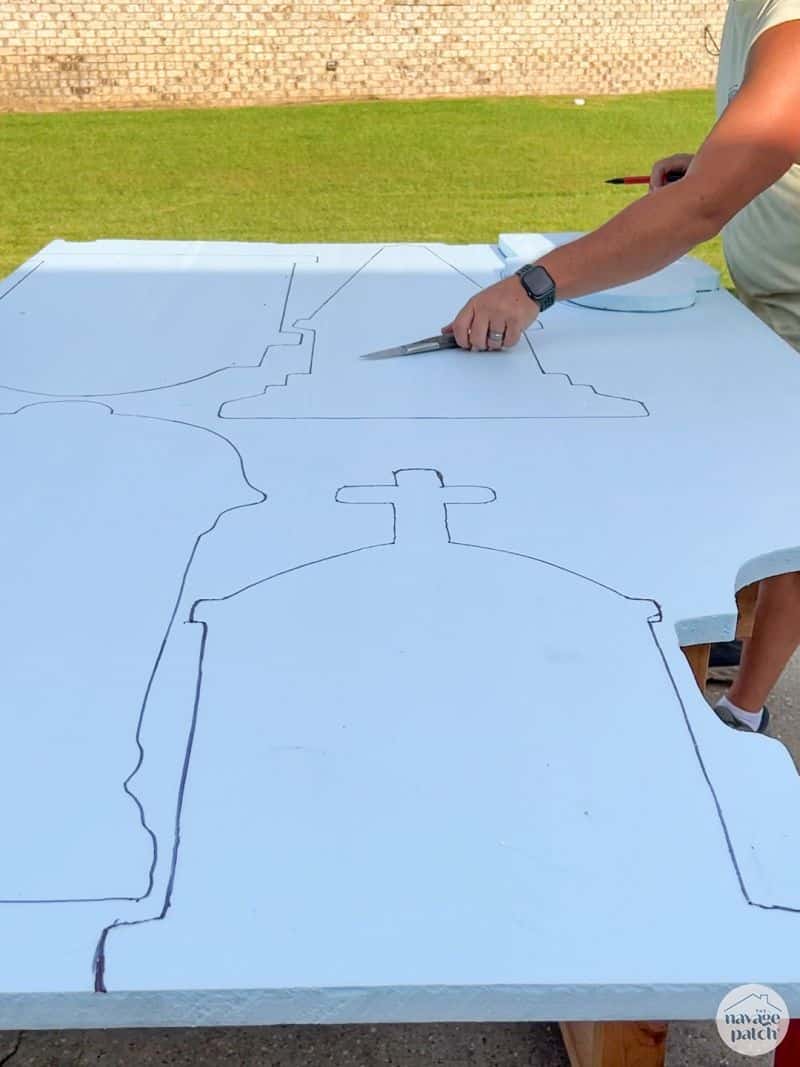
Each tombstone would require two cutouts. In other words, they’d each be about 2-inches thick. Now I also used 2-inch foam for certain things, but for the actual headstones, I used doubled-up 1-inch. There’s a reason for that.
The 1-inch foam (shown above from Lowe’s, so it’s blue – Home Depot sells a pink version) is a much denser and more high quality foam than the 2-inch panel. In fact, the 1-inch panel above weighs more than the 2-inch panel! I’ll show when and where I used the 2-inch a little later in the post.
And as for the store-bought templates – I also used those, but I doubled their thickness with a traced and cutout backing.
Step 2 – Cut out the shapes for your DIY headstone
A long, thin, sharp non-serrated knife works very well to make tombstones, but it’s much quicker to use a jigsaw. And let’s face it, we all have different reasons for making a graveyard, so you may not have all the time in the world to hand-carve works of art if there’s an army of the undead baying at your heels!
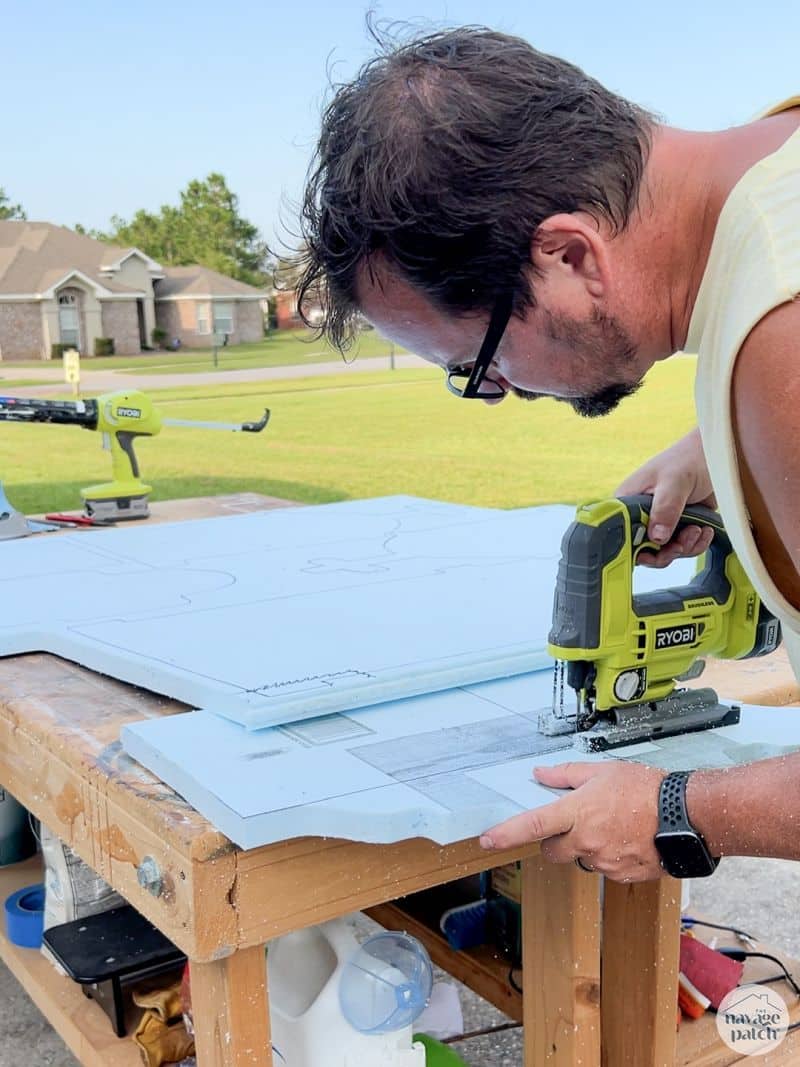
The jigsaw may not make cuts as pretty as the knife, but it won’t matter in the end.
When you think about it, nothing matters in the end! MWAH ha ha…sorry, got a little carried away there.
Don’t even worry if you cut two shapes meant to be glued together that come out far from identical. It will all be remedied after glue-up!
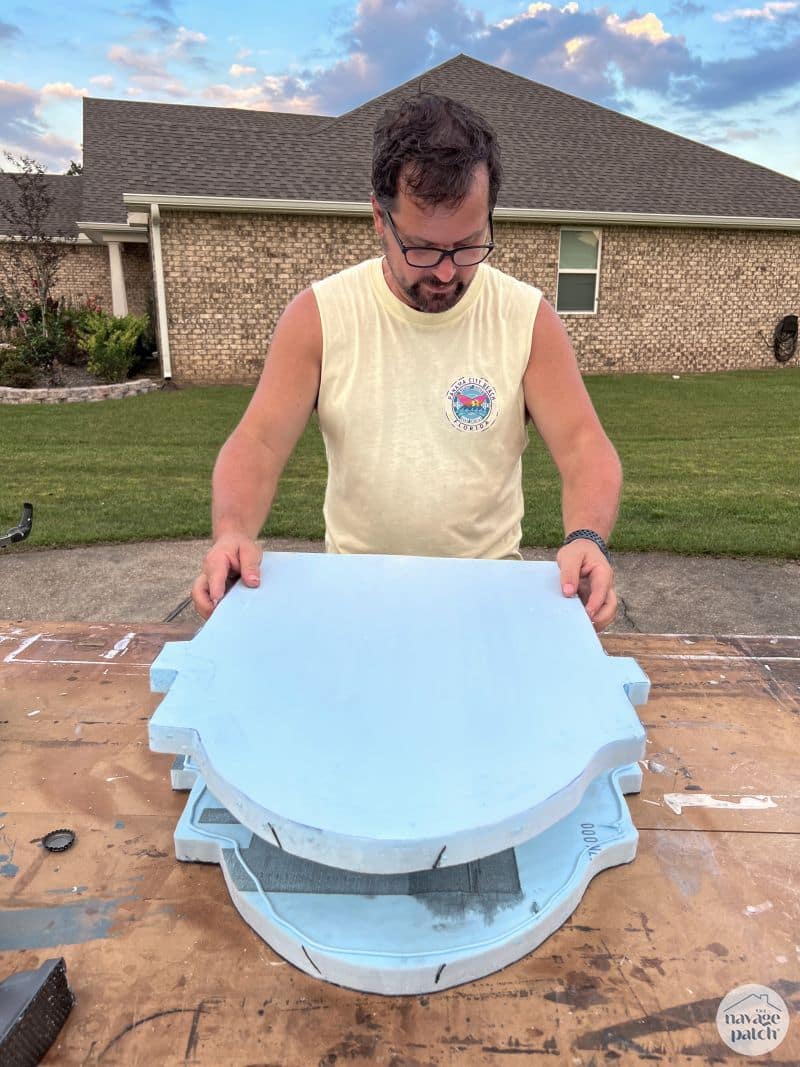
Step 3 – Glue the DIY tombstone pieces together
For this step, I used a combination of Loctite foamboard adhesive and Loctite (or 3M) spray adhesive. The spray adhesive gives the initial grab, and the foamboard adhesive makes it permanent (after about 24 hours).
I put a line of foamboard adhesive around the edges and in the middle of one of the foam cutouts.
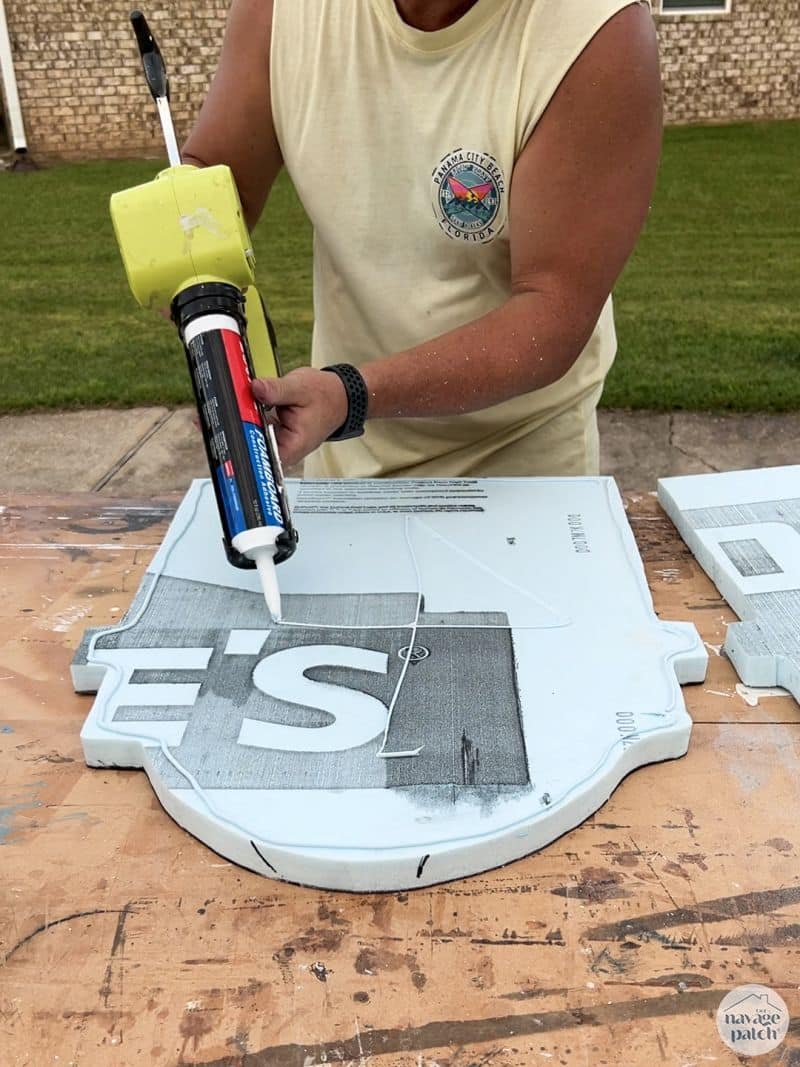
Then I sprayed both cutouts with spray adhesive. Now the thing about spray adhesive is you have to let it sit a minute or two to get tacky. If you just straightaway jam the two pieces together, you’re not going to get good hold. Let the spray get nice and sticky, and then when you join the two pieces, they won’t budge an inch!
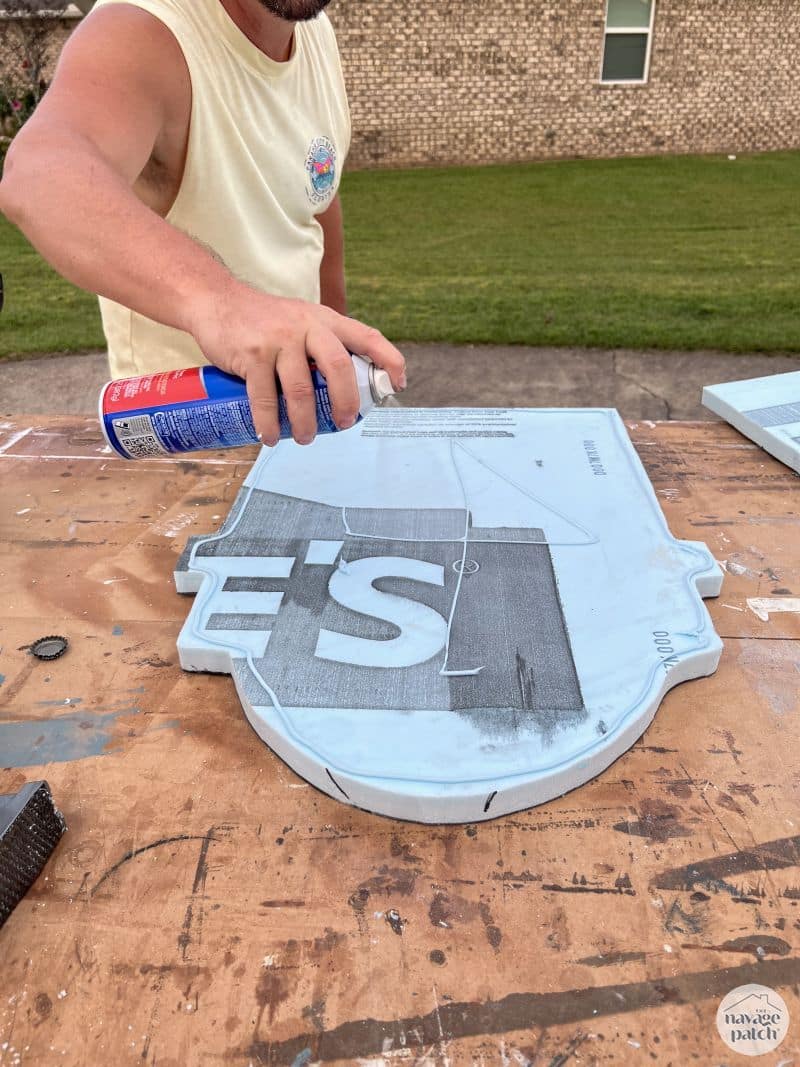
Then why do you use foamboard adhesive? I can hear you, you know.
I use foamboard adhesive because I found in the Florida heat here in the fall (it’s about 7000 degrees), the adhesive liked to come apart at the seams. The foamboard adhesive solved that issue.
Next, I pressed the two pieces together and let the spray adhesive do its thing.
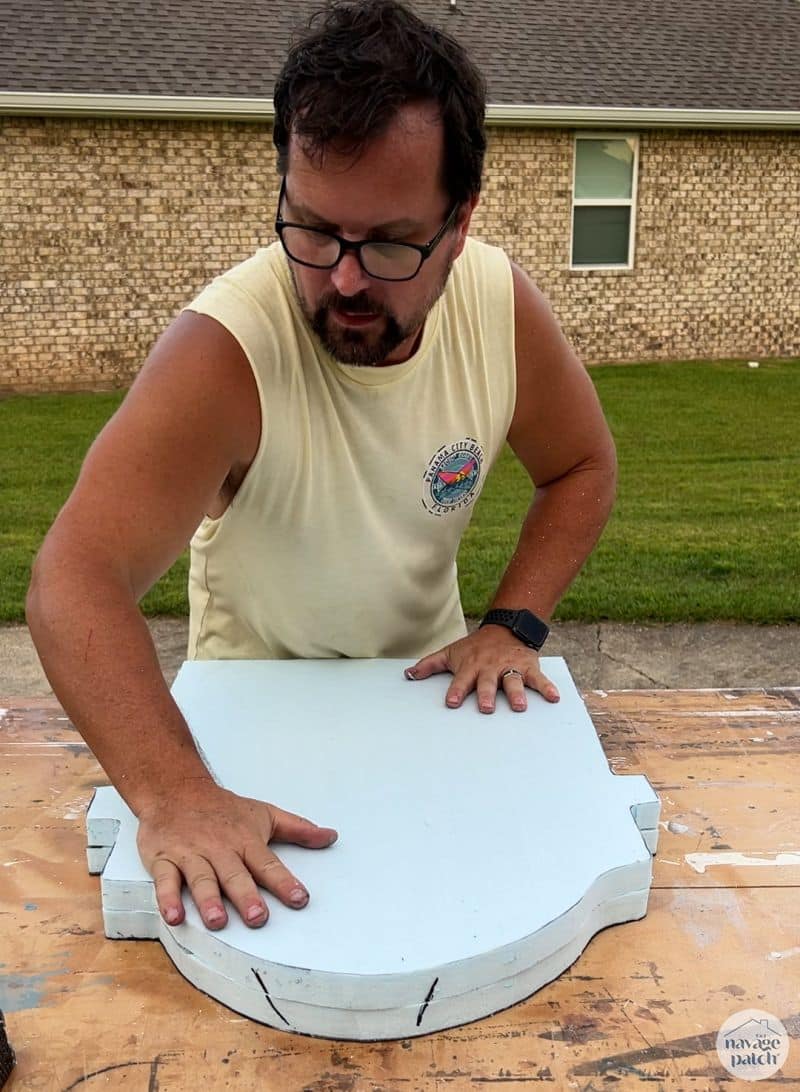
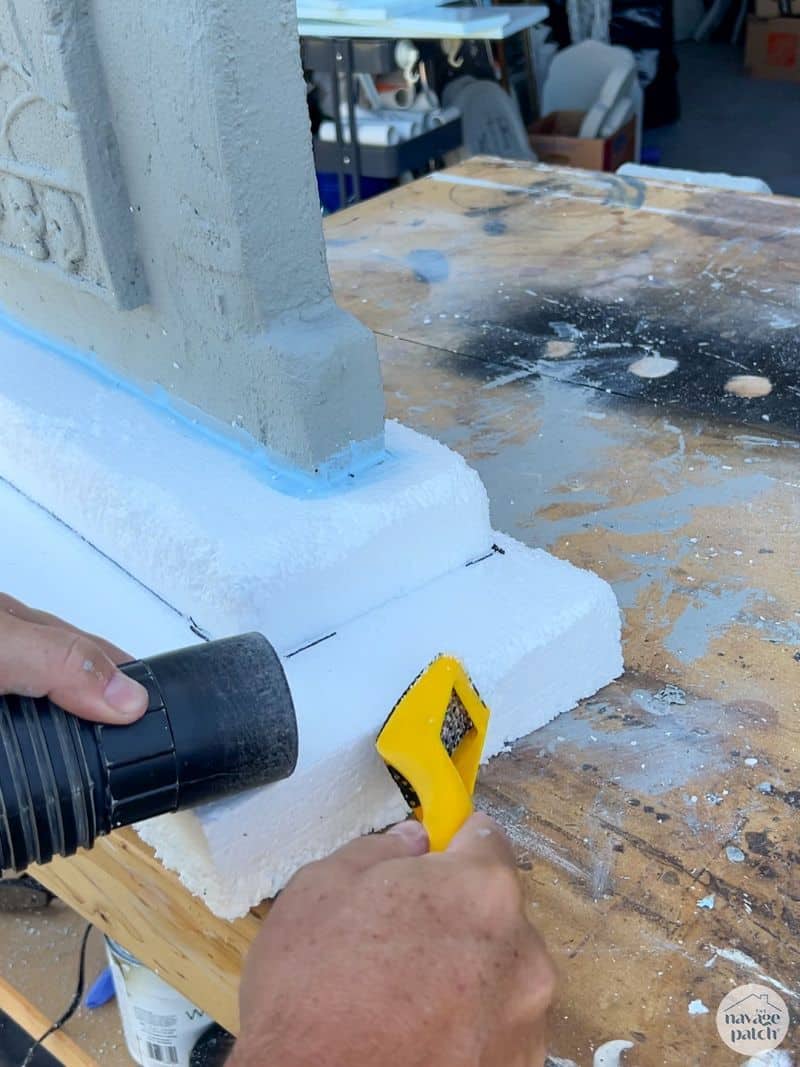
Step 4 – Blend and Shape
I used the Surform tool to blend away the seams and differences between the two pieces. Pic below is from a different tombstone.

The same can be accomplished with a random orbit sander but with less control and more chance of removing too much material.
Variations
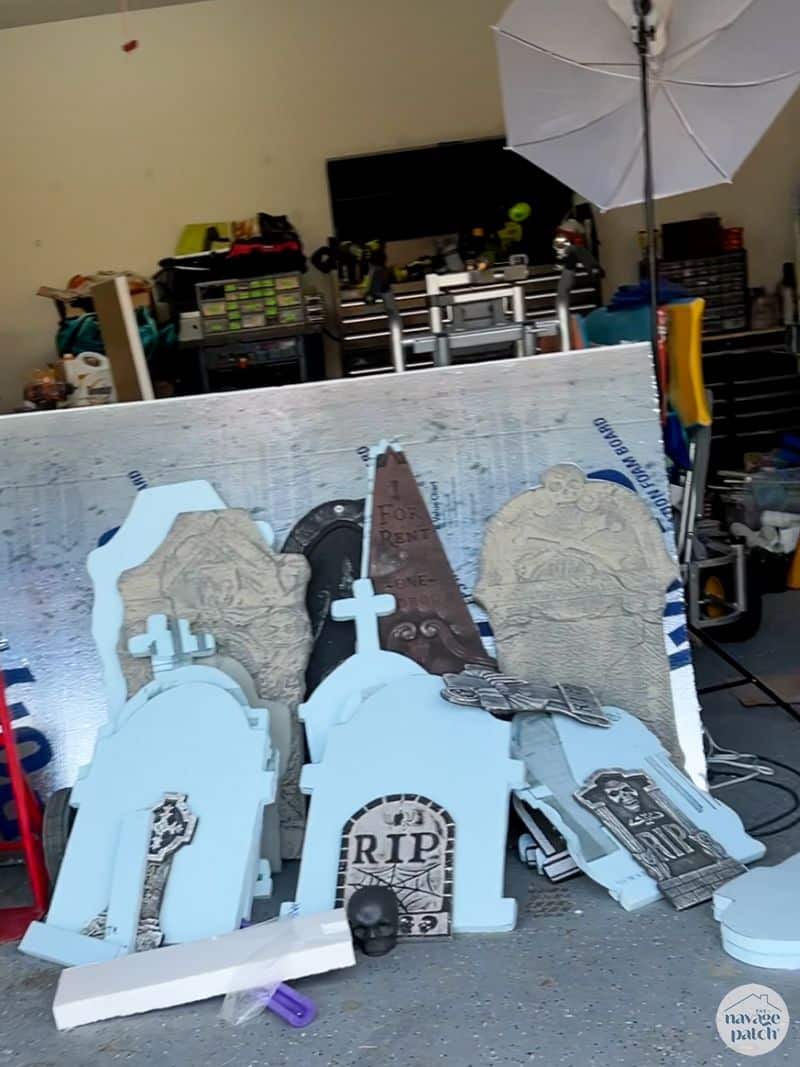
I made some headstones by mounting smaller store-bought stones onto larger ones I traced and cut. This saved me having to develop artistic ability!
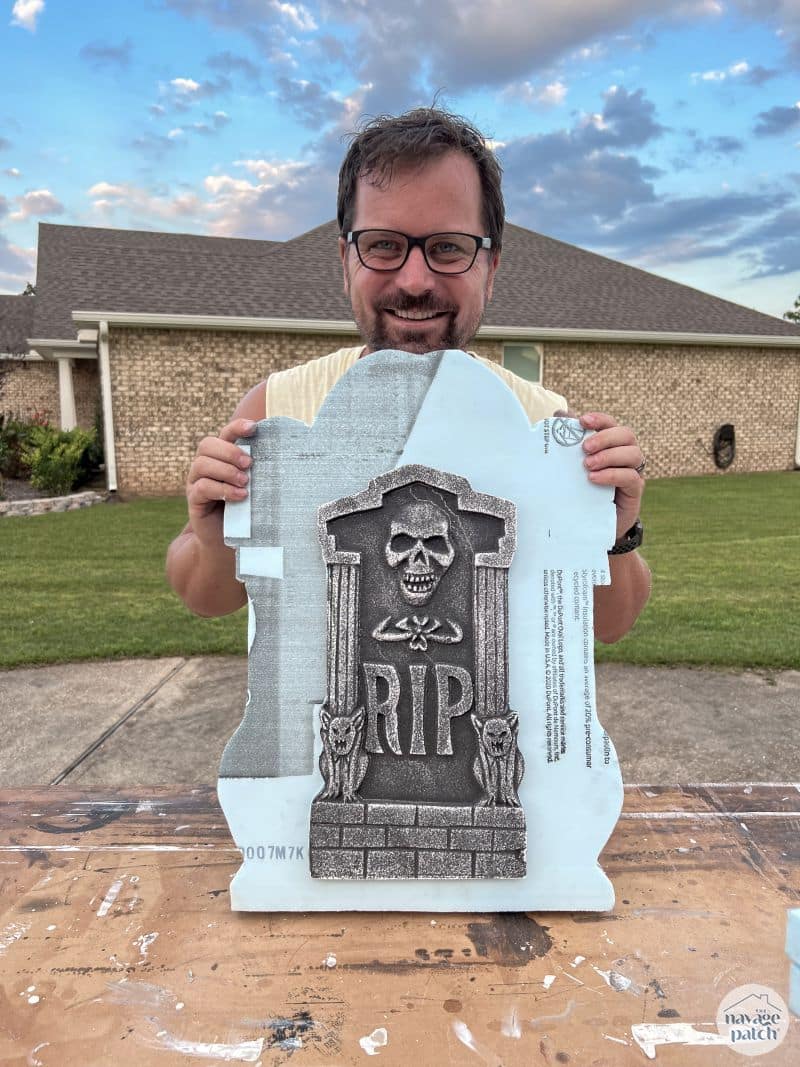
Here’s another store-bought on large backing.
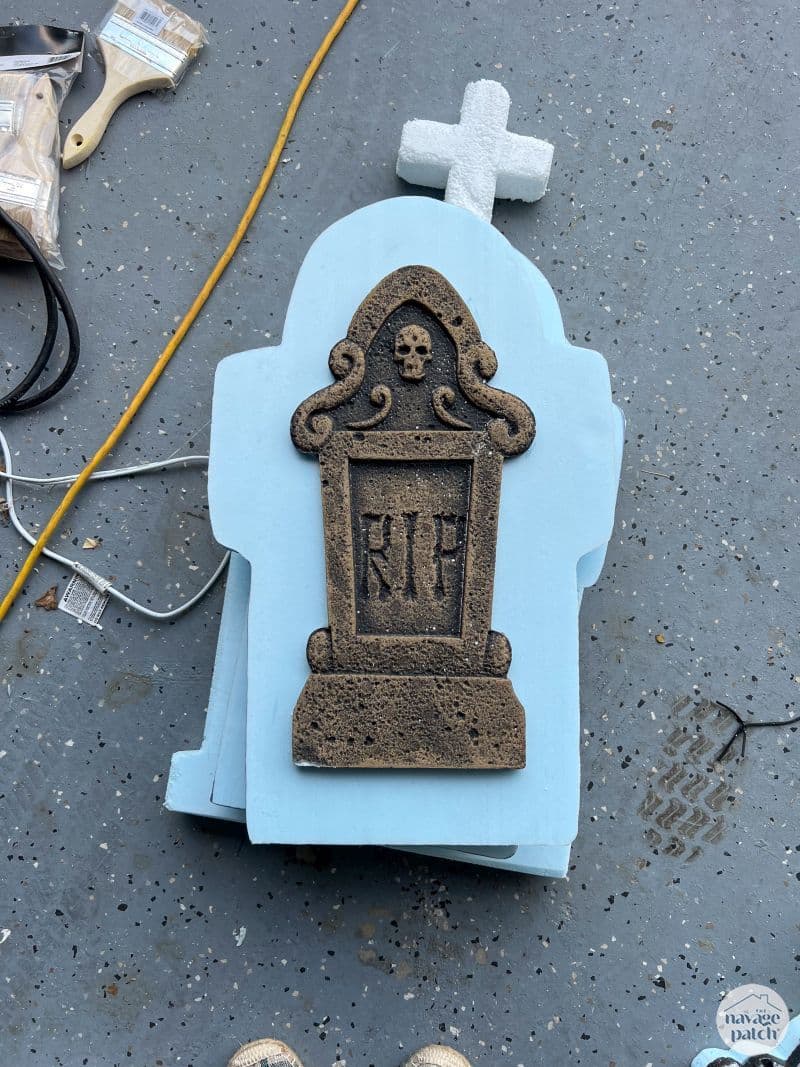
Here are a few more store-bought with full-size backing.
And even more waiting in the wings!
DIY Cemetery Part 2 – Aging & Weathering
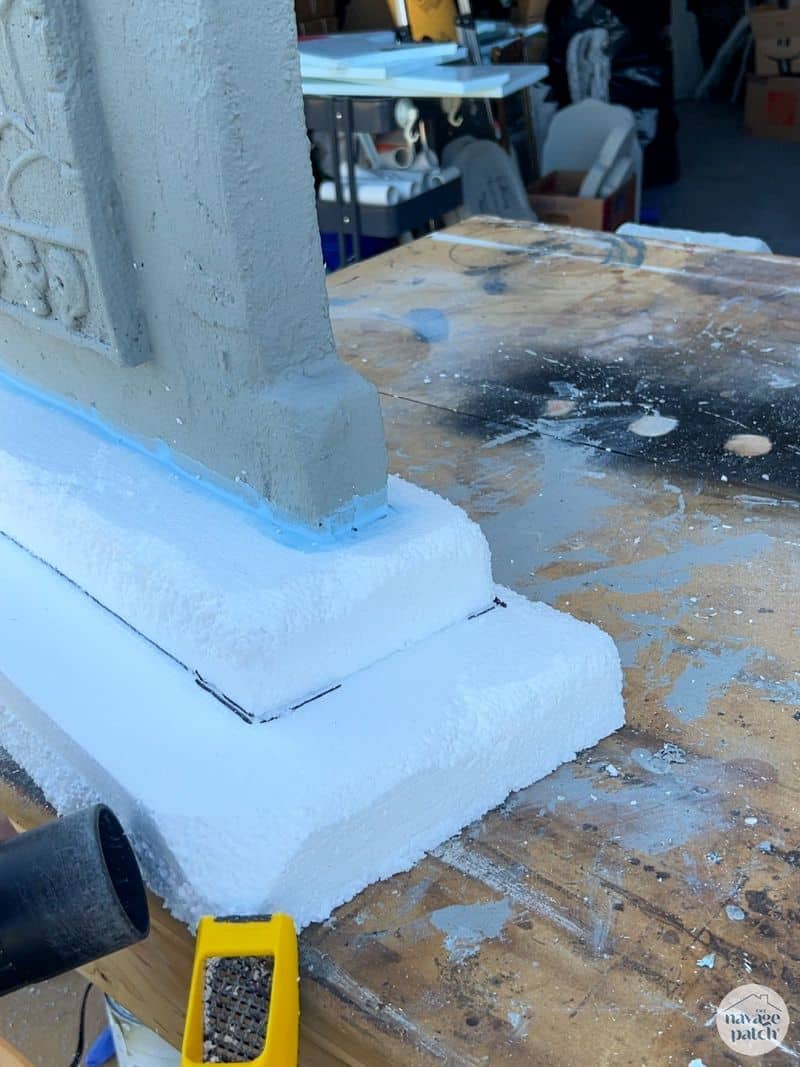
Before I get to the aging and weather, I’ll show you the bases I made for some tombstones. I used 1- and 2-inch foam for the bases – sometimes a combination of both. For the one below, I used a 1-inch and a 2-inch piece. And yes, that 1-inch piece is made from the same cheaper and lighter foam as the 2-inch. I used all sorts of foam for this project!
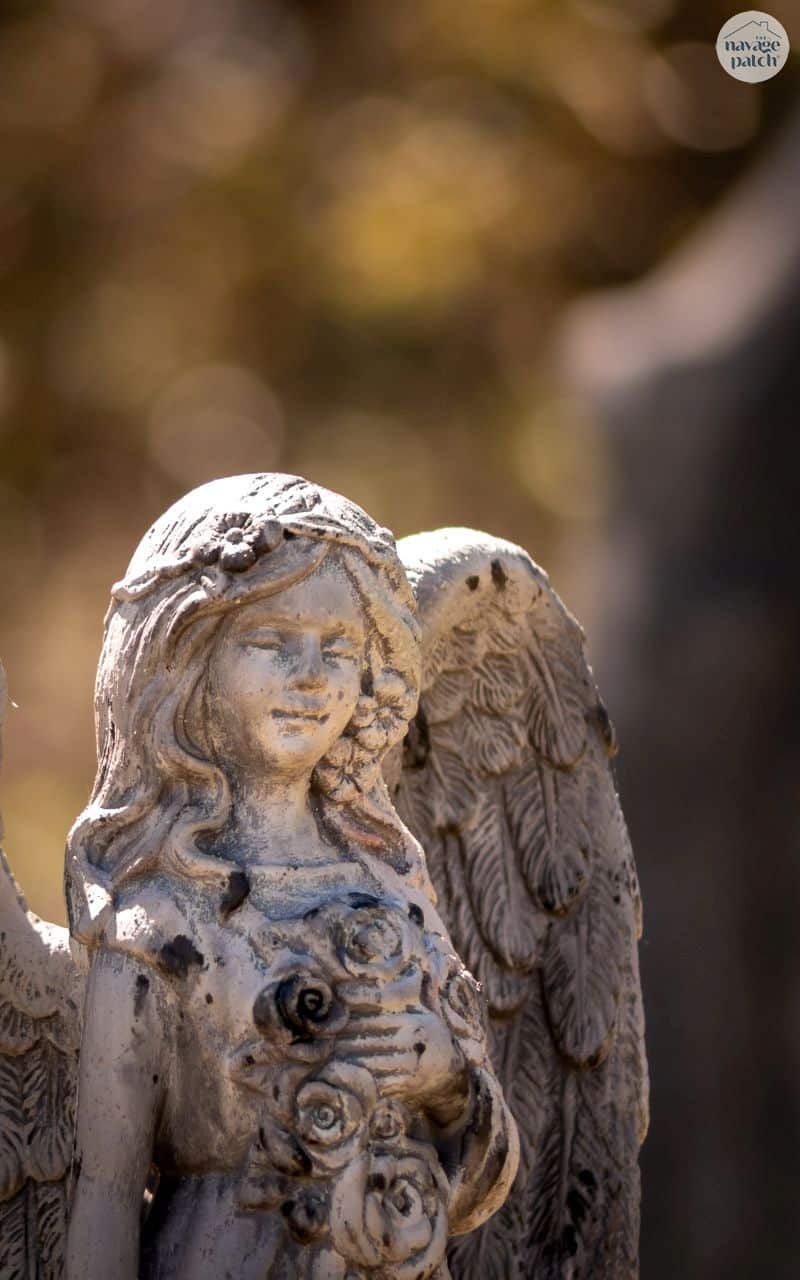
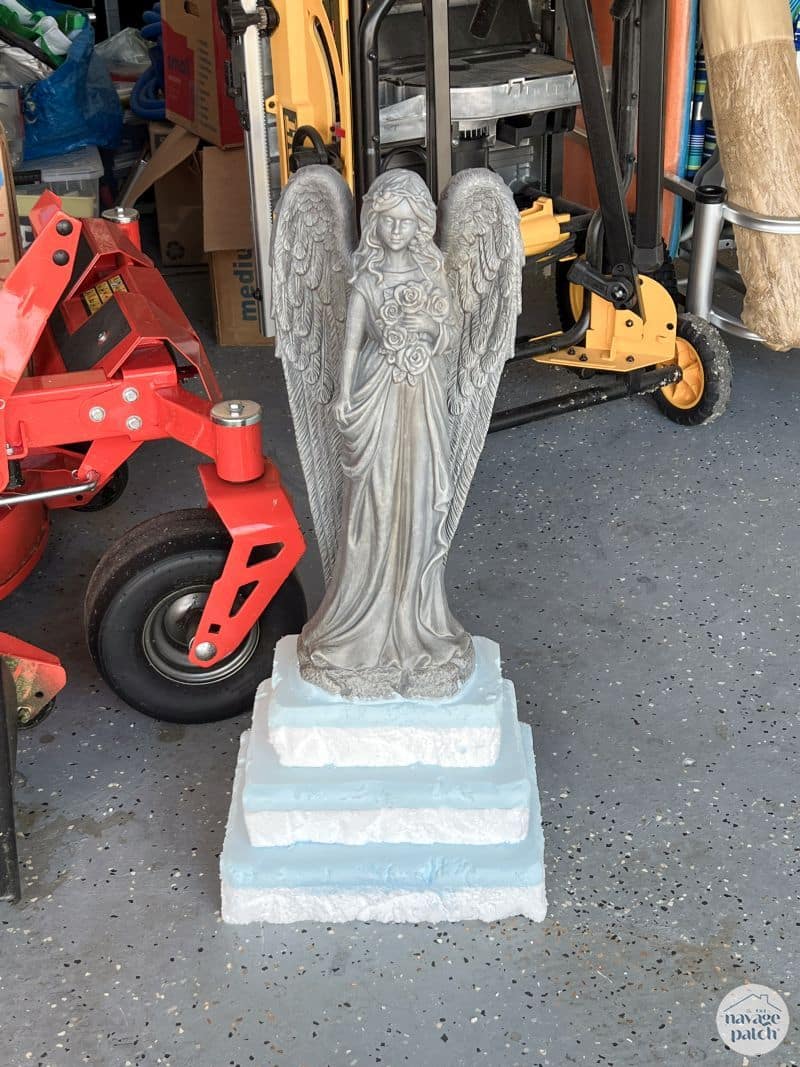
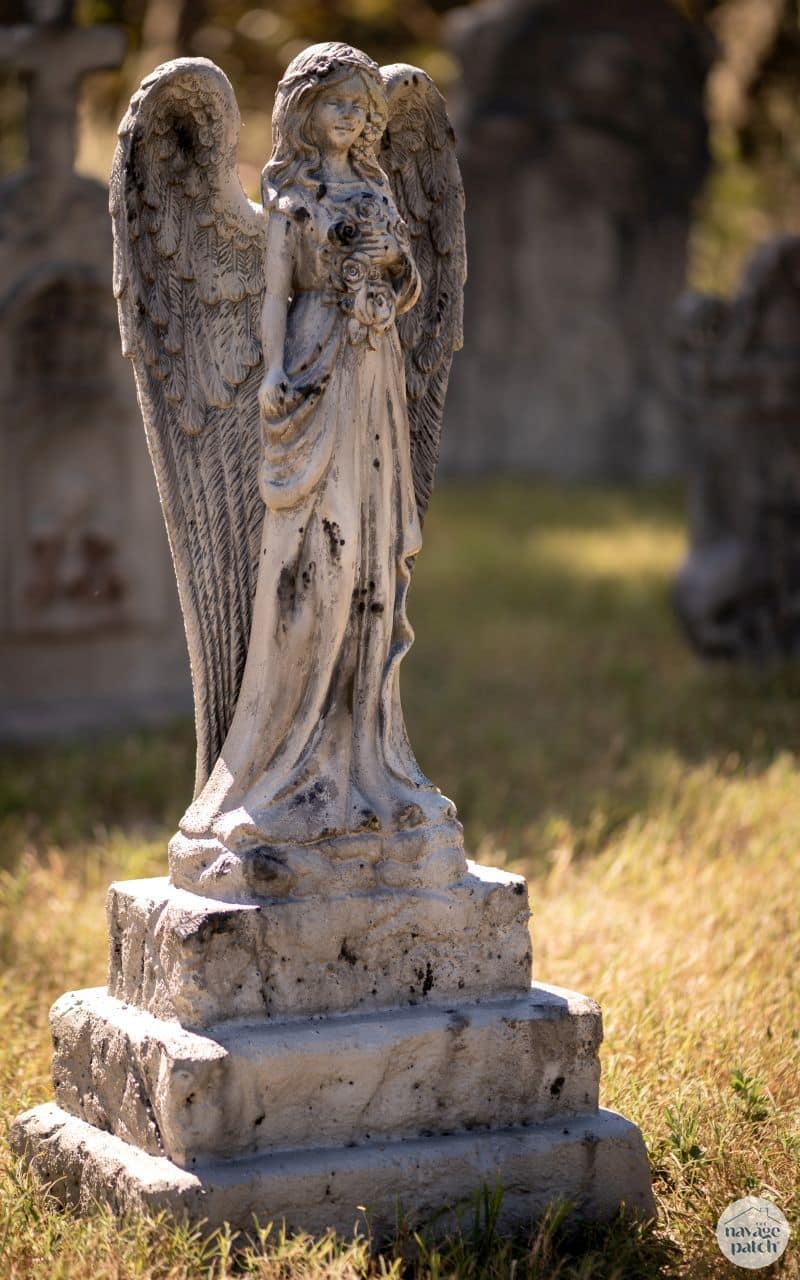
This is the base I made for an angel garden statue from 1- and 2-inch foam sandwiched together.
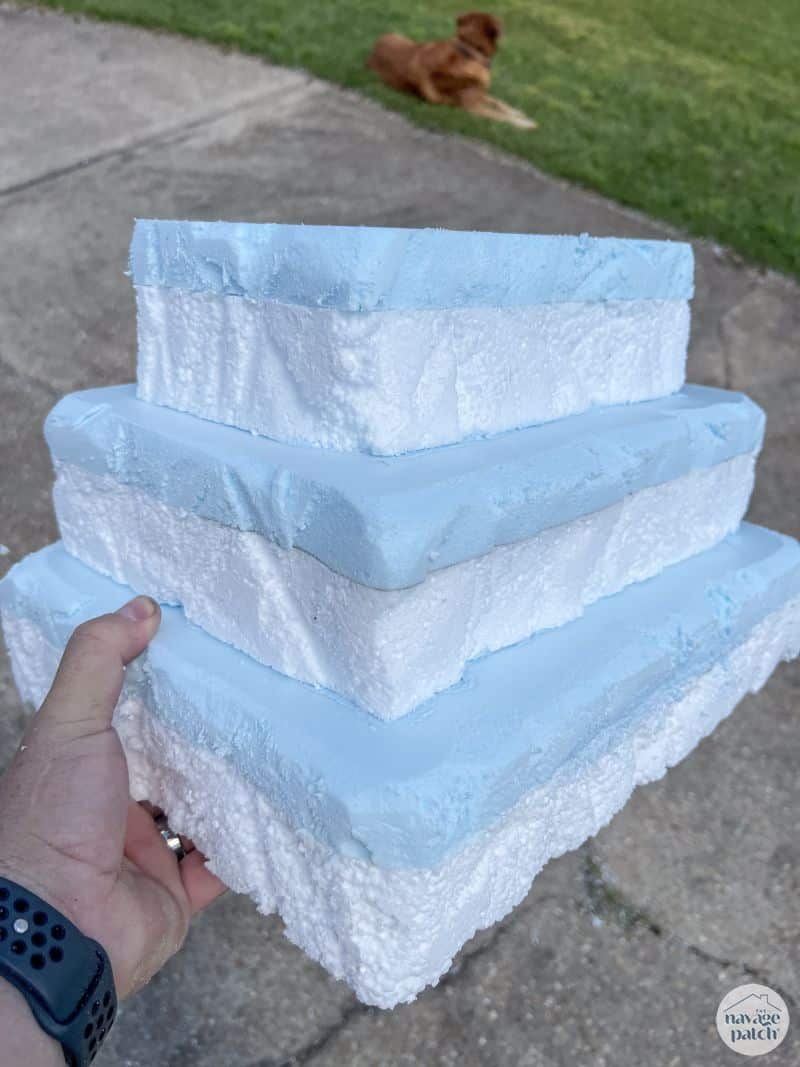
Looks kinda like a wedding cake above, but here’s how it looks with the angel mounted on it.
Method 1 – Surform & Sander
I used the Surform tool for much more than just blending out seams – It also works great to rough up the flat face of the headstone, to round corners and edges and to create chips and divots.
I also used my random orbit sander. It’s much faster, but it can also instantly take too much off if you’re not careful. I used it to weather this stone by quickly jabbing the spinning edge of the sander here and there.

A closer view.
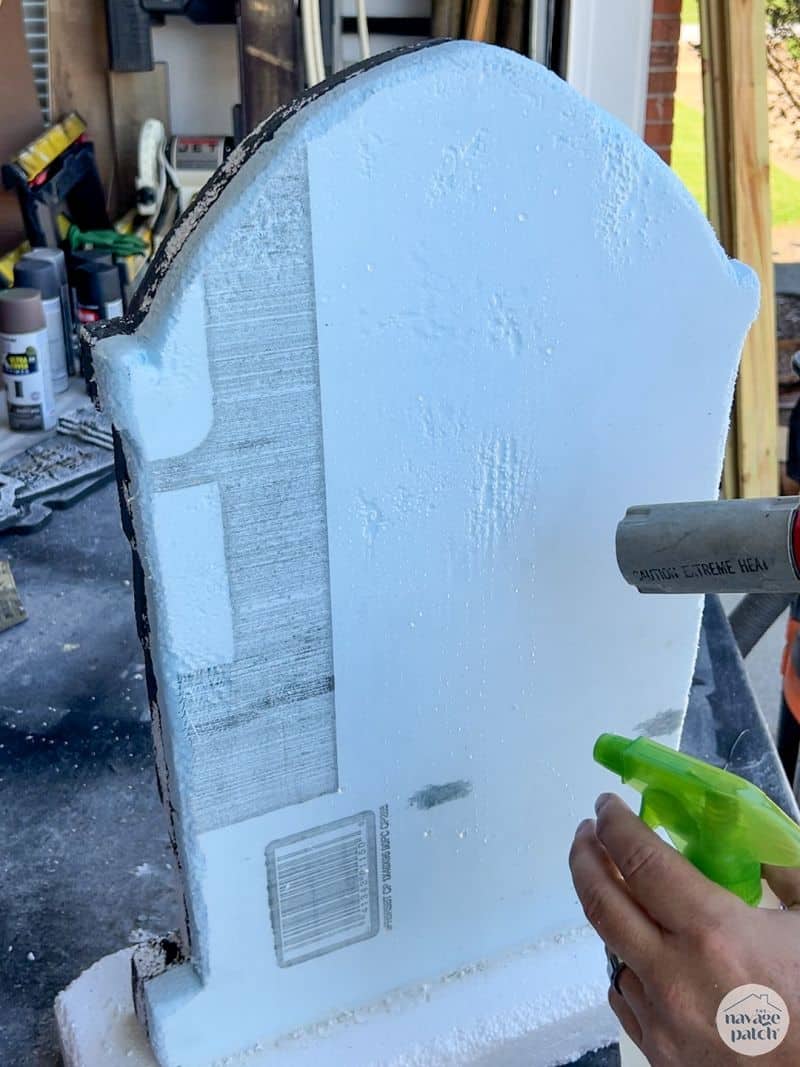
Method 2 – Water & heat gun
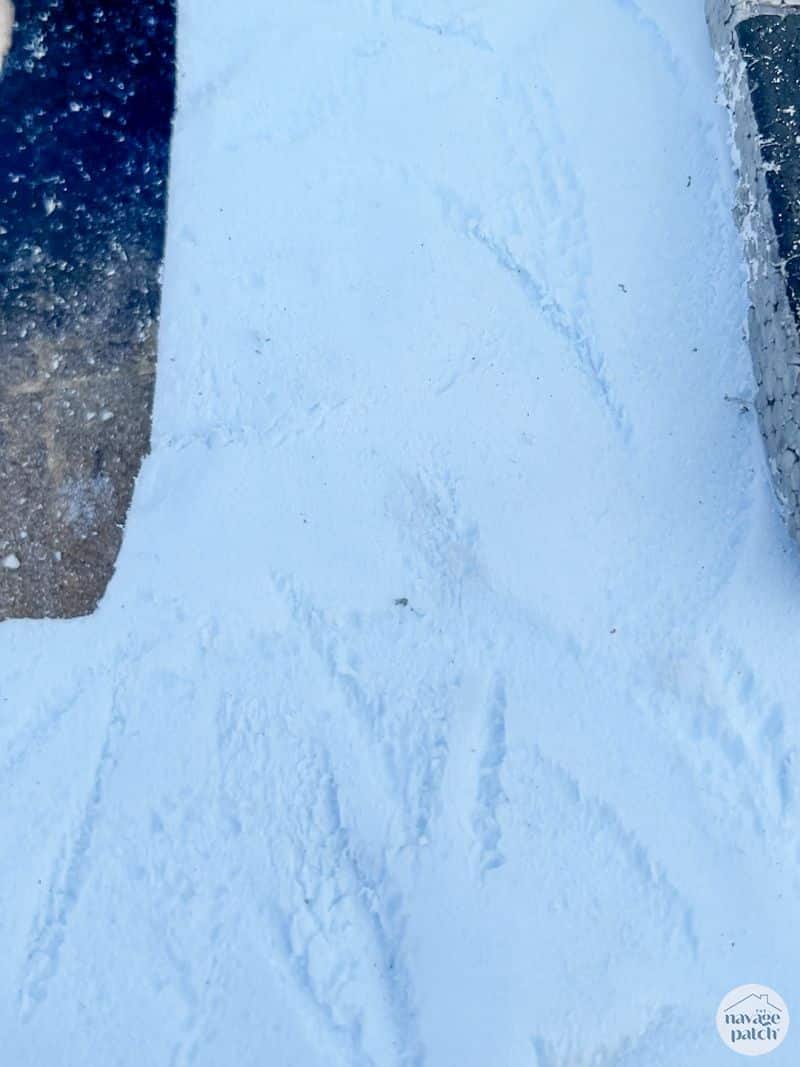
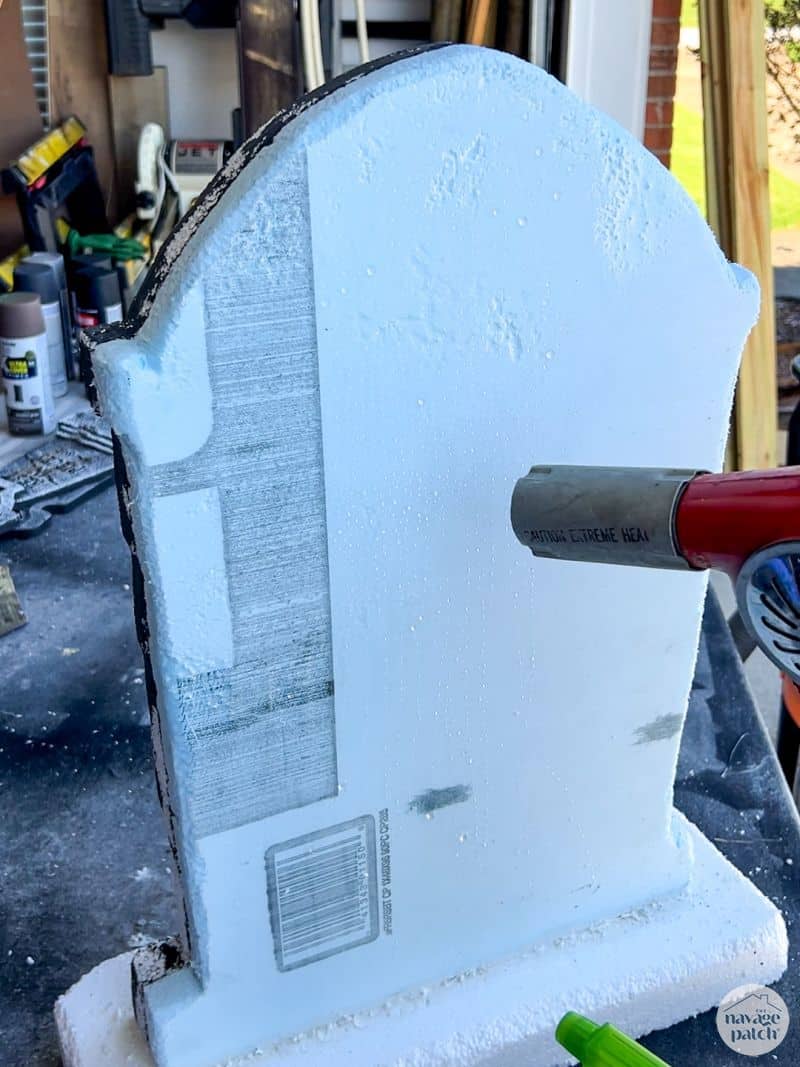
A spray bottle of water and a heat gun is a great way to get a pitted stone look. Remember, ghosts prefer weathered old graveyards that look like they’ve been rode hard for a few centuries and put away wet, so don’t skimp on the weathering!
This method is as simple as spraying a section of the tombstone with water and then waving a heat gun around the sprayed area. The water droplets will protect the foam directly underneath them, while the exposed foam will begin to pit and melt.

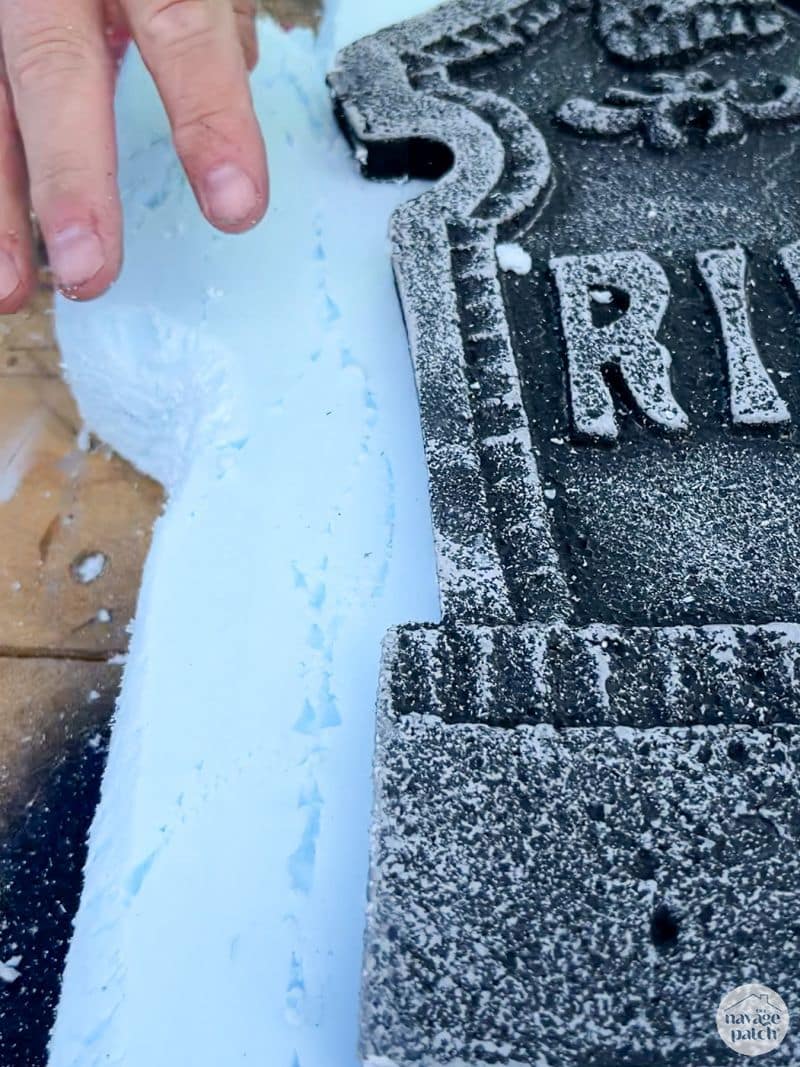
Method 3 – Cracks
No haunted graveyard worth its salt would have headstones without plenty of splintering cracks.
I started making cracks with a utility knife, and while I got some realistic beauties, the method needed an eternity I wasn’t prepared to spend.
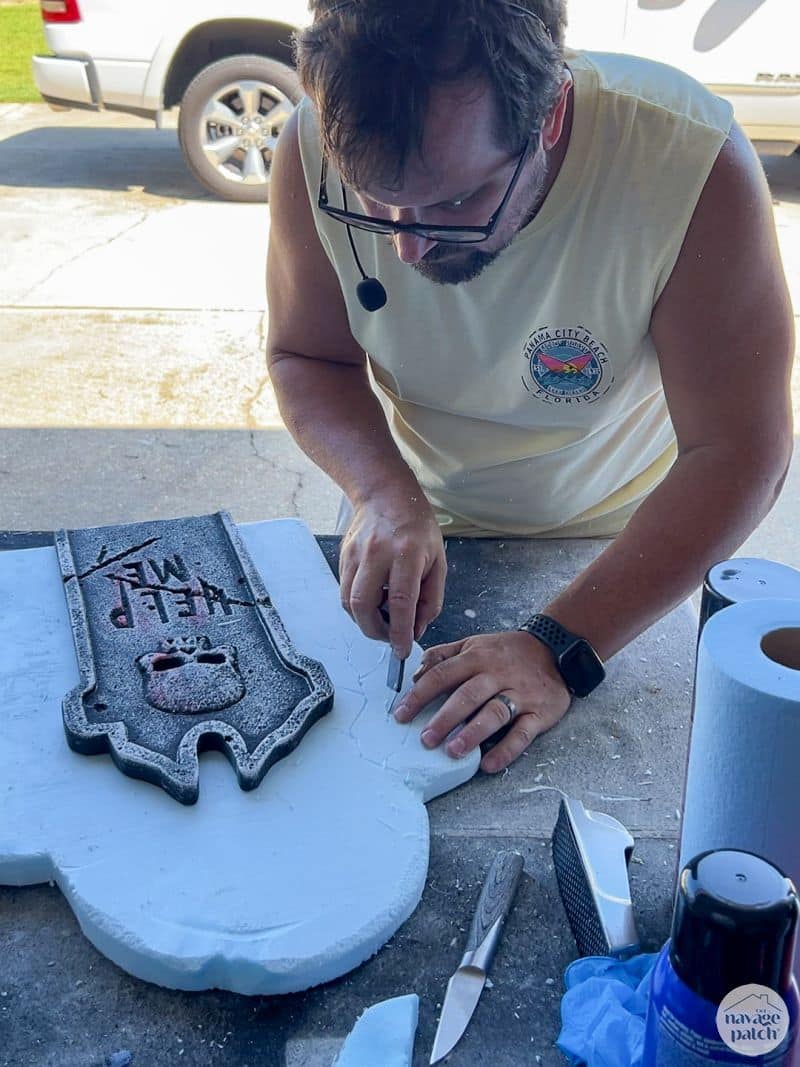
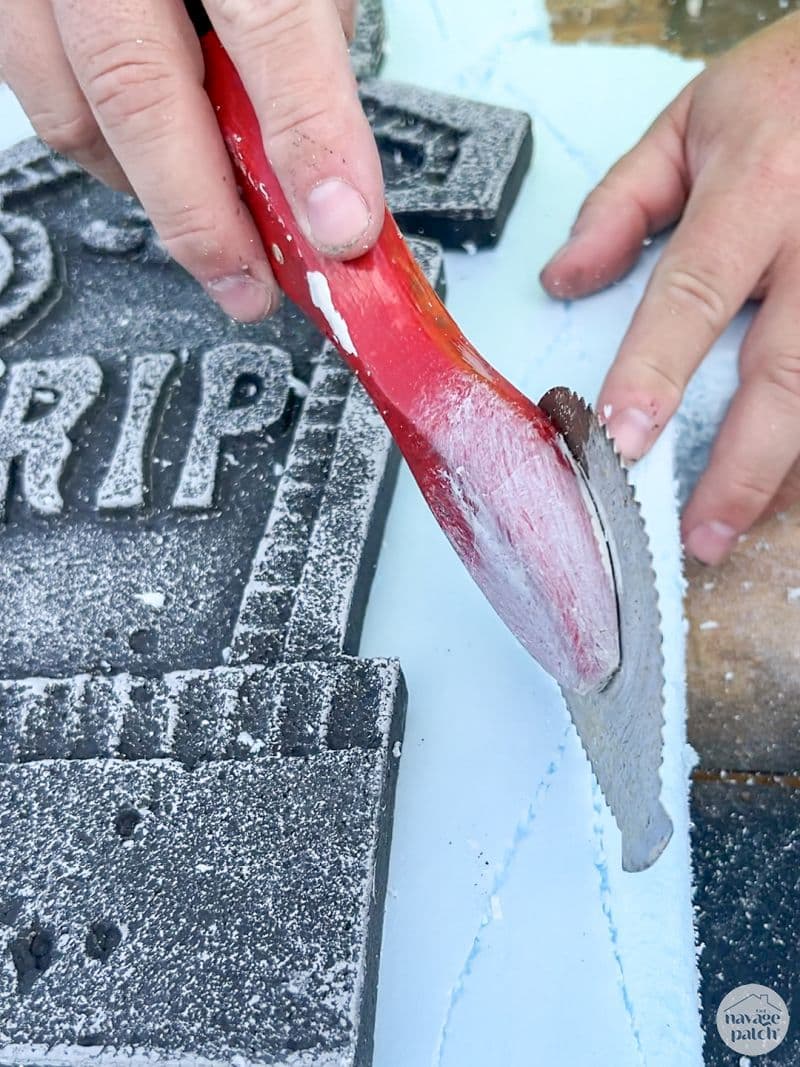
Fortunately my babes isn’t so artistically pure and demanding as I am, so she just grabbed the nearest serrated…whatever…and started digging like a pirate looking for his buried treasure. I adopted her technique and found while crude, it saved enough time to justify the downgrade in realism.
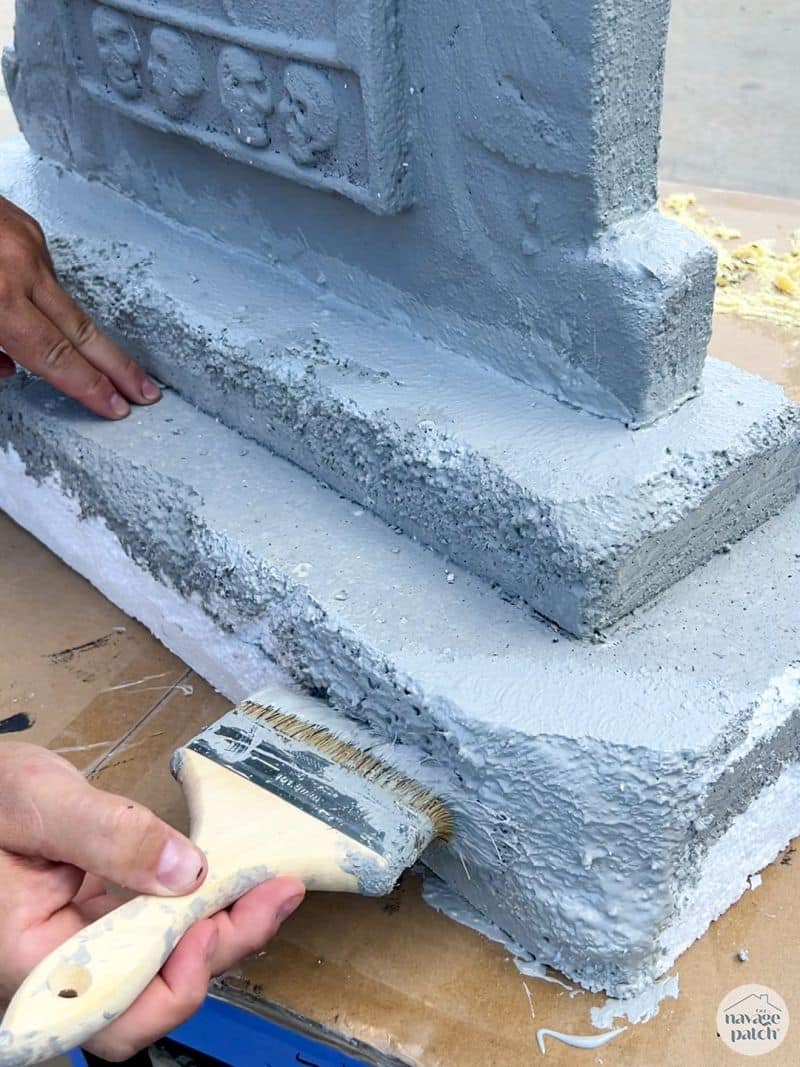
Method 3 – DryLok
DryLok is a concrete and masonry waterproofer and sealer, and it’s what gives these diy tombstones a stony look and feel.

After all the rasping, sanding and gouging, two thick coats will not only make the headstones look and feel authentic, but they’ll be protected from the elements pretty much indefinitely.
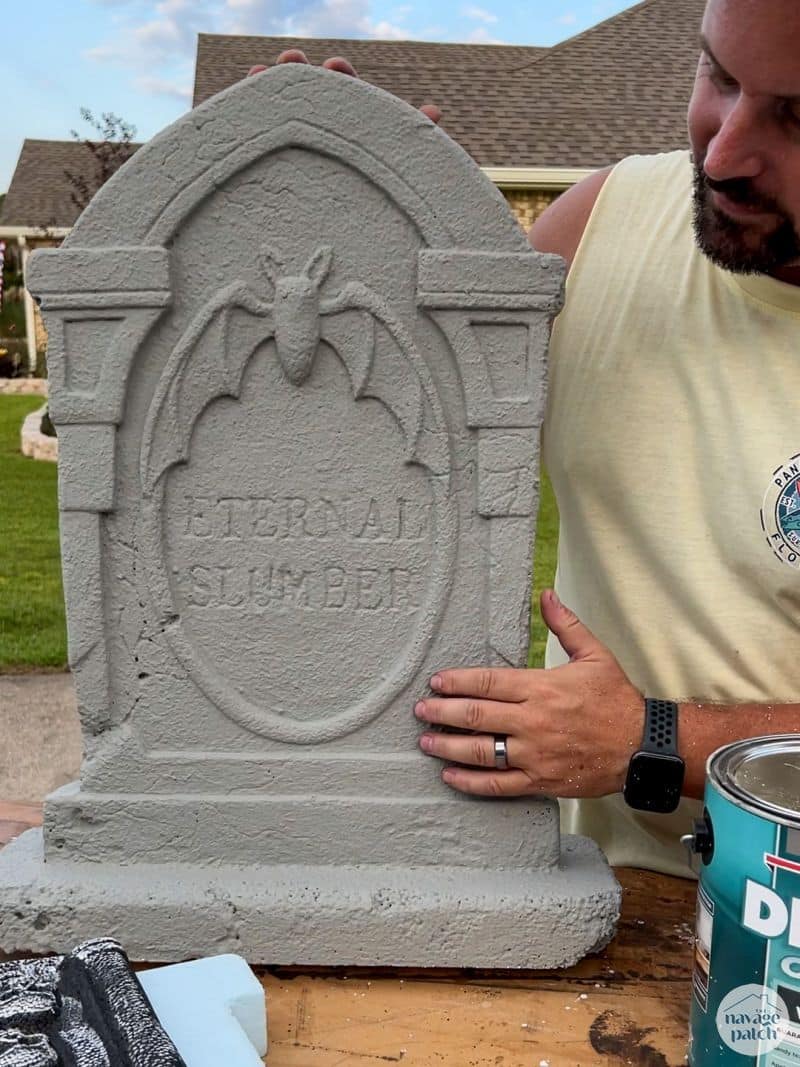
And this is roughly the look you’d get from a store-bought headstone, though ours are still much stronger and better looking.
But to take them next level and make them the envy of the neighborhood and the talk of the town, we need paint.
Method 4 – Paint
Now, I know what you’re thinking, but this time you’re wrong.
You don’t need a single bone fragment of artistic ability for this next step, though you for thinking so by the looks of some of these works of art!
All this was done with four colors of paint, and no brushing to speak of. Let’s dig into the this delightful bone salad and see how its done!
I started with a plastic plate upon which I plopped some black and brown paints.
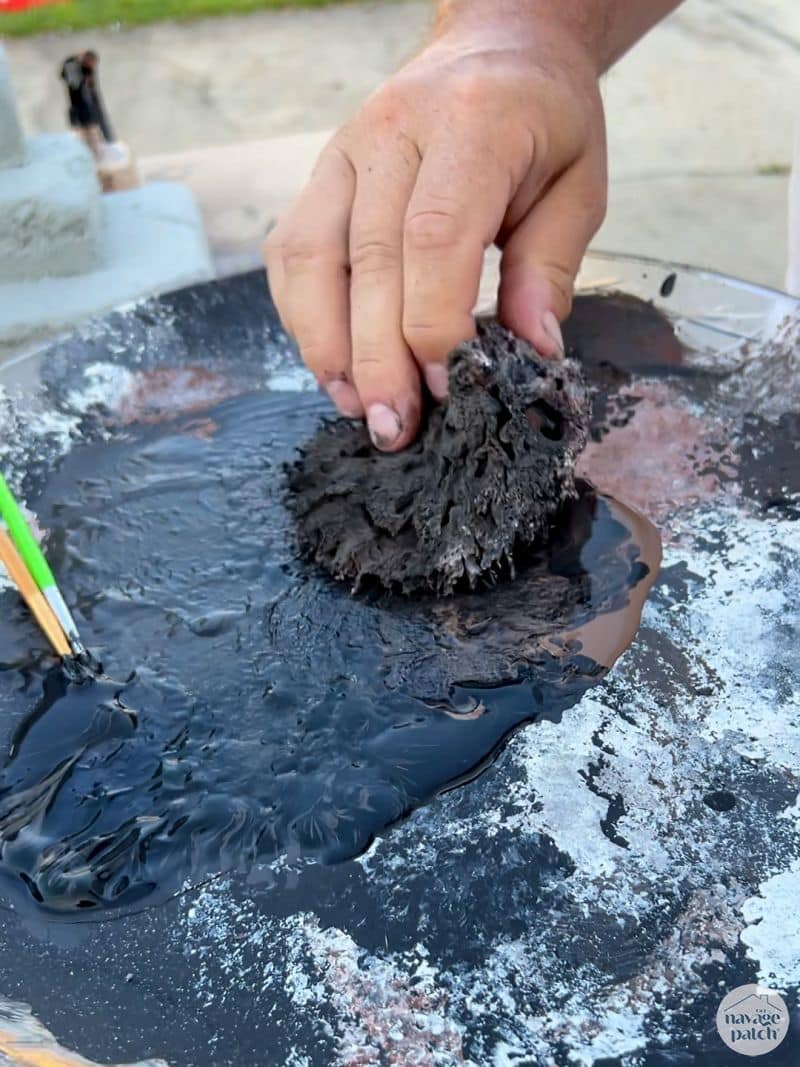
I used a sponge to mop up some of each color, and then I dabbed the paint here and there on the tombstone.
The goal of this step isn’t full coverage but to introduce a base layer of paint to the headstone. After I sponged on as much as shown below, I dry-brushed the sponged areas to spread the paint out a bit.
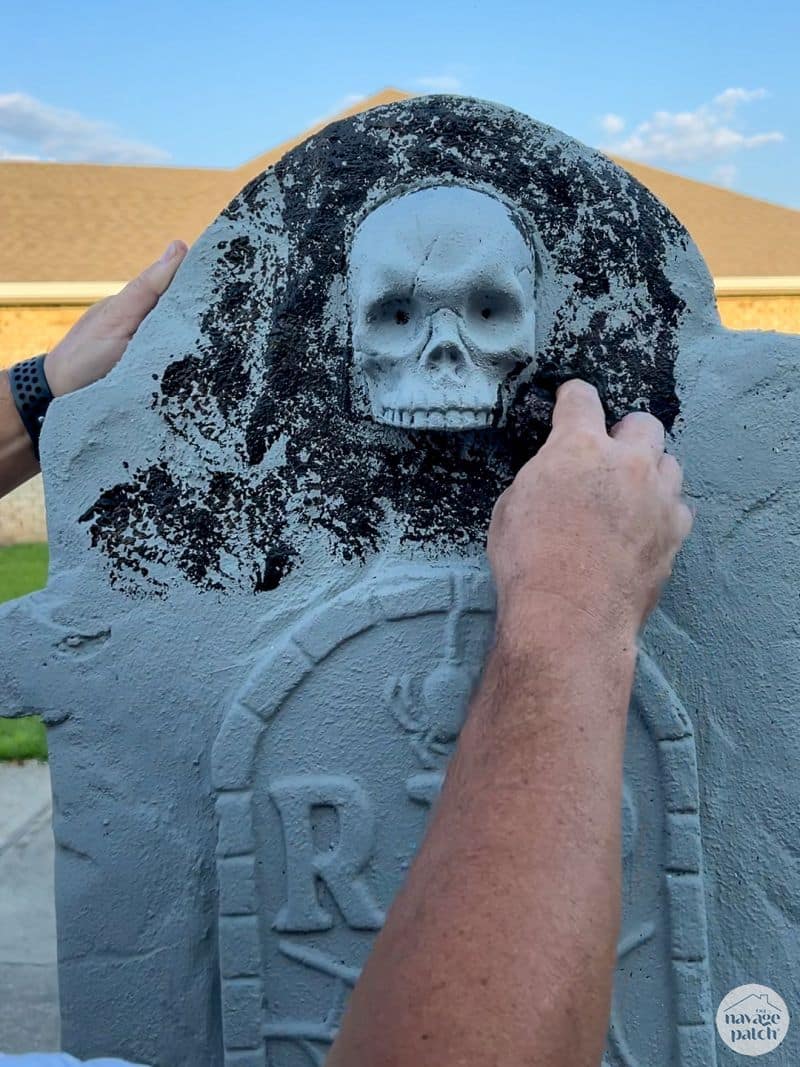
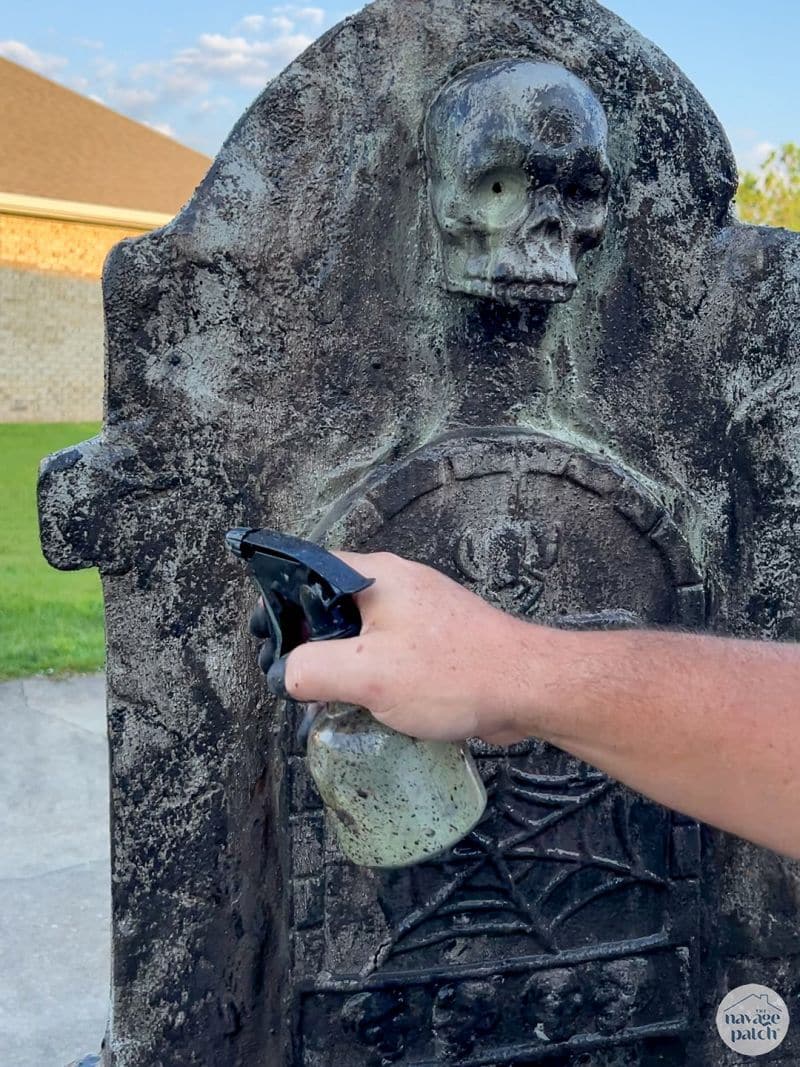
Next, I mixed up some black, algae green and rust color paint with water in three separate sprayers, and I sprayed them here and there on the DIY headstone. I tried to imagine where algae and lichen might form.
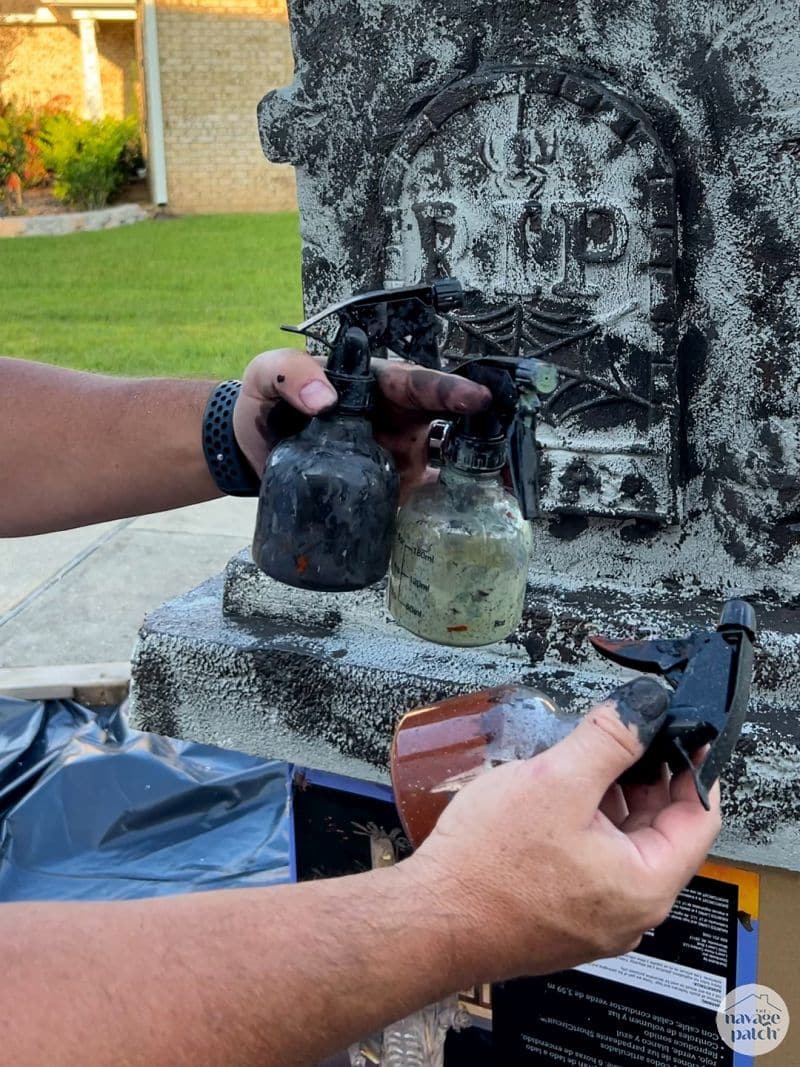
First a little black.
Then some green.
Then, the magic!
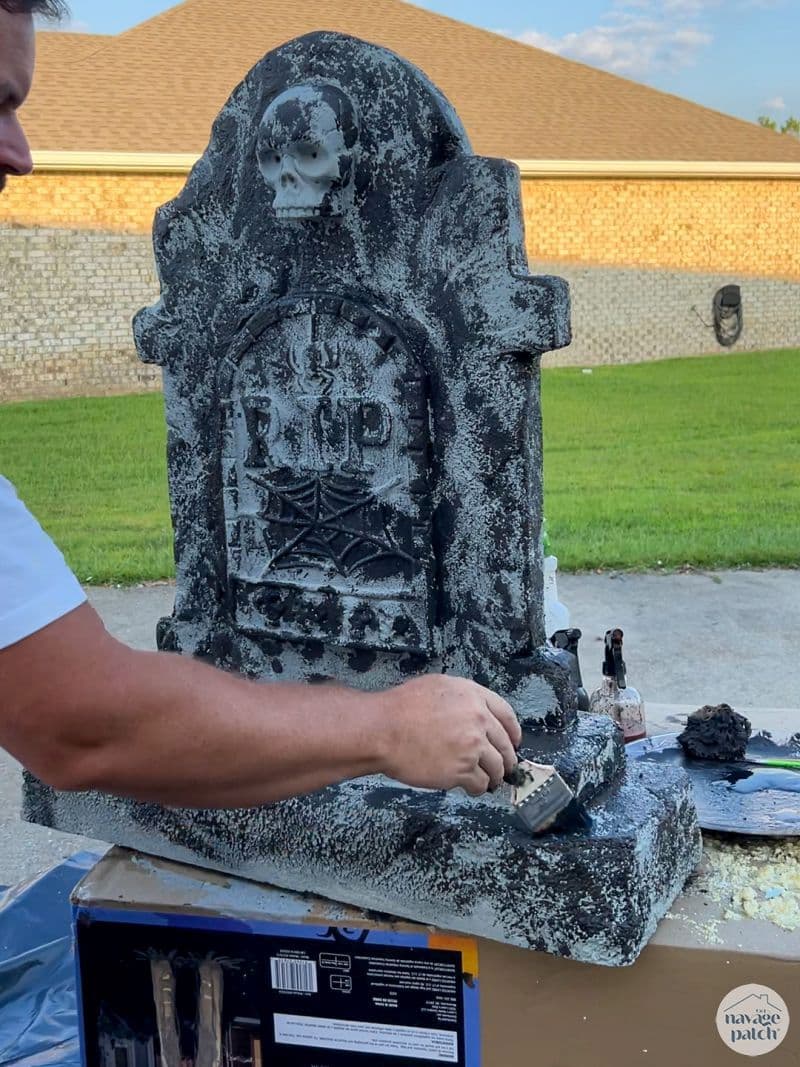
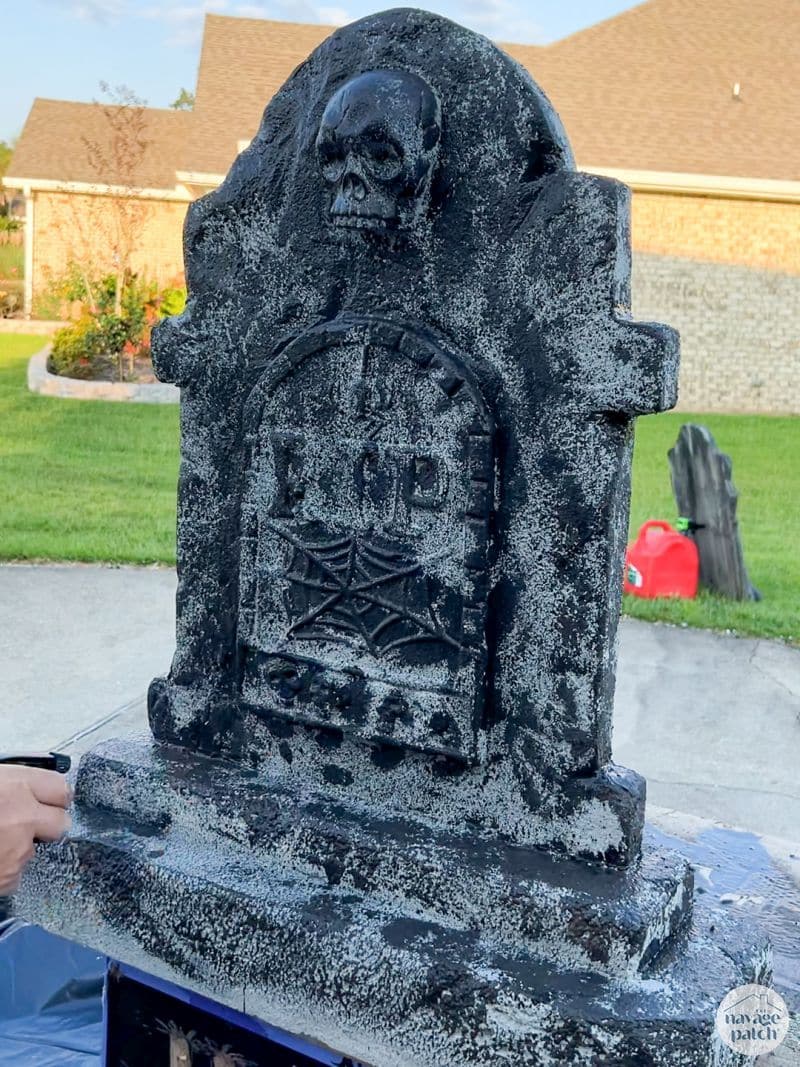
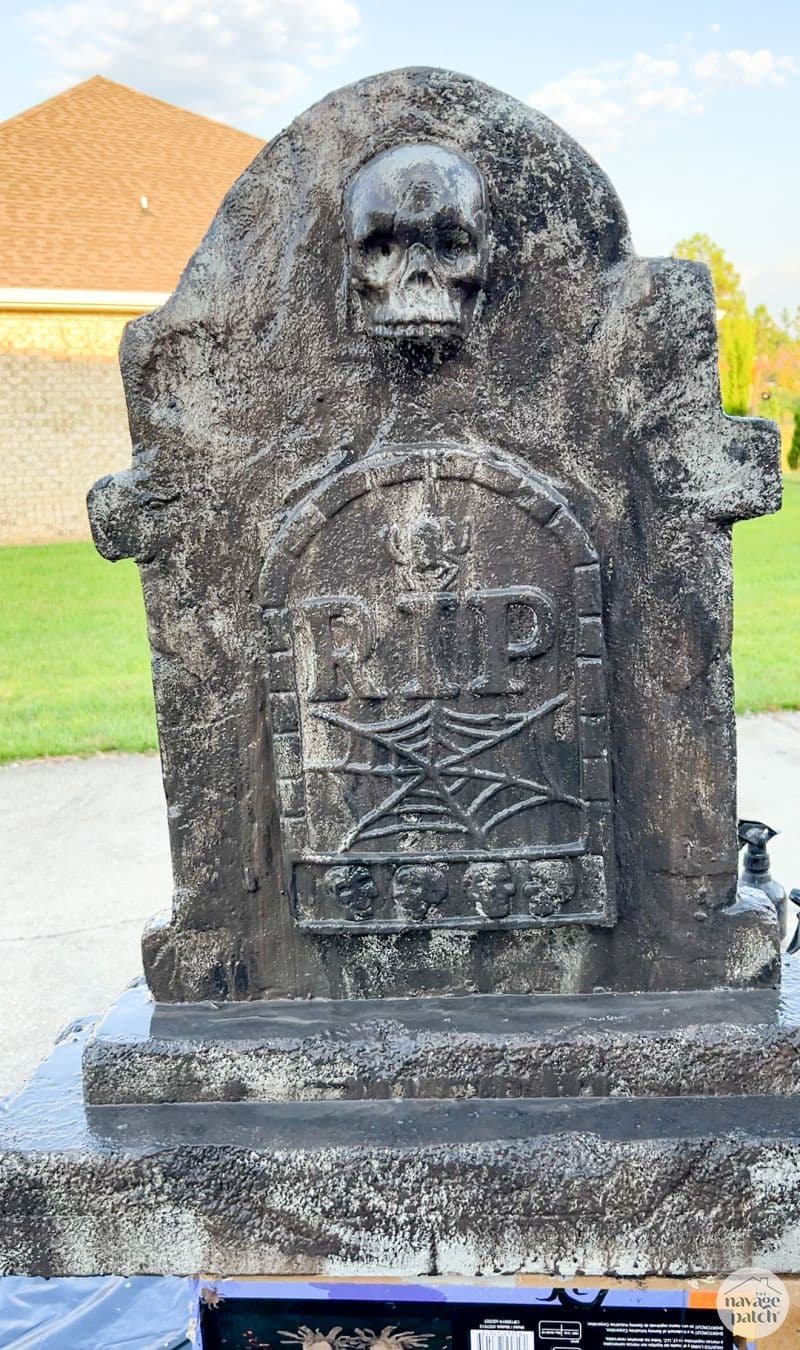
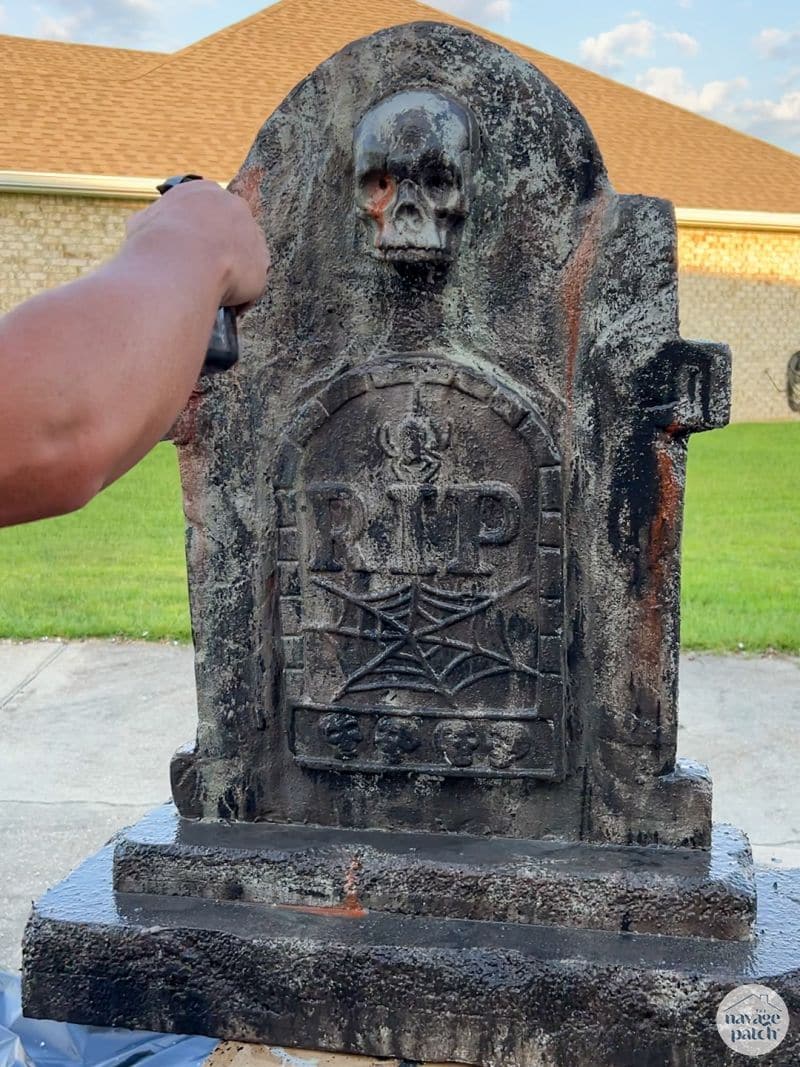
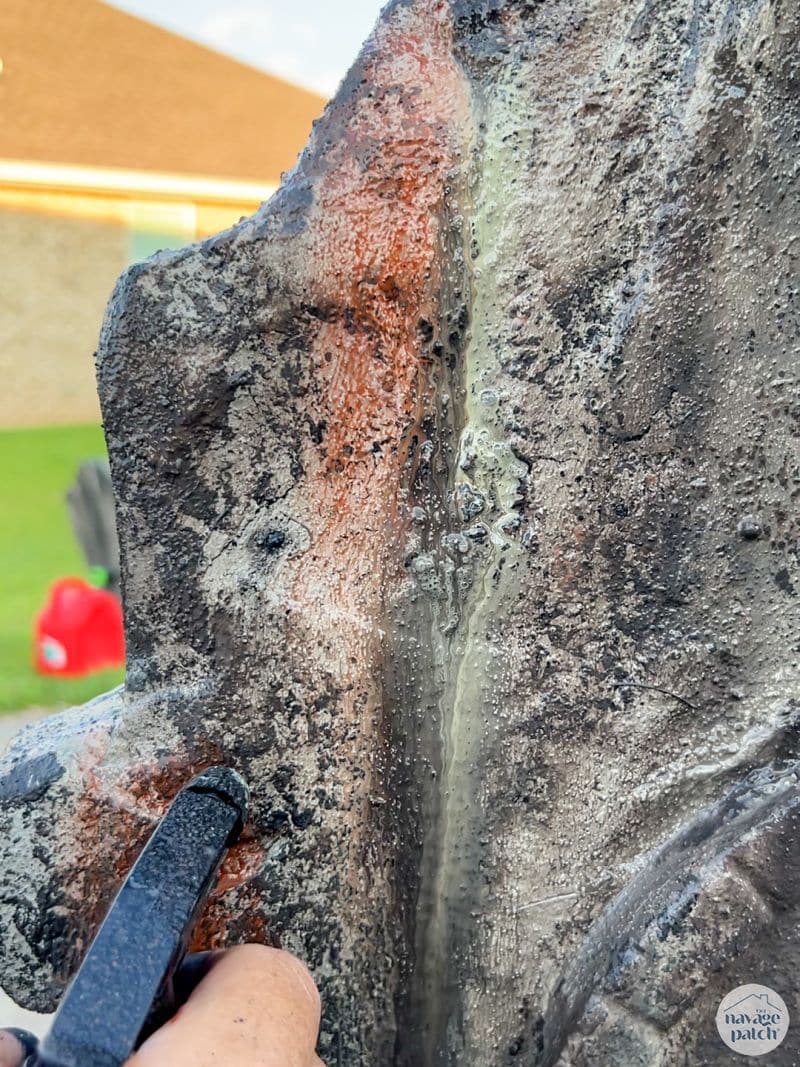
Using a spray bottle of water, I sprayed the painted areas and let the watered paint run.

The more you spray, the more you get down to base gray.
This was the end of round one.
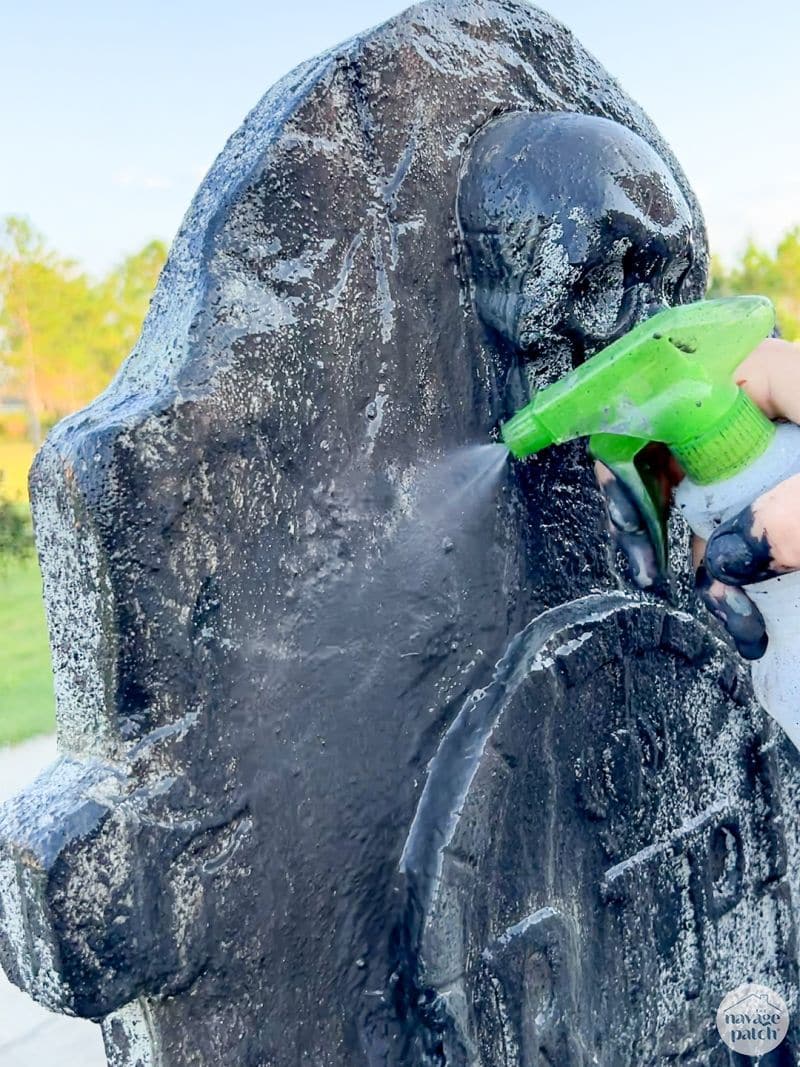
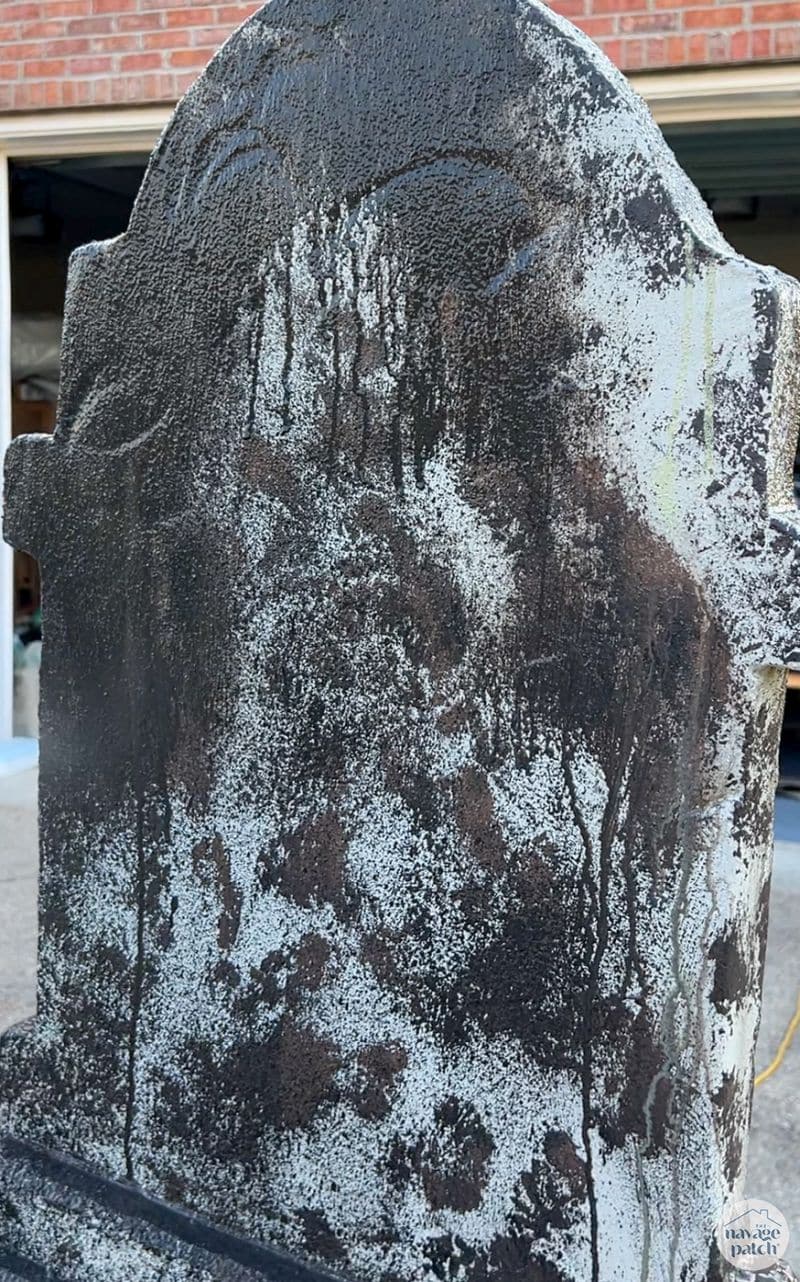
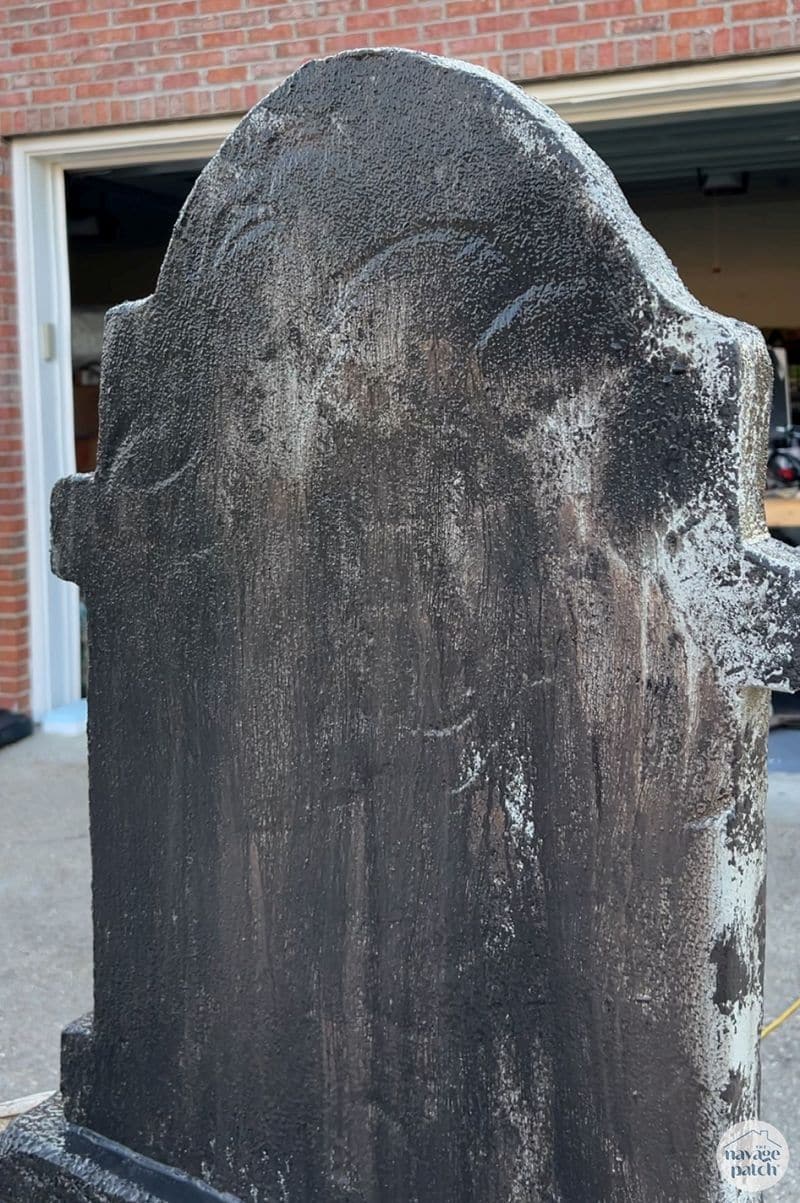
Before anything dried, I went back in again with the red and green and then repeated the watering. But first, I worked on the back. You can really see how the water blends everything together back there.
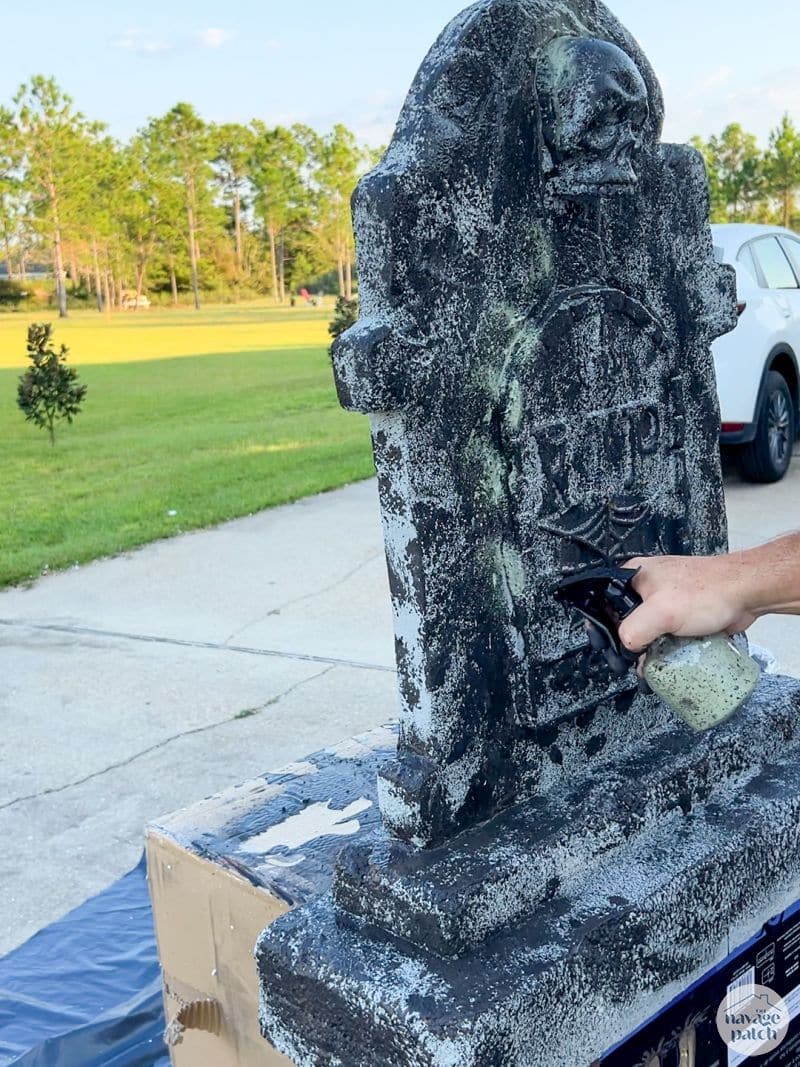
Then I went back to the front and started in with the green again and the red.
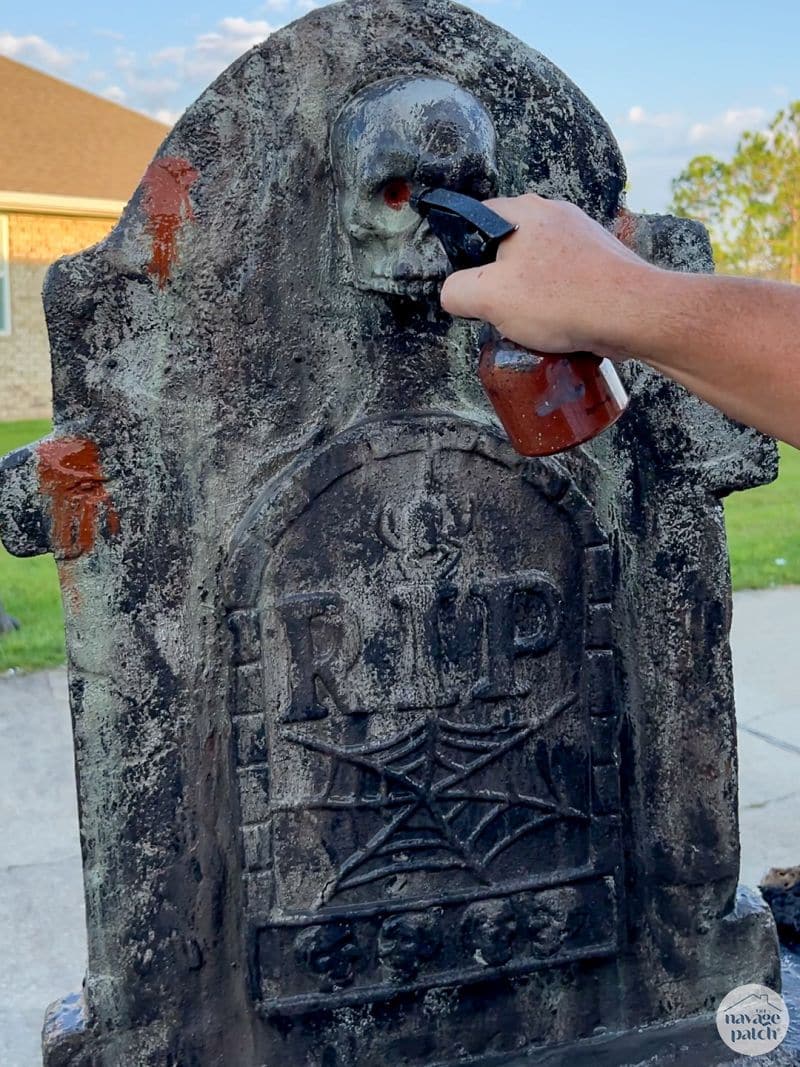
And a little more water…
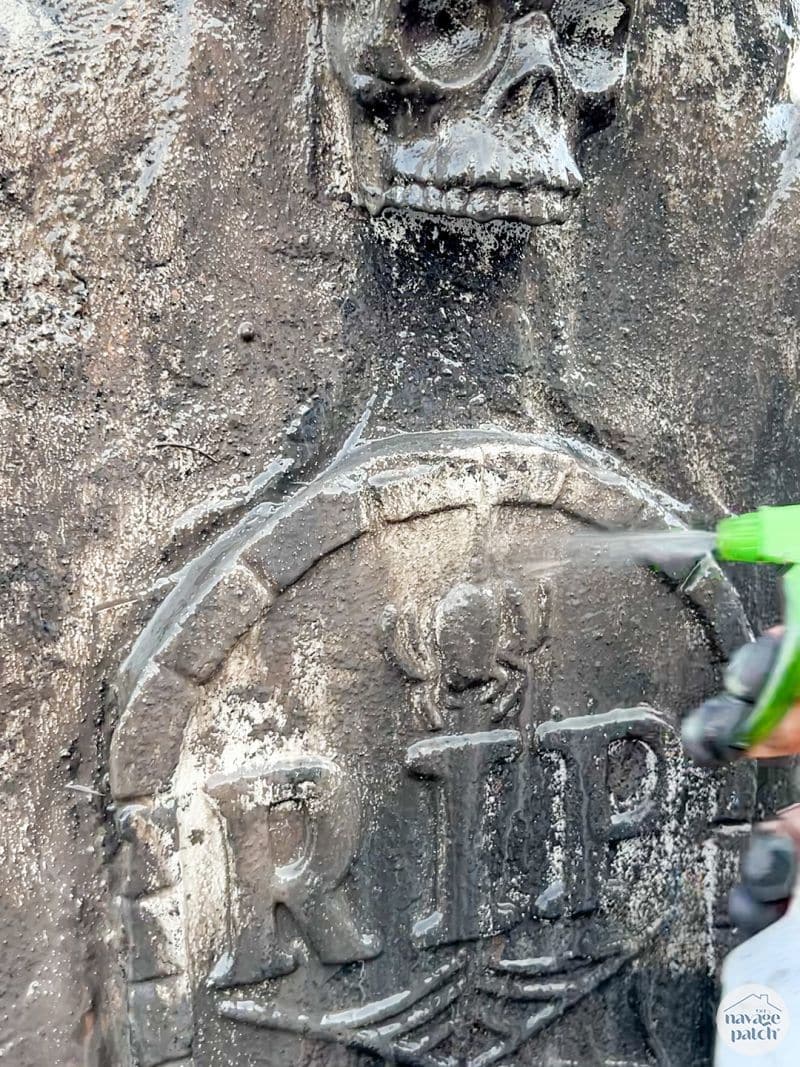
By the way, this painting should be done on the grass, preferably on a large tarp. I put a huge plastic tarp underneath me, but due to the slight slope of the driveway, all the painty water flowed onto the concrete slab. I got most of the paint out with a pressure washer and the rest was totally worth it for the results!

DIY Graveyard Part 3 – Installation
My first method of installation failed in a windstorm, but I’m going to show it to you anyway, because I think I know the reason it failed. I will then show you the new method that worked perfectly.
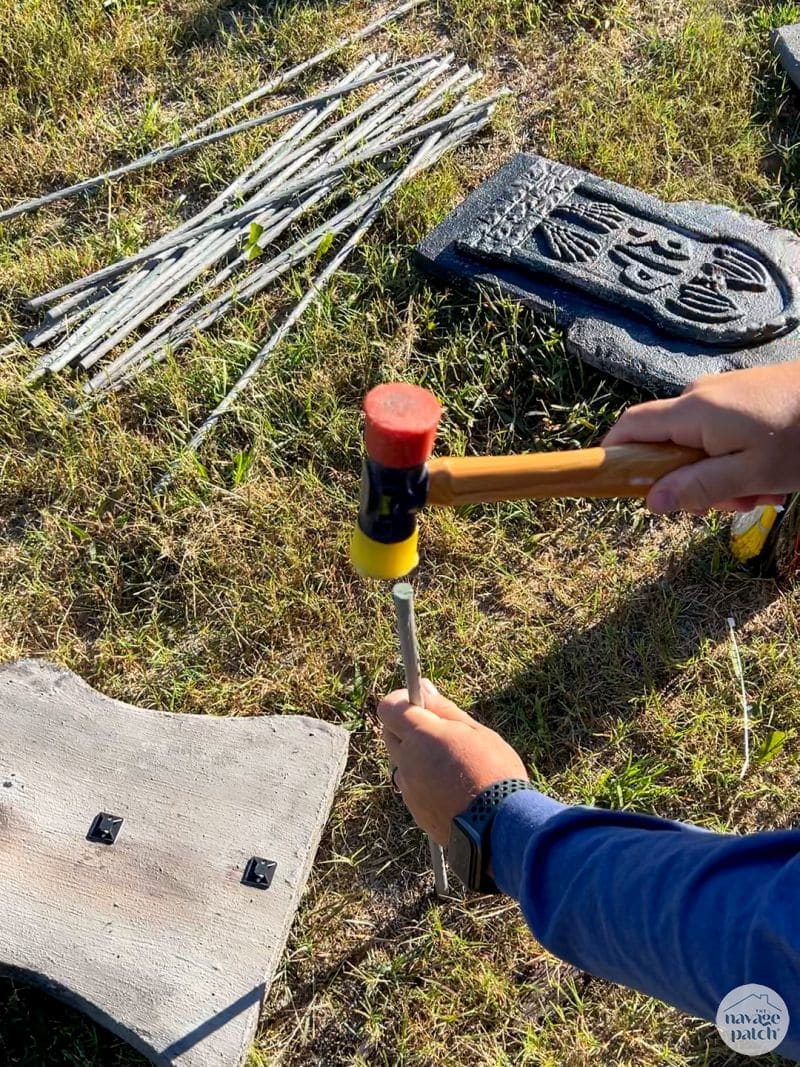
Our first idea to keep the headstones upright was to attach cable tie mounts to the backs of the tombstones and then zip tie them to garden stakes pounded into the yard.
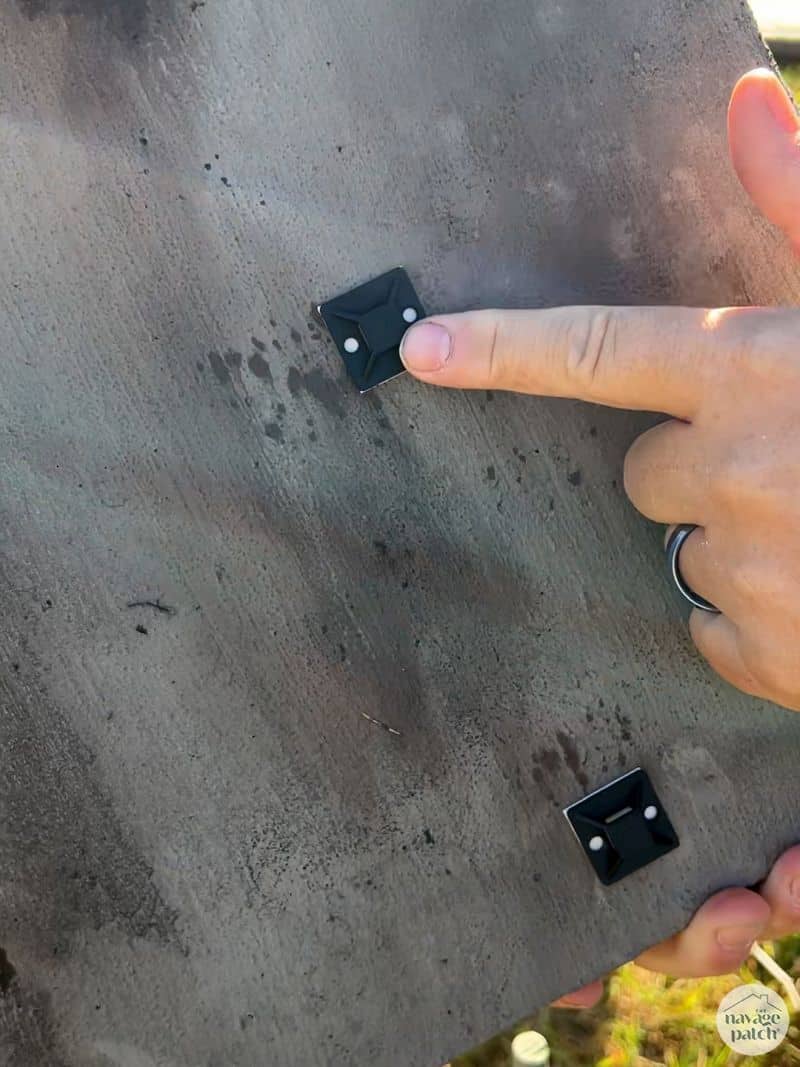
My fatal flaw in this plan was installing the cable mounts after I DryLok’d and painted the stones. After the first big windstorm, several of the mounts tore off, taking the DryLok with them.
If I had attached the mounts before the DryLok, I think these cable mounts would have survived the wind because the 3M adhesive they have is strong!
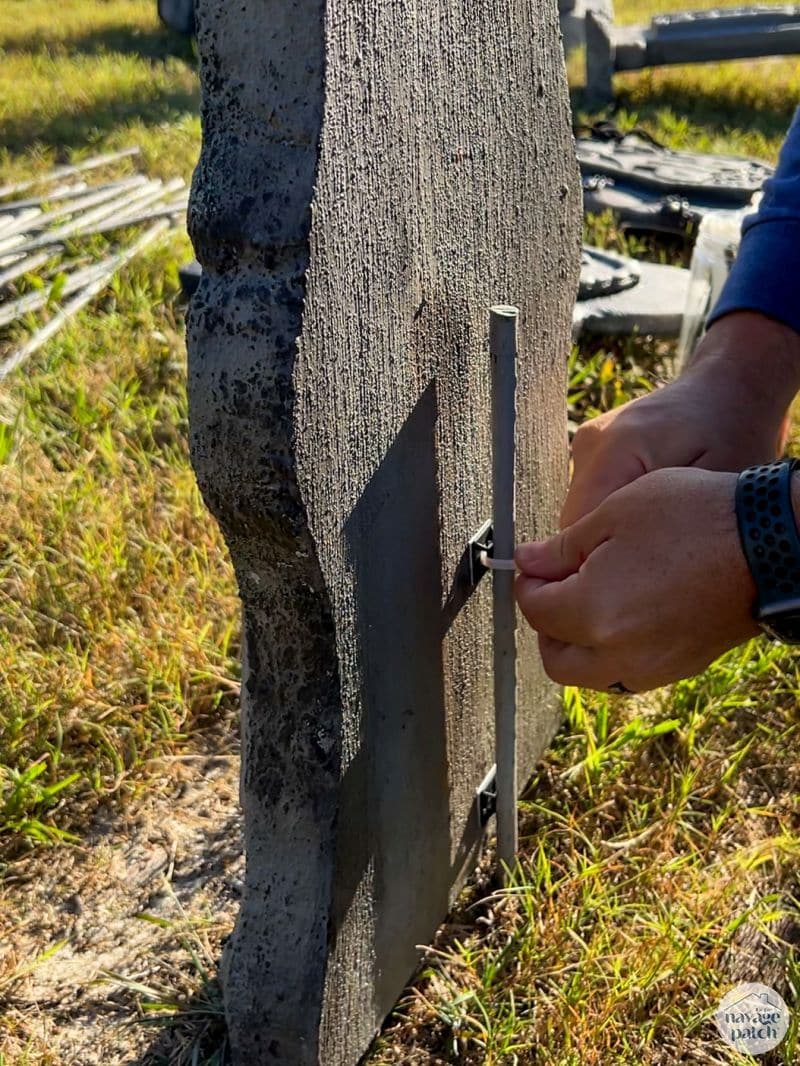
But since I couldn’t unpaint the stones, I thought that VELCRO’s Extreme Outdoor Mounting Tape placed over a larger surface would hold on the DryLok without tearing it off. We tried it, and it work like gangbusters!
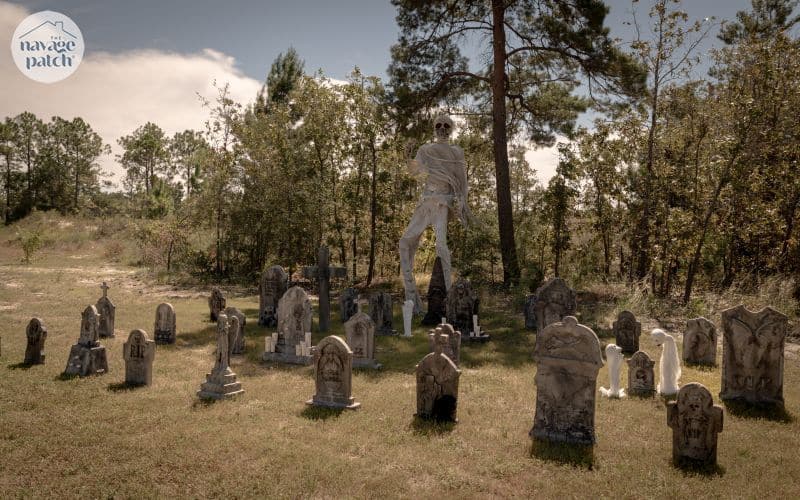
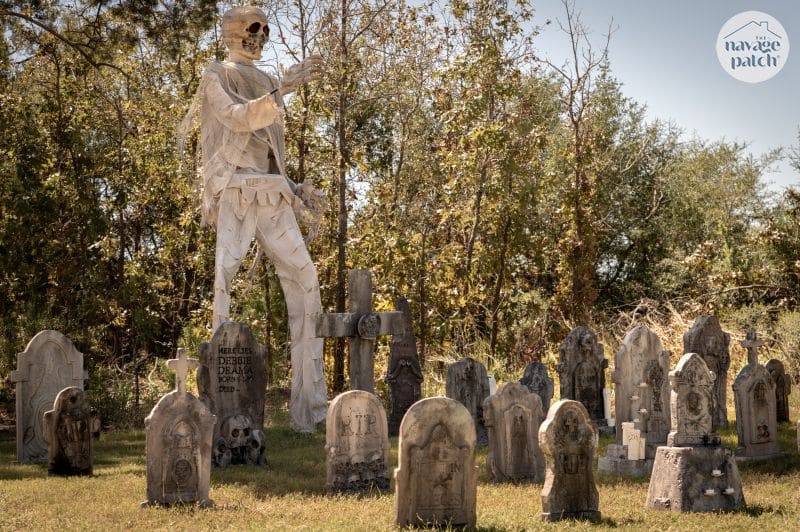
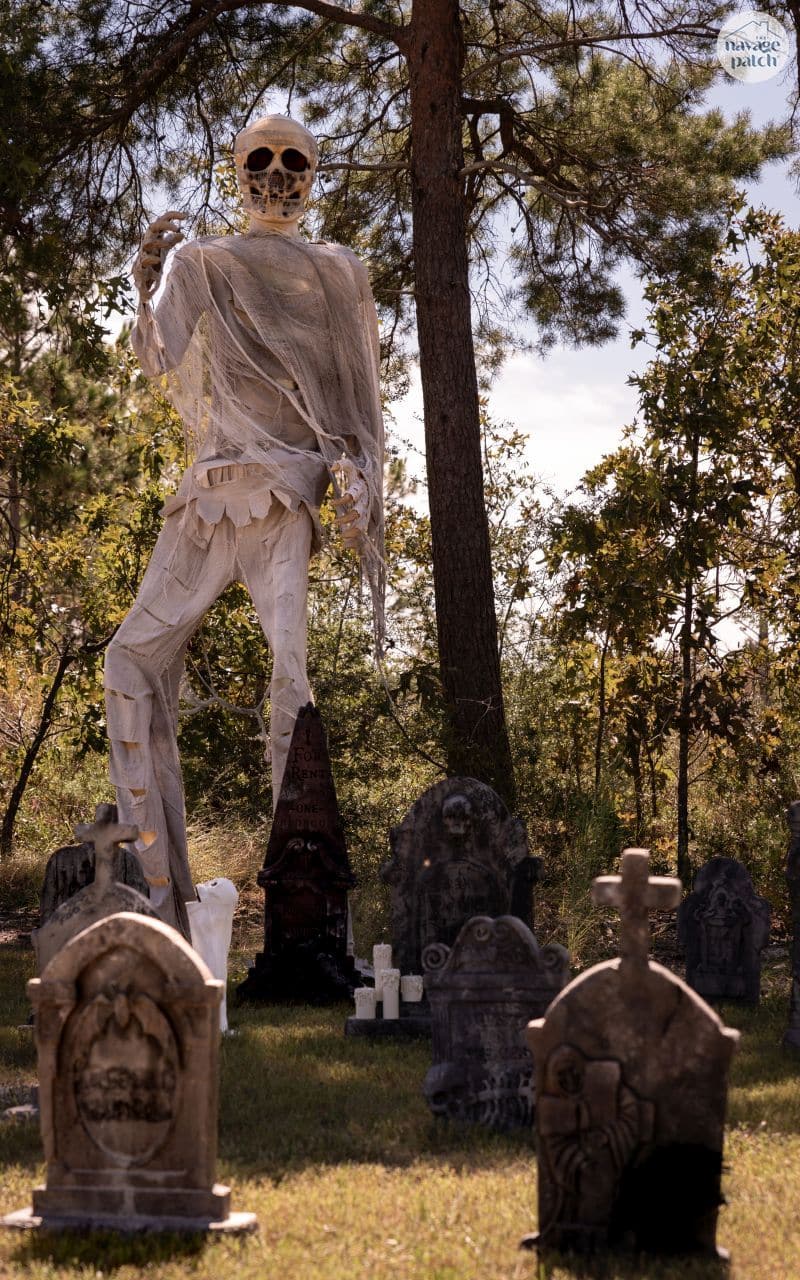
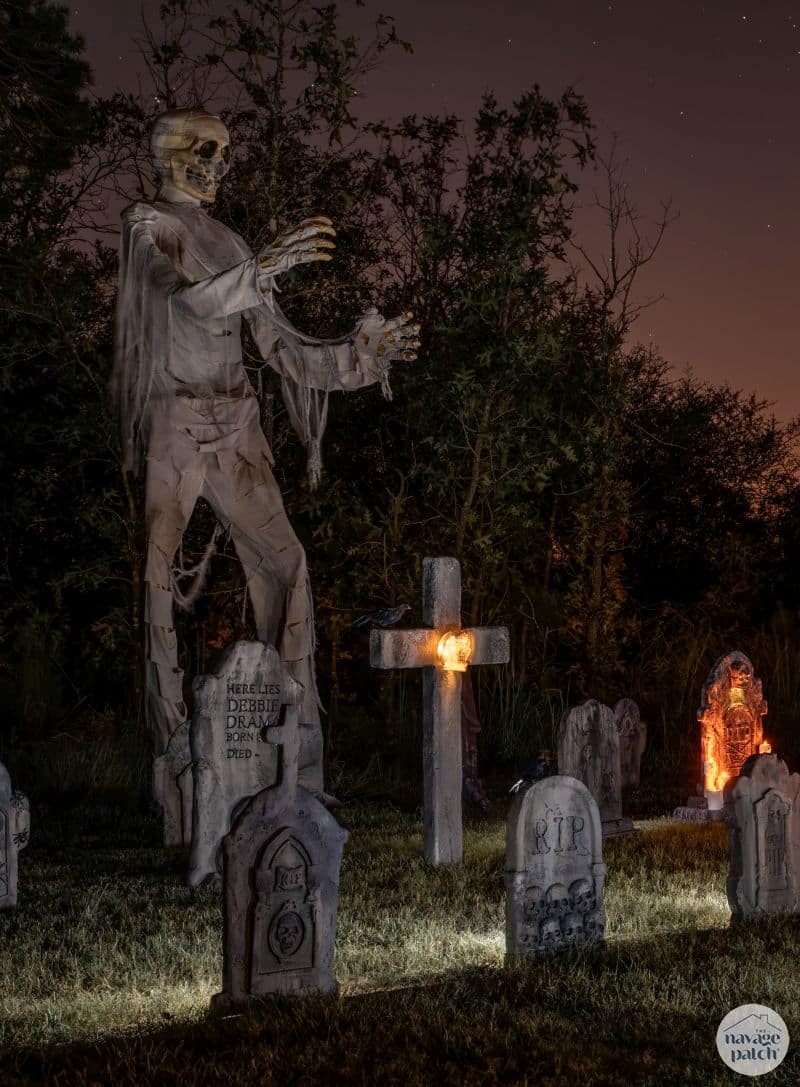
And here is the first iteration of our DIY cemetery. We installed it in the back yard since we started so early in the season. We were still new in the neighborhood, and we didn’t want to completely terrify our wonderful new neighbors.
They now know us well enough to understand, but back then we wanted to play it safe. In October, we moved the cemetery to the front yard so it could be a part of our overall public-facing installation. But I have to admit, the pics I took in the back yard really capture the essence of creep, so that’s what I’m going to be sharing with you here.
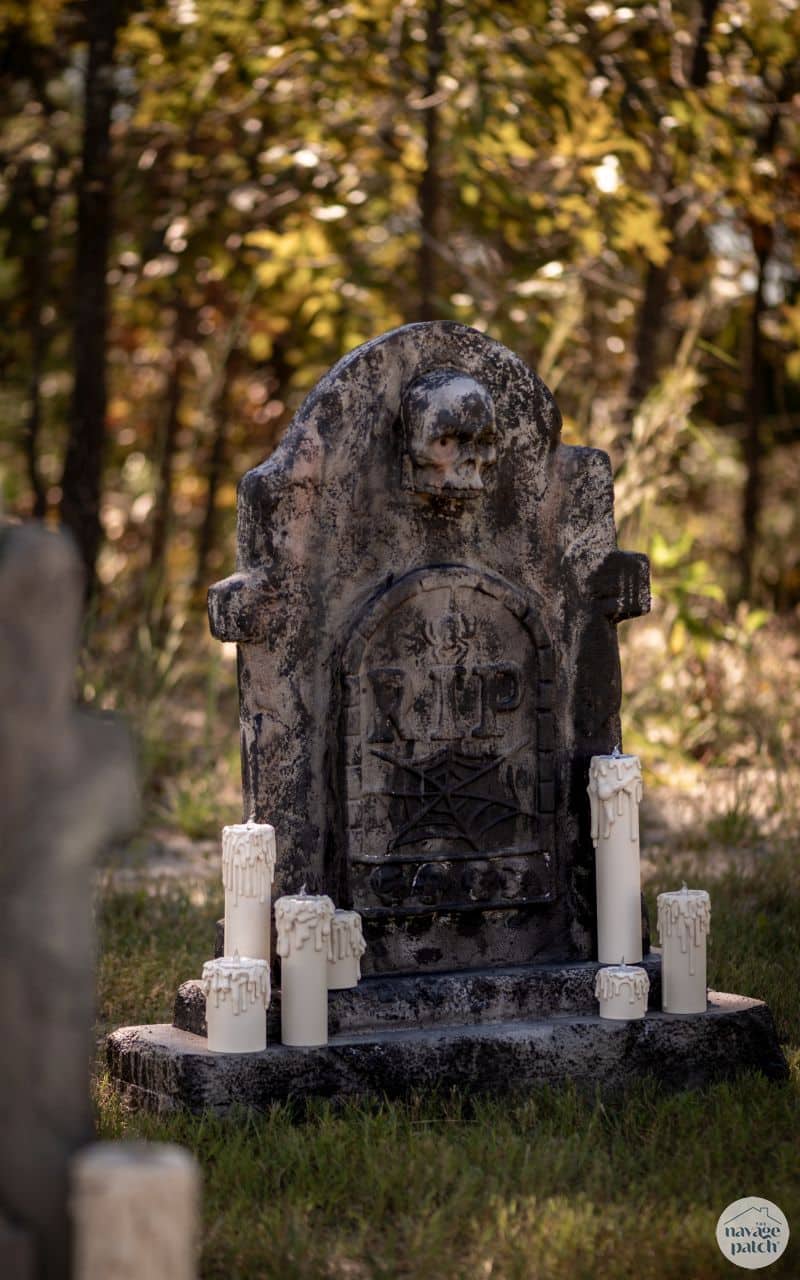
Enjoy the show!
This is one of two Grandin Road tombstone dupes I did. They’ll be the subject of another post.
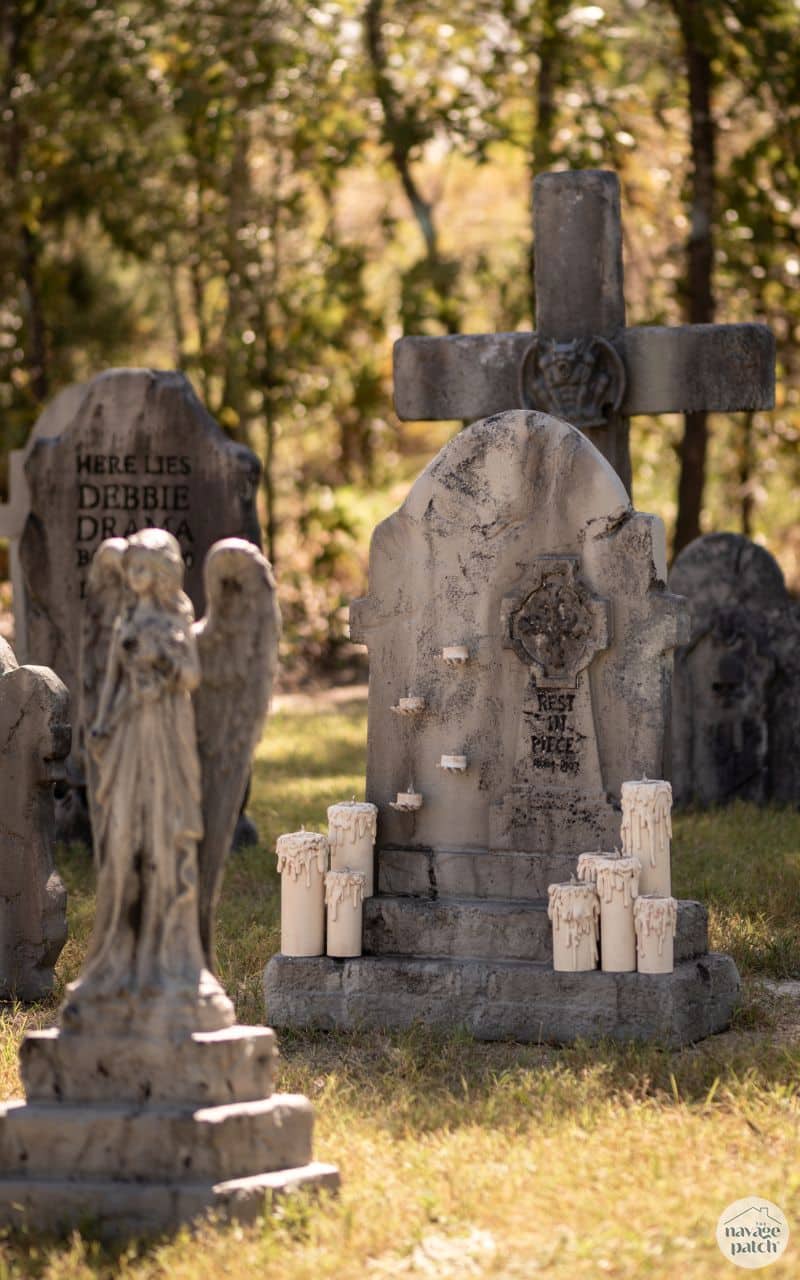
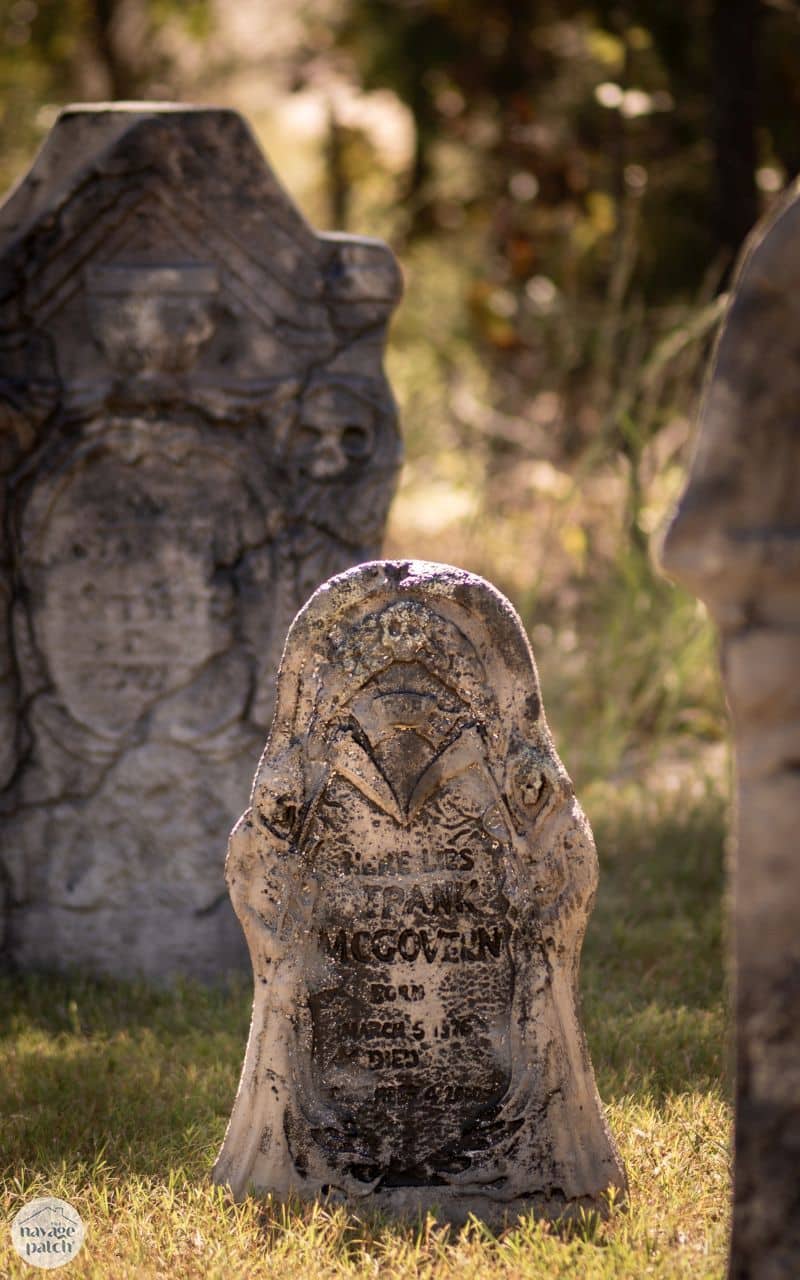
We made this one from scratch.
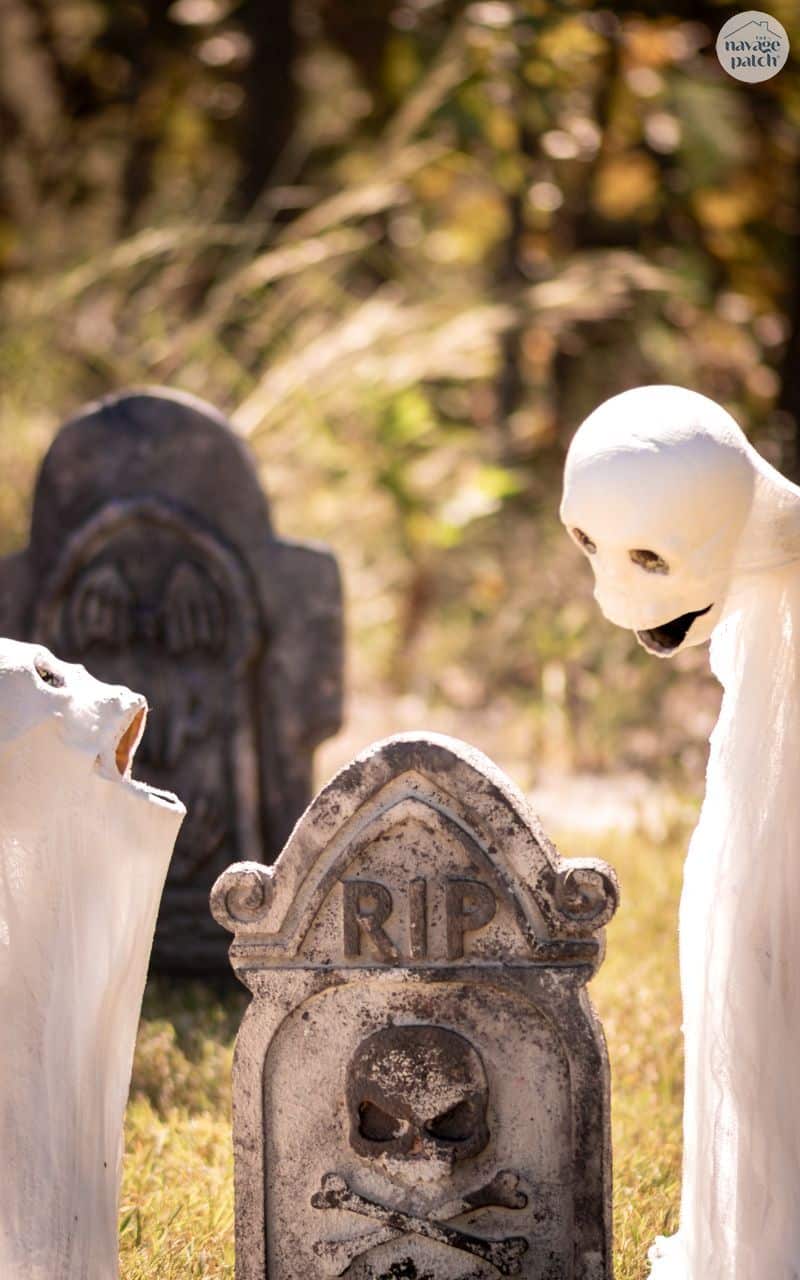
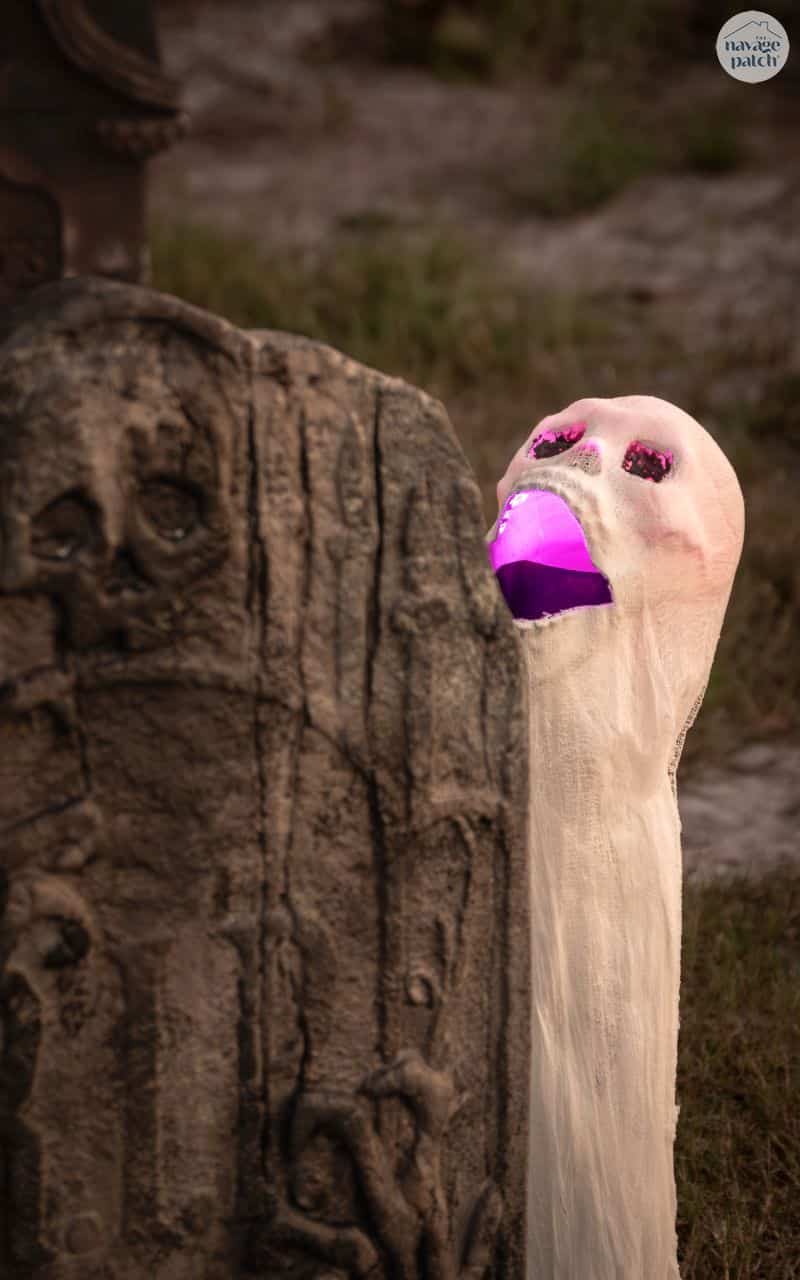
This is a grave popper. More to come on him and his kind.


We got this distinguished gentleman at Lowe’s. He snapped in half in a windstorm. This year we got an even bigger (and different) one.
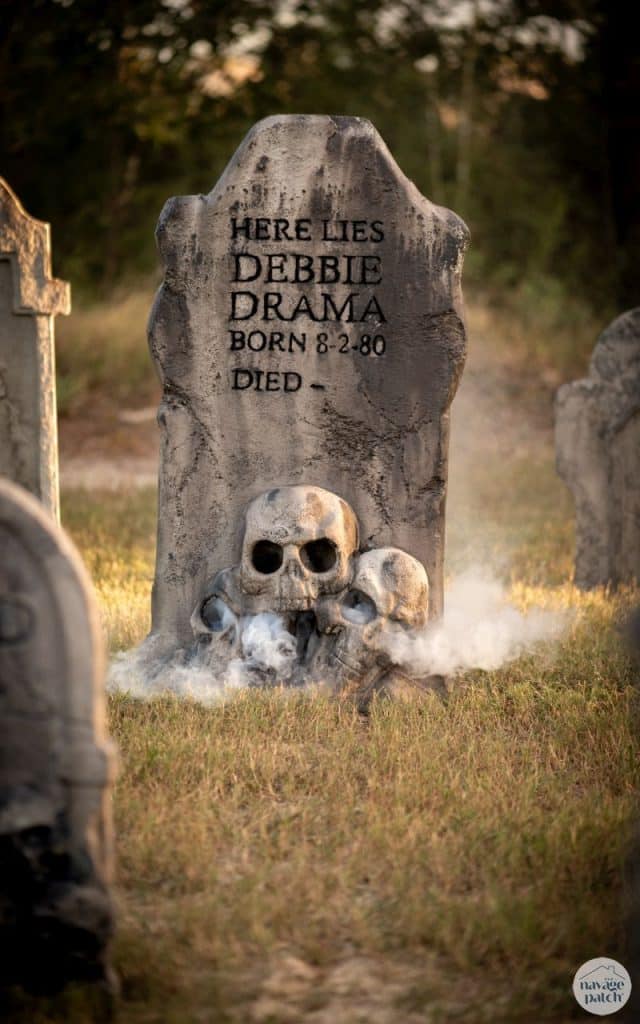
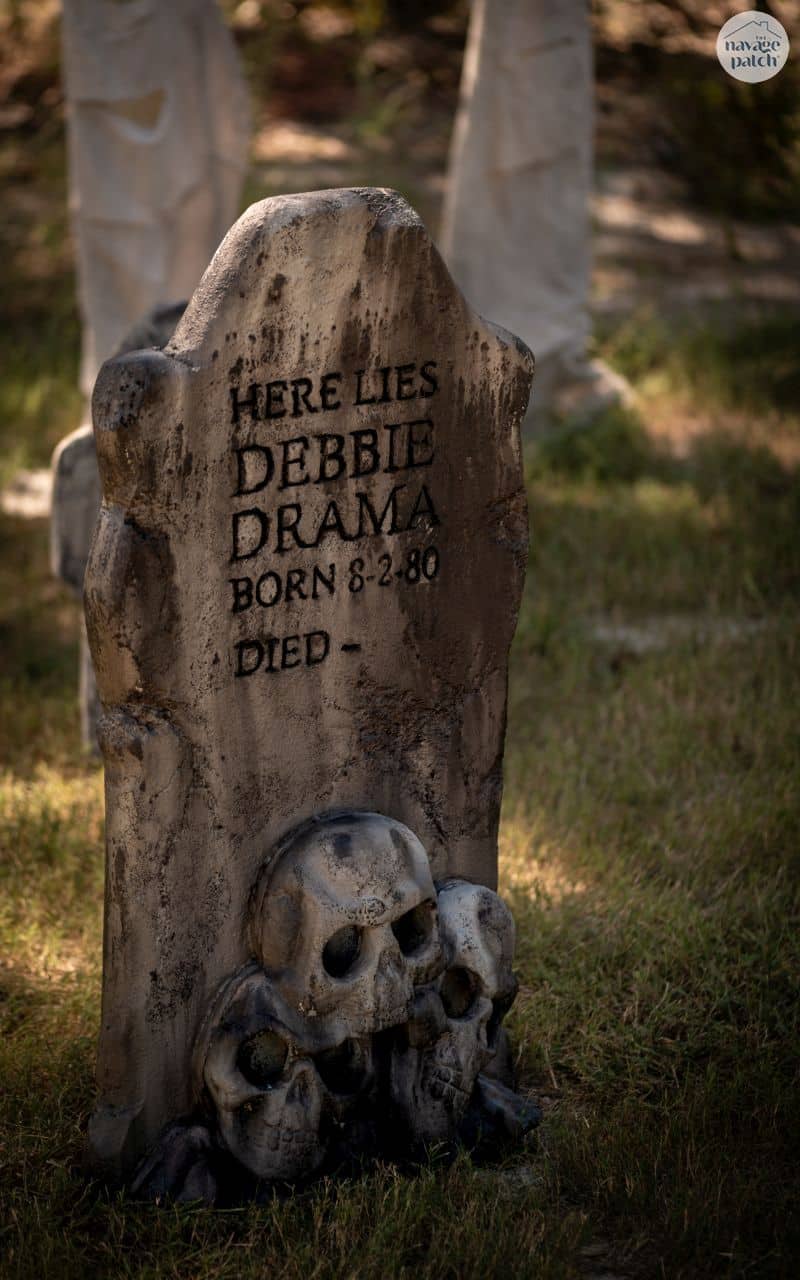
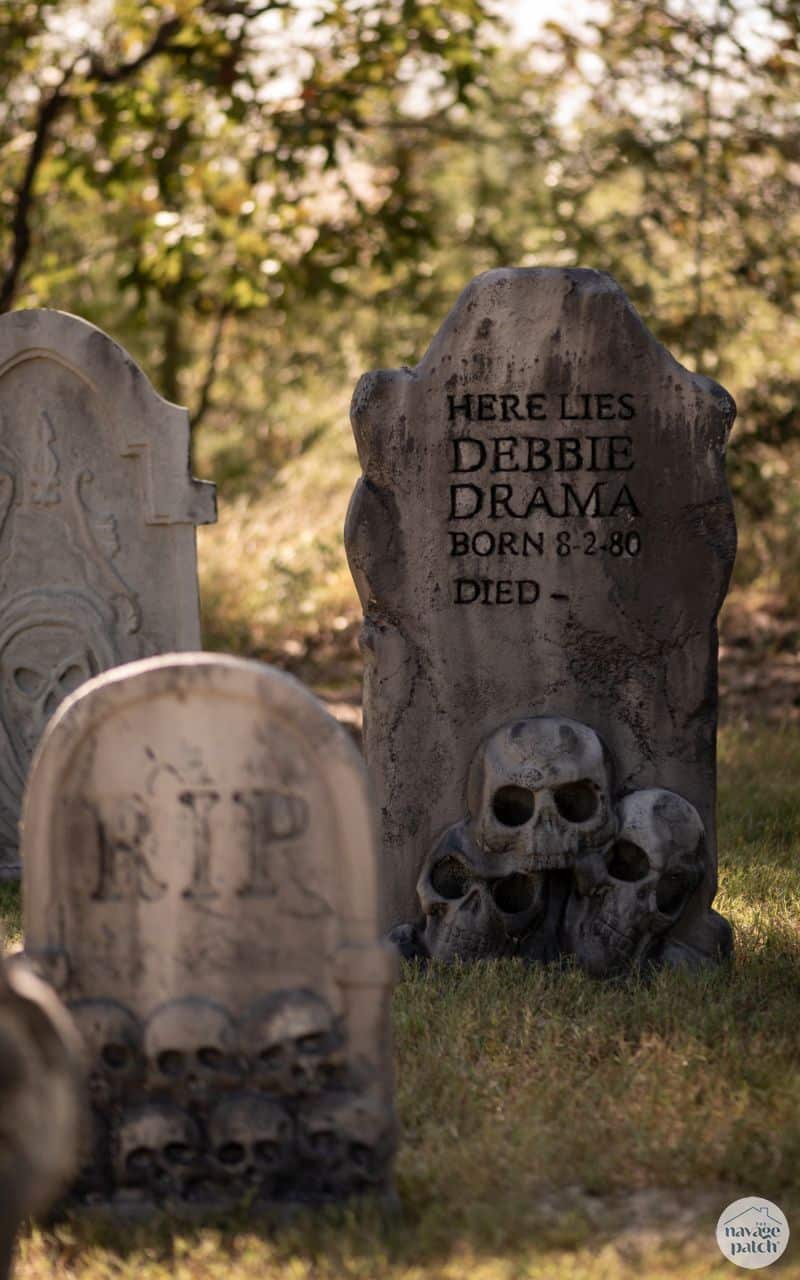
Debbie Drama. She can’t even with this place.
This is the other Grandin Road dupe.
I didn’t do much to this one besides make it thicker. It’s from Party City – they actually did a good job with it (except it being too flimsy).
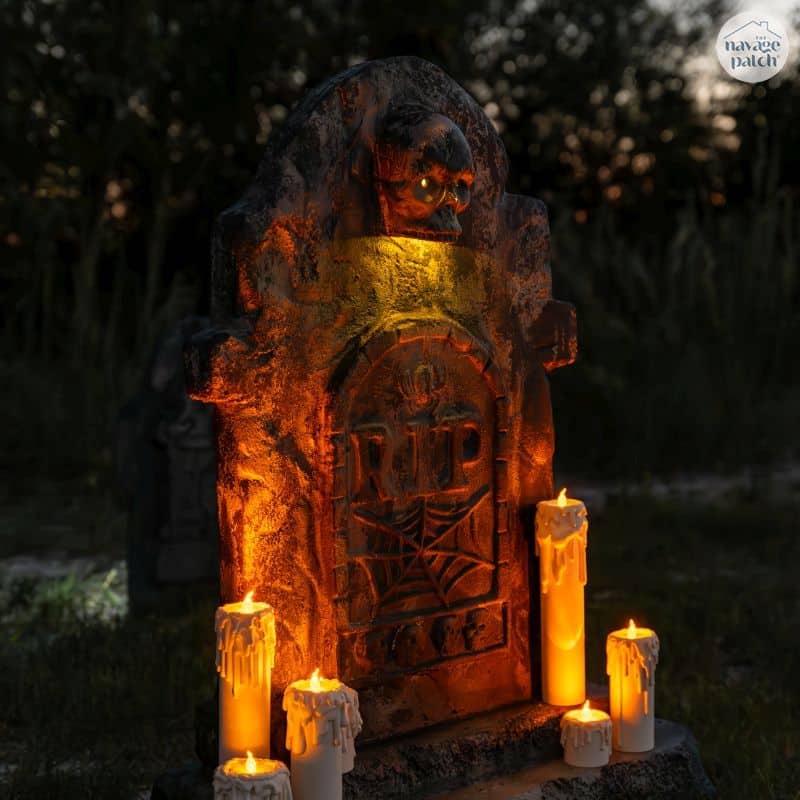
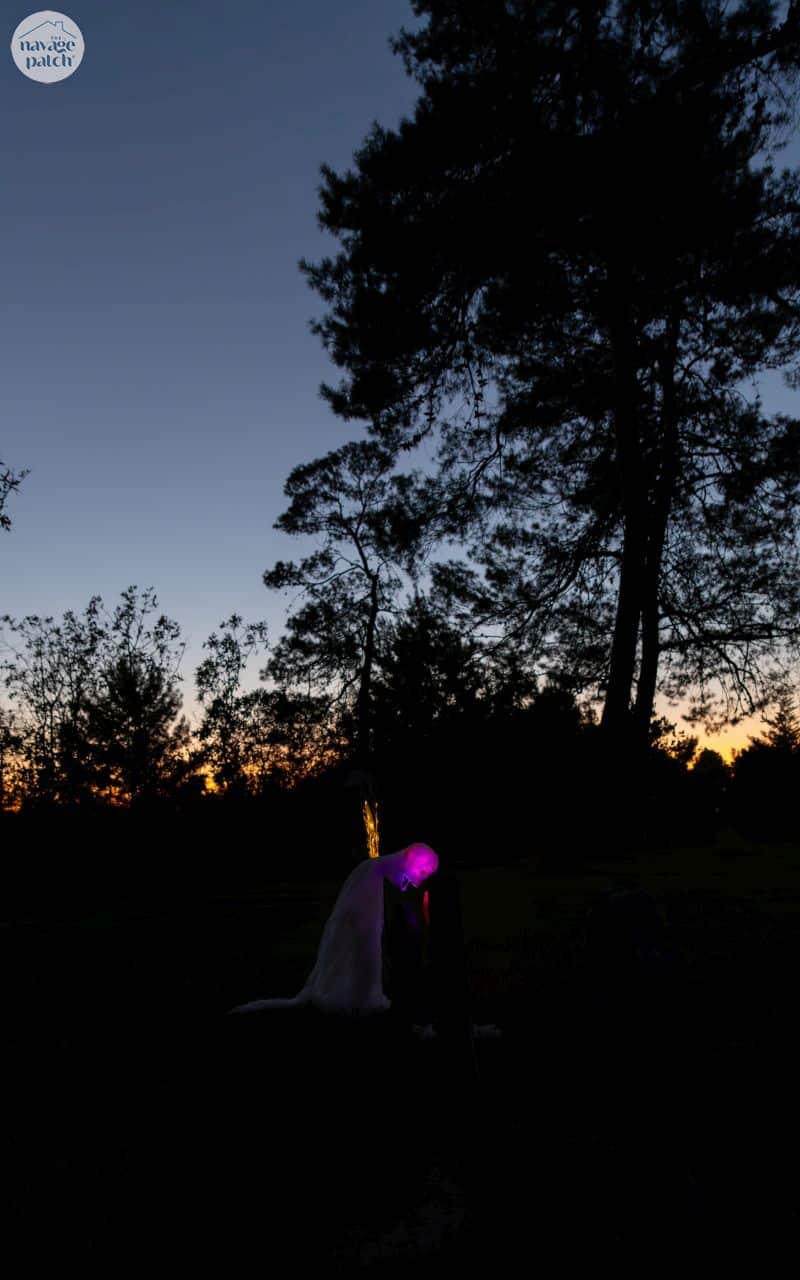
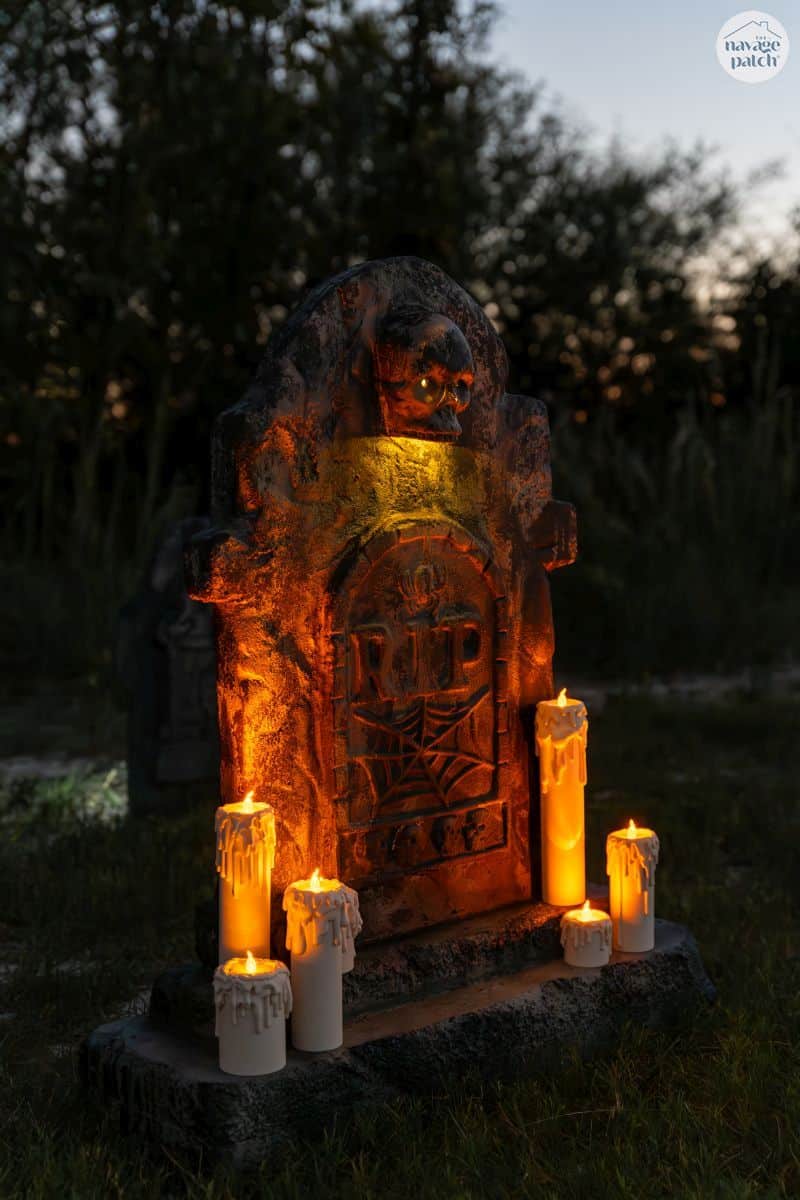
Night time!

Congratulations for making it to the end! I hope you like what we’ve done. It was a lot of work, but it was worth every minute! Please drop us a comment and let us know what you think!

This is amazing! The best display of DIY marble yard I’ve ever seen. You, my friend, are an inspiration.
Thank you so much, Ariel! 🙂
Thanks for the great ideas and the laugh about the Marble Farm! Keep messing with Handan and she might plant YOU in the marble farm. 😂
There is a suspicious hole out back…:D
I use the same approach of gluing two 1 inch boards together to make stones. The way I secure them is, before gluing them together, I route two 1/4 inch channels into each side, then when I glue them together I put a 1/2 inch piece of pvc into each channel. I can then use small rebar, or wooden dowels, pounded into the ground and the stone slides right on top of it. That way you never see support structures from any angle.
That approach could probably be improved upon if I ever make a template for the channels since it’s a little tricky to make sure they line up. However I do have a template for the spacing between channels, and use the same length of pvc, so that way all my stones have fairly uniform support channels, and I just use the spacing template to set where I need to place the rebar or dowels in the ground when I do my setup.
That’s a great solution – thank you for sharing!
Haven’t heard of a marble farm, but I have a funny for you. Our nephew (from a larger city) was riding through the country with his grandparents when they passed by an old church cemetery with the tall markers. He commented, “Boy, that farmer sure has a lot of trophies!”
🤣🤣🤣
Awesome, I love your projects! I can imagine the work that went into this one. Thank you for keeping us inspired!
Thank you so much, Sandra! A lot of work, but so worth it!
Marble Farm!!! Buuhaahaa I spit coffee on that one haahaaa all kidding aside this is very cool!!!
😀 Thank you!
You must love that this now your “job” and you can devote a lot of time and effort to this. I enjoy driving around and seeing displays like this but have no desire to do it myself.
You are a master. Never heard marble city before!
Thanks, Carla! It is an amazing job, that’s for sure! 🙂
So cool! I really like what you did with your marble farm. LOL
I grew up on a small farm where the previous owners had tended a local cemetery. Turns out, whenever a new stone arrived they took the older one home with them and turned it into a paver for their walkway. My siblings and I dug up so many old headstones from around where their old house had sat and we used them for our own Halloween decorations every year. I even had a small one in my bedroom at one point since it didn’t have any markings on it and I thought it was cool. A couple of years ago while I was picking berries next to our property, where an old train track used to go through, I found part of a marker with some initials on it. Not sure it’s a headstone, but it’s not under heard of for an old cemetery to be moved and the markers carted off to be ground up and used elsewhere. I placed it in amongst my rose bushes.
Wow, that’s a cool story! It’s amazing to think of the life of a very old tombstone!
Your tombstones are amazing!! I love all things Halloween and your projects are my favorites. I always look forward to your Halloween posts. 🖤
Thank you so much, Pam! It’s our favorite time of year!
This is amazingly creative, but then so is everything you do. Wish you were still in Glastonbury because I’d definitely do a driveby.
LOL, thanks, Melissa! Hey, Florida isn’t too far! 😂
You two are my Halloween heroes. I love all this stuff!!!
Thank you so much, Patty! 🙂
Love your cemetery!! Walking through it with the pictures you couldn’t tell they were DIY’s very authentic and clever! Can’t wait to see what you come up with next, but must say this project will be hard to beat!! Thanks for sharing very inspired.
Thank you, Lori! I agree, they are very creepy and real! We’re working on lots of new stuff this year!
Love, love, love your graveyard/marble farm! My neighborhood loves my (mini) graveyard, but I think there will be some improvements this year thanks to you. Thanks for sharing all your tricks, talents and humor!
Mu pleasure, Robin! Have fun with it!
In upstate NY my husband called them “Bone Orchards”! I love DIY decorations because you get unique things that no one else has. We have made headstones out of wood and a couple of foam. I think your technique is great and will be looking into adding a few. Thanks for the inspo! Halloween is the best because you KNOW all your work will be appreciated when all those trick-or-treaters come to the house. Happy Halloween to you and Handan!
Exactly! You get a big payoff in the end! BTW, I love the term bone orchards!
Absolutely amazing! Your step by step instructions really make me confident I can do this next year. Would you mind sharing a picture of the final velcro and stake setup you ended up with on the back of the tombstones?
Love! I want details on the grave poppers
I love this idea! The tombstones look so easy to make and perfect for adding a spooky touch to my Halloween decorations. Can’t wait to try this out with my kids—thanks for the great tips!
Love this idea! The step-by-step instructions make it so easy to follow. I can’t wait to try making my own tombstones for Halloween this year. Thanks for the inspiration! 🎃👻
Hi! I am scouring the internet for ways to secure my foam stones.
You said the Velcro works like gangbusters, and that phrasing is convincing! But, fundamentally I’m not sure how you use the Velcro.
Can you share a photo? Do you attach to cable mount and the ln with zipties still? HALP! I’m a visual learner. Photos help immensely.
With spooky love. jenn
This is such a fun and creative idea! I love how easy these tombstones look to make. Can’t wait to try this out for my Halloween decorations! Thanks for the tips! 🎃
I absolutely love these ideas for DIY tombstones! They look super easy to make and will definitely add a spooky touch to my Halloween setup. Can’t wait to try them out with my kids this weekend! Thanks for the inspiration! 🎃👻
I love this idea! The step-by-step instructions and materials list make it so easy to follow. Can’t wait to try these tombstones for my Halloween decorations this year! 🎃👻
I love this idea! The step-by-step instructions are super helpful, and I can’t wait to try making these tombstones for my Halloween décor. The tips for painting and weatherproofing are especially useful. Thanks for sharing such a fun DIY project! 🎃🪦