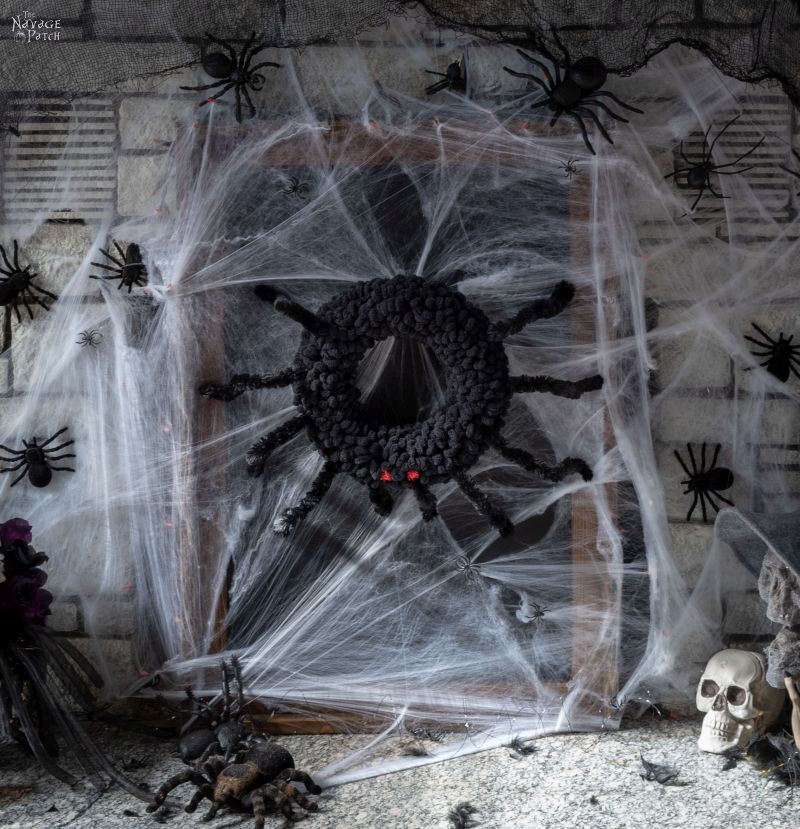
DIY Spider Wreath
Our DIY Spider Wreath is perfect for any Halloween display – from creepy to classy to kid-friendly – and it’s a cinch to make with loop yarn!
Do you remember our DIY winter loop yarn wreath from last year?

It was our biggest hit of the year and has become our most-viewed post of all time!
I think that project was such a hit because not only is it so easy to make that even a man can do it, but the basic premise can be applied to all seasons and holidays!
We hadn’t even opened our Christmas presents last year before Handan was already dreaming up new wreaths to make using the same technique.
Easter?
Shove two ears up top and plop a pom pom for a little bunny butt, and you’ve got the backside of the Easter Bunny.
Fortunately, spring came and went without Yours Truly having to show you how to make an Easter keister – aka, Bugs Bummy.
But I swear that if it weren’t for the sane and steady head on my shoulders, you would’ve been reading the very first Halloween post as New England laid buried under the cold snows of January.
My babes gets a little loco en la cabeza where Halloween is concerned.
I think the idea came to her while we were packing away the Christmas stuff and the winter wreath along with it.

Yeah, yeah, I know – it’s a winter wreath, so shouldn’t it stay up all winter?
In a nutshell – no.
Remember that time flows differently in Blogland, so seasons and holidays are all wackadoodle and widdershins.
You may be lying on a beach somewhere slathering yourself in coconut oil and counting the weeks until your halflings are due back in school, but Handan and I could be filling cauldrons with witch parts in our living room and stretching spider webs across the fireplace.
So we packed away the winter wreath in January, but not before Handan gave it a little shake.
And that’s when it hit her.
Use black yarn, add some legs, and you’ve got yourself a nifty spider wreath for Halloween!
Of course she wanted me to make it right away.
I looked out the window.
Howling wind and snow.
I looked at my project list.
Barish’s room makeover dominated my foreseeable future.
And this curly-haired craftpot wanted me to make Halloween projects?
I informed her in no uncertain terms that she was nuttier than a tub of crunchy peanut butter, and that I would be doing no such thing!
Halloween in January, indeed!
So anyway, life rolled on, and I forgot all about the spider wreath. (Obviously.)
But Handan didn’t. (Obviously.)
She’d been biding her time, just waiting for the perfect moment to spring it on me.
Well, that moment is here. Lucky for you, madam – it’s now September, so it’s kinda sorta officially Halloween Season.
But when The Witch of the Patch sprung it on me, it was still August – you know, the month during which normal people go to the beach and eat hamburgers and watch baseball games on lazy dog-day afternoons.
Sister, there’s nothing normal about anything here at The Navage Patch, so while most of America was busy summering, Handan and I were already Halloweening!
So enough of my yapping – let’s start Halloweening!
DIY Spider Wreath
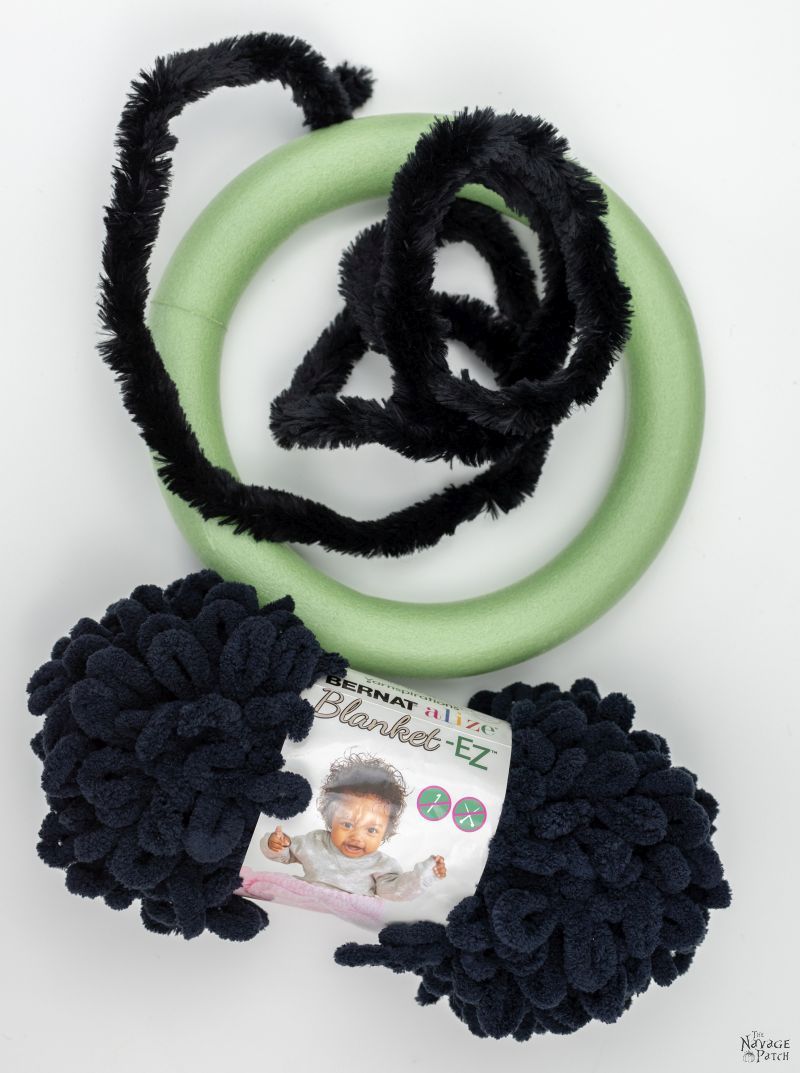
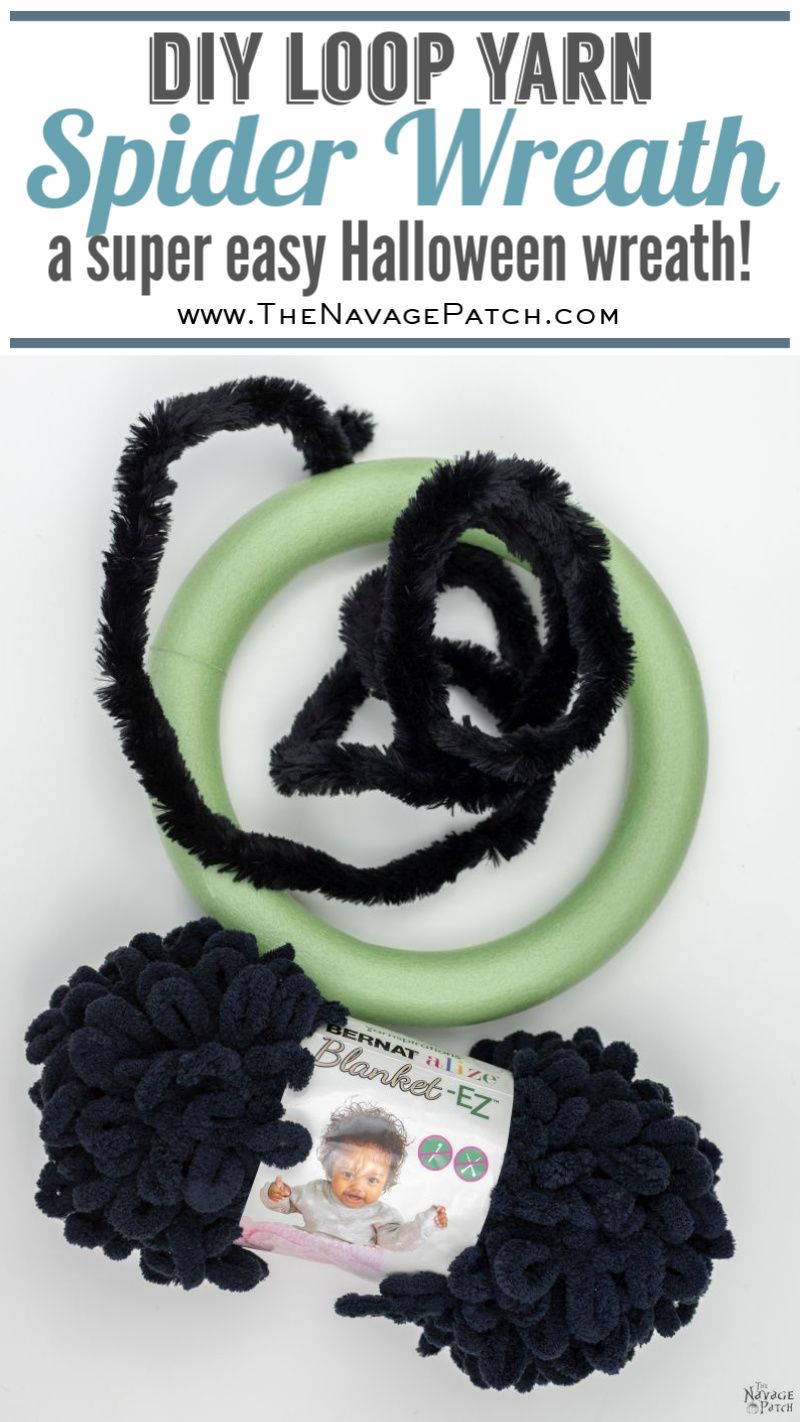
- 12″ foam wreath form
- 2 packs of black loop yarn
- 2 jumbo chenille stems – we bought ours at Michaels. If you have Michaels around, we suggest getting it from there as it’s half price of what Amazon sells it for.
- Red tinsel pom poms – we got ours at Dollar Tree, but Amazon also carries a wide selection.
- 3 pins
DIY Spider Wreath Video Tutorial
You can watch the video tutorial here. The full text tutorial is below.
DIY Spider Wreath Tutorial
This spider wreath is totally simple to make. I’m talking Guy Simple, here. Everyone knows the greatest simpletons of all time have been men, and perhaps the greatest simpleton of them all sits at a keyboard at this very moment pecking out the letters that will become the very post you’re reading.
So if the King of the Simpletons can make this DIY spider wreath, then you, madam, can make it after three martinis with one hand tied behind your back.
As I mentioned earlier, the body of our spider wreath is made exactly like our DIY winter loop yarn wreath.
Hey, look, we stick with what works! If you Ladies of the Internet hadn’t whooped and hollered over our winter loop yarn wreath and basically acted like you were at a Tom Jones concert (minus all the panty throwing, alas), we wouldn’t have bothered!
But the trend is your friend, and go with the flow, right?
Right. So let’s get to it.
Now, our winter wreath was made with Red Heart loop yarn, which comes in smaller packages than Bernat loop yarn. Those smaller packages were a breeze to work with. The Bernat loop yarn isn’t difficult to use, but you’ll want to keep the yarn in a tidy bundle as you make the wreath. If you’re a man (like me!), you’ll need help with this. May I recommend finding yourself a woman? They’re better at keeping things tidy than you are. Oh, don’t get all gender-squeamish on me now! We all know it’s true!
Slobs and Simpletons – it’s our lot in life.
Anyway, moving on!
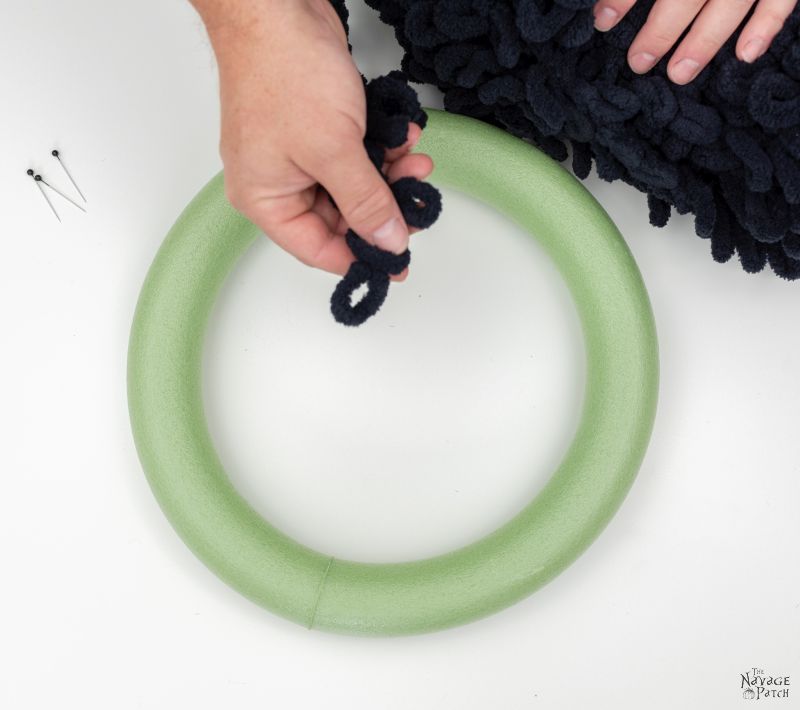
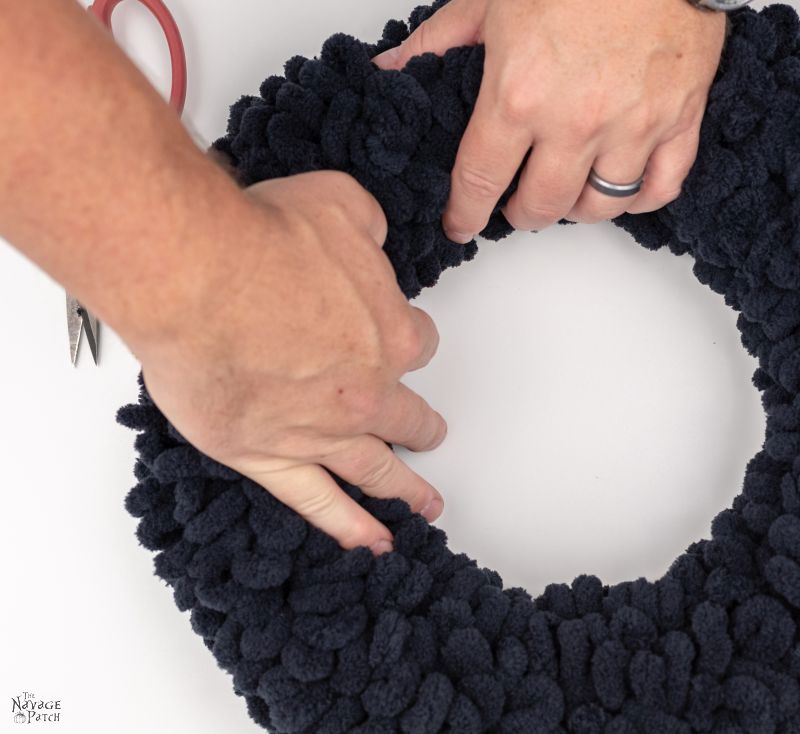
Step 1 – Make the body
After removing the wrapper and finding one of the ends Handan removed the wrapper, found one of the ends and made a nice little yarn bundle for me, I pinned it onto my foam wreath form.

I can hear you, you know. You can’t stop marvelling at my dainty fingers.
What can I say? I had a nice swim in the Gene Pool when I was much much smaller.
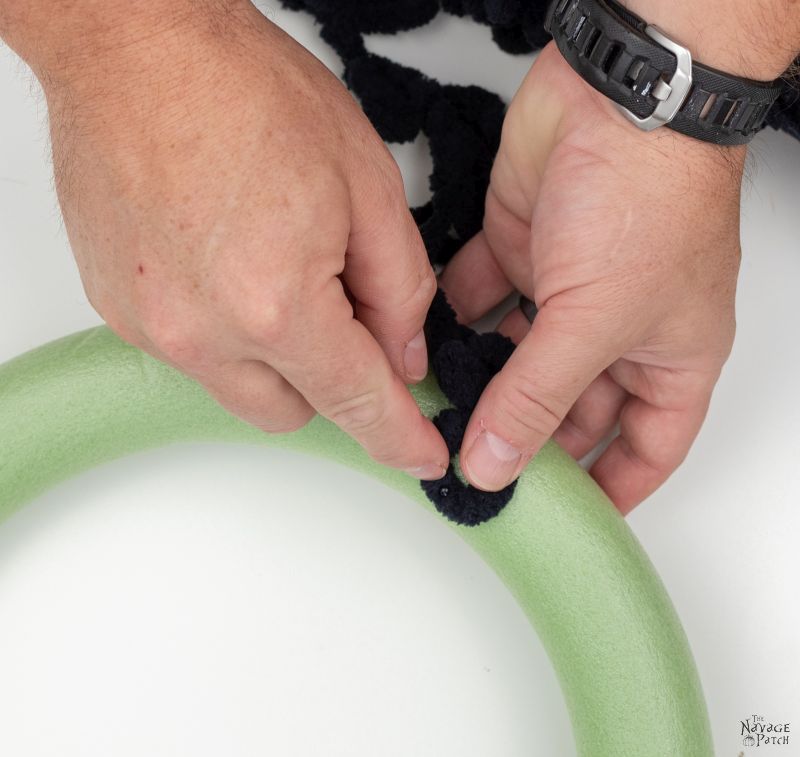
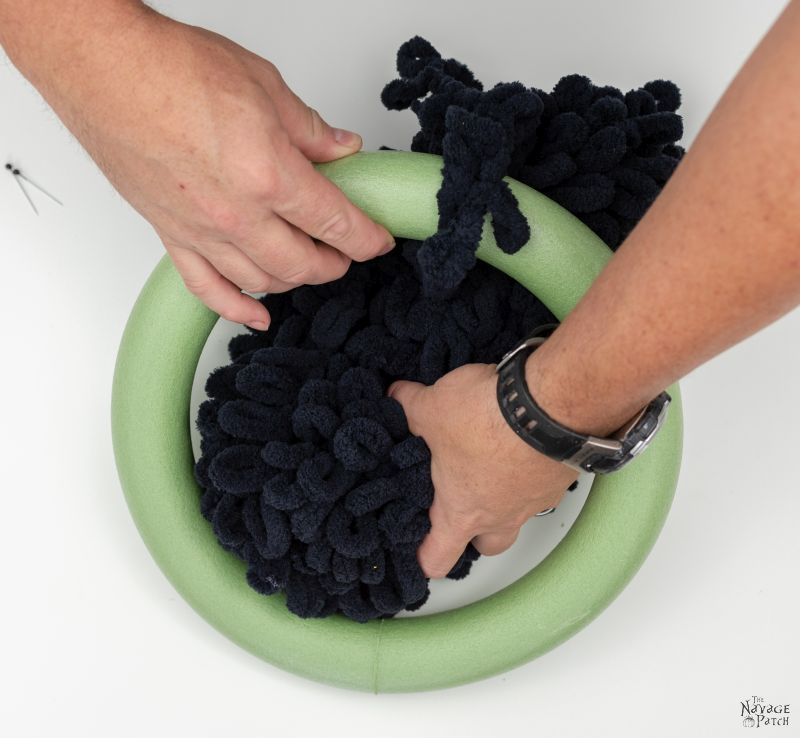
Then I started wrapping the loop yarn around the wreath form.
Now, there are two ways you can wrap: the easy way, and the slightly less easy way.
For these pictures I chose the slightly less easy way.
Not by choice. I just picked a direction and started coiling. I had forgotten how I did it last fall.
As you’ll see below, I’m pulling the yarn bundle up through the middle and then wrapping it around.
This isn’t wrong, and you’ll get the exact same wreath in the end, but there’s an easier way.
The way I did it last year.
The way I did it in the video above.
I found it is much easier and quicker to toss the yarn bundle down through the wreath form hole and then wrap it around.
Quick and easy.
That’s how we like it, right, madam?

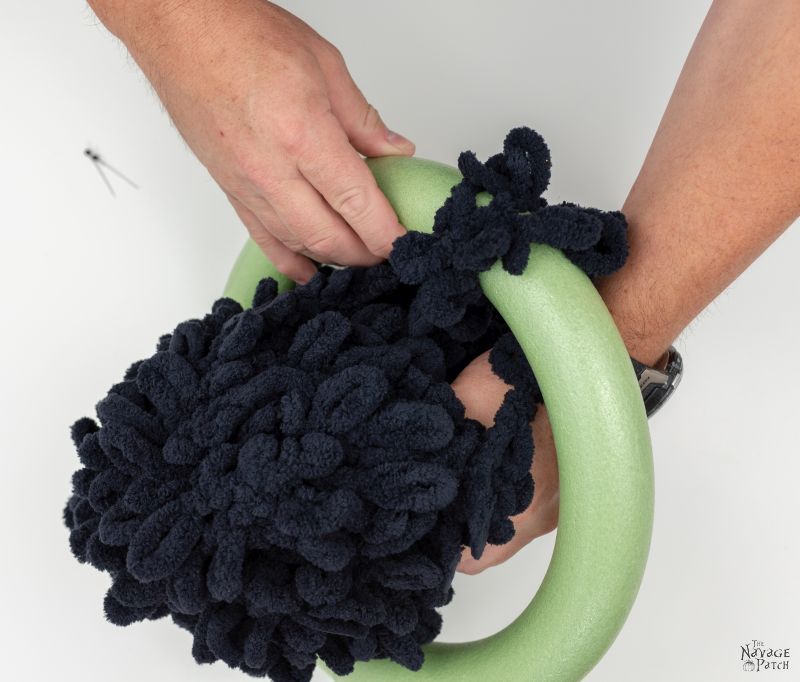
I made sure to tighten the coils every two or three passes. Nobody likes loose coils, and no one in their right mind would want a spider wreath with loose and flabby coils! We have standards around here!
One pack of Bernat loop yarn will get you this far on a 12 inch wreath form. So close!
But not close enough!
You’ll need that second pack to have a nice full spider wreath. Too bad Red Heart doesn’t make black loop yarn. Three packs of Red Heart make a perfect wreath.
(Hey Red Heart, what’s up with that? You were my hookup for loop yarn! Now I’ve had to go for one of your competitors!)
I opened the second pack Handan opened the second pack and made another loopy bundle for me, and I pinned the end of the first pack and the beginning of the second onto the form.

And then I continued wrapping.
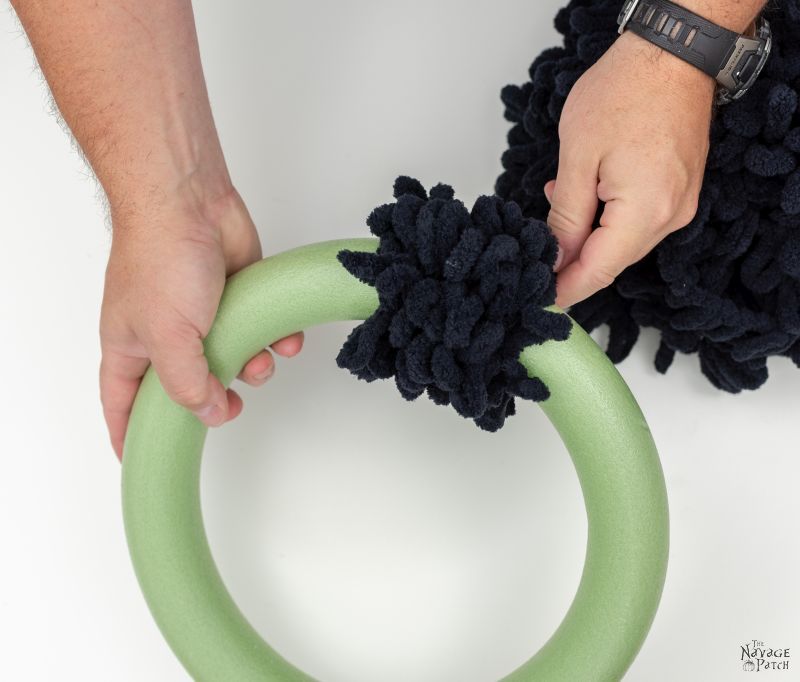
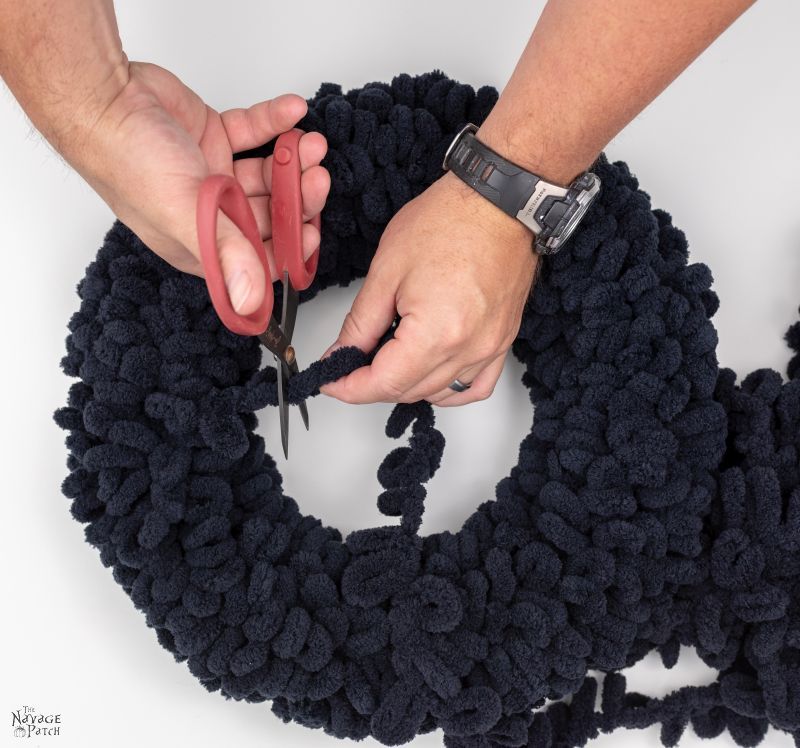
When the wreath form was fully covered, I cut the loop yarn and pinned the trimmed end onto the form.

I looked upon my dark creation and smiled! The man did it again – he made a craft!
Man Can Craft! Man Can Craft! Man Can Craft!
I mentally cheered myself and congratulated myself for a job well done.
“Babes?” Handan said.
“My babes!” Louder this time.
“Huh, what?” I said, suddenly snapped from my thoughts.
“You’re not done. It’s a spider. It needs legs.”
“Righto, woman! Eight legs, coming right up!”
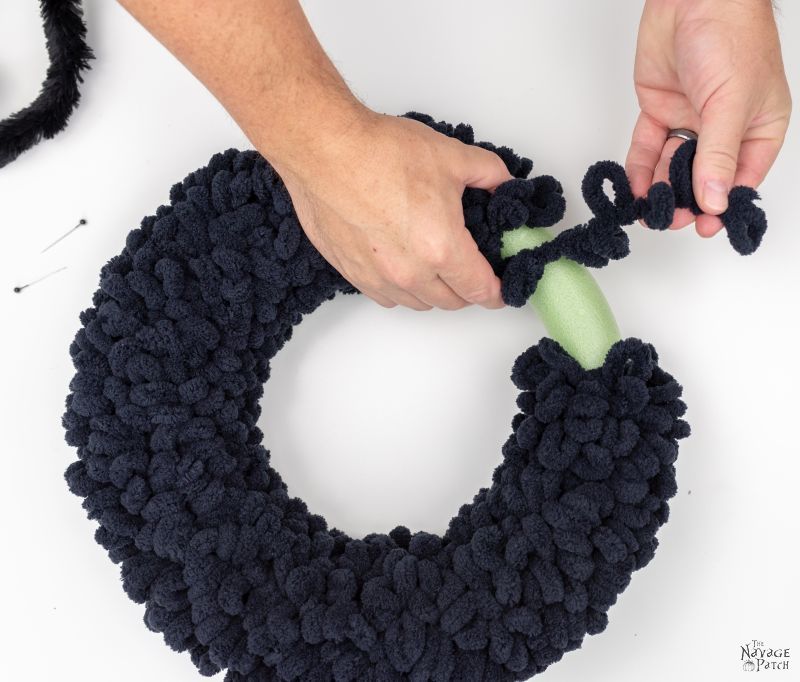
Step 2 – Make the legs
One jumbo chenille stem is enough for a 6-legged spider wreath, but who the heck wants a 6-legged spider?
Look, I know our spider wreath isn’t going to win any spider look-alike contests, but I’m big into realism, so 8 legs was a must!
But if you don’t want to fork out the clams for another jumbo chenille thingy, but all means, make yourself a 6-legged spider wreath.
I’m sure your neighbors won’t laugh.
Much.
Oh, and if you splurge on the second chenille thingamabobber, you’ll have enough for those two little legs that spiders have in front.
I first found the midpoint of the stem. I used the ancient technique of folding it in half.

And then I cut the stem in two.

I folded each of the halves in thirds and cut. Best way to fold in thirds?
Make an “N” shape!
“N” stands for Navage.
It also stands for “nerd,” “nincompoop” and “ne’er-do-well.”

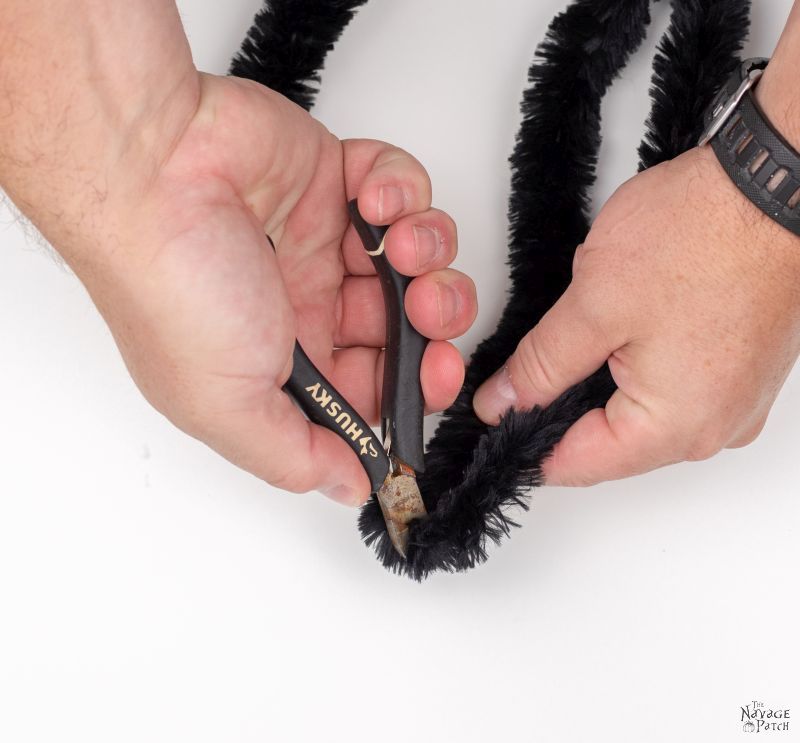
I cut 8 legs of the same size and two smaller ones for the little legs up front.
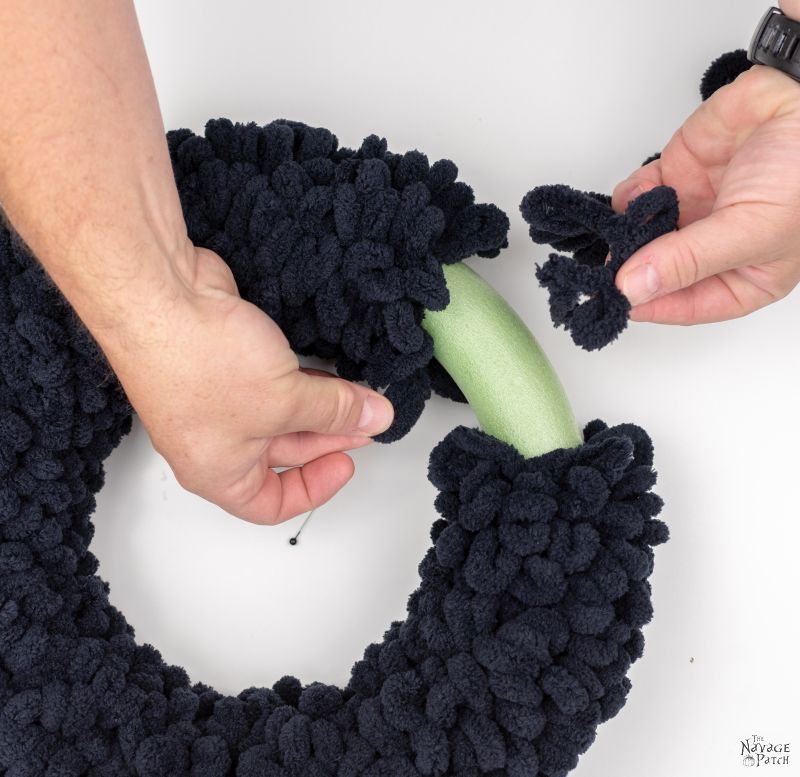
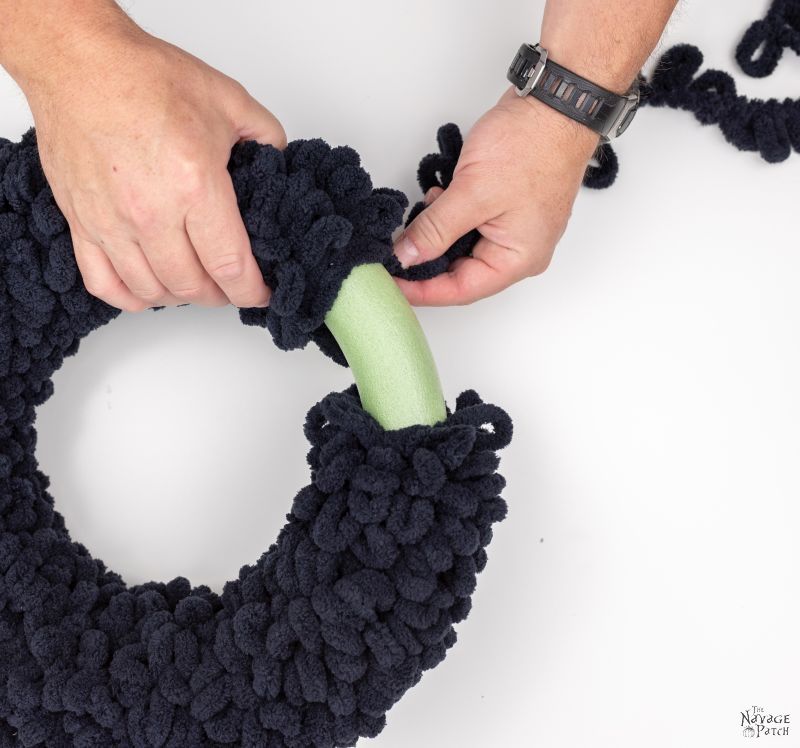
To attach the legs, I pushed away the yarn to expose the wreath form and then stuck the chenille wire into the form. Couldn’t be easier, amirite?

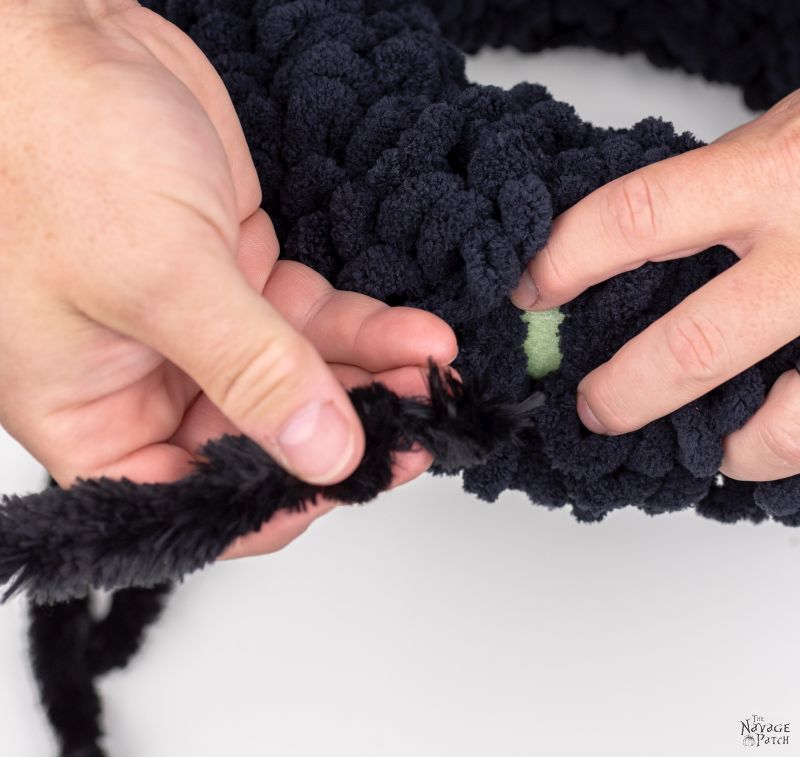

I just eyeballed the placement of the legs. If you happen to place one wrong, it’s a simple fix to pull it out and reposition it! This is wire and foam here – it’s pretty forgiving of screw-ups. Take it from me: I’m a man – we invented screwing up!
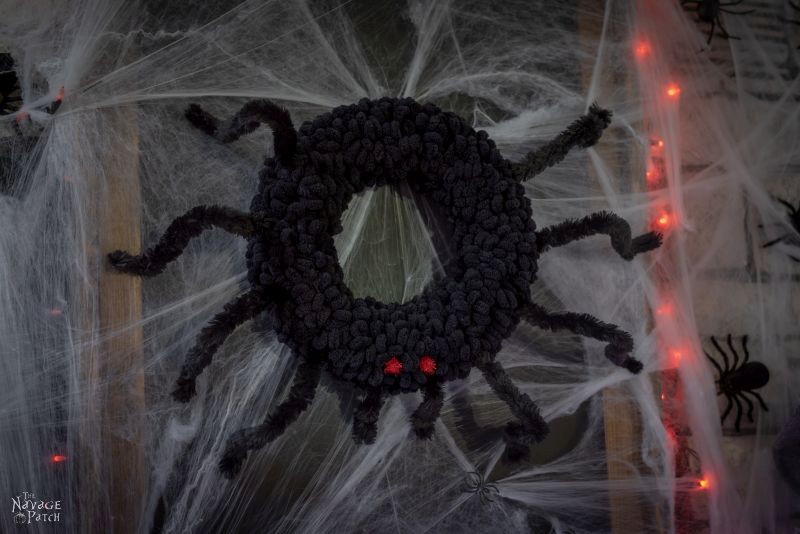
After I installed the legs on our spider wreath, I bent them into a spidery shape.
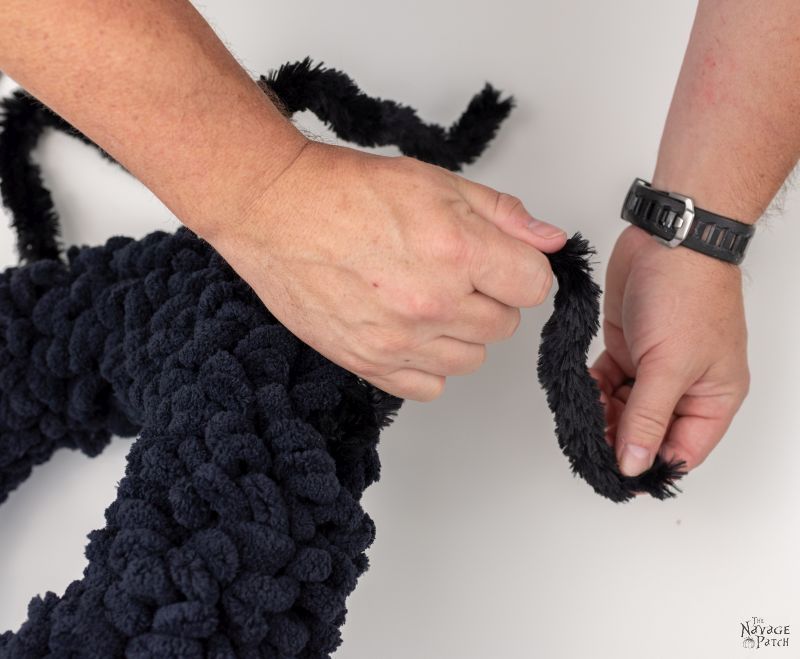
After shaping the legs, I stuck the two little ones up front. Awww, he’s looking so spidery!
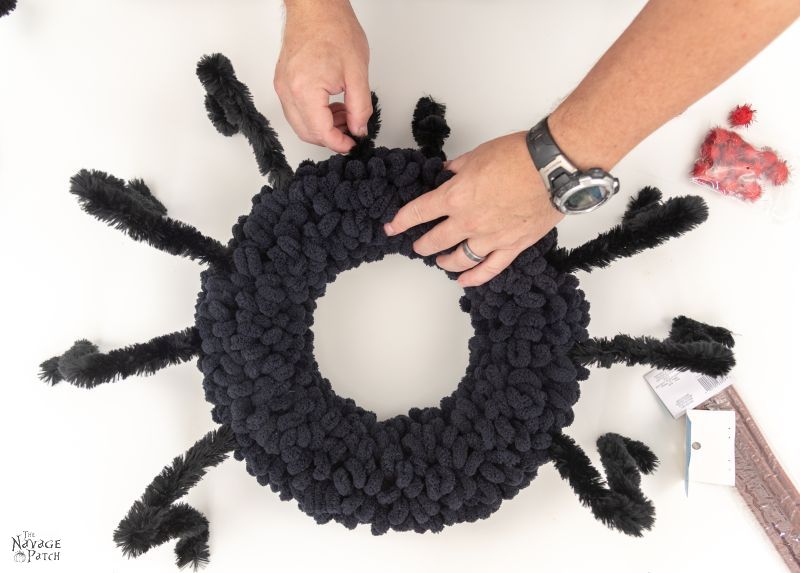
Step 3 – Attach the eyes
This is the easiest step! The eyes nestle right into the loop yarn – no glue or pins needed! You can use any color or type of pom pom you like, but we found red tinsel looked the best.
Whatever you do, please try to resist the temptation to put googly eyes on your spider wreath.
As I’ve mentioned before, madam, we have standards, and we expect you to have them too.
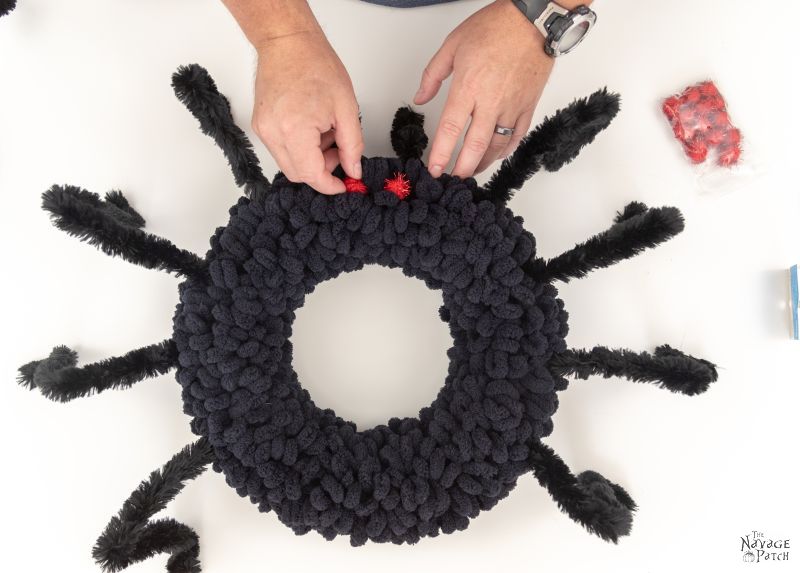
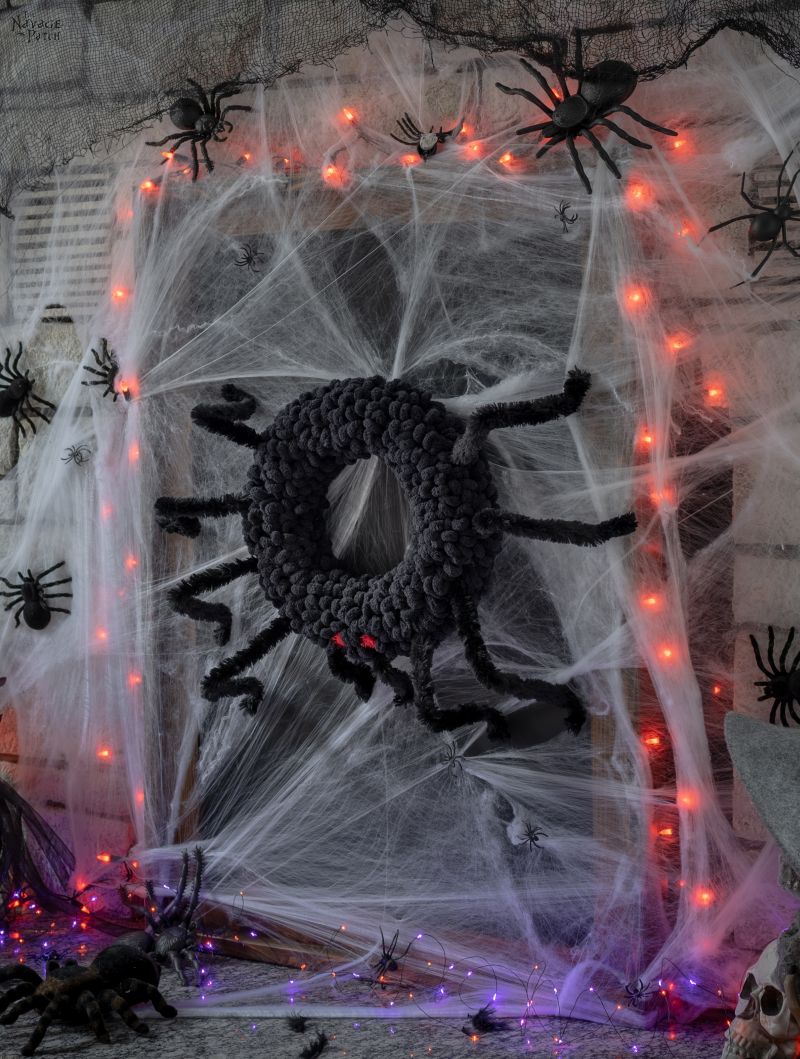
And that’s it! Our DIY spider wreath was ready to hang!
We hung ours on our magnetic chalkboard using these magnetic wreath hangers.
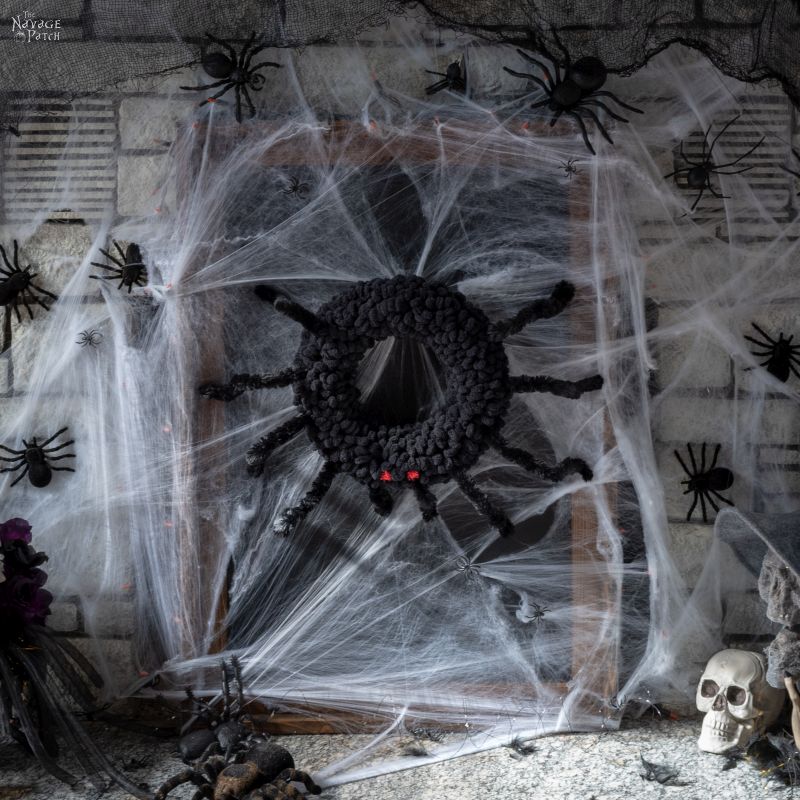

So what do you think of our 8-legged friend?

It’s such an easy wreath to make – do you think you’ll try it?

The best part about the loop yarn body is that we can reuse it for other Halloween wreaths!

You’ll just have to wait a little longer to see what we’ll do! 🙂


We love it when you share our posts on Facebook and Pinterest!


Loved it!!!!
Thank you, Regina! 🙂
Love it!!! A Halloween Must do!
Thanks, Maria! 🙂
Spiders usually creep me out, but this one is cute. For the record, I probably would have been tempted to add googly eyes. Want to have a good laugh? Stick those suckers are a variety of everyday objects just for fun. Try it when you are having a grumpy day and I dare you to stay grumpy.
And loop yarn is the best invention since sliced bread.
LOL, you’re right – they do make things funny! But that’s why I have to draw the line when it comes to googly eyes and halloween – there’s gotta be some creep factor involved! 😀
Like your spider. I bet your son’s friends love all the creepy details at your house! My favorite part was the technical folding the pipe cleaner into thirds! It’s like me and fractions–the ONLY time I want to use them is when I am doubling a cooky recipe! When I need to find the center of a small picture frame to add a hanger, I fold a piece of scrap paper to the width of the frame, fold it in half then mark the frame center! No tape measure, no fractions. Not even pounded fingers since I learned to hold those tiny nails with my needle nose pliers!
Smart lady! That’s a much better method than using a tape measure! And yeah, the pliers/nails trick is a real finger saver, lol! 🙂
I loved your winter wreath so much that I went and bought all the supplies and started on the wreath. Started not finished. So guess before I buy things for this wreath I better finish the last one.
You still have time to finish both, lol! 🙂
OoooooooWeeeeeee it’s a spider. I love them and that’s the bestest wreath I’ve ever seen.
Thank you, Michelle! 🙂
You could make a baby spider with a smaller wreath and leftover yarn. Maybe pipe cleaners would work for legs. This is really a fun wreath.
Absolutely! Great idea, Gayle! 🙂
Fantastic!
Thanks, Carole!