
Coffee Can Repurpose (& How to Paint Plastic!)
Our Coffee Can Repurpose is the perfect craft room small storage solution! We’ll also show you how to paint plastic so it won’t peel, even when flexed!
Handan has been working at her current job for exactly six years, and for exactly six years, she’s been hoarding the company coffee cans.
They buy those big tubs of Chock full o’ Nuts – pretty standard-issue for the modern office (with the occasional Folgers and Maxwell House thrown in for good measure).
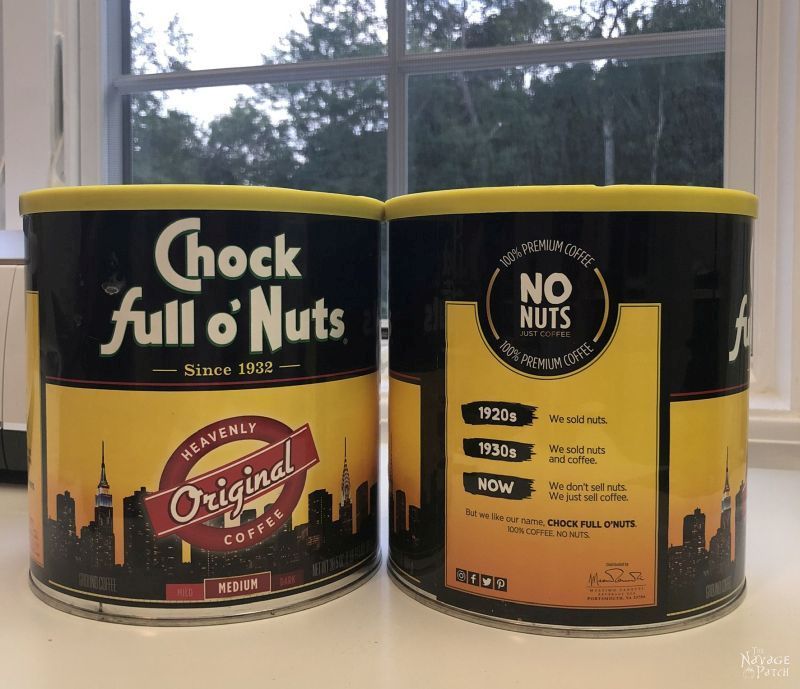
And whenever the (Good to the) last drop has been sipped by one of her bleary-eyed coworkers, Handan sneaks into the company cafe and purloins the empty can.
Over the years, her coworkers took note and started depositing the empties on her desk.
Some women become Crazy Cat Ladies as they age.
My babes has become the Crazy Coffee Can Lady.
I dreaded Coffee Can Day, when yet another yellow and black monstrosity would clutter up my counter until I kicked it down into the basement.
I’d occasionally commandeer one of the cans and press it into service as a grease and oil receptacle.
A couple of them became targets for Barish’s pellet gun.
But mostly they just multiplied in our basement.
No one knew what she wanted with so many empty coffee cans.
I sure as hell didn’t!
And I’m pretty sure Handan didn’t have the foggiest notion of what she’d do with all those gallons and gallons of empty space.
But then our Craft Room Makeover began, and we found ourselves in search of storage solutions, big and small.
Wouldn’t you know it? Just as I was about to put my foot down, grab the bull by the horns and very politely ask if I might possibly be allowed to throw away her cans, my babes came up with a beautiful and functional coffee can repurpose for almost the whole damn flock of cans! And in the process, we figured out how to paint plastic so it won’t crack or peel, even when you bend it!
Coffee Can Repurpose
- Empty coffee cans
- Bamboo placemats – we used IKEA Bamboo placemats ($1.99 each). If you don’t have IKEA near by, Amazon also has some really nice bamboo placemats.
- Zinsser BIN spray primer
- Flat black spray paint
- Plasti Dip spray
- Glue gun
Like many upcycles, makeovers and repurposings, this one started with some spray paint.
Well, really it started with primer, if you want to be technical about it. Zinsser BIN to be exact.
Okay, if you really want to get technical, it started by peeling the labels from the coffee cans and scrubbing off the label glue. But then came the primer!
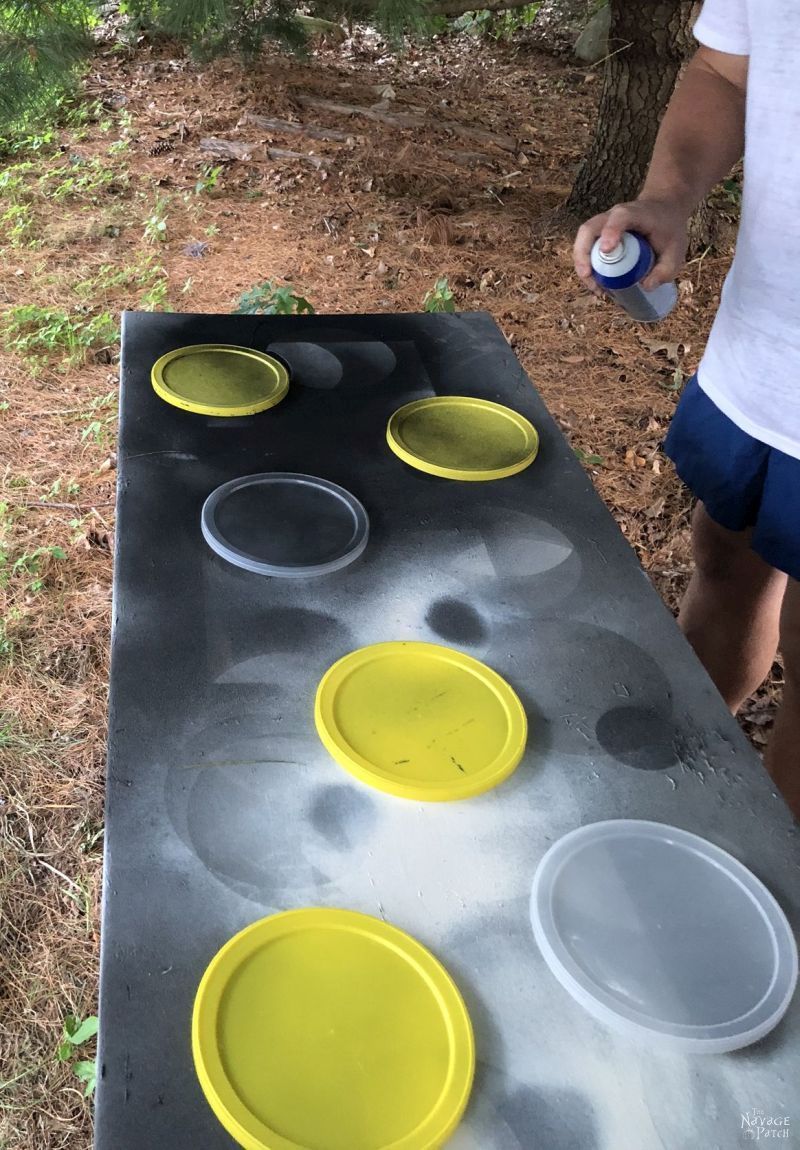
Once the cans were primed, I sprayed them with three light coats of flat black paint.

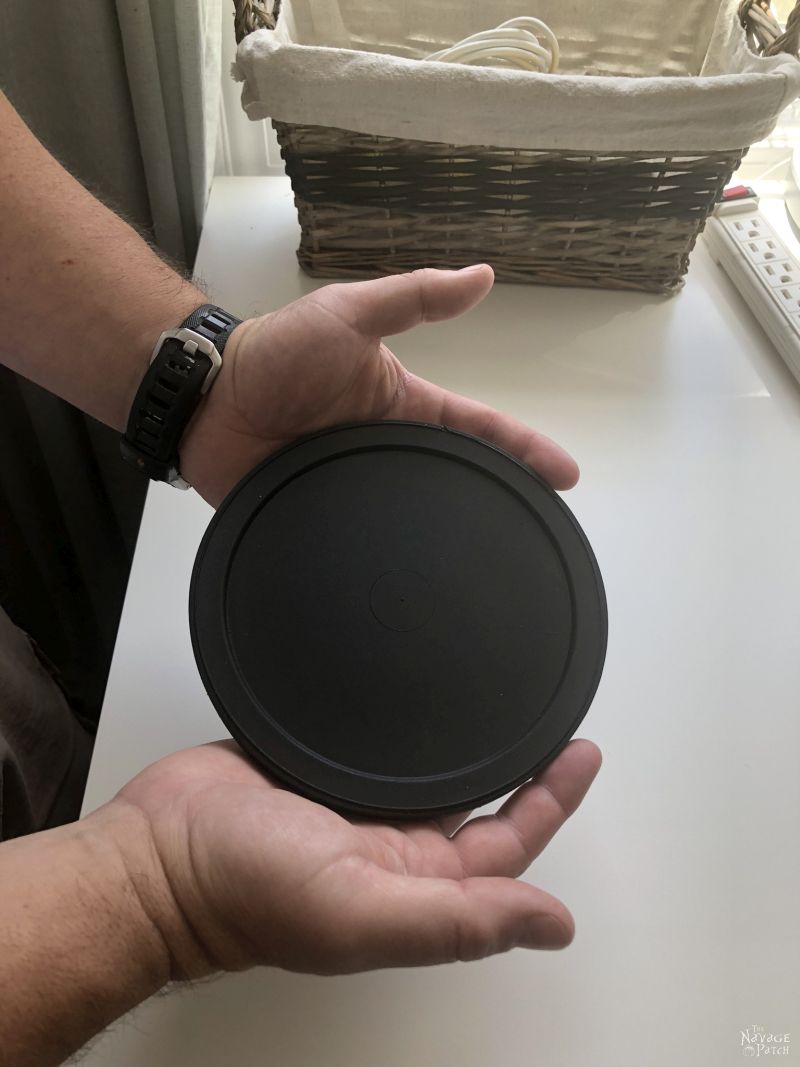
You’ll notice that I’m also spray painting the plastic lids that had already been primed. This all happened after Handan had first tried to spray paint the lids with no primer.
That worked as well as you might imagine. The first time she bent the lid, almost half the paint flaked off, and the rest was not far behind.
I grabbed the lids from her and assured her I’d solve the mystery of how to paint plastic without it cracking or peeling when flexed.
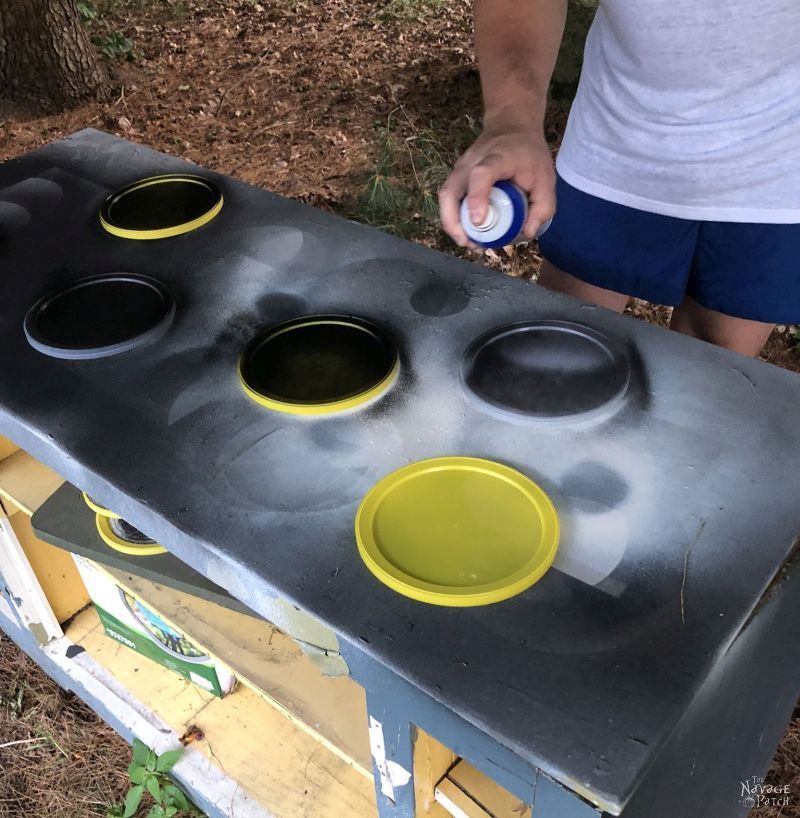
First, I lightly sanded the lids, then I hit them with primer, and then I spray painted the little round nuisances (as shown above).
I was sure this technique would work! It had to!
But it didn’t, and the lids flaked like a French baker’s croissant on a cool Parisian morning.
Okay, look, the lids I painted were a world better than Handan’s unsanded and unprimed versions, but these lids would be used frequently. They had to be able to endure some bending!
Bending…
Flexing…
Bending and flexing…
Hmmmmm….
My mind wandered to Olivia Newton John doing Jazzercise in the 80s…
STOP!
I mentally slapped myself.
Wrong bending and flexing, doofus! Get back with the program!
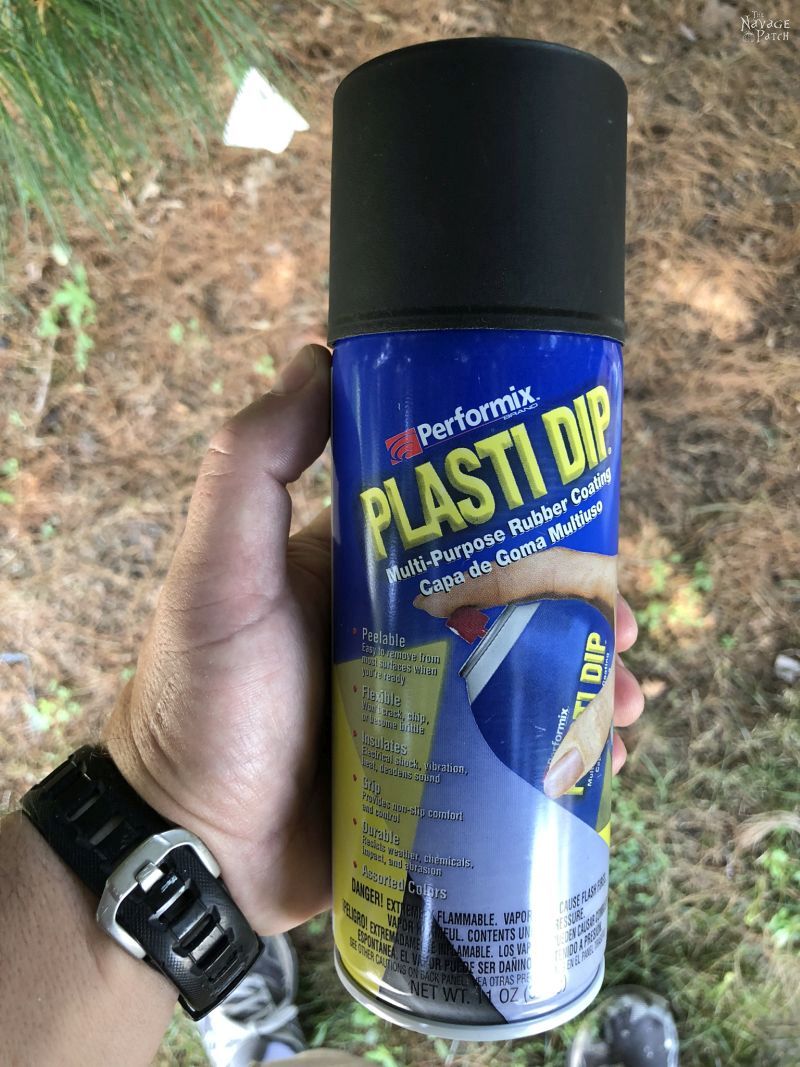
Okay, I’d been using a product in my workshop called Plasti Dip. It’s a liquid rubbery plastic that I used to create new grips for a bunch of pliers and other old tools that I had gotten from my father.
It might be perfect for those coffee can lids.
I checked Amazon to see if they had different options.
And there it was!
Plasti Dip spray! It even comes in all different colors!
This could be the answer to my prayers. These stupid lids were giving me far too hard a time considering how easy the project was supposed to be!
I had removed the paint from the failed lids, and I still had lids that were brand new. I took them all out and began the Plasti Dip experiment.
How to paint plastic so that it doesn’t crack or peel
Plasti Dip is an interesting substance. When spraying it, I was tempted to treat it like spray paint and just spray very light coats.
But the can assured me that I could go thicker, so I got a little more aggressive with the spraying.
I gave the lids two good coats of Plasti Dip, waiting 30 minutes between coats.
The result? Perfectly “painted” plastic lids!
That can be bent…
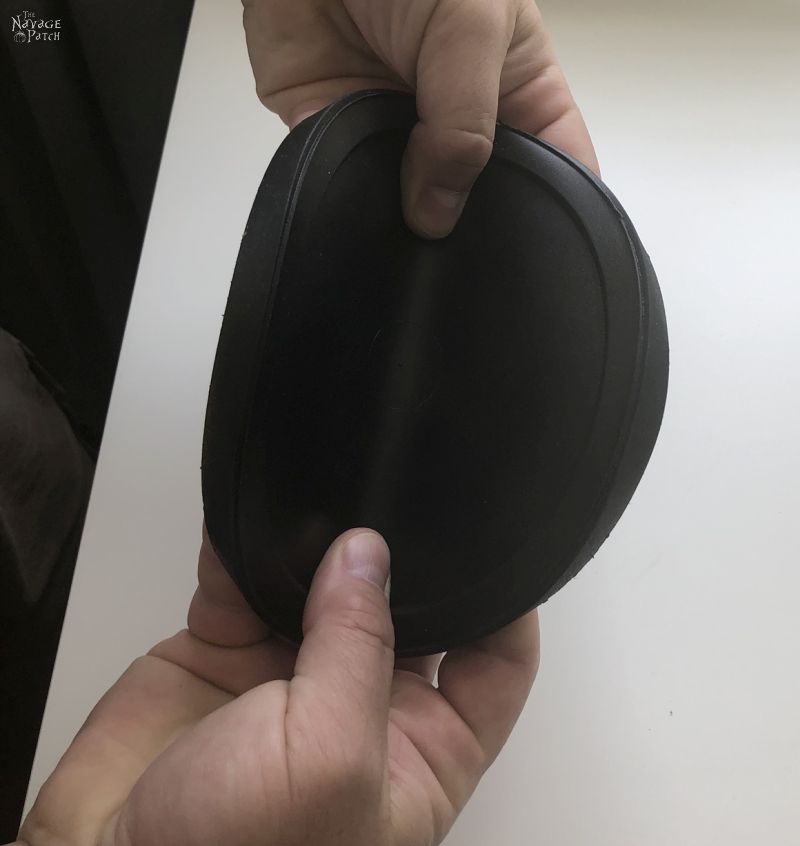
and flexed…
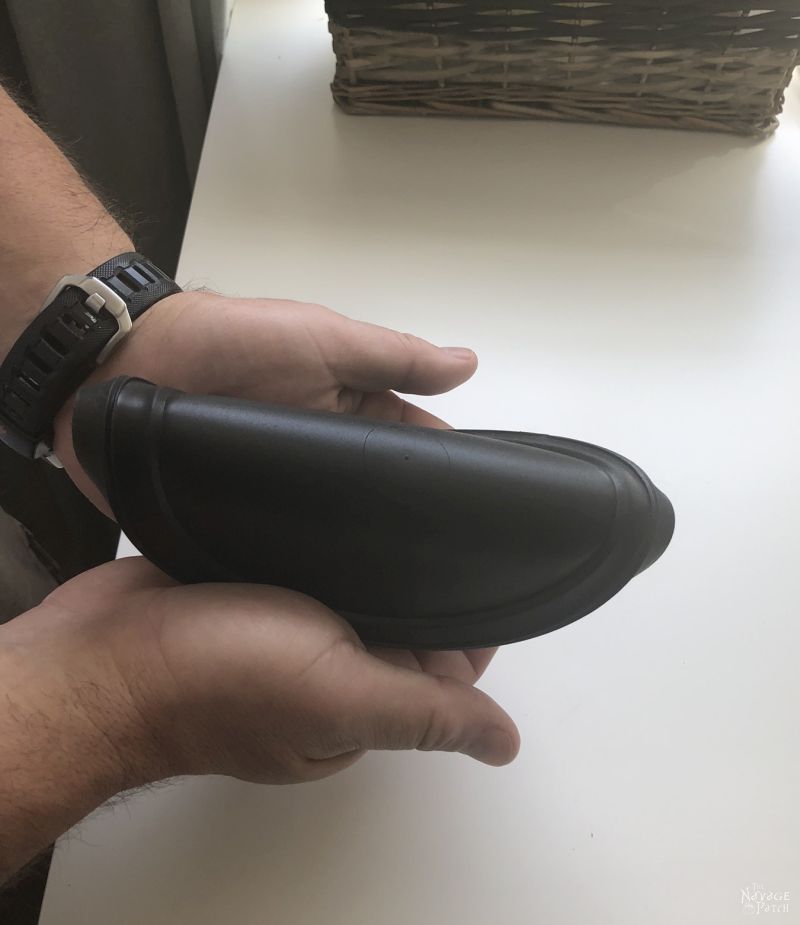
…with no cracking, peeling or flaking!

Update 2021: we found an even more durable way to “paint” the lids: Flex Seal Spray. It is stronger than the Plasti Dip, but it leaves a textured finish. Depending on the look you’re going for, that could either be a good thing or a bad thing, but we love the way they look with texture!
Having solved the mystery of how to paint plastic (and earning the admiration of my babes), I turned back to our simple coffee can repurpose.
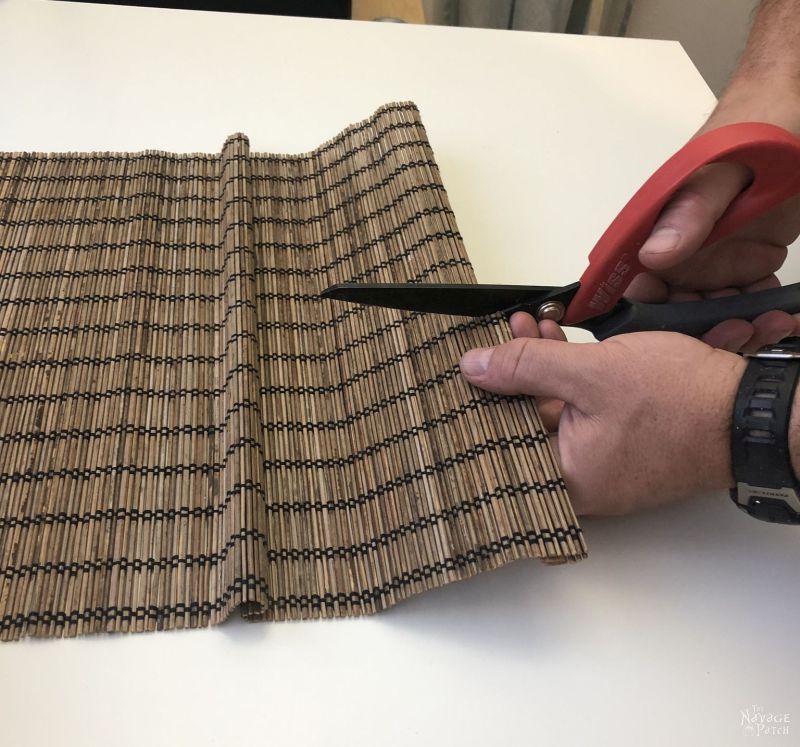
To add interest to our matte black cans, Handan found a bunch of old IKEA bamboo placemats that we used to use in our dining room but had been retired and relegated to the basement. Like all things she squirrels away, she may not know at the time of squirreling what their future use will be, but she’ll always remember them, and she’ll almost always find a use!
Handan thought that a strip of bamboo placemat glued onto the cans would look awesome.
Who was I to disagree?
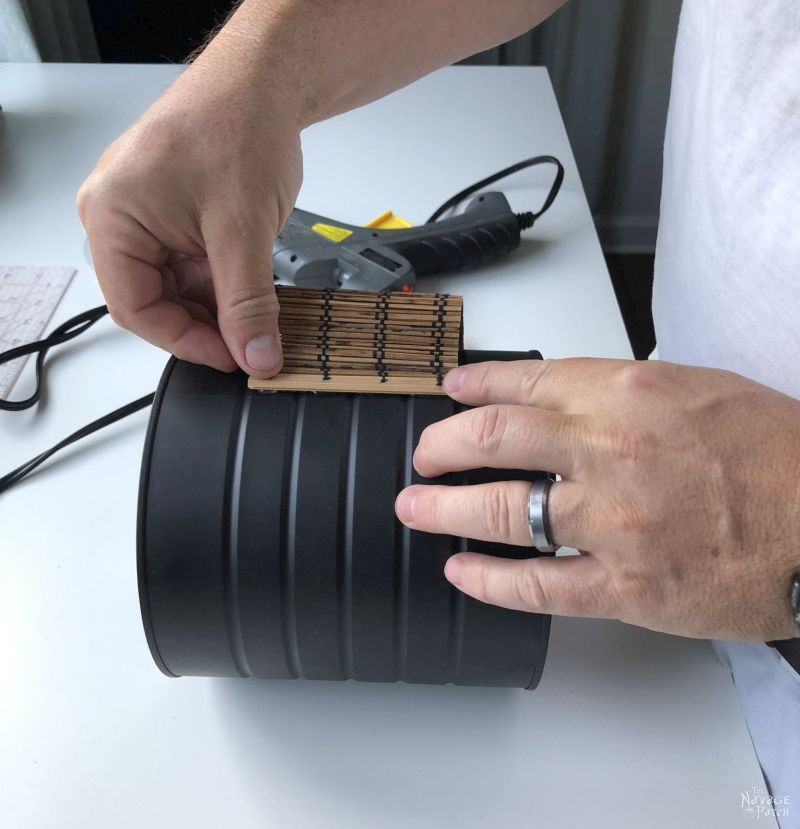
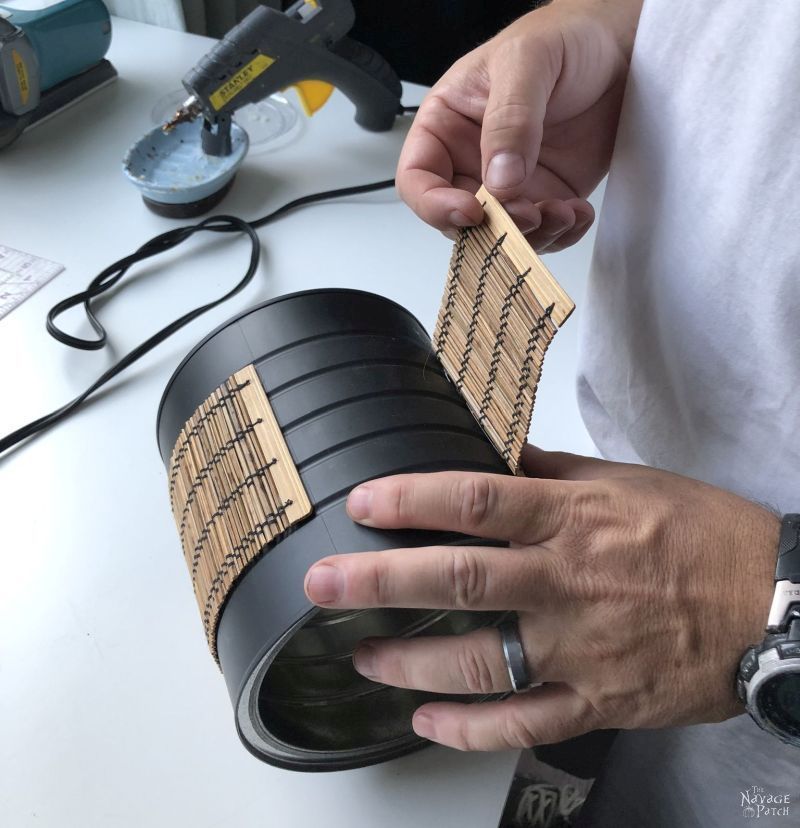
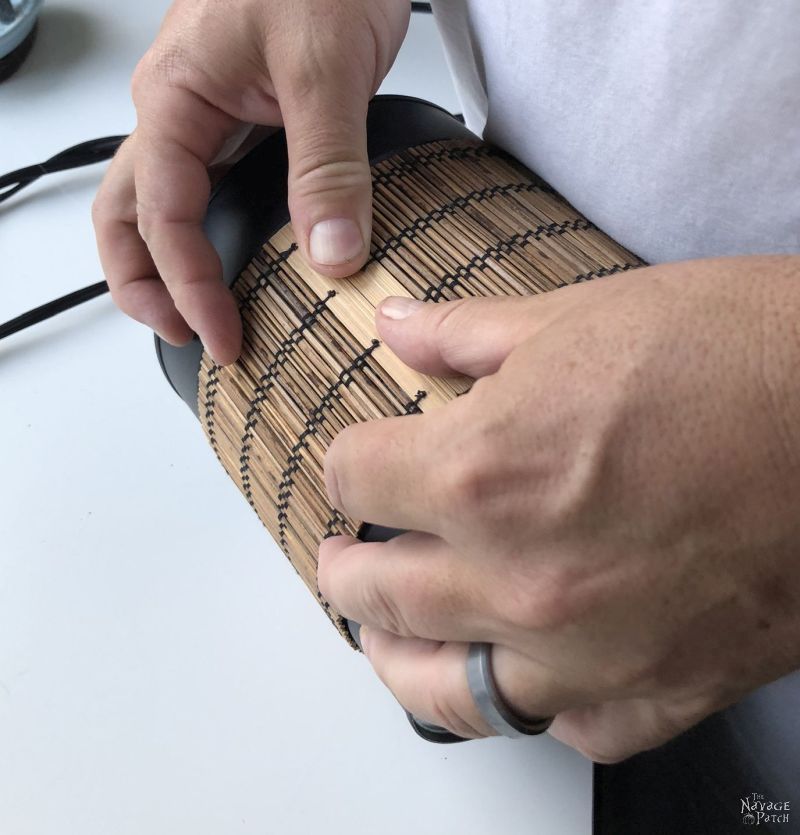
I cut the placemats so that the bamboo strips would fit between the grooves in the cans. We first tried one with a bigger strip, but we settled on a width of 4 black lines in the placemat.
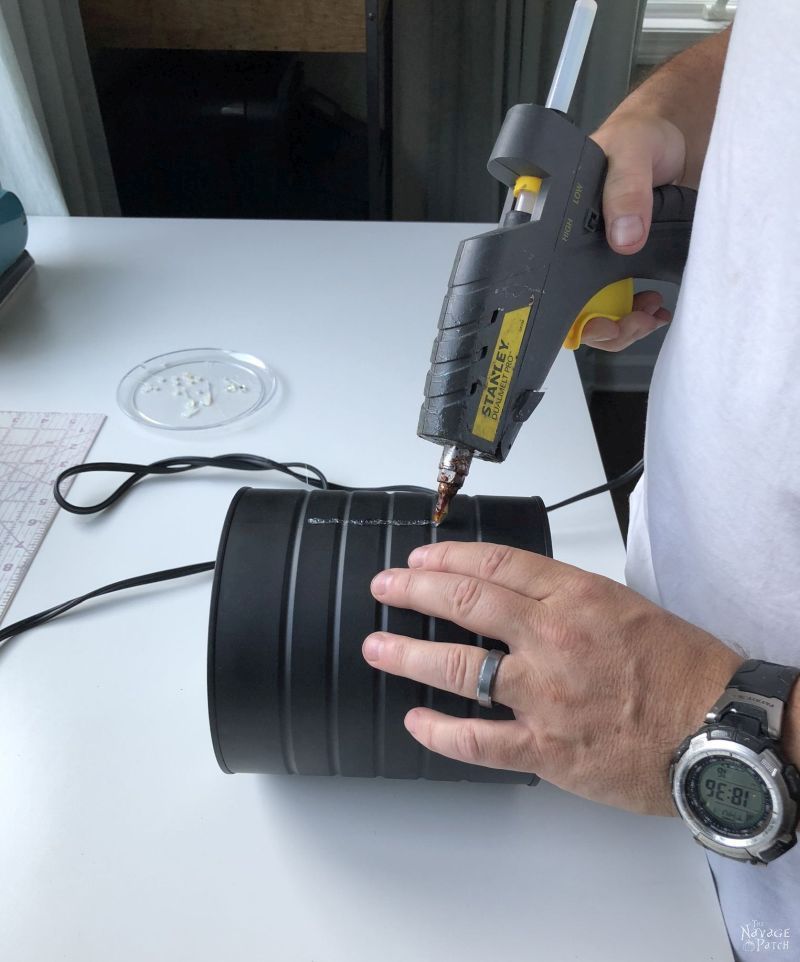
Starting at the seam in the coffee can, I put a line of hot glue between the grooves on the can.
Then I glued one end of the placemat strip.
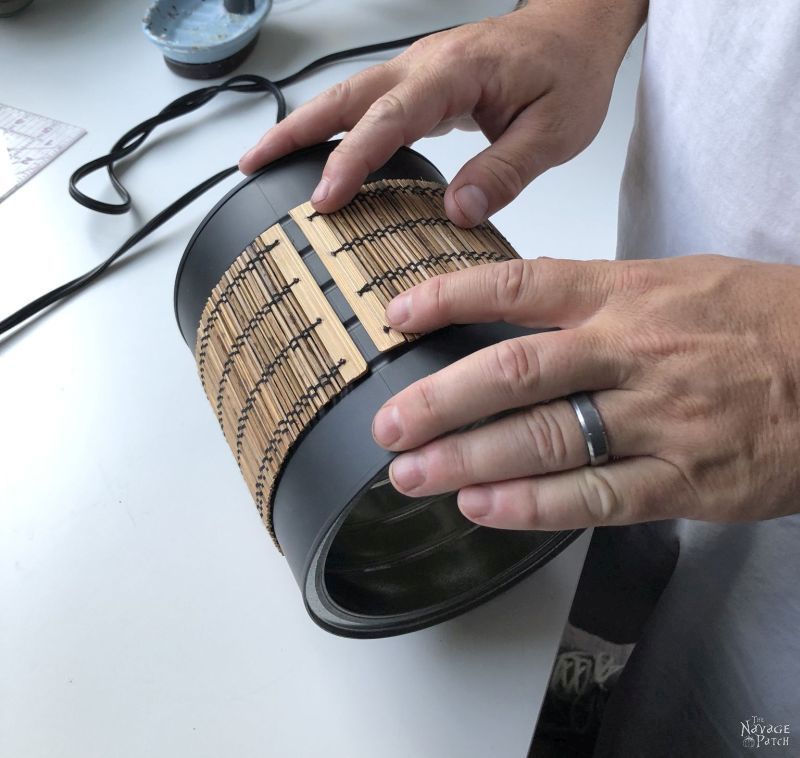
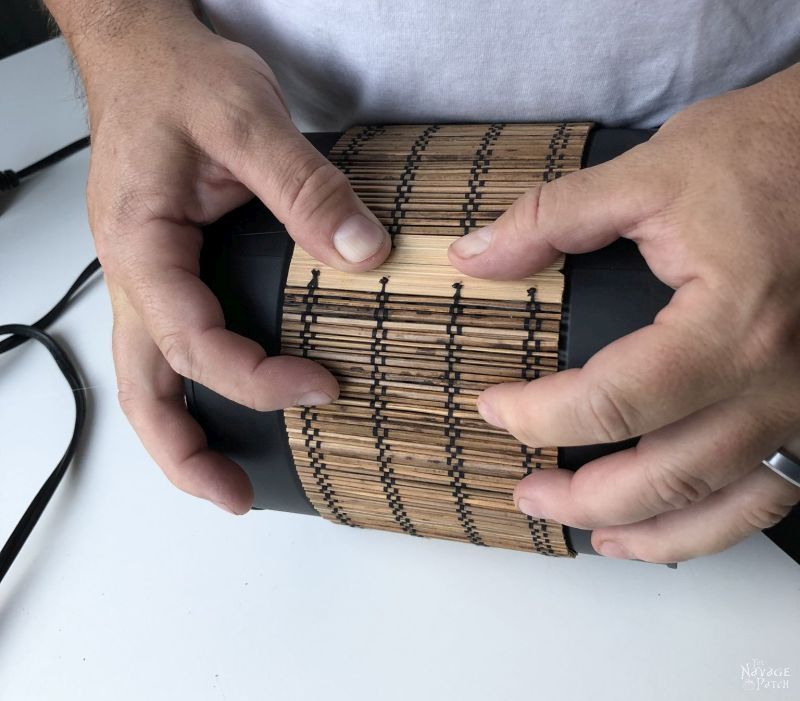
Every few inches around the can, I put another line of hot glue…
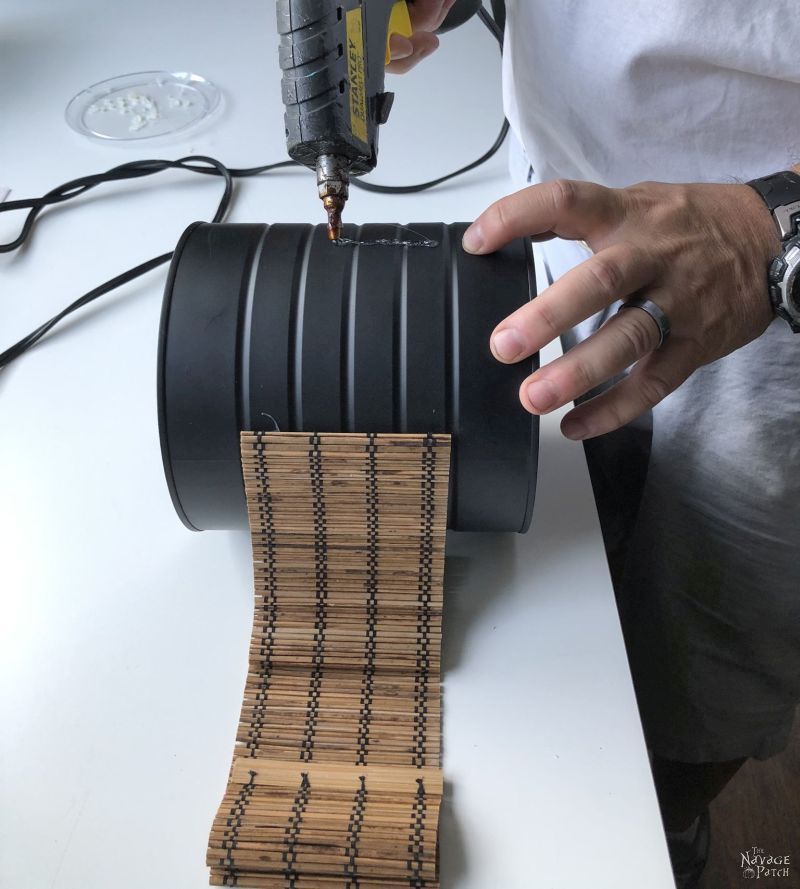
…then I wrapped the bamboo around and glued it in place.
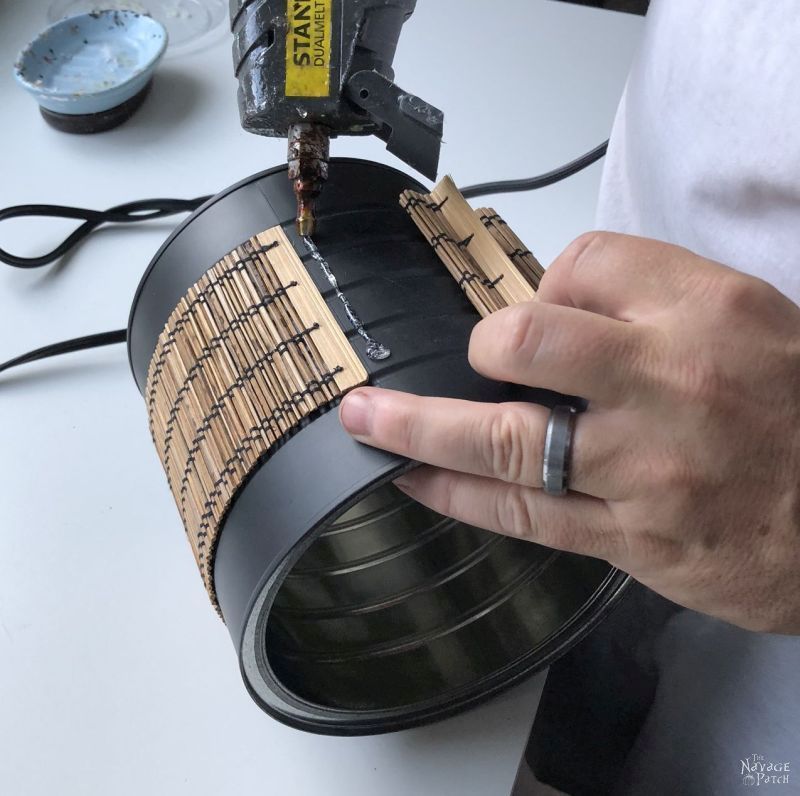
Getting near the end…
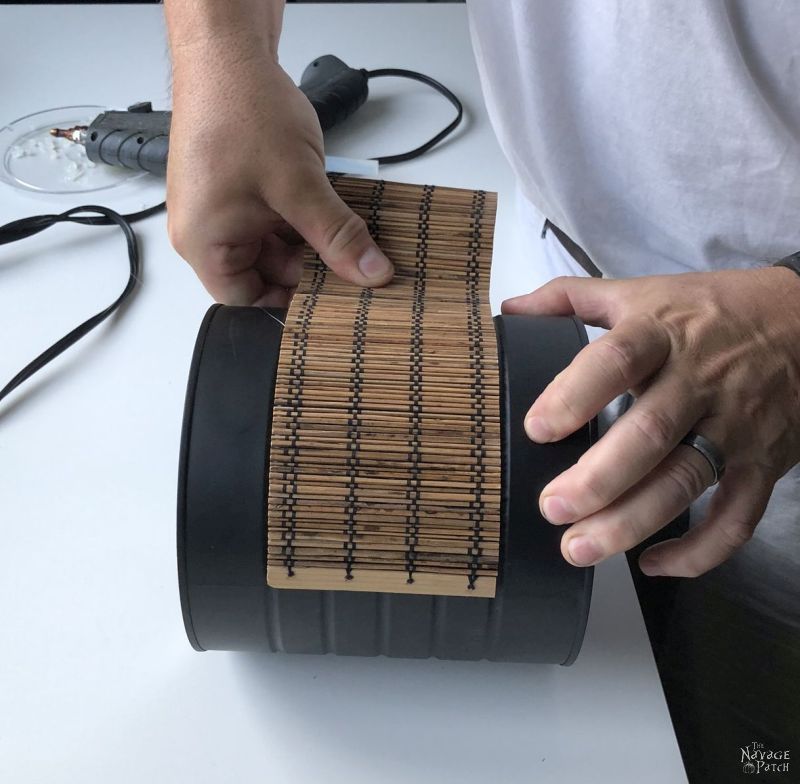
This next pictures shows me just laying the bamboo down on the can without glue. Notice that it comes up short.
No problem! The bamboo mat stretches!
I put the last line of hot glue.
And then I stretched the bamboo strip so that it met with the other end.
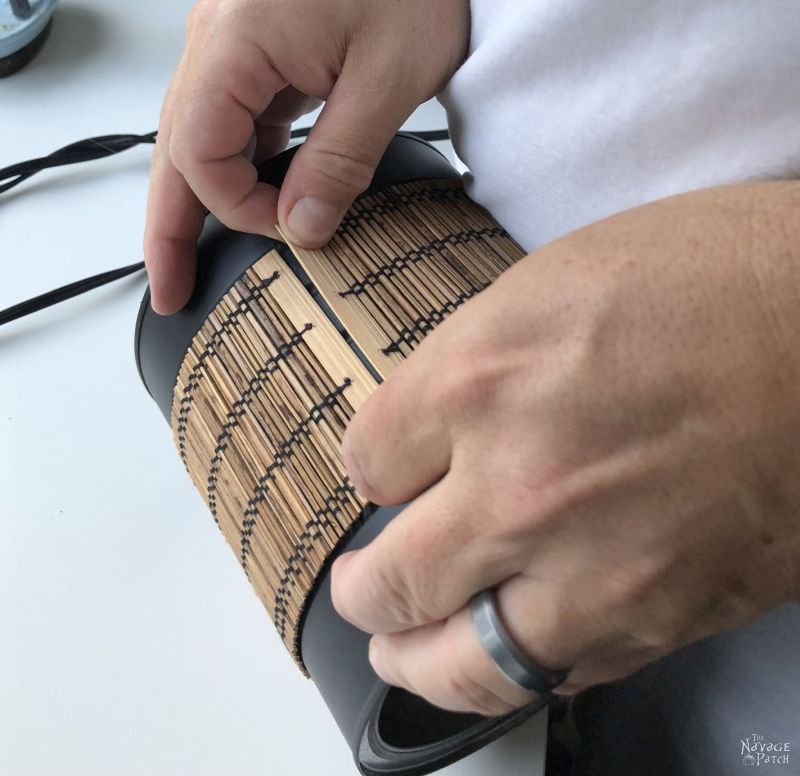
One final push to make the ends meet…
Hold a few seconds, and then it’s perfect!
And that’s it! A little spraying, some cutting and some hot gluing, and we now have a whole fleet of stylish storage for our (nearly-completed) craft room!


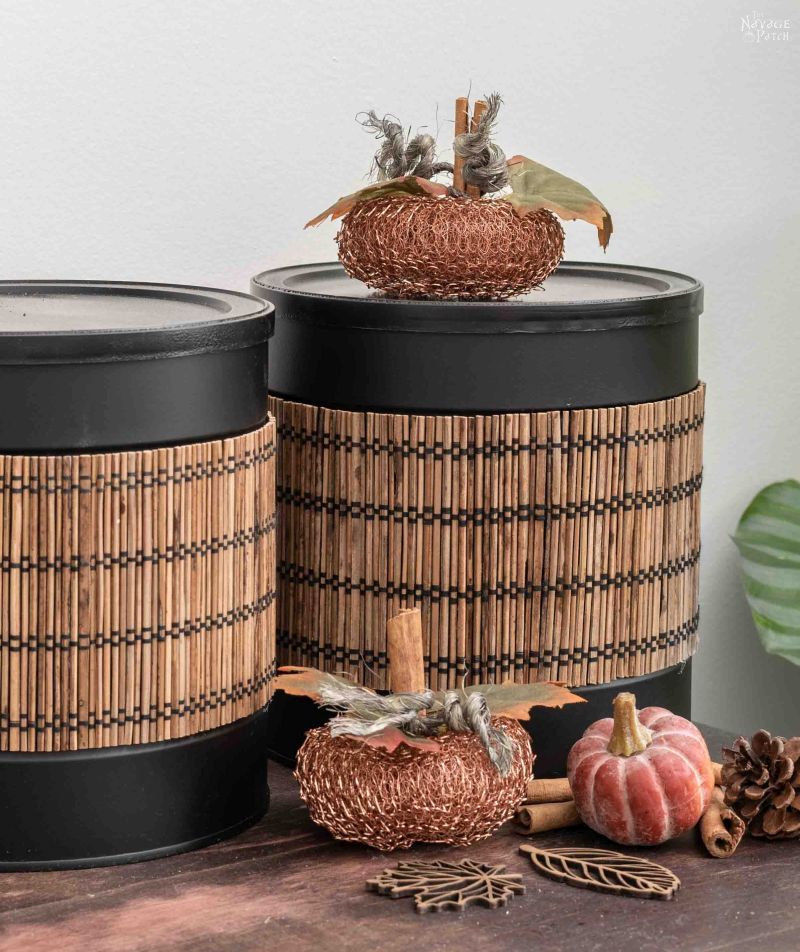


How do you like our coffee can storage solution? What have you used old coffee cans for? Let us know in the comments!
If you’re following along with the craft room makeover, here’s how we stand:
Craft Room Makeover Checklist
Craft room ideas and laying out the game planPaint the walls, ceiling and trimPaint the French doorCarpet removalInstall laminate flooringBuy curtains and install curtain rodsDIY craft table for CricutDIY / buy a computer deskDIY Closet makeoverDIY Industrial Bookcase (West Elm Inspired)Antique sewing machine drawers upcycled to a storage cartUpcycled craft room storage- Craft room makeover reveal
Click here to see more craft room makeover posts as we continue to cross items off our checklist!
We love it when you share our posts on Facebook and Pinterest!


Hmmm , mind goes to all those “useful” plastic lidded containers accumulated over the years……… You two are geniuses! I love what you have done with those cans, they look like something from an expensive designer store!!
It’s amazing what a little paint and a placemat can do, isn’t it! 🙂
Did u spray paint the cans/or try to after the plastic dip /flex spray coating? Bc i want to use a specific color spray, but they don’t have it in the plastic dip/flex spray? So I was wondering if I spray paint it after applying that coating, will it still not flake/ not crack?
Hi Addy, we haven’t tried that, so I can’t say for sure. You may want to experiment with it, and I’d suggest using white Flex Spray.
Those came out nice. I never heard of that Plasti Drip. Good to know for any possible future need. And hey, is that copper pumpkin made from a scrubby pad? Ingenious if it is.
I don’t squirrel too much away (well some craft supplies because my basement storage is limited. But I do tend to buy items for future decor that may take awhile to get to (like artwork, different hardware, accents, etc.) and pull them out years after purchase to use once I get to that remodeling project. It pays to always be on the lookout for potential craft/decor stuff.
Heheheheh, you caught on to our little teaser! 🙂 Yep, we’ll be posting about that pumpkin and more coming up real soon! You and Handan are kindred spirits – she’s always acquiring “future projects” lol!
Greg, this is awesome! I use empty dishwashing detergent pod containers in my craft room. They used to have removable labels, but now they are printed on the plastic, and they are really ugly. Now, I can paint them all (or wrap them)! Thanks again for all your great ideas!! Can’t wait to see the reveal!
Thank you, Terra! Yep, this idea can be used for any time of small storage – not just coffee cans!
Amazing Handan! Soooooooo – out in my hubby’s workshop there are SEVERAL black plastic garbage bags FILLED with Folger’s Coffee Cans!! My idea when i started (hoarding) collecting them, was to paint them, add graphics, and fill with cookies as Christmas gifts. WRONG!! I sprayed them up nicely, but like you two, the paint crackled when the lid was lifted. I was so disappointed. Every so often the hub grabs a coffee can for “whatever”.
Wait until I tell him what you did!!!!!! LOL
PS Greg, you handle a Glue Gun like a pro!!! You make Handan proud!!
LOL, practice makes perfect, Laura! I sure hope I make her proud! 🙂
Wow, That Plasti Dip is a real game changer! I can hardly wait to try it out. Will you eventually label the containers? I know I would probably open a few before I found the right one! Lol!
Also, will you be printing any more of the Book Page wall art? I’m still hoping for “This is the beginning of a new day…”
Thanks to you both for bringing so many new ideas for us to try!
Lynn, finally it’s in the queue now: not the next printable post (it will be fall related), but the one after that!! 🙂
It’s a huge game-changer, Lynn! Yes, we’ll eventually either cut vinyl labels for the tops or hang tags from the bamboo.
Hi Lynn, I have a little surprise for you today. Please don’t forget to check your email! 🙂
Great idea! And thanks for the tip on Plasti Dip!
Thank you and you’re welcome!
Those are terrific. Now I can solve my flex and bend plastic problems. I have one question. How is your babes planning to label those cans. I will never remember by location what is in where? Thanks and I love your blog
Thank you, Frankie! We’ll either make vinyl labels for the tops or hang tags from the bamboo. Once we fill all the containers, we’ll get around to the tags. 🙂
The cans looked like they were made of metal, so perhaps some magnetic dry erase labels from Amazon would work and they would be easy to erase when the contents changes!
That’s a great idea, Melinda! 🙂
We have used the plastic coffee containers for storing left over paint. It keeps it quite fresh, for at least four or five years, much better than the original csn. My 5th grade teacher painted six metal coffee cans, stacked them in a pyramid, glued and screwed them together and we put our homework and classroom assignments in them. She labeled the cans by subject.
Good ideas – both the paint storage and the classroom organizer!
These are quite nice! I wonder if you could screw the bottoms to a flat board (after you gussie them up) then hang on the wall for horizontal storage in an entry way, craftroom, etc. I think you could corral, gloves, caps, scarves, shoes, etc. in an entry.
You could absolutely do that, and it’s a fantastic idea, Glyniss! 🙂
These look AH MAY ZING!!! What a great idea with the placemat!
Thank you so much, Colleen! Handan never ceases to amaze me with her ideas!
These look awesome! Have you tried the spray paint specifically for plastic? I wonder if it would flake off too. I have never heard of the Plasti Dip but with Amazon I’m sure it will be easy to find. The only problem being things tend to be double and triple the price on the Canadian site! ☹️
Thank you, Giselle! I haven’t heard of spray paint for plastic, but now that you’ve told me, I’m going to have to buy some and try it, lol!
I love this idea and that paint is amazing! Thanks so much for the inspiration, I’m pinning it for later!
Thank you, Susan! 🙂
How did you protect the inside of the coffee can when you spray painted the cans?
I like the coffee can project and the plastic paint but the raw edge on the bamboo does not look finished, take some cord or twine like in some of the photos, glue it around the edges of the bamboo. I think it give a much more finished look….
That’s a great idea, John!
Hi Beverly, I painted the cans upside down and then flipped them over and lightly sprayed around the rim. Some spray did get into the can, but since they’re used for storage, it wasn’t a big deal. If you wanted to paint the rims and keep all the paint out of the can, just blow up a balloon that’s a little bigger than the mouth of the can and then squeeze it into the can. Spray away, and the inside will be totally sealed off from the paint!
I never see those metal coffee cans any more…just the plastic ones. The metal coffee cans are worth their weight in gold and are so handy for things that can’t be stored in plastic!!! Smart Handan!!! They look gorgeous and love the tip on Plasti Dip!! I’ll have to check that out!
Thank you, Susan! Yeah, all these years I thought Handan was nuts! Turns out, she’s a genius! 🙂
We have 2 smaller cans…..one for nickels and one for dimes. Yours are more attractive.
It’s an easy project to make them look better! 🙂
What a wonderful and useful idea. I am blown away once again by your and Handan’s creative talent. I have so many projects in the works but always get sidetracked when your blog pops up.
Thanks again for sharing!
Thank you so much, Jan! I’m happy to be a distraction for you, lol! 🙂
Pumpkins! Please it is still August. Some of us are still looking forward to a beach vacation. I do love pumpkins, but not in August. Great project though.
LOL, I hear you, Jody! But time moves differently here in Blogland. Fall starts August 1st, Christmas starts November 1st and summer posts starts rolling out well before the last frost. If we waited until the season to post projects about that season, people wouldn’t have time to do them! How often are you looking for a Christmas DIY the week of Christmas? Not very often, I’d imagine. You’re too busy hustling to prepare for the big day! Just be happy you’re heading to the beach! You can think of Handan and I toiling away here on our fall projects and smile that you’ve got the better deal, lol! 🙂
Greg. I hope you are planning on a post about making handles for your fathers tools! Lovely storage, great tip for painting plastic!
Hi Rose, I made those handles years ago, but I may still write a post about something similar!
OMG I AM A HOARDER OF COFFEE CANS MYSELF I LOVE LOVE LOVE +1,000,0000,0000 LOVE THIS THANK YOU SO MUCH FOR SHARING ???
Thank you, Anjelykuh! I’m so happy you love it! 🙂
Love! and thank you for the paint advice. In the past I used a spray paint that said ‘for plastic’ and sadly lasted about a week and then started cracking.(sprayed a big wheel to resemble a Harley)
I always learn something new with. your posts! x0x0
You’re welcome! Yep, to solve that plastic paint dilemma, you gotta use something that’s not really paint, lol! 🙂
You guys are amazing…I think you just solved my need for new canisters in the kitchen! They look fabulous!!! Now to find some cans suitable for my work of art…hmmmm….
Good luck in your search, Cindy! 🙂
These coffee cans with bamboo accents are awesome! But I am in love with the copper scrubby pumpkins too!
Thank you, Wendy! We posted about those just last week! https://www.thenavagepatch.com/shower-pouf-pumpkins/
Now those are some smart, sharp-looking, and easy craft supply holders! Great job!
Thank you so much, Julie! 😀
Plasti Dip was surely handed to us DIYers by the Gods.
No doubt, Jay! It’s incredible stuff! 🙂
Just awesome! so elegant (and that’s coming from a French girl ;-))
I wish we had coffee tins that big in France (coffee is usually sold in packets, here, not in tins, anyway): I would probably save one for the kitchen, as I’m looking for large tins showing brandnames to store my various types of flour.
Anyway, congratulations!
Thank you so much! Hope you can find something suitable in France to make one, too! 🙂
I love your creativeness and projects. Like Babes, i too am a hoarder of things i “may” need later! Its always so fulfilling when u can repurpose stuff-even if its 15 years later!
LOL, you are exactly like Handan! It’s incredible that she can remember all the things she has stashed all over the house!
Missed this one! Glad I found it! Very professional looking containers. My current fave is Michael’s photo storage boxes; generally in florals. Like your economy much better!
Thank you, Kathy! 🙂
Do you think this plasti drip would work on a rubber otterbox defender case???
It could, Angel. I’d try to scuff the Otterbox with sandpaper first to improve adhesion.
I read on the PlastiDip description that it begins to peel in a short amount of time & is made to peel off easily. Have you had trouble with peeling?
Hmmmm, no we haven’t. I wonder why they make it that way??
I love these!! I’m finally getting my She-Shed for my crafting things, and you’re ideas, you’re creativity is something I envy and have so much appreciation for. I can replicate Van Gogh’s, Starry Night using melted crayons drop by drop (which I did in high school, humble brag), but it’s hard for me to look at something, and see what all it could be! 😩 I’ve started flipping furniture too, on top of my love of crafting, decor, and making furniture, etc. After my husband passed suddenly at 35, it left me and our then 10 year old with nothing. It’s all still tied up in litigation bc we had 5 businesses, well I should say he did, since we were 35 we didn’t think to put my name on them or think anyone would try to take from our son what he’s left him in his will, yet here we are. And to top it off, I now have a four month old son!! I found out a week after that we were pregnant! So money is tight, and making things is my stress reliever and now money making helper lol. So when someone like me can find someone like you and watch and learn from the amazing things that you create I wanted to make sure I reach out and let you know that your work is appreciated and value more than you know! Please please keep it up! I have now found myself with an excessive amount of plastic and formula containers and detergent containers anything and everything you can think of not to mention the amount of 2 gallon water jugs, that I have held on to simply for the fact I knew I could do something with them, not to mention the waste! I wish I had your eye and creativity! LOL☺️🥰
Wow, that’s was an eye-opening read, Whit! I’m so sorry for your predicament, but I’m at least happy that you’re here with us and liking what we do. Best of luck to you now and always, and I hope to hear from you again!