Closet-to-Office Makeover
This Closet-to-Office makeover opened up some much needed space in our craft room, and it can be fully hidden by closing the bi-fold doors!
Before we embarked upon our Craft Room Makeover, the closet in the old craft room was a place where fabrics went to fade away and be forgotten.
By me at least.
Handan remembered every square inch of every piece of lace, leather and linen that had been folded, stacked and hung over the past 6 years.
Yes, that’s a sombrero in the picture below.
No, Handan has never been to Mexico, nor have I since I’ve been with her.
I have no earthly idea where that thing came from, but it’s entirely possible that my babes is moonlighting in a mariachi band.
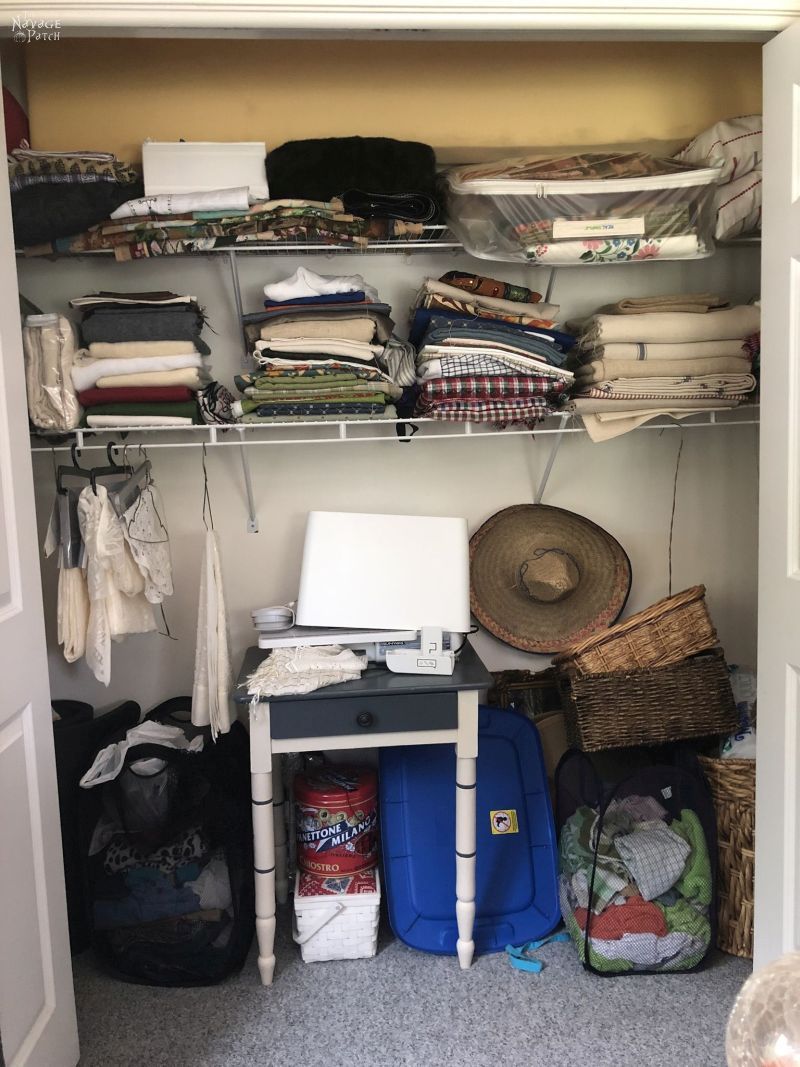
I stuffed all those fabrics into rolling duffel bags. The sombrero stayed visible in case Handan needed to grab her maracas and run to a midnight fiesta.

As I previously covered in the Painting and Laminate Flooring Installation post, the closet was a mess after I removed the wire shelves.
Instead of screws, they were held up with thick nails in the drywall anchors.

The only effective method I found to remove them was to grab hold and yank them out with a mighty heave.
It was fun work, and I pretended to be The Incredible Hulk while doing it, but it did leave some rather ghastly holes.

I detailed my method for quickly fixing those holes in that previous post, so give it a read if you missed it.
Once the holes were repaired, the priming and painting were easy. Since the ceiling would rarely be seen and would always be in shadow, I painted it with the same white that I used on the walls. You can’t tell, even if you look straight at it.
Here’s how it looked. You can get a little peek in there of what’s coming up.
About 3 seconds after we finished installing the laminate floor, Handan started carrying in the components of this closet to office makeover!
Closet to Office Desk Elements

The idea was simple: the two IKEA ALEX drawer units would form the base of the desk, and the IKEA laminate countertop would serve as the desktop. The laminate was longer and wider than we needed, but it cuts easily with a table saw, circular saw, or even a jigsaw.
We chose the LILLTRÄSK laminate countertop instead of the LINNMON desktop we used for our DIY craft table/Cricut station because the LILLTRÄSK has a solid core. This not only allows it to be cut to any size, but it is stronger than the LILLTRÄSK, and will bear more weight without sagging.
The LINNMON desktops, on the other hand, have a thin particleboard shell surrounding a honeycomb paper inside. The paper fill gives great compression strength, but they are more prone to bending and sagging under heavy loads. The craft table we built won’t be subjected to heavy loads, and it is adequately supported by the cabinets underneath.
Since the LINNMON is merely a veneer around paper fill, it can’t be cut to custom sizes. Once that particleboard shell is cut from one or more sides, not only would you be left with exposed paper fill, but the desktop would lose a lot of its strength and rigidity.
The ALEX drawers are the perfect size for this closet – they have the exact same depth.
I cut the countertop to the correct depth, and then I trimmed the length so that I’d have floor access on either side.

The picture above is the only “building process” picture we took. There wasn’t much to document – we just pushed the drawer units in place, laid the countertop, put the add-on unit on top of that and then started moving in all my stuff.
Let’s have a look.
The beauty of this closet to office makeover is that when the doors are closed, the closet’s true purpose is concealed.

But open the door, and voila!
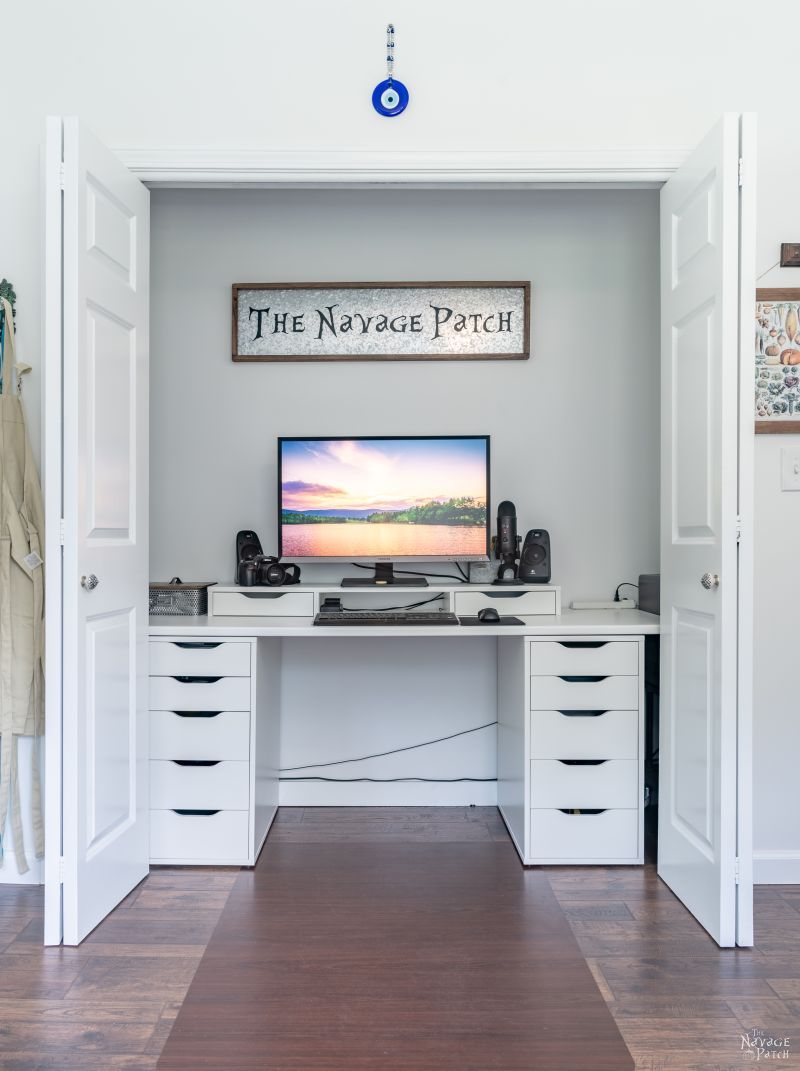
The protective floor pad can fold up behind the doors if we need to hide it.

It’s the new Navage Patch World Headquarters!

Here’s a closer look at one of the ALEX units. These little guys have TONS of storage space!
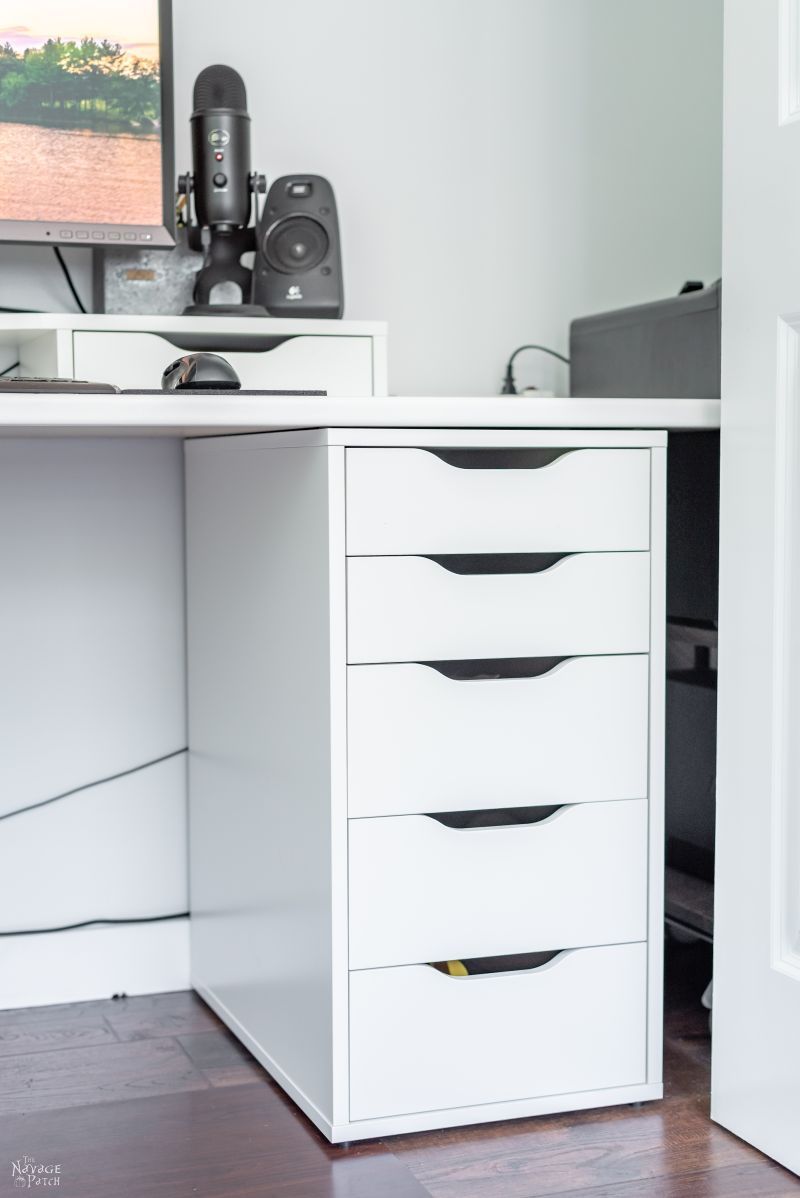
Over on the left, I store my camera gear.
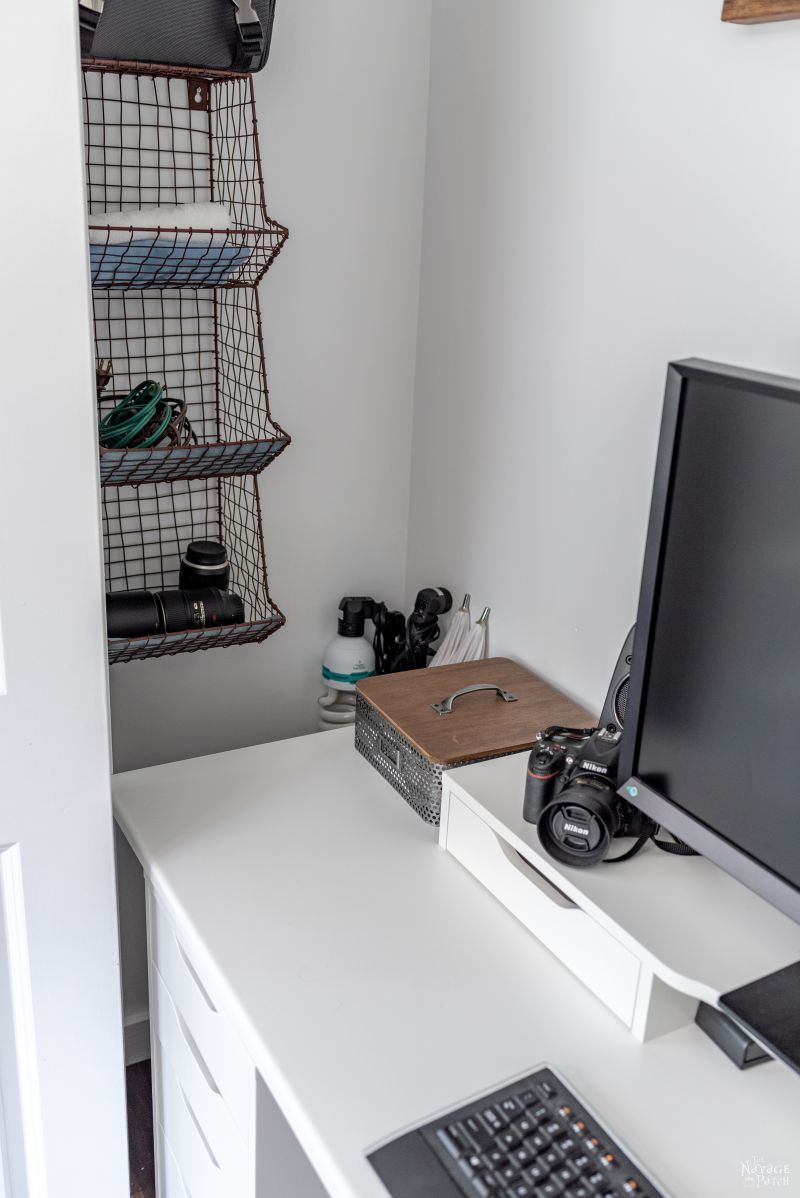

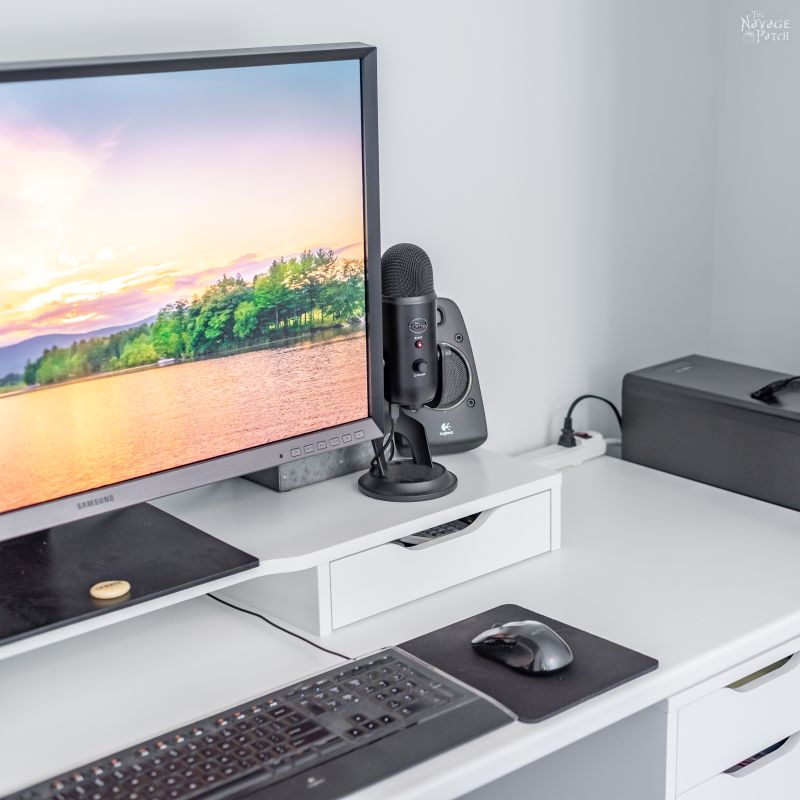
I built a small table for my computer to sit on off to the right side of the desk.

There’s not much to it – Just a simple DIY desk in a closet, but I love it because it can be closed off and hidden when we need more work space.

What do you think about my new little office hideaway? Let us know in the comments!
If you’re following along with the craft room makeover, here’s how we stand:
Craft Room Makeover Checklist
Craft room ideas and laying out the game planPaint the walls, ceiling and trimPaint the French doorCarpet removalInstall laminate flooringBuy curtains and install curtain rodsDIY craft table for CricutDIY / buy a computer deskDIY Closet makeover- DIY Industrial Bookcase (West Elm Inspired)
- Antique Sewing Machine Drawer Upcycle
- Upcycled craft room storage
- Craft room makeover reveal
Click here to see more craft room makeover posts as we continue to cross items off our checklist!


It looks great, fresh, bright, and streamlined. But how hard will it be to vac the floor on either side of the desk, it look like a tight fit to get a vac hose and attachment down to the floor (dust hater me just needs to know). Will you be adding a storage cabinet/space/something to hold all the stuff you previously put in the closet?
Good question! The vacuum with the narrow thingy attached fits right in between the desk and the bi-folds, so dust doesn’t stand a chance! We won’t be adding shelves above the desk. We want to keep the office looking streamlined, as you said. All that fabric crapola will be stored in the basement. When needed for a craft, we’ll bring it upstairs. That’s also one of the main themes of this room: keep it for crafting, taking photos/videos and writing. We will have plenty of storage for our most-used items, but some lesser-used stuff will now be stored in the basement and brought in as needed.
What a great idea! I once had a “sewing room” that was basically made from a very large closet with double doors. I loved being able to shut the doors and walk away.
It definitely keeps it tidy! 🙂
As usual, another great job! Lots of ideas h ere I can use too!
Love it. Especially like that it can be shut away. Clean and sleek. Great creative idea.
Thank you, Dorothy! I really love working there! 🙂
I LOVE the desk idea so much I am going to copy it. When I redo my craft room
Thank you, Judi! When will you be doing your craft room?
It looks great! Hopefully you put good lighting in there for you. Where did you get the metal storage box with the wood handled lid?
There’s a already a can light up in the ceiling! 🙂 I’ll check with Handan about that box. We’ve had it for quite a while, but she’ll remember where we got it!
Hi Michelle, we bought it from Hobby Lobby. It was in the 90% discount section, so it was only a couple of dollars ($1.90 to be exact) 😉
I love it! I shared with family! Nicely done!?
Thank you, Bernice! 🙂
Darn, all my closets are walk-in. Never thought I’d see that as a problem so thank you so much for that – lol! I love everything about this. That Alex add-on unit you have the computer on, do you find that handy?
Oh yeah, Sara, I love the add-on. Those two little drawers are super handy to have, and I like the extra lift for my monitor!
Looks great!! You guys are soooo clever!! Thanks for the inspiration!!
Thank you, Shelley! 🙂
Where does the chair live when the closet doors are shut?
Hi Nicole, so most of the time, the doors are open and the chair is at the desk. I work at this desk every day, so it gets used a lot! But for those times when I need to take pictures or video in the room, and the office might be in the background, I close the doors and either wheel the chair to a different part of the room or into another room.
Hi Nicole, we also use the chair when we’re working on the other craft table/desk we made (the one for the cricut.) So “the different part of the room” which Greg mentioned above is that craft table 🙂
I want help with storing the fabric. Haha no basement here. My craft room is a disaster. Too much buying too little craft room. Looks great.
LOL, that seems to be everyone’s problem. The supplies pile up faster than the crafts get made, so the craft room slowly but surely becomes a storage room!
It looks great!! Can’t wait to see the rest of the room!!! 🙂
Thank you, Kathy! 🙂
You did a great makeover, but for those of us who do not have a basement to store things in, this kind of makeover does not make sense.
Been following you for a very long time, and love most all you do.
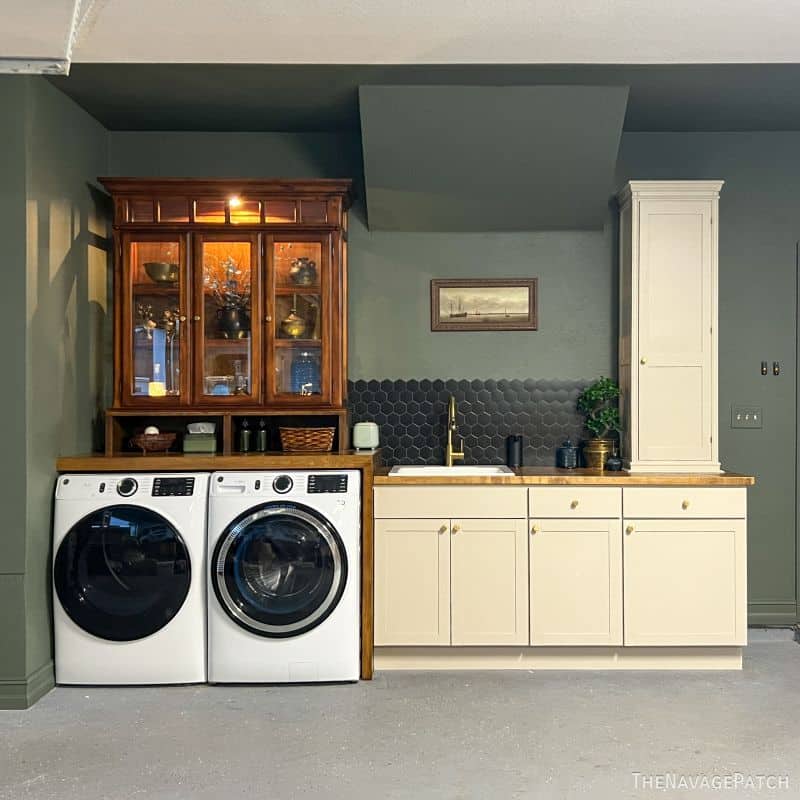
Hi Dee, don’t worry, there’s more to come with this craft room makeover, and you’re going to see some storage solutions! Next week I’ll be sharing a post about something I built that can store a lot of stuff. We’re using it for a printer, sewing machine, all sorts of papers and all of my files. For those who don’t have files to store or a printer, all of the space can be allocated to fabric, paint, craft supplies or anything else. Since this space is also an office, we need to accommodate storage not just of crafting supplies but of business files as well. Much of what we’ve carried to the basement hasn’t really been crafting supplies but more like future projects – picture frames, etc. This room will only store the things we use most, while lesser-used things (like fabric) will be stored elsewhere.
Ahhhh, so great! I bet recording audio in there is so much better than out in the open. I really love the hanging baskets hiding on the sides that hold your camera equipment. I’ve not stored mine very well and need a similar solution.
Also, for your office chair check out the roller blade type wheels on Amazon, I changed mine out easily when I did my office chair makeover. They roll so much easier than standard desk chair wheels.
Hi Toni, oh yeah, the sound is much better in there than in my last office! That is a fantastic idea about the rollerblade wheels. Gonna check those out right now… 🙂
Ooh that’s brilliant i love it! That’s some fancy office chair Greg, are you sure your not moonlighting as a dentist while Handan is moonlighting in the Mariachi band? 🙂
LOL, it is a little sci-fi isn’t it?
Love your makeover. I have a spare bedroom (there’s nothing spare about it; it is CRAMMED full). I would love to do this with the closet (currently full of OLD clothes). I would love to do this; am looking for 2 yard sale-ish file cabinets to use as a desk base. Oh, to have a ROOM dedicated to crafts; there is enough space on the kitchen table for 2 dinner plates–not good! You are an inspiration!
Donate the old clothes and go for it, Kathy! 🙂
In our first home, I had a similar closet which I used as my sewing space. It fit perfectly when my console was opened and I could shut the doors when not in use. I don’t need that much room for the little sewing do now.
I almost remember that!
Lo-ove the office, of course (always charmed by your projects)! But my biggest take away is the gorgeous evil eye bead you have hanging over the closet. Annn-nnnd wondering what evil you need to keep away from your office. ?!!!!!! lol
Thank you, Susan! The nazar isn’t for warding off evil, it’s meant to protect from the jealous eyes (or evil eyes) of others. It is believed that when someone gets a lot of compliments, they will fall sick the next day or shortly thereafter. The nazar helps keep the one being complimented from falling ill! Good thing, too, since you just paid me a compliment, LOL! :D:D:D