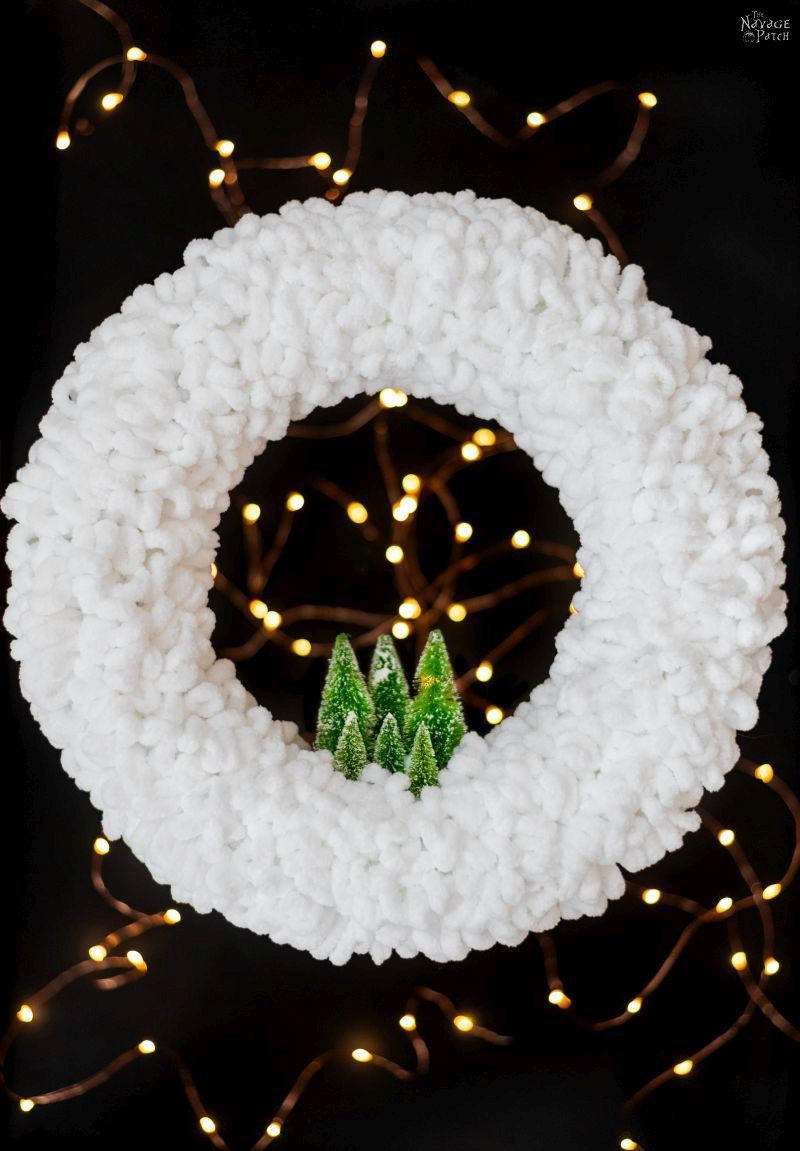
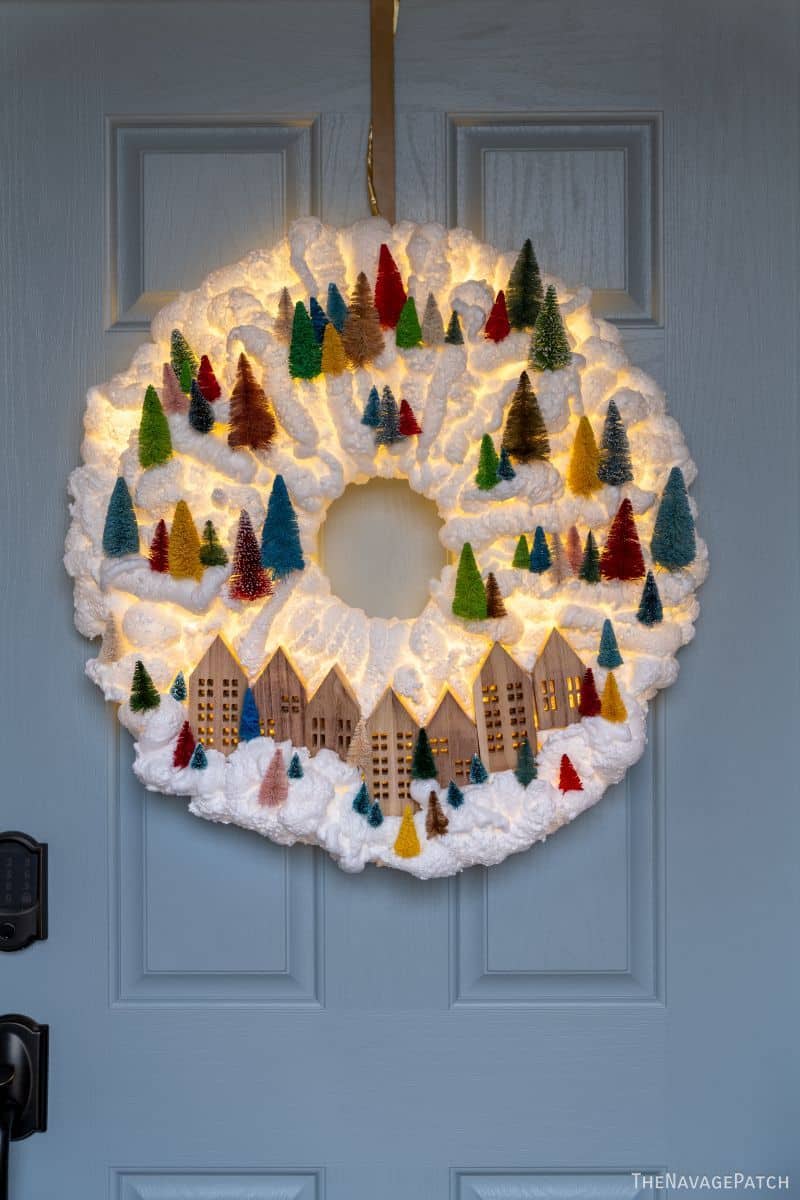
DIY Light-up Snowy Village Wreath
No one has this light-up snowy village wreath – so be the first on your block and in your town to make it and be the envy of your neighborhood!
There’s gonna be a white foam shortage after this one.
Soon, hordes of foam-sprayers across the land will look down at their foamy creations and realize that they’re yellow. Slowly, it will dawn on them that everything they’re ever made with spray foam looks like stained yellow teeth.
Yellow.
What good is yellow, especially at Christmas?
Ooooh, it’s winter – let’s all go outside and play in the yellow snow!
We all know how snow turns yellow.
But then the hordes of yellow-foamers will read this post or watch social media or listen to the buzz in the air, and they will learn of a different foam. A better foam. A foam that is white as un-peed-on snow, and they will rejoice!
They will throw down their cans of that Other Stuff, and they will pick up cans of bright white foam, and together they will usher in a new area of foamy crafting!
(And if they chance upon a gap or a crack, they will fill it and get back to crafting.)
As some of you may have guessed, this light-up snowy village wreath is a direct descendant of our Halloween Fire Wreath. After we thought of the fire wreath back in August, we immediately saw that the technique would be brilliant for Chrismtas!
But our first attempt was…sickly.
You see, we used the same Stuff we used for our fire wreath – that yellow foam that everyone knows. When we put lights behind it – either warm or cool – the wreath was yellow. But we expected that – we were ready for it! I shook up a can of white spray paint, and drowned that hideous yellow beneath a layer of Rustoleum’s finest.
And in the end?
A sickly yellow glow. Yellow foam = yellow glow, no matter the paint color.
This yellow conundrum led us to look into spray foam a little deeper, and then we found our salvation: bright white craft foam. This stuff sprays white and stays white. Just look at the difference between the two foams!

If you want to make this wreath without lights, then by all means, use the Cheap Stuff and then spray paint it white. But if you intend to light it, know that the yellow foam will color the light, regardless of the white paint on top.
DIY Light-up Snowy Village Wreath SUPPLIES LIST
Affiliate links are provided below. Full disclosure here.
- Small wood houses or these small wood houses from Amazon
- Mini Bottle brush trees
- Loctite white foam or the same foam on Amazon
- 18 inch wire wreath form (Dollar Tree sells these too)
- Battery-operated LED lights or plug-in LED 100 mini string lights (clear or white wires are better)
- Plastic sheet or cardboard or tin foil (or anything else that you can spray the foam on)
We love to see our craft projects out in the wild! If you try this seasonal craft project, take a picture and post it on Instagram, be sure to tag us – thenavagepatch
DIY Light-UP SNOWY Village WREATH VIDEO Tutorial
Watch Our Tutorial On YouTube
More DIY Christmas Decor Ideas


- DIY Dollar Tree Duster Trees
- DIY Dollar Store Mop Wreath
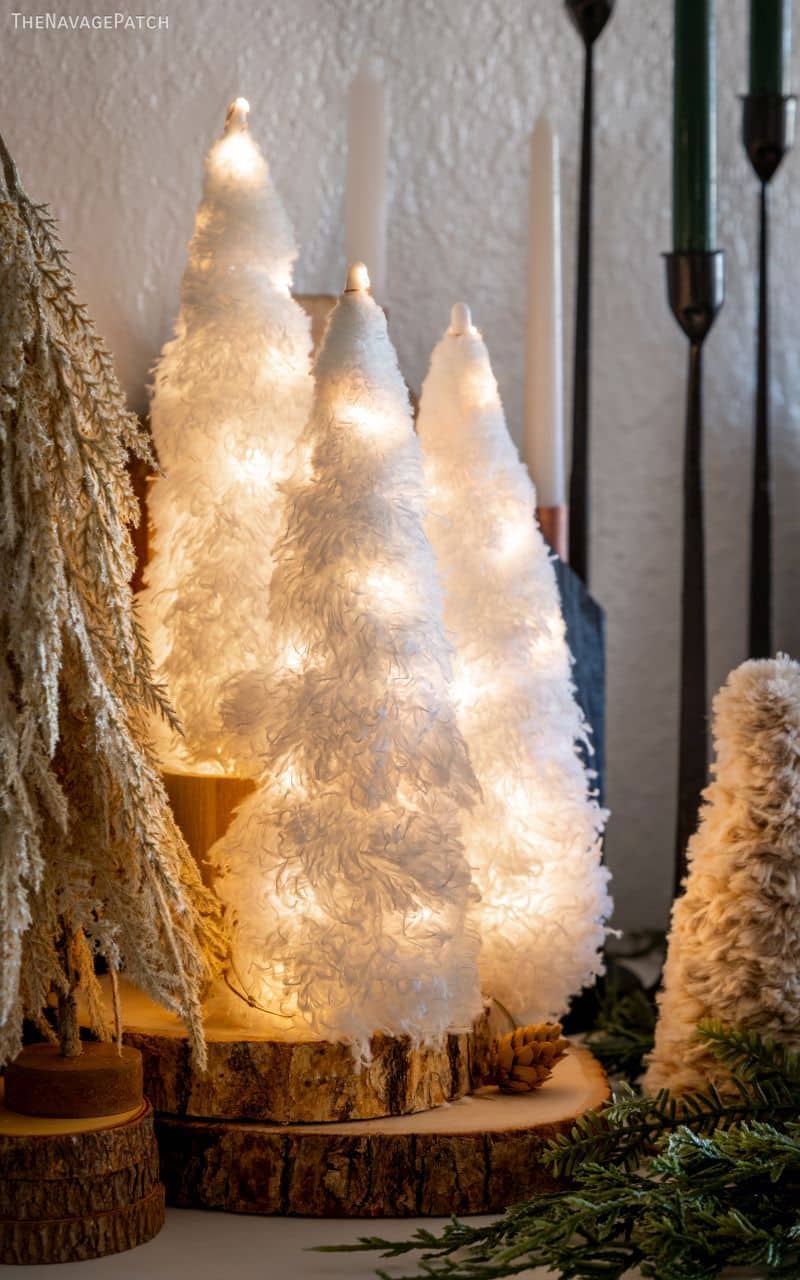
- DIY Faux Fur Trees
- DIY Faux Antique Brass Bells
- Free Vintage Christmas Magazine Cover Printables
- DIY Shag Tree Pillow
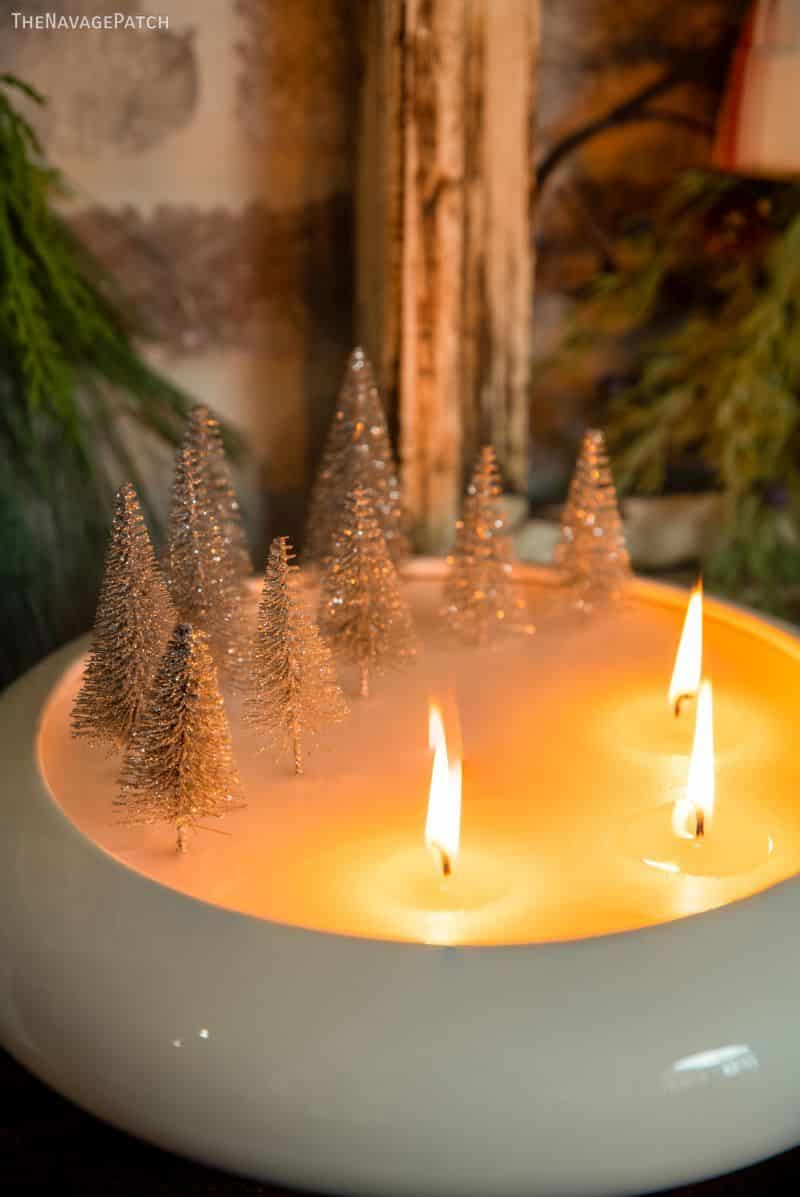
- Easy DIY Christmas Candles
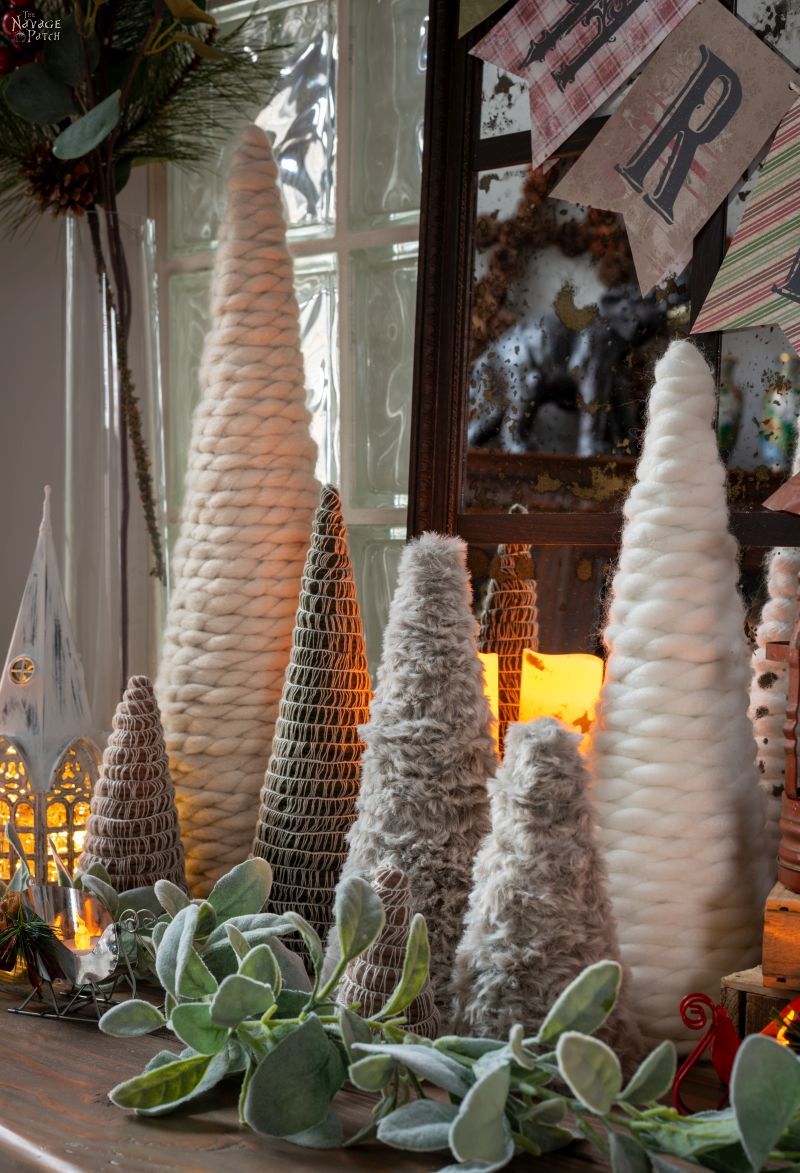
- DIY Winter Loop Yarn Wreath
- DIY Christmas Decor: Faux Tree Repurposed 3 Ways
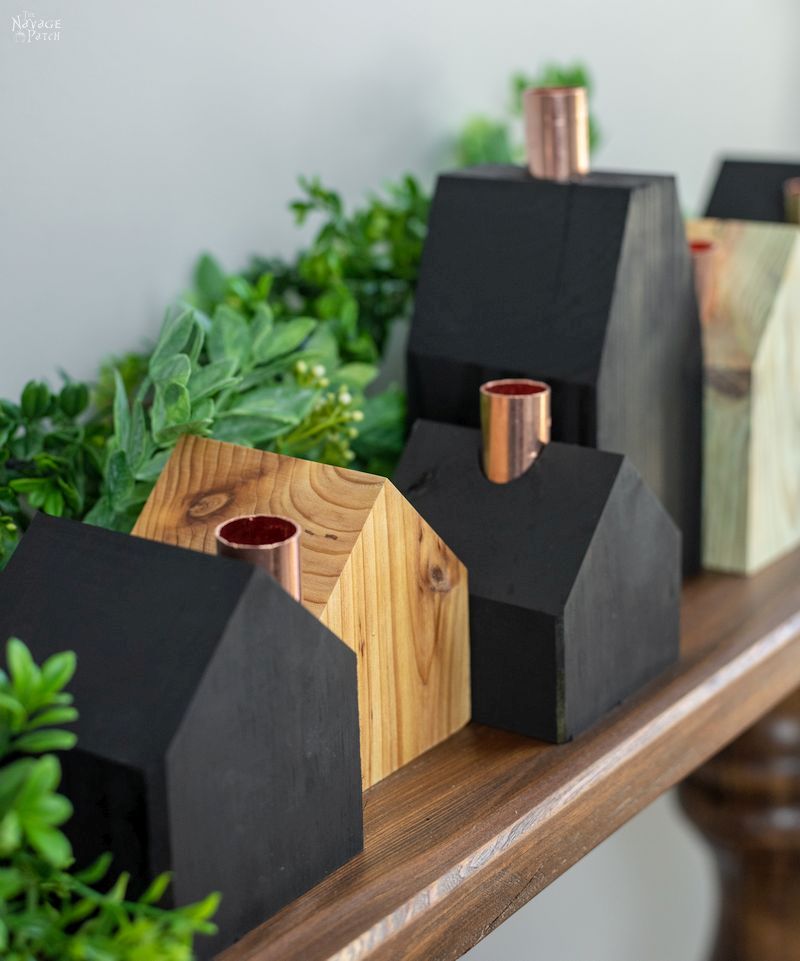
- DIY Wood House Candle Holders
- Christmas Patent Wall Art And 18 Free Printables
- DIY Epoxy Wood Shim Trees
- DIY Dollar Tree Snow-White Nutcrackers
- Free Watercolor Christmas Printables (20+ BEAUTIFUL Holiday Prints)
DIY Light-UP SNOWY Village WREATH Tutorial
Step 1 – Prepare the foaming area
First, we laid a heavy plastic tarp on the work table. The foam won’t stick to it when dry.
I knew from my first attempt that maintaining a circle shape with a well-defined inner circle is tough when freehand-foaming the wreath form. This is especially true for this wreath, because we wanted the foam to be about 9 inches wide all around.
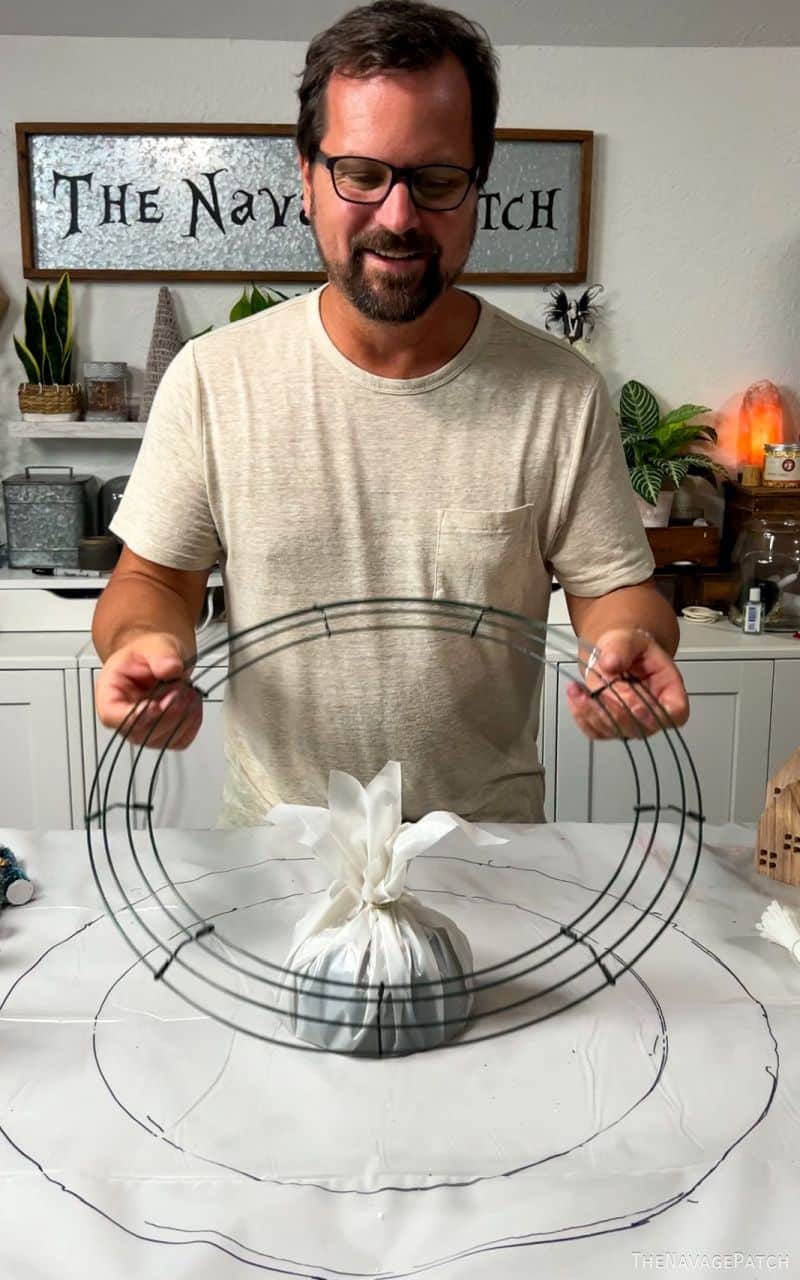
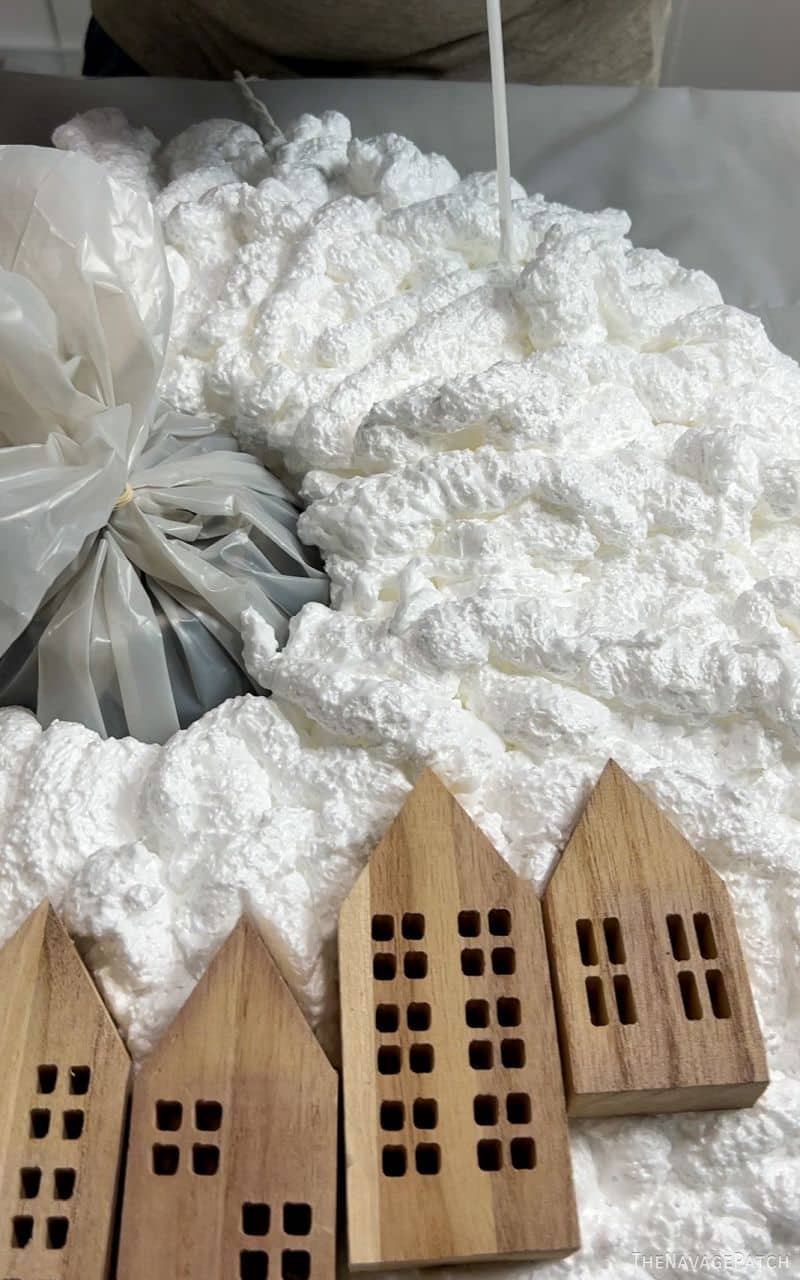
To help keep a defined inner circle, I covered a bowl with plastic and put it in the middle of the form.
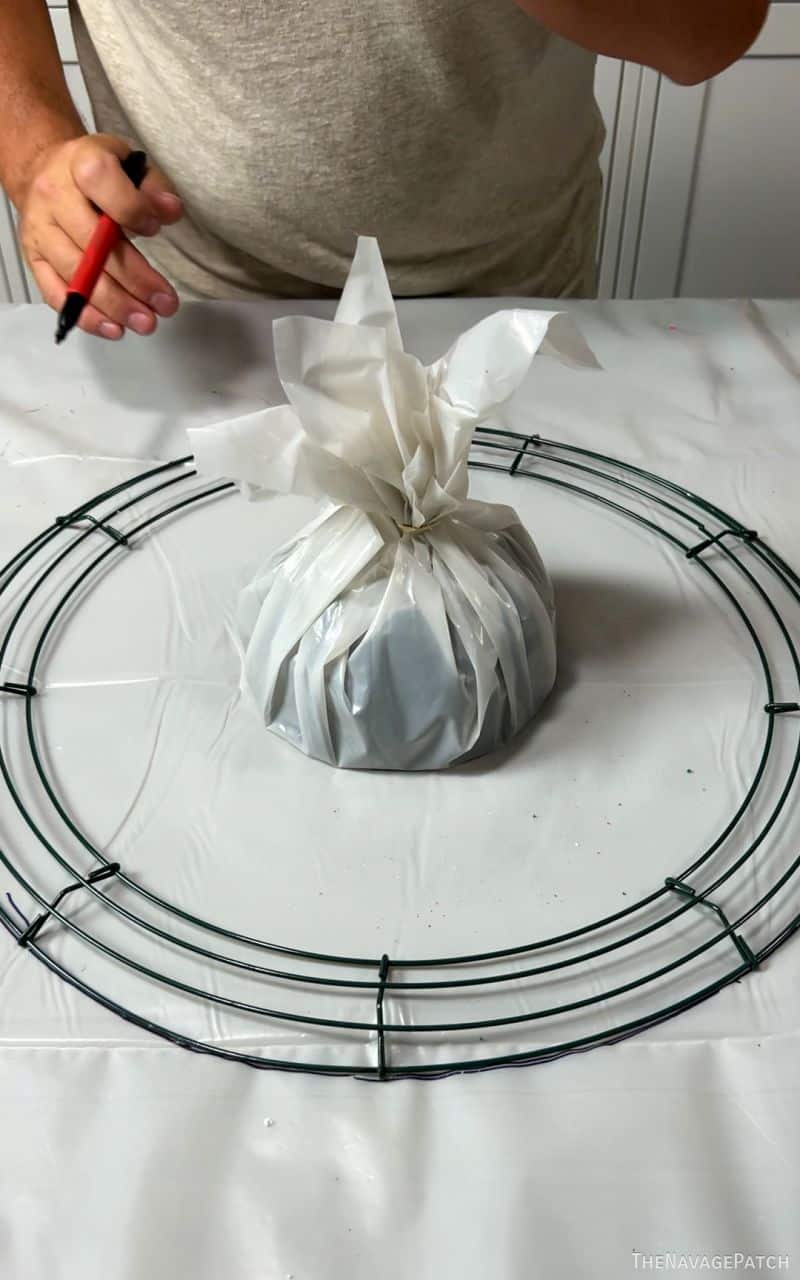
I then measured out 9 inches from the bowl and marked the plastic.
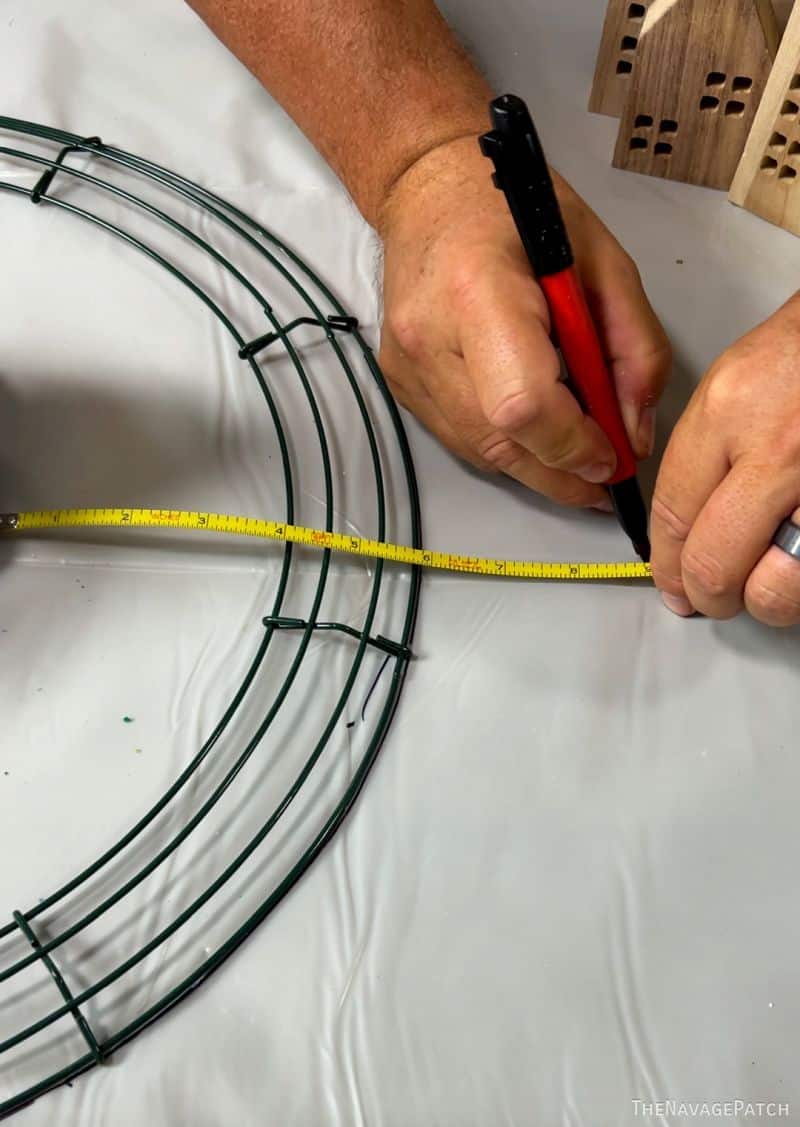
One of the wood houses was the right size to use as a jig to trace out a circle all the way around the wreath form. This line marks where I’d be foaming to.

After tracing my circle, I flipped the form upside down.
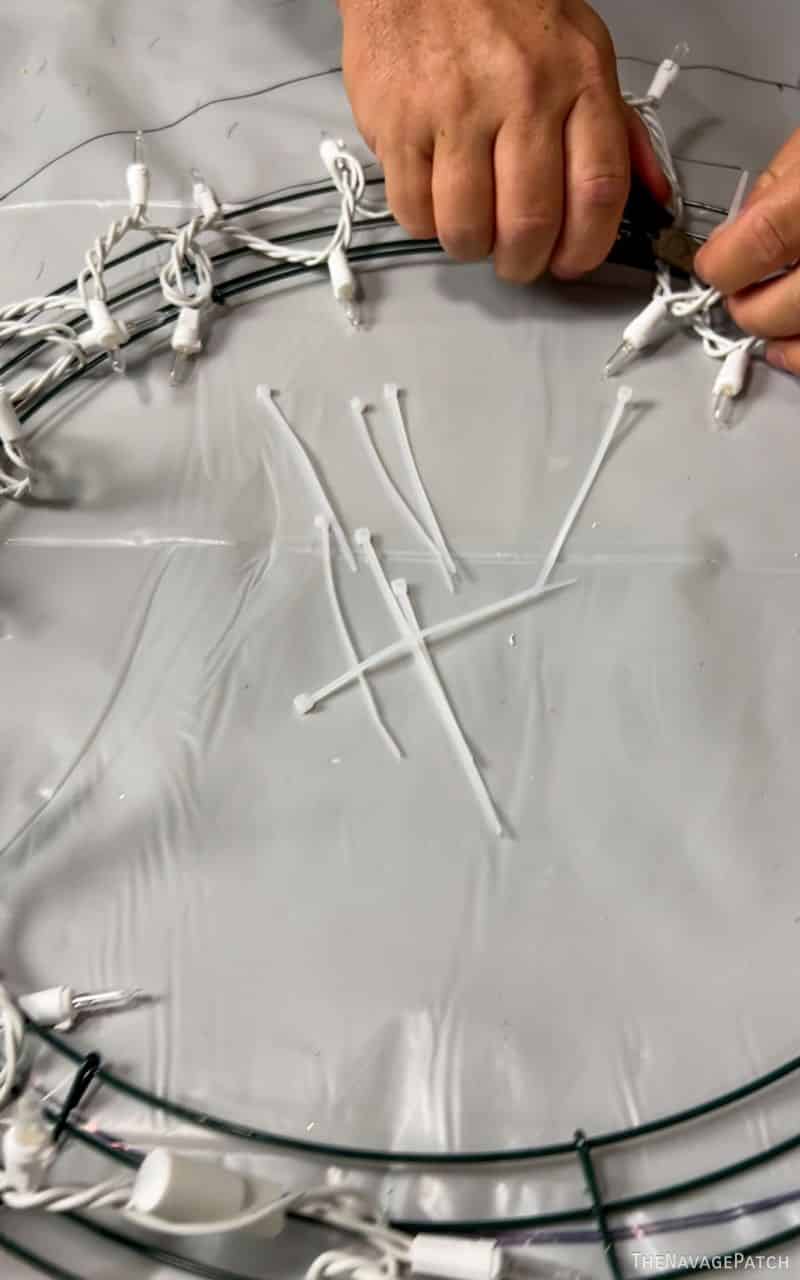
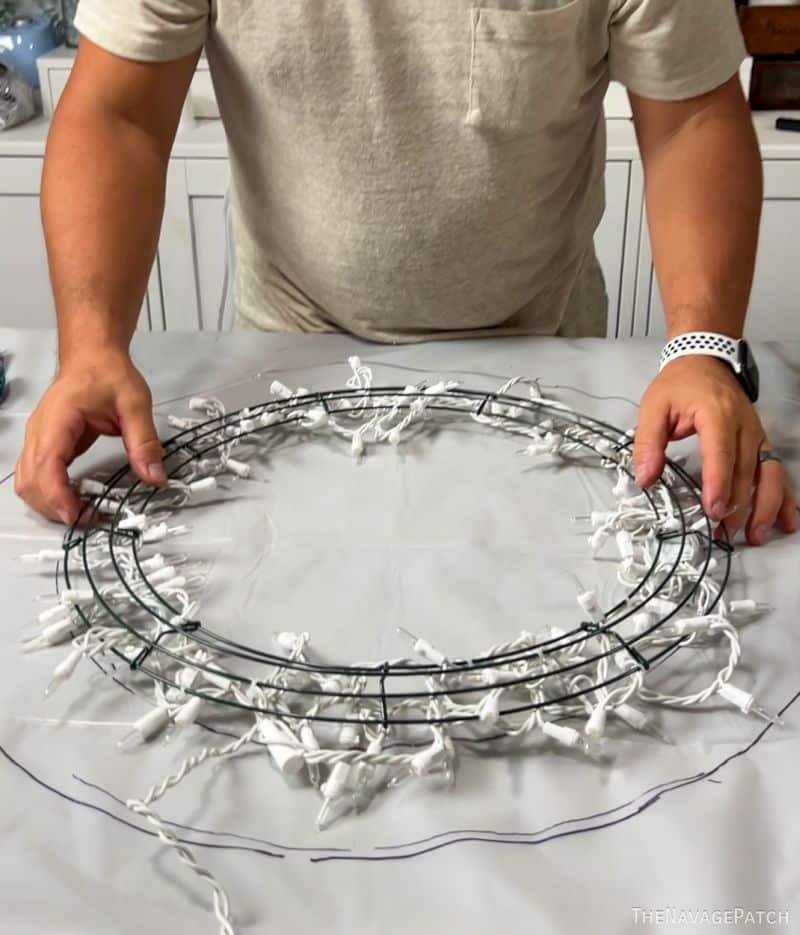
Step 2 – Add lights
I secured one strand of 100 warm white LED lights to the form. I used plug-in, but you can also use battery-operated LED lights. As long as they’re LED, you’re good.
DO NOT MAKE THIS WREATH WITH ANYTHING BUT LED LIGHTS!
I used zip ties here and there on the first pass.
And then I wrapped the rest around the form. Notice I left a good amount of cord coming from the top. This is the plug, so you want to leave enough to go over your door.
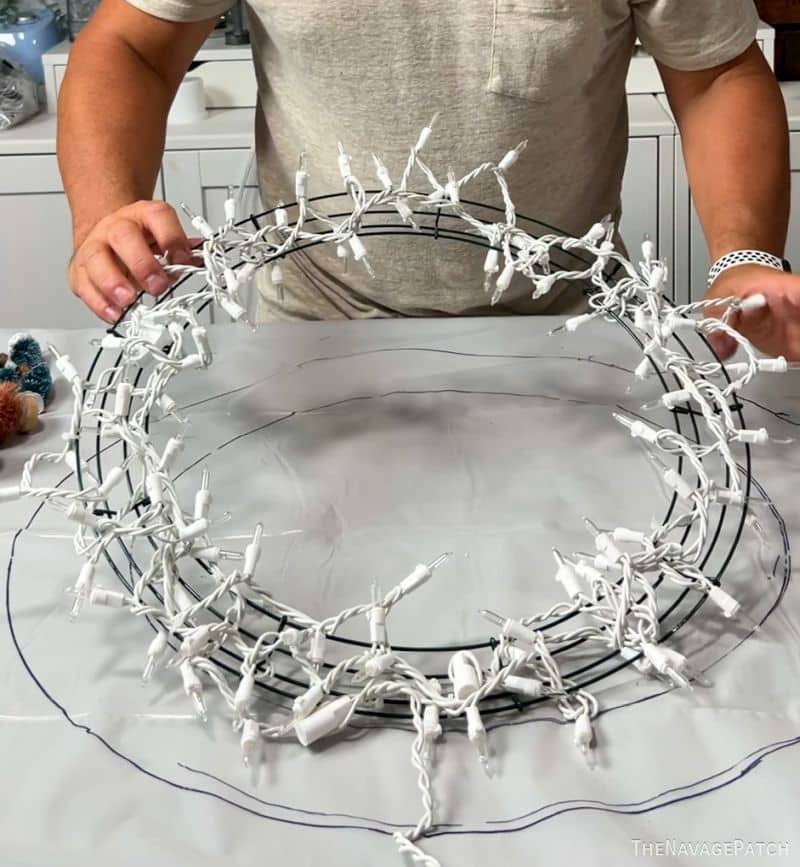
I flipped the wreath form over so the lights were against the table. Time to foam!
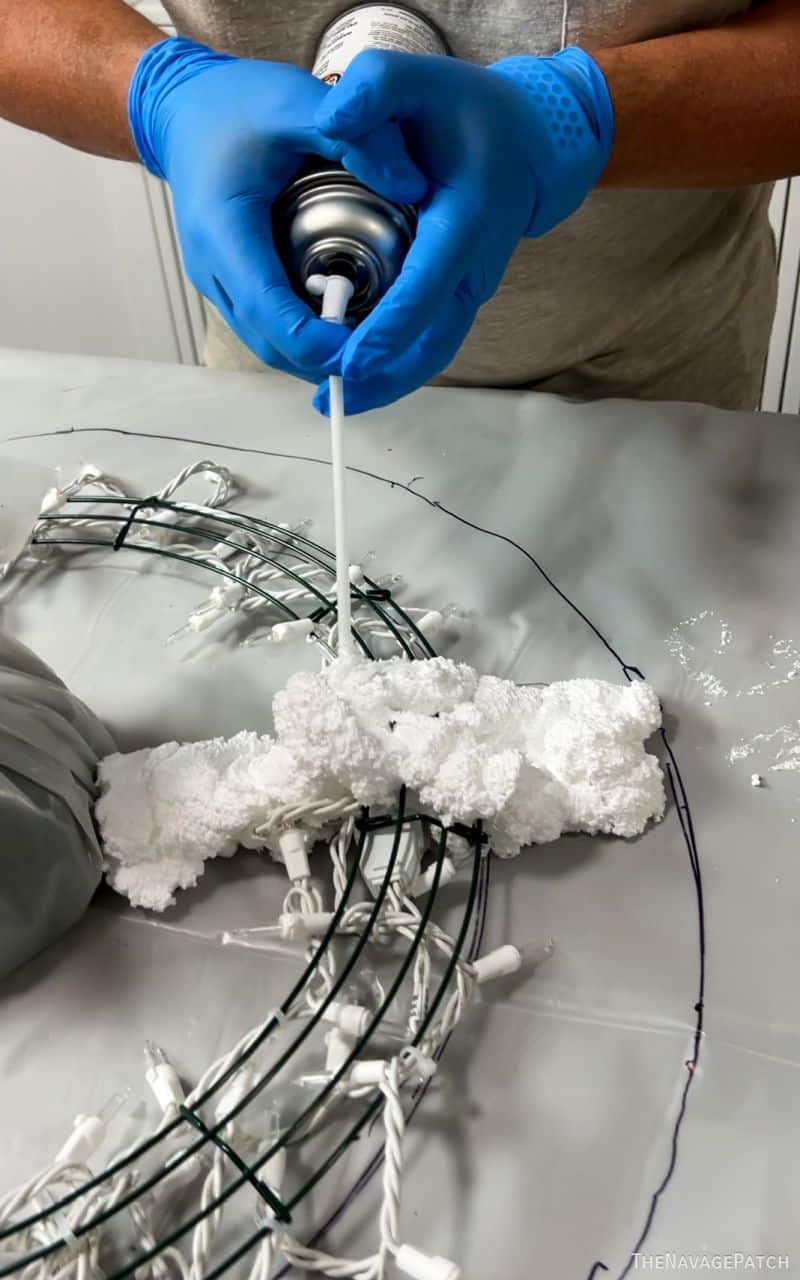
Step 3 – Foam
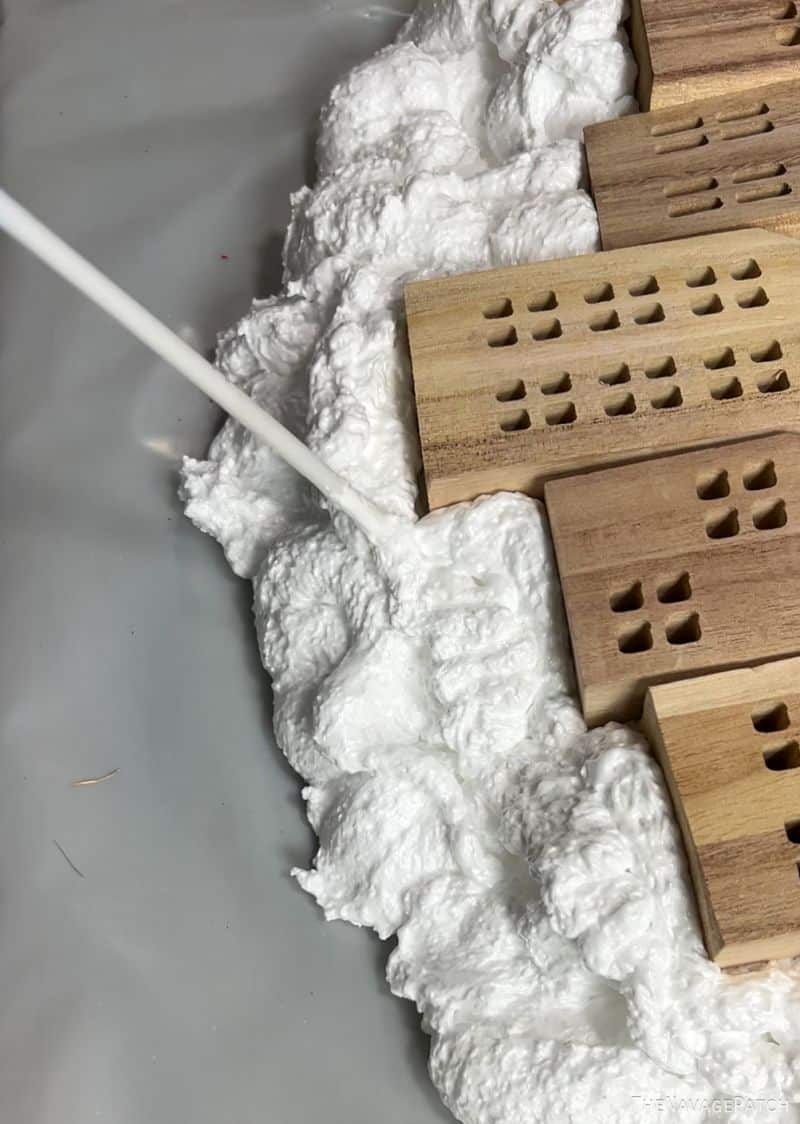
I foamed the wreath going back and forth from the bowl to the outer line (wear nitrile gloves and safety glasses). The whole wreath took 3 cans of foam, but I stopped after the first when only the bottom third was foamed so I could nestle in the wood houses before the foam hardened.
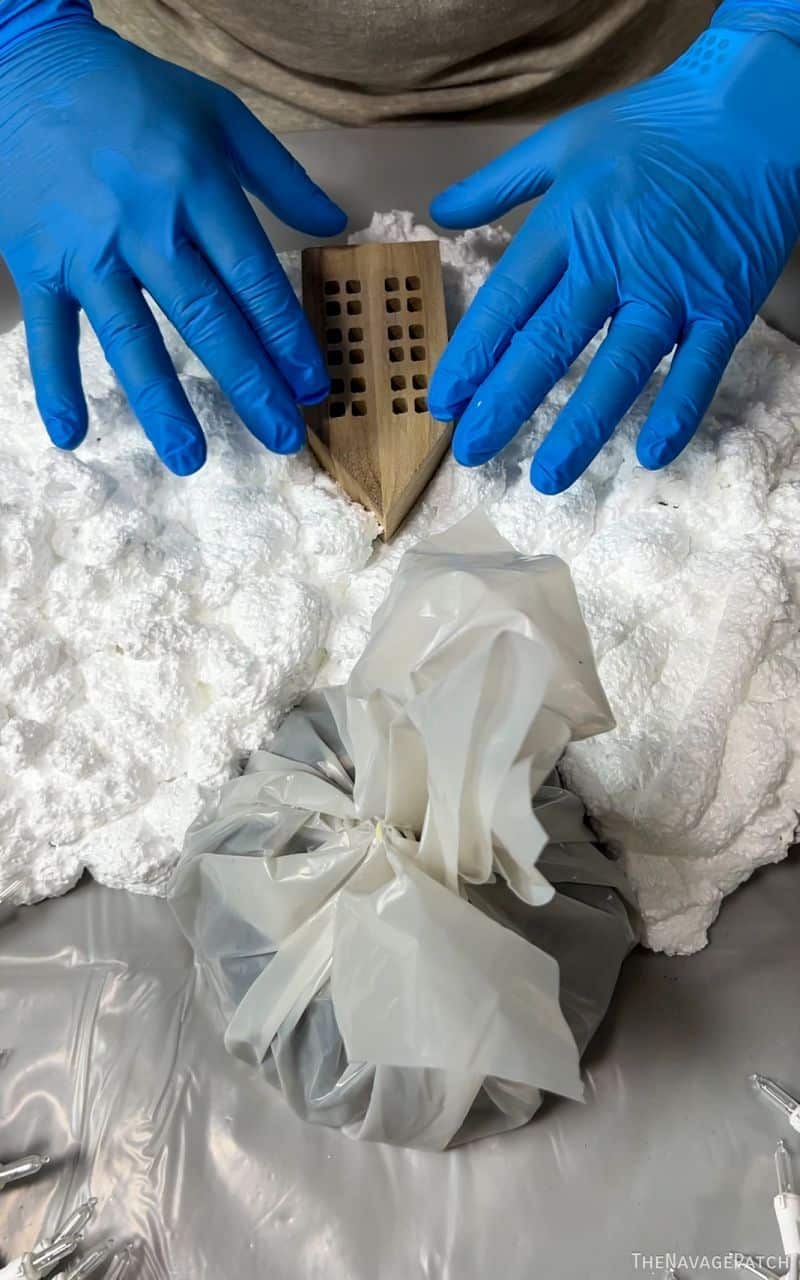
I arranged my 7 houses, and then got back to foaming the rest of the wreath.
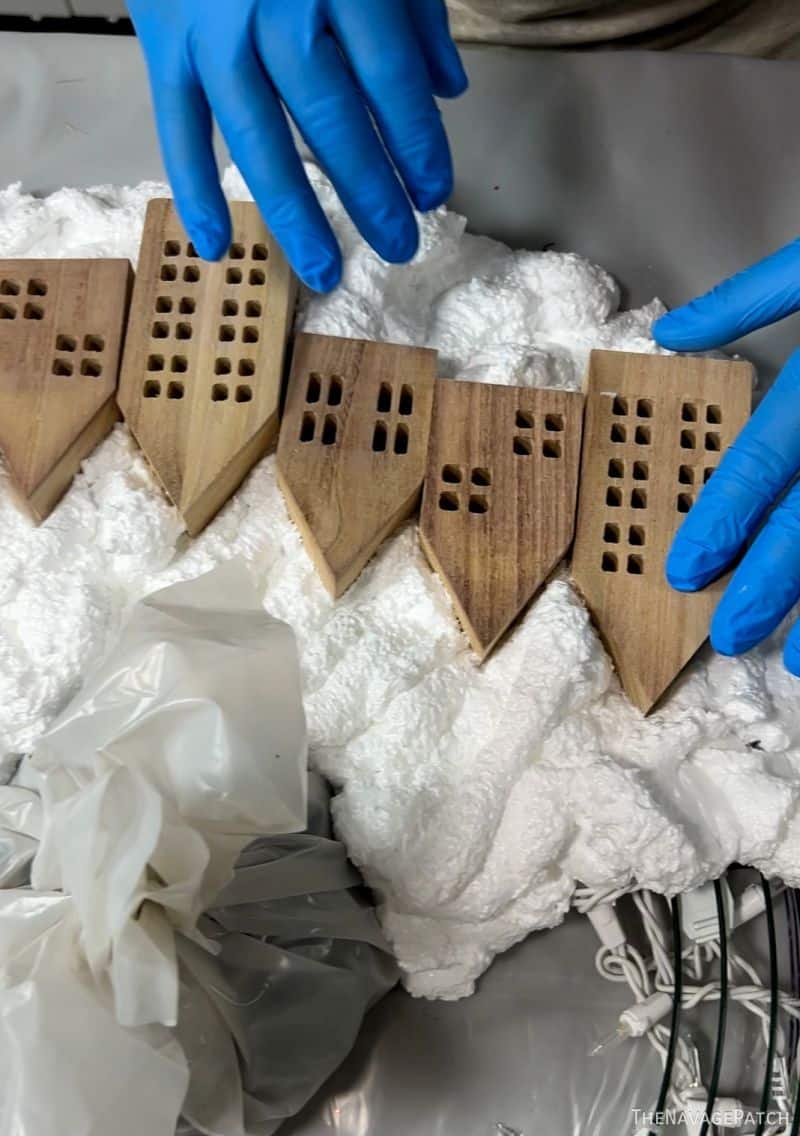
After the the wreath was fully foamed, I built up more foam underneath the houses. This would let me more easily add trees there when the foam had hardened.
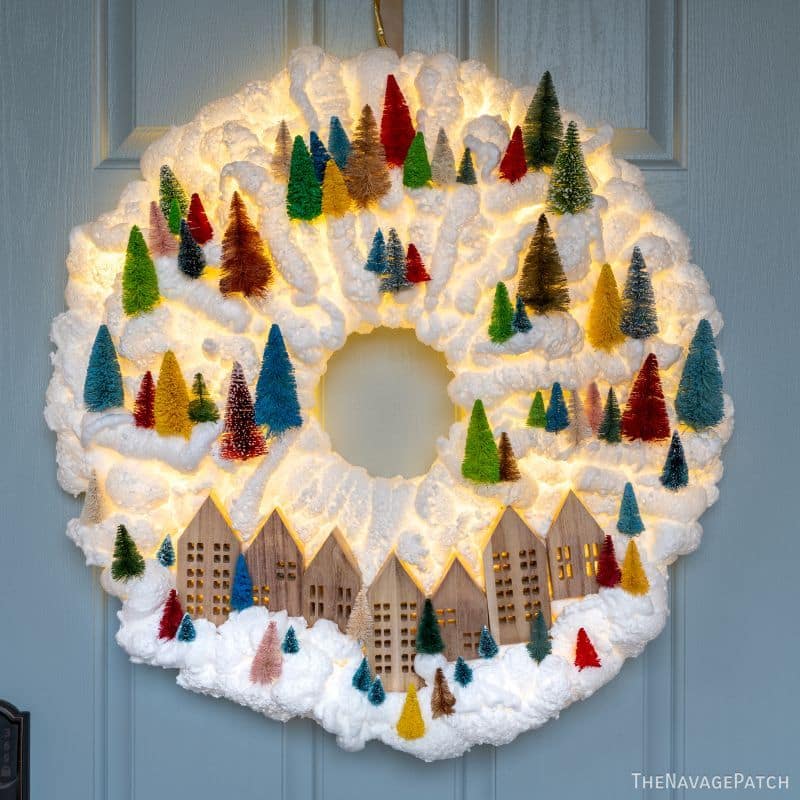
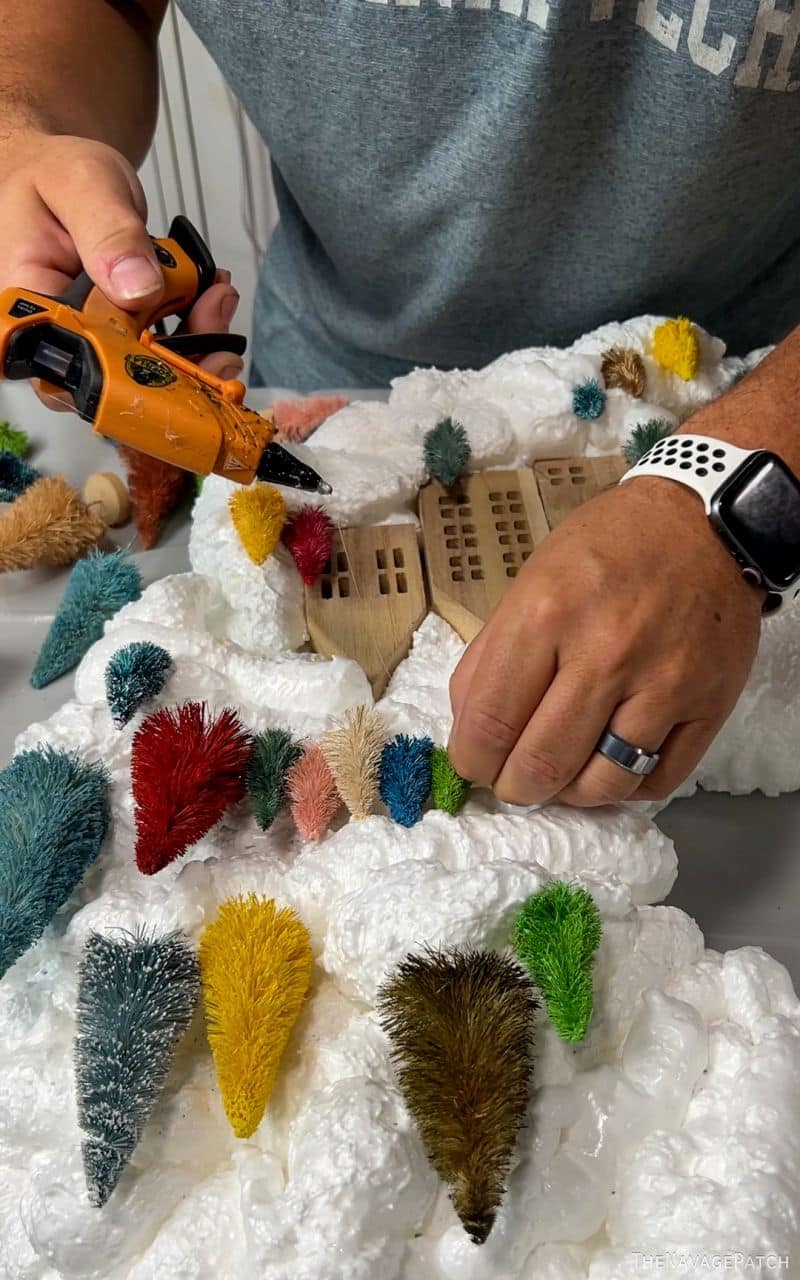
Step 4 – Add trees
I used bristle brush trees of all sizes and colors for my snowy village wreath. I either pulled off or snipped off their wood bases and then stuck them here and there into the foam.

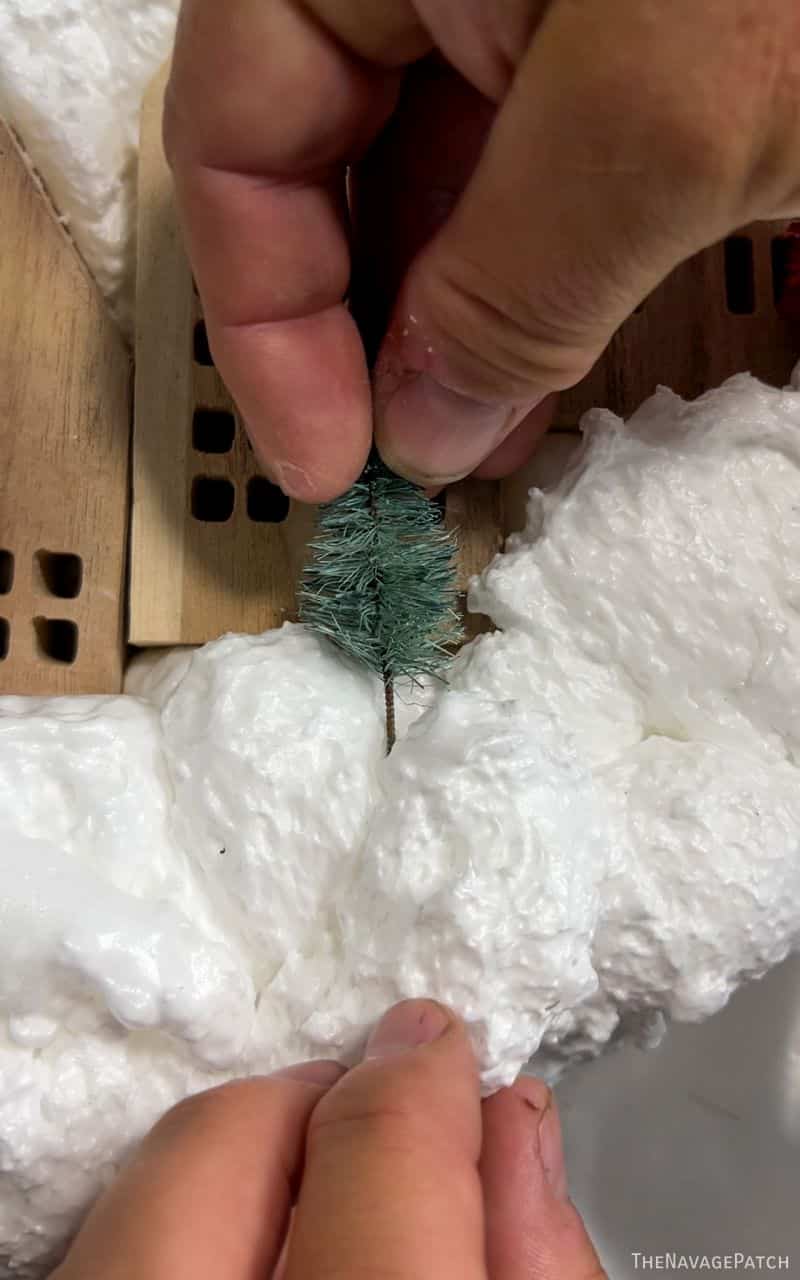
It helps to put a small dab of hot glue on the stem, even if the tree seems to be sticking in firmly. This is especially true if you’ll be hanging this wreath outside.
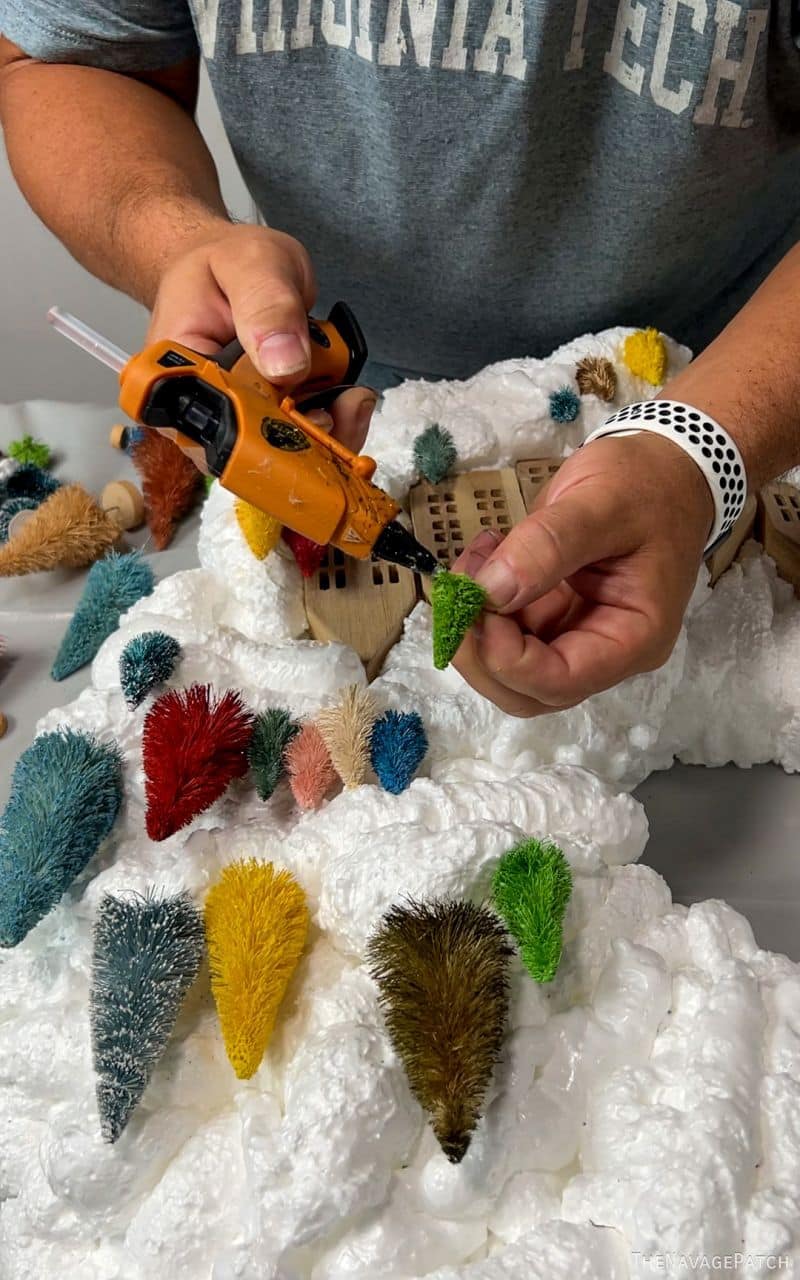
Some of the trees didn’t have a place for the stems to stick, so I cut those stems off and glued the trees right on the wreath. The number and placement of trees is totally up to you.
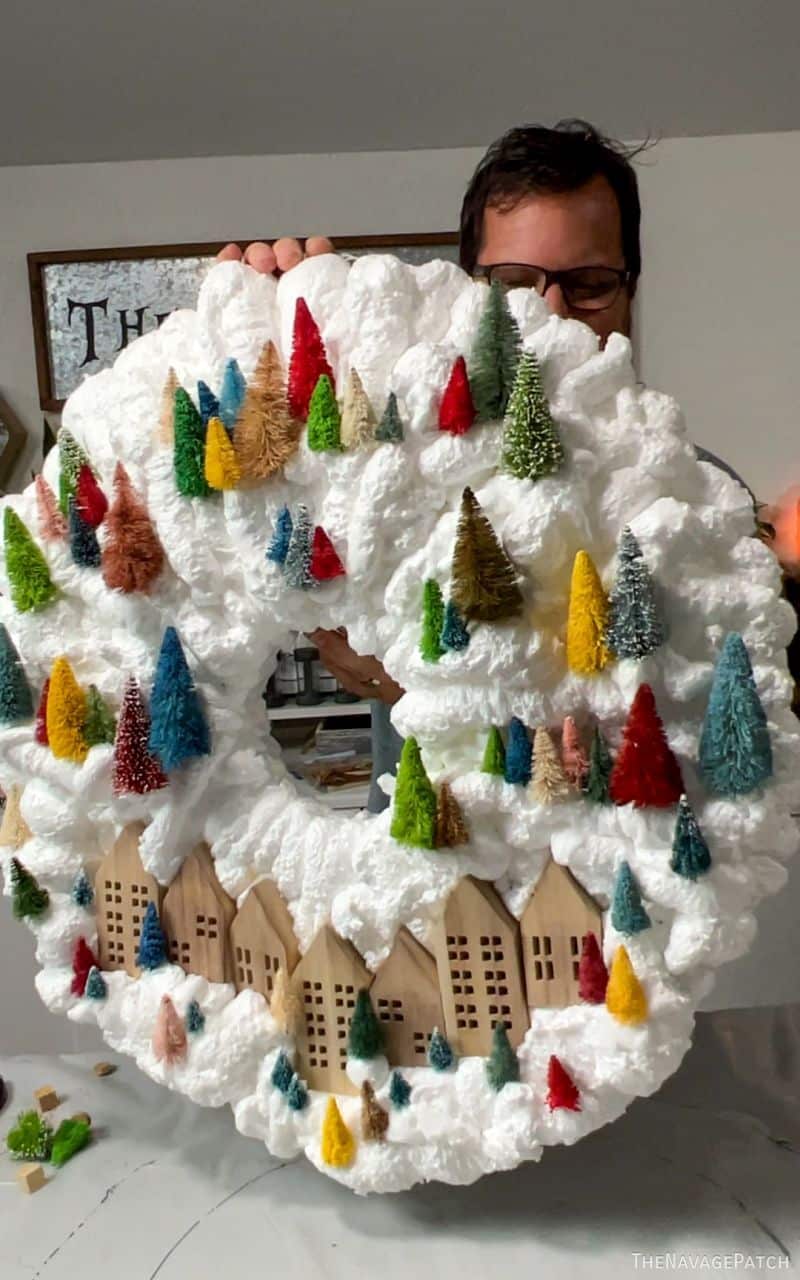
After a while, my babes declared it to be perfect, so I holstered my glue gun and showed her the final product.
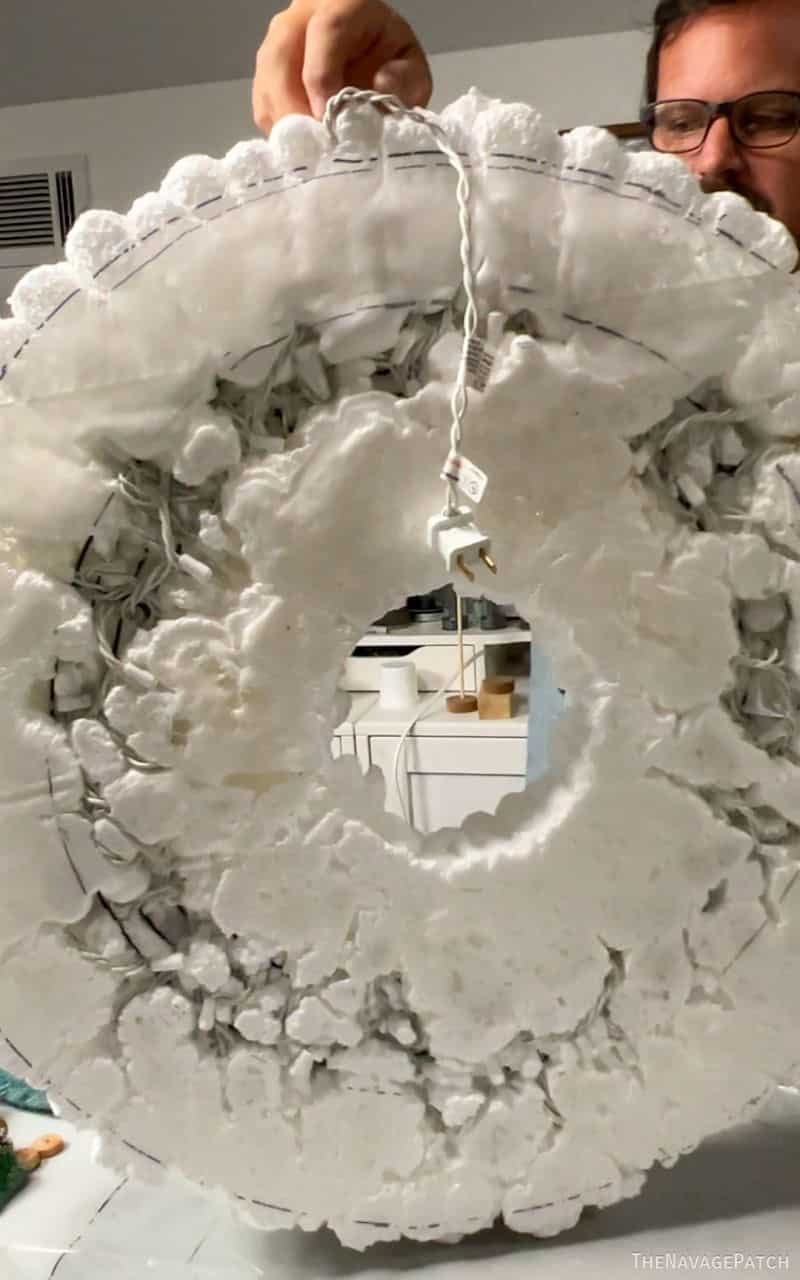
And for those curious what the back looks like…
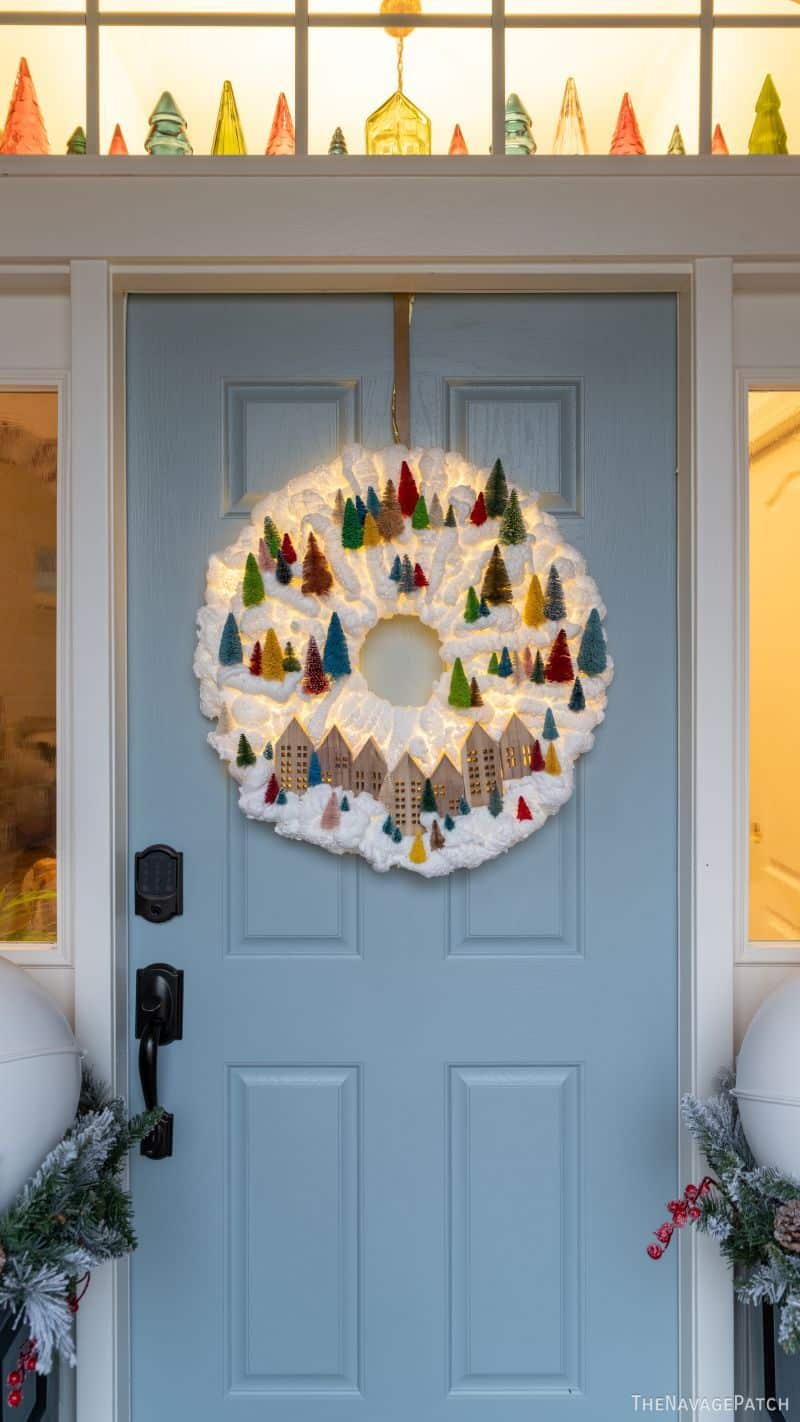
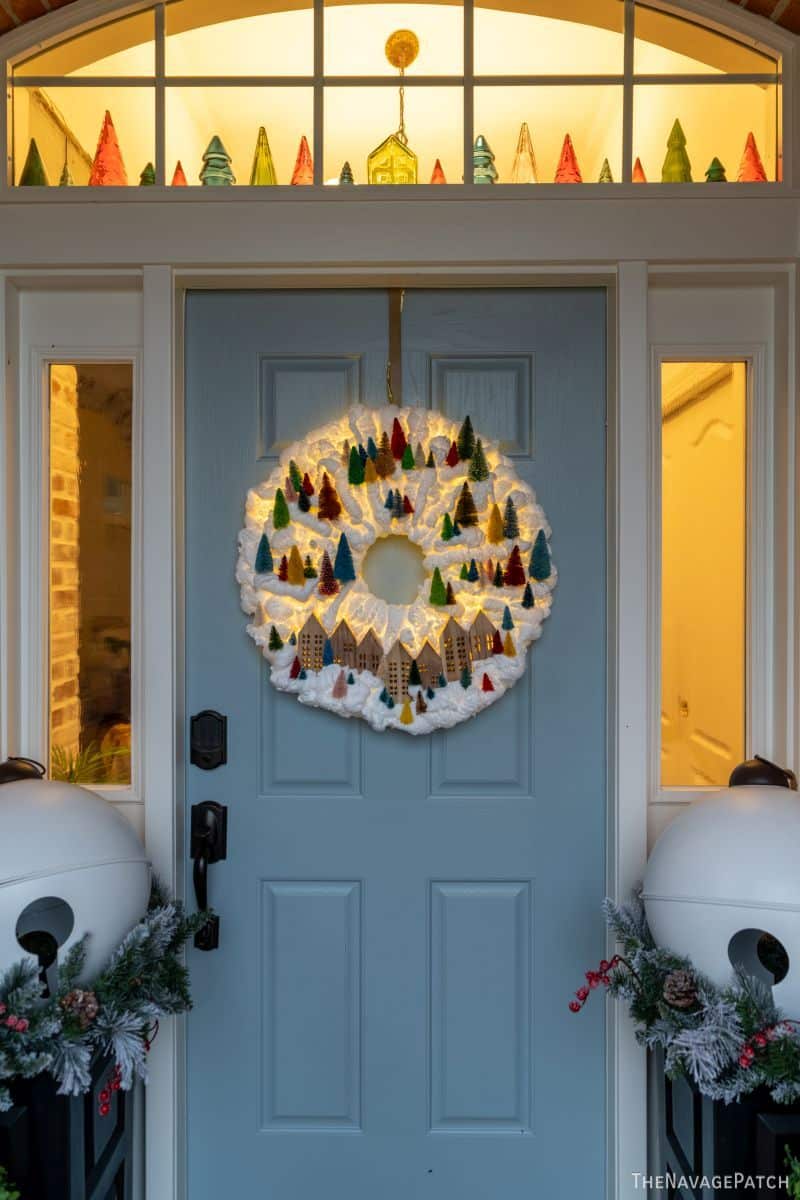
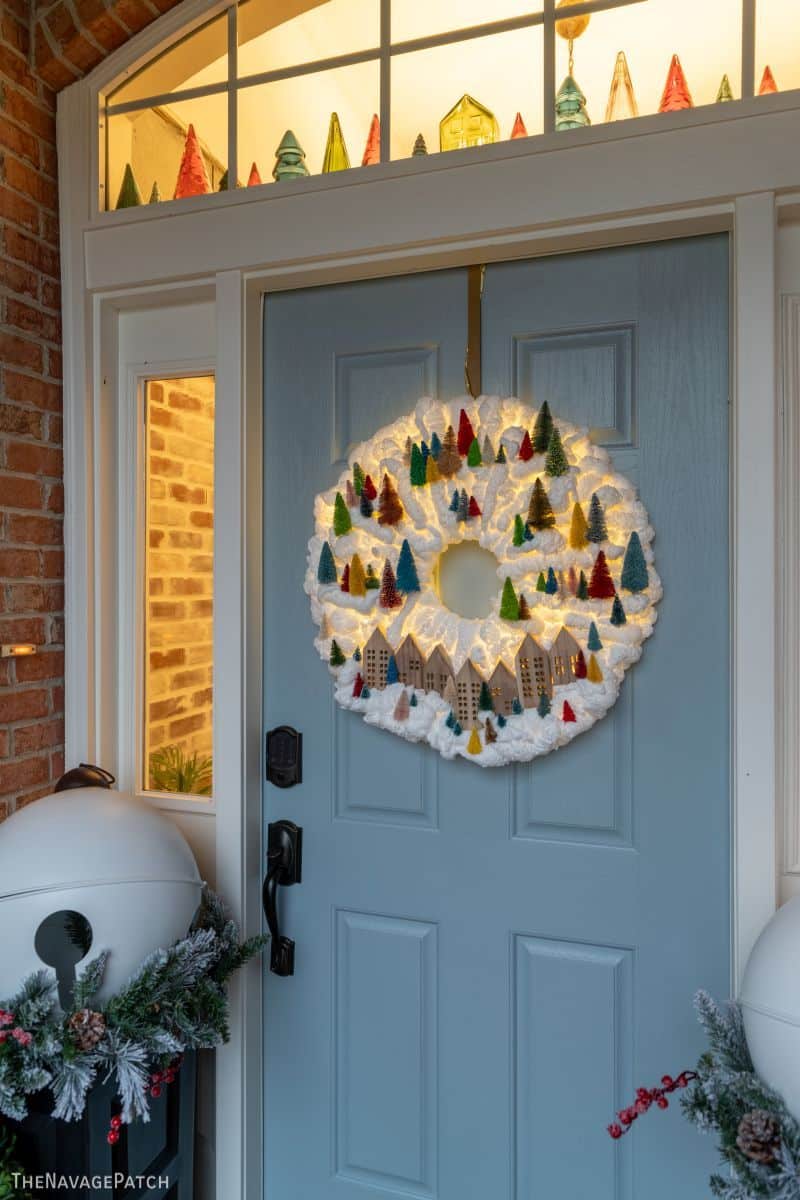
And finally, out on the door near dusk on a rainy day…
This is super cute! I am thinking white LEDs would make it light up a bit whiter (if wanted). This is giving me ideas…
BTW, I love the glass trees in the upper window lite that the wreath compliments!!
Thanks, Mo! Yep, white would give it a different vibe and would look awesome!
I love this wreath and I’m not a huge wreath fan. Very ingenious of you Greg! And everyone will be imitating you. The sincerest form of flattery.
Thank you, Carla! The imitations have already started!
This is really nice. I love the colors and houses. Your diy crafts are the best not to mention your commentary.
Thank you so much, Sheila! I’m really enjoying making the commentary! 🙂
Love it always inspiring.
Thank you, Sara! 🙂
I don’t know how to out do yourselves every single time, but you do! I hope you never stop. This is beautiful!! Thank you so much!
Sometimes I don’t know either! 😂
I keep trying to downsize my crafting and decorations but you make it impossible!! My husband DOES NOT thank you, but I do!!
LOL, I think a lot of husbands feel that way! 🤣
I LOVE it. What a great way to use spray foam and it is beautiful. You’re always an inspiration to all crafters. Thanks
Thank you so much, Christine! 🙂
Brilliant! Absolutely Gorgeous! I can think of so many options. 🤔 One question..did you leave the plastic on the back, and cut away the excess? Appears so, however it could be.just the foam flattened flat and set? I will send a pic of mine, when completed. Thank you for sharing your beautiful wreath and ideas! Merry Holidays 🤶
Rebecca
(Washington State)
Thanks, Rebecca! Nope, the wreath peels right off the thick plastic tarp. What you see on the back is just flattened foam. 🙂
Once again, you have outdone yourself. I love it! I really want to try this one. I have 3 cans of foam left over from my glowing Halloween wreath. Unfortunately, it is the yellow stuff. Great. Now I need to go get more craft stuff. I am going to have to watch an episode of Hoarders to so I won’t feel so bad about my craft supply addiction.
Access to an outlet will be a problem on my porch. Do you have a recommendation for LED battery lights?
Hi Lynn, I just linked a great battery LED lights I found on Amazon in the supplies section. The cord is clear, it’s dimmable and it has a remote! Annnd it’s the cheapest I found on Amazon! 🙂
Absolutely gorgeous!
Thank you, Giselle! 🙂
You have outdone yourself! Wonderful!
Thank you so much, Amy!
WOW! I just can’t think of anything else to say. Well, ok, incredible. I could go on but I think you get the message.
Thanks, Patti! 🙂
So when do we get the diy for the ginormous jingle bells in the urns on your front porch?!
That’s coming soon, Kim! 🙂
Oh my gosh, this is beautiful! Thanks so much for sharing with us!
Thanks, Gail – it’s our pleasure! 🙂
Greg – this is very clever. I am curious as to what appears to be giant jingle bells next to each side of the doors. Next time you may want to use battery operated lights with a automatic timer. I find they save on the electric bill.
Hi Sue, thank you so much! We’ll be duping those bells real soon, so keep an eye out! We do have timer lights, and they are great!
I don’t know who really comes up with these amazing things you create but, you out did yourself this time. This wreath is gorgeous. I wish I had half of the imagination of Handan and yourself. I don’t think I can follow the directions and have it come out just like yours. Although I would try to think of my own arrangement to make it different. I try to anyway. Like I said, not enough imagination. Long story short, it’s beautiful!!
Thank you, Ellen – we both do, but really Handan does most of the mental heavy lifting while I do the actual heavy lifting, lol!
Stunning wreath! And as usual, done with very clear instructions on how to do it. I really enjoy reading your blog and watching the how to videos. You always make things look/sound so simple. And thank you for making the goofs and before we attempt the project. Well done!
Thank you so much, Jennifer, and i’m sorry for the late reply!
does the loctite foam stay true white? the DAP bright white craft foam is sold out all around me.
thanks for the insight
It does as long as it’s not exposed to too much direct sunlight. But you can paint it white first if sunlight would be an issue!
Beautifully done. It goes especially well with the glass trees in the window above the door. Like they were made for each other.
Thank you, Barbara! 🙂
I love this! May have to try it!
Go for it, Marte! 🙂
I am not a wreath person, but I will make an exception for this one! This one knocked it out of the park. I absolutely love the colors! And I want a link to where you purchased the glass bottles showing over the door. I have a bottle collection and need to add to it! 😂
Thank you so much, Tina! Those bottles are actually Christmas trees, and most came from Target dollar spot, though i think some also came from Dollar Tree and other places. I’ll have to chack with Handan.
That wreath is brilliant! So impressive – I love it!
Thanks, Regina!
TEN!!!! franki
Thanks, Franki! :D:D:D
That. Is. Beautiful.
Thank you so much, Sheri! 🙂
Wow….another great project. I would have never thought of that! So happy that I joined your blog. Love your projects!! Happy, happy holidays to you and yours!
Hey Sandra, and welcome! The happiest of holidays to you and your family as well! 🙂
Oh. My. Word!
You two are unbelievable!
Yes, you will be duped!
Out with that polyester batting stuff and in with FOAM!
May your Christmas be as Merry and Bright as you two have made it for your followers!
LUV U 2!
Thank you so much, Anne! And yes, the dupes started literally a day later, and they haven’t let up since!
I would like to get the full instructions of your DIY Light up Snowy Christmas Village Wreath
Hi April, this post is the full instructions for making the wreath. 😊
Wow Wow Wow. This wreath is so beautiful. You have the best ideas.
Thank you so much, Barbara! 🙂
I can’t believe I saw the first copies of this project just two days later! The DIY and crafting communities really just spend most of their time stealing from one another…until it’s so rampant that 5 Minute Crafts does it! 🤣🤣 I mean there’s inspiration, and I don’t think you need to credit every single inspiration you’ve ever seen, but then there’s just blatant ripoffs…
First and best here, Dudes!
Jay, it’s getting ridiculous – everyone is stealing from everyone, and no one is giving credit. It’s pretty frustrating. But we’ll just keep on doing what we’re doing and try to keep one step ahead. Merry Christmas!
I totally love this. If I can find the foam I might try this. One question, what did you use on the back to hang it? I live in Florida, will it stay white when exposed to sunlight? Thank you so much.
Thanks, Marie! I used a flat metal door hanger hook that I embedded into the foam on the back. As for sunlight, that’s a big NO! This foam like all other foam yellows horribly in sunlight (it’ll stay white forever indoors though). So if you want to hang it outside, you’ll have to paint the foam white after it hardens.
Cute wreath. Wonder what the final cost was to make it.
I will try to make this one, but also interested in the ornaments on each side of the door…how to make those?
Hi Rebecca, I have a post about them here.
So trying this. However, do I need to use plastic to spray it on or will cardboard be ok? Does the foam stick to the paper on the cardboard?
You’re better off with a plastic sheet underneath. You can get it off cardboard, but it is much harder. I used cardboard for smaller foam projects, but this one has a really big surface area, so plastic will make your life infinitely easier!
What a cute cute wreath!!!